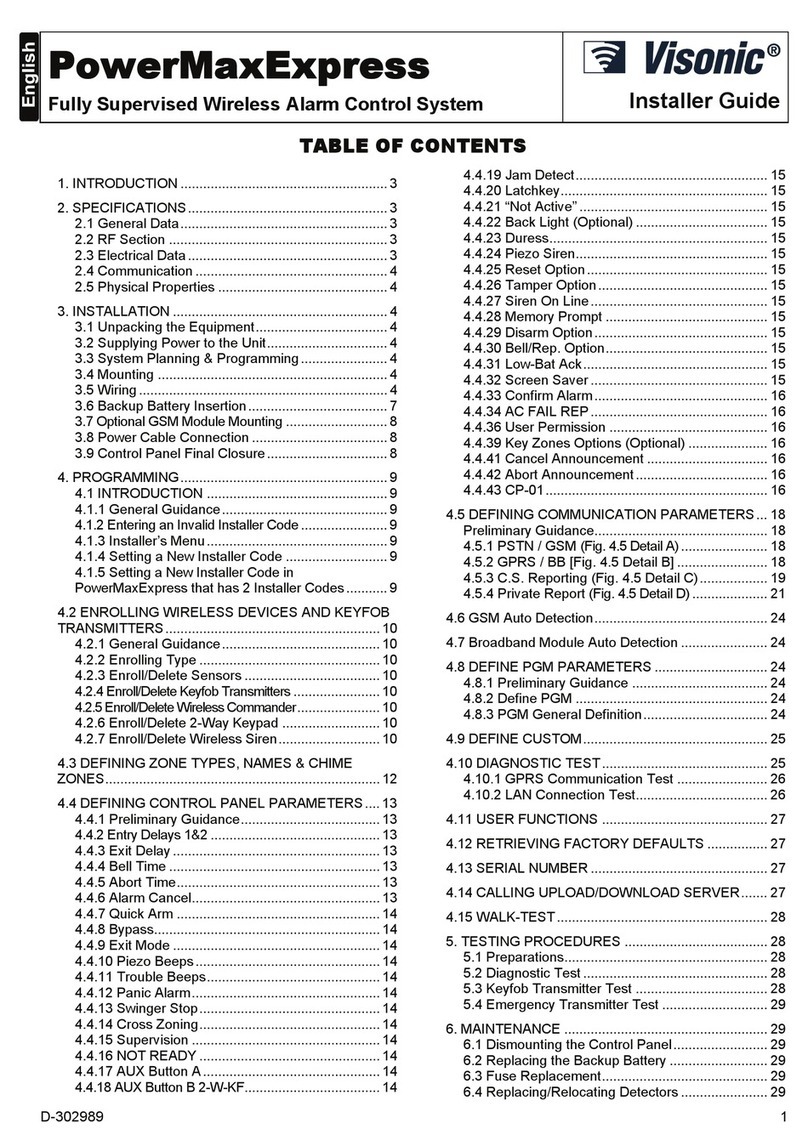
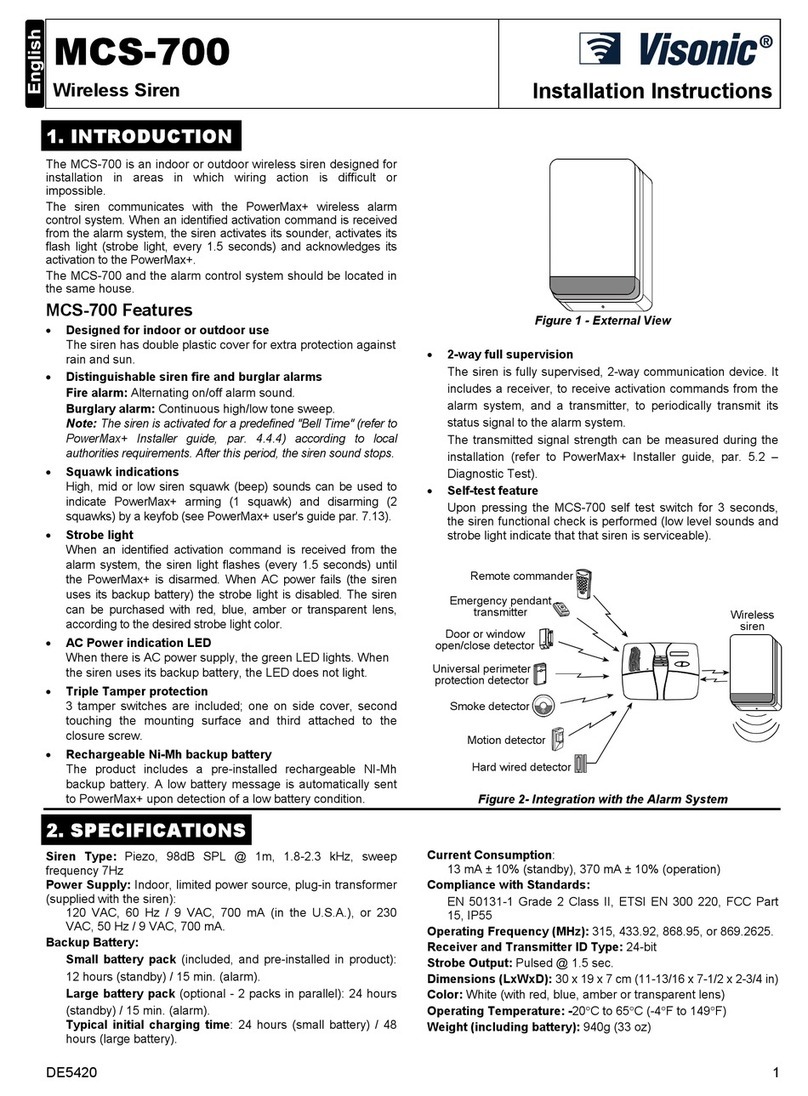
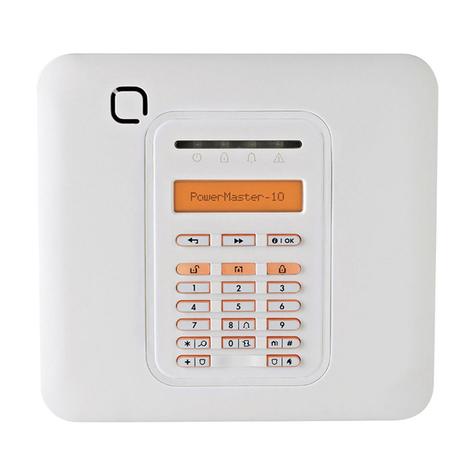
manuals.online logo
Brands
  1. Home
  2. •
  3. Brands
  4. •
  5. Visonic
  6. •
  7. Security System
  8. •
  9. Visonic MCS-730 AC User manual

Visonic MCS-730 AC User manual

D-301680 1
MCS-730/MCS-730 AC
Fully / Mains Powered Wireless Outdoor Siren
Installation Instructions
1. INTRODUCTION
The MCS-730, powered by 1 or 2 (optional) non-rechargeable batteries, is
fully wireless outdoor siren, designed for installation in areas in which wiring
action is difficult or impossible. It is compatible with control panels such as
PowerMax Pro, PowerMaxComplete, PowerMaxExpress or Visonic newer
panels (not compatible with PowerMax+ and PowerMax control panel).
The MCS-730 AC is similar to MCS-730 but it is powered by an External
9VAC Adaptor and non-rechargeable backup battery - enables very long
operation time without replacing the battery. The MCS-730 AC complies
with PowerMax+ also.
Features
 Siren and strobe light activation: The siren produces a strong alarm
noise and emits flashing light to deter intruders and guide police to the
site.
Notes:
The duration of the siren's alarm is controlled from the control panel by
setting the "Bell Time" option (refer to alarm system installer guide,
par. 4.4) and should be set according to local authorities requirements.
The strobe light operates (every 1 second) for 20 minutes after siren
stops or until the system is disarmed, whichever occurs first.
 2 Types of alarm indication
The siren produces different alarm signals for Burglar and Fire.
 Squawk indication: Squawk (beep) sounds can be used to indicate
alarm system arming (1 squawk) and disarming (2 squawks) by a
keyfob (squawk can be enabled from the control panel User menu).
 Tamper / supervision failure indication: Siren is equipped with
tamper protection, which produces alarm if a burglar attempt to open
the siren's cover or remove siren from wall.
 Low battery voltage alert
The siren reports a low battery message to the alarm system when
battery is about to drain. After low voltage is reported, at least 2 siren
alarms are possible before the siren is totally inactive.
 Strobe Light Color: The siren can be purchased with red, blue, amber
or transparent lens, according to the desired strobe light color.
 Siren activity LED: A flashing LED (optional, at the bottom of the
siren front panel) indicates siren activity (can be disabled by an internal
jumper, see fig. 3, step 8)
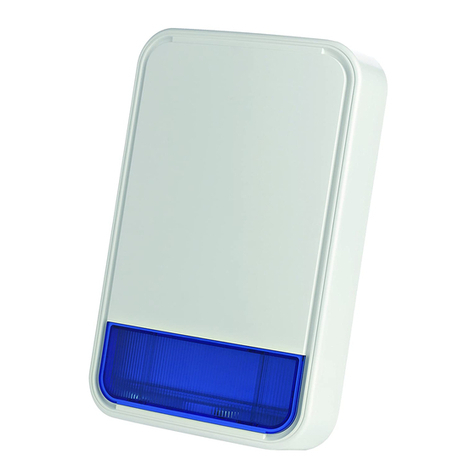
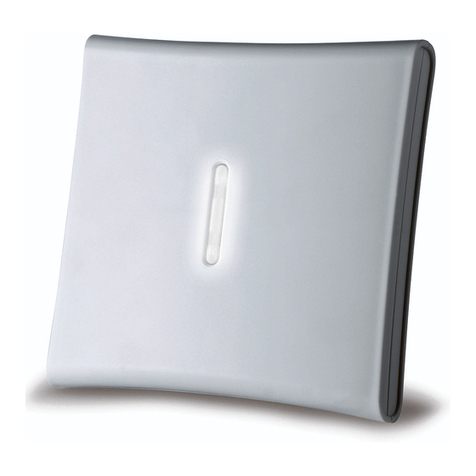
Fig. 1a - External View
Fig.
1b –
Mount
ing
Positi
on
IMPORTANT! The MCS-730/MCS-730 AC siren must be installed on
the wall in a vertical position with the screw pointing to the floor only,
as illustrated in Figure 1b. The importance of correct positioning of the
MCS-730/MCS-730 AC is to enable the siren to function as a
waterproof device.
 2-way full supervision
The siren is fully supervised, 2-way communication device. It
periodically transmits its status signal to the alarm system.
 Installation diagnostics
The transmitted signal strength can be measured during the
installation (refer to the alarm system Installer guide, par. 5.2 –
Diagnostic Test).
 Self-test function
Upon pressing the self test switch, siren functional check is performed - low
level sounds and flash light indicate that the siren is serviceable.
MCS-730 /
MCS-730 AC
Hard wired detector
Smoke detector
Wireless transmitter
Door or window
open/close detector
Motion detector
Remote commander
PowerMax+ /
PowerMax Pro /
PowerMaxComplete /
PowerMaxExpress
Figure 2- Typical Integration with the Alarm System
2. SPECIFICATIONS
Siren Type: One Piezo 109 db. Sound Pressure Level @ 1m, 1.8-3.5 kHz,
sweep frequency 7 Hz. Additional piezo is optional.
AC Power Supply Adaptor (MCS-730 AC only):
120 VAC, 60 Hz / 9 VAC, 0.35 A min. (in the U.S.A.)
230 VAC, 50 Hz / 9 VAC, 0.35 A min.
Battery: 3.6V/14.5A/H Lithium battery (EVE ER34615M/w200), Visonic
assembly cat. No. 0-9912-K.
Caution! Risk of explosion if battery is replaced by an incorrect type. Dispose of
used battery according to the manufacturer's instructions.
Battery Life Time: 3 years (taking into consideration a typical alarm of 4
minutes Piezo + strobe operation per week).
Current Consumption: Standby - 250µA average, Operation - 300mA average.
Compliance with Standards:
Europe: EN 300 220, EN 301489, EN 50130- 4, EN 60950-1, EN 60950-22,
IP55, EN 50130-5, EN 50131-4 Grade 2 Class IV,
USA: FCC- CFR47 Part 15,
Canada: IC-RSS 210
Operating Frequency (MHz): 315, 433.92, 868.95
Maximum Tx Power: 10dBm @ 433MHz, 14dBm @ 868MHz.
Supervision Time: 5 minutes
Strobe Light: Pulsed @ 1 sec.
Dimensions (LxWxD): 295x186x63mm (11-5/8 x 7-5/16 x 2-1/2 in)
Color: White (with red, blue, amber or transparent lens)
Operating Temperature: 33C to 70C (-27.4F to 158F), RH humidity 75%.
Weight (including battery): 970g (34 oz)
This device complies with Part 15 of the FCC Rules and RSS-210 of Industry and
Science Canada. Operation is subject to the following two conditions: (1) This device
may not cause harmful interference, and (2) this device must accept any interference
received, including interference that may cause undesired operation.
Hereby, Visonic Ltd. declares that the radio equipment type MCS-730 / MCS-
730AC is in compliance with Directive 2014/53/EU.
The full text of the EU declaration of conformity is available at the following
internet address:
http://www.visonic.com/download-center.
Note: The manufacturer is not responsible for any radio or TV interference caused by
unauthorized modifications to this equipment. Such modifications could void the user's
authority to operate the equipment.
Interference Prevention
This device complies with FCC Rules Part 15. Operation is subject to two conditions: (1)
This device may not cause harmful interference, and (2) this device must accept any
interference that may be received or that may cause undesired operation.
The digital circuit of this device has been tested and found to comply with the limits for a Class B
digital device, pursuant to Part 15 of the FCC Rules. These limits are designed to provide
reasonable protection against harmful interference in residential installations. This equipment
generates, uses and can radiate radio frequency energy and, if not installed and used in
accordance with the instructions, may cause harmful interference to radio and television reception.
However, there is no guarantee that interference will not occur in a particular installation. If this
device does cause such interference, which can be verified by turning the device off and on, the
user is encouraged to eliminate the interference by one or more of the following measures:
– Re-orient or re-locate the receiving antenna.
– Increase the distance between the device and the receiver.
– Connect the device to an outlet on a circuit different from the one which supplies power
to the receiver.
– Consult the dealer or an experienced radio/TV technician.
Changes or modifications not expressly approved by Visonic Ltd. could void the user's
authority to operate the equipment.
2 D-301680
3. INSTALLATION, TESTING AND ENROLLING
3.1 Installation
Optional step only:
Hang back unit with a screw on mounting
surface to make the next step (drilling
marking) easier.
3
Mark for driling
4
For
tamper
1
Open screw
plastic cover
Using Philips screw-
driver, remove screw
and remove cover.
2
Drill 5 holes
5 6
Fasten with 5 screws
BA
Release catch (A) and open battery cover (B)
7
Optional second battery
location and its connector
Self-test button
Connect battery / optional battery and
9VAC power to the proper connectors and
set the optional jumpers as desired
8
220/110 VAC
9VAC
9VAC connector
Siren rear side
LED KEEP ALIVE
Enable (ON)/ Disable
(OFF) jumper
AC CONFiguration Enable
(ON) / Disable (OFF)
jumper
Note: When external power is
used, set the AC CONF jumper
to ON position (see step 8)
Note: There is siren model that is supplied
with battery only (MCS-730) and siren
model that is supplied with 9VAC adaptor
and backup battery (MCS-730 AC).
PM+ / Others
configuration
jumper
Figure 3 –Installation
3.2 Self-Test
Press the self test button (see figure 3 step 8). Low level piezo sounds
and flash lights indicate that the siren is fully operational.
3.3 Configuration (see figure 3, step 8)
LED Keep Alive Jumper Setup:
When it is desired that the Keep Alive LED should blink (every 5 sec.);
LED configuration must be set to ON position.
PowerMax+ / Other Jumper Setup (MCS-730 AC only):
When enrolling to the PowerMax+, the internal jumper must be set to the
"PM+" position. When enrolling to other PowerMax control panels the
internal jumper must be set to "others" position.
AC CONF ON/OFF Jumper setup (MCS-730 AC only):
When it is desired to use AC power supply (optional); AC CONF jumper
must be set to ON position.
3.4 Enrolling
Important Note: The siren is ready to operate 30 seconds after the
enrolling. Pre-enrolled sirens are ready to operate 30 seconds after
power up.
The alarm system must recognize the siren's unique identification code for
command delivery and supervision. To enroll the siren into the alarm
system memory, refer to the ENROLLING section of the alarm system
installation instructions, and momentarily press the Self-Test button (see
figure 3 step 8) when you are instructed.
After the enrolling, close the siren's cover and perform diagnostic test, as
described in the alarm system installer guide, DIAGNOSTIC section.
Enrolling cancellation, if required, is also described in the alarm system
Installer Guide, ENROLLING section.
WARRANTY
Visonic Limited (the “Manufacturer") warrants this product only (the "Product") to the original purchaser only (the
“Purchaser”) against defective workmanship and materials under normal use of the Product for a period of
twelve (12) months from the date of shipment by the Manufacturer.
This Warranty is absolutely conditional upon the Product having been properly installed, maintained and
operated under conditions of normal use in accordance with the Manufacturers recommended installation and
operation instructions. Products which have become defective for any other reason, according to the
Manufacturers discretion, such as improper installation, failure to follow recommended installation and
operational instructions, neglect, willful damage, misuse or vandalism, accidental damage, alteration or
tampering, or repair by anyone other than the manufacturer, are not covered by this Warranty.
The Manufacturer does not represent that this Product may not be compromised and/or circumvented or that
the Product will prevent any death and/or personal injury and/or damage to property resulting from burglary,
robbery, fire or otherwise, or that the Product will in all cases provide adequate warning or protection. The
Product, properly installed and maintained, only reduces the risk of such events without warning and it is not a
guarantee or insurance that such events will not occur.
THIS WARRANTY IS EXCLUSIVE AND EXPRESSLY IN LIEU OF ALL OTHER WARRANTIES, OBLIGATIONS
OR LIABILITIES, WHETHER WRITTEN, ORAL, EXPRESS OR IMPLIED, INCLUDING ANY WARRANTY OF
MERCHANTABILITY OR FITNESS FOR A PARTICULAR PURPOSE, OR OTHERWISE. IN NO CASE SHALL
THE MANUFACTURER BE LIABLE TO ANYONE FOR ANY CONSEQUENTIAL OR INCIDENTAL DAMAGES
FOR BREACH OF THIS WARRANTY OR ANY OTHER WARRANTIES WHATSOEVER, AS AFORESAID.
THE MANUFACTURER SHALL IN NO EVENT BE LIABLE FOR ANY SPECIAL, INDIRECT, INCIDENTAL,
CONSEQUENTIAL OR PUNITIVE DAMAGES OR FOR LOSS, DAMAGE, OR EXPENSE, INCLUDING LOSS
OF USE, PROFITS, REVENUE, OR GOODWILL, DIRECTLY OR INDIRECTLY ARISING FROM
PURCHASER’S USE OR INABILITY TO USE THE PRODUCT, OR FOR LOSS OR DESTRUCTION OF
OTHER PROPERTY OR FROM ANY OTHER CAUSE, EVEN IF MANUFACTURER HAS BEEN ADVISED OF
THE POSSIBILITY OF SUCH DAMAGE.
THE MANUFACTURER SHALL HAVE NO LIABILITY FOR ANY DEATH, PERSONAL AND/OR BODILY INJURY
AND/OR DAMAGE TO PROPERTY OR OTHER LOSS WHETHER DIRECT, INDIRECT, INCIDENTAL,
CONSEQUENTIAL OR OTHERWISE, BASED ON A CLAIM THAT THE PRODUCT FAILED TO FUNCTION.
However, if the Manufacturer is held liable, whether directly or indirectly, for any loss or damage arising under
this limited warranty, THE MANUFACTURER'S MAXIMUM LIABILITY (IF ANY) SHALL NOT IN ANY CASE
EXCEED THE PURCHASE PRICE OF THE PRODUCT, which shall be fixed as liquidated damages and not as
a penalty, and shall be the complete and exclusive remedy against the Manufacturer.
When accepting the delivery of the Product, the Purchaser agrees to the said conditions of sale and warranty
and he recognizes having been informed of.
Some jurisdictions do not allow the exclusion or limitation of incidental or consequential damages, so these
limitations may not apply under certain circumstances.
The Manufacturer shall be under no liability whatsoever arising out of the corruption and/or malfunctioning of
any telecommunication or electronic equipment or any programs.
The Manufacturers obligations under this Warranty are limited solely to repair and/or replace at the
Manufacturer’s discretion any Product or part thereof that may prove defective. Any repair and/or replacement
shall not extend the original Warranty period. The Manufacturer shall not be responsible for dismantling and/or
reinstallation costs. To exercise this Warranty the Product must be returned to the Manufacturer freight pre-
paid and insured. All freight and insurance costs are the responsibility of the Purchaser and are not included in
this Warranty.
This warranty shall not be modified, varied or extended, and the Manufacturer does not authorize any person to
act on its behalf in the modification, variation or extension of this warranty. This warranty shall apply to the
Product only. All products, accessories or attachments of others used in conjunction with the Product, including
batteries, shall be covered solely by their own warranty, if any. The Manufacturer shall not be liable for any
damage or loss whatsoever, whether directly, indirectly, incidentally, consequentially or otherwise, caused by
the malfunction of the Product due to products, accessories, or attachments of others, including batteries, used
in conjunction with the Products. This Warranty is exclusive to the original Purchaser and is not assignable.
This Warranty is in addition to and does not affect your legal rights. Any provision in this warranty which is
contrary to the Law in the state or country were the Product is supplied shall not apply.
Warning: The user must follow the Manufacturer’s installation and operational instructions including testing the
Product and its whole system at least once a week and to take all necessary precautions for his/her safety and
the protection of his/her property. 1/08
W.E.E.E. Product Recycling Declaration
For information regarding the recycling of this product you must contact the company from which you orignially purchased it. If you are discarding this product and not
returning it for repair then you must ensure that it is returned as identified by your supplier. This product is not to be thrown away with everyday waste.
Directive 2002/96/EC Waste Electrical and Electronic Equipment.
EMAIL: [email protected]
INTERNET: www.visonic.com
VISONIC LTD. 2018 MCS-730/MCS-730 AC, D-301680 (Rev 6, 03/18)

Other Visonic Security System manuals

Visonic MC-302E PG2 User manual

Visonic

Visonic MC-302E PG2 User manual

Visonic SR-740 PG2 User manual

Visonic

Visonic SR-740 PG2 User manual

Visonic SR-720B PG2 User manual

Visonic

Visonic SR-720B PG2 User manual

Visonic MCS-730 User manual

Visonic

Visonic MCS-730 User manual

Visonic POWERMAX PRO User manual

Visonic

Visonic POWERMAX PRO User manual

Visonic MCS-730 User manual

Visonic

Visonic MCS-730 User manual

Visonic POWERMAXCOMPLETE PANEL - User manual

Visonic

Visonic POWERMAXCOMPLETE PANEL - User manual

Visonic PowerMaster-10 G2 User manual

Visonic

Visonic PowerMaster-10 G2 User manual

Visonic POWERMAX - User manual

Visonic

Visonic POWERMAX - User manual

Visonic KF-234 PG2 - User manual

Visonic

Visonic KF-234 PG2 - User manual

Visonic IR-50 User manual

Visonic

Visonic IR-50 User manual

Visonic TOWER 10 AM - User manual

Visonic

Visonic TOWER 10 AM - User manual

Visonic MCS-730 User manual

Visonic

Visonic MCS-730 User manual

Visonic POWERMAXEXPRESS - User manual

Visonic

Visonic POWERMAXEXPRESS - User manual

Visonic MCS-720 User manual

Visonic

Visonic MCS-720 User manual

Visonic PowerMaster-10 G2 Instruction manual

Visonic

Visonic PowerMaster-10 G2 Instruction manual

Visonic MAESTRO-1600 User manual

Visonic

Visonic MAESTRO-1600 User manual

Visonic AXS-10 PRO User manual

Visonic

Visonic AXS-10 PRO User manual

Visonic POWERMAXEXPRESS - User manual

Visonic

Visonic POWERMAXEXPRESS - User manual

Visonic rMaster-360 User manual

Visonic

Visonic rMaster-360 User manual

Visonic MCS-720 User manual

Visonic

Visonic MCS-720 User manual

Visonic POWERMAXCOMPLETE PANEL - User manual

Visonic

Visonic POWERMAXCOMPLETE PANEL - User manual

Visonic POWERMAXEXPRESS - INSTALLATION 2 Assembly instructions

Visonic

Visonic POWERMAXEXPRESS - INSTALLATION 2 Assembly instructions

Visonic CLIP PG2 User manual

Visonic

Visonic CLIP PG2 User manual

Popular Security System manuals by other brands

DSC WT5500 installation instructions

DSC

DSC WT5500 installation instructions

Stahl YA11 operating instructions

Stahl

Stahl YA11 operating instructions

Satel ABAX 2 Quick installation guide

Satel

Satel ABAX 2 Quick installation guide

MOOSE Z1100 user manual

MOOSE

MOOSE Z1100 user manual

Gentex HD135 Series quick start guide

Gentex

Gentex HD135 Series quick start guide

Risco Agility user manual

Risco

Risco Agility user manual

Swann DVR4-8600 Specification sheet

Swann

Swann DVR4-8600 Specification sheet

Eminent EM8670 Quick install

Eminent

Eminent EM8670 Quick install

Secure USAB-1 operating instructions

Secure

Secure USAB-1 operating instructions

AJAX DoubleButton user manual

AJAX

AJAX DoubleButton user manual

EVERSPRING AC136-1 manual

EVERSPRING

EVERSPRING AC136-1 manual

Zircon ZIRCONLC1 Installation, operating,  & maintenance instructions

Zircon

Zircon ZIRCONLC1 Installation, operating, & maintenance instructions

Climax Mobile Lite R32 Installer's guide

Climax

Climax Mobile Lite R32 Installer's guide

Rondish Nexus User instructions

Rondish

Rondish Nexus User instructions

Radionics 6112 user guide

Radionics

Radionics 6112 user guide

Axis Camera Station user manual

Axis

Axis Camera Station user manual

Samsung SSC-17TQ installation manual

Samsung

Samsung SSC-17TQ installation manual

Swann DVR4-Pro-Net TBA Easy setup guide

Swann

Swann DVR4-Pro-Net TBA Easy setup guide

manuals.online logo
manuals.online logoBrands
  • About & Mission
  • Contact us
  • Privacy Policy
  • Terms and Conditions

Copyright 2025 Manuals.Online. All Rights Reserved.