Vitalograph Spirotrac 7000 User manual

Vitalograph Spirotrac Instructions for Use
IFU Part No.: 07402
Issue 22
_______________________________________________________________________________________________________________
Page 1 of 78 DT_0006-15
Vitalograph
Spirotrac®
MODEL 7000
Instructions for Use

Vitalograph Spirotrac Instructions for Use
IFU Part No.: 07402
Issue 22
_______________________________________________________________________________________________________________
Page 2 of 78 DT_0006-15
Vitalograph Ltd, UK Vitalograph Ltd, International
Maids Moreton, Buckingham Maids Moreton, Buckingham
MK18 1SW MK18 1SW
England England
Tel: 01280 827110 Tel: +44 1280 827120
Fax: 01280 823302 Fax: +44 1280 823302
E-mail: sales@vitalograph.co.uk E-mail: sales@vitalograph.co.uk
www.vitalograph.co.uk www.vitalograph.eu
Technical Support Technical Support
Tel: 01280 827177 Tel: +353 65 6864111
Email: tech.support@vitalograph.co.uk Email: technical.support@vitalograph.ie
Vitalograph GmbH Vitalograph Inc.
Rellinger Straße 64a 13310 West 99th Street
D-20257 Hamburg Lenexa, Kansas, 66215
Germany USA
Tel: +49 40 547391-0 Toll Free: 800 255 6626
Fax: +49 40 547391-40 Tel: (913) 730 3200
E-mail: info@vitalograph.de Fax: (913) 730 3232
www.vitalograph.de E-mail: contact@vitalograph.com
Technical Support www.vitalograph.com
Telefon: +49 40 547391-14 Technical Support
E-Mail: support@vitalograph.de Tel: (913) 730-3205
Email: technical@vitalograph.com
Vitalograph (Ireland) Ltd Vitalograph Ltd, Hong Kong/China
Gort Road Business Park P.O. Box 812
Ennis, Co Clare, V95 HFT4 Shatin Central Post Office
Ireland Hong Kong
Tel: +353 65 6864100 E-mail: sales@vitalograph.cn
Fax: +353 65 6829289 www.vitalograph.cn
E-mail: sales@vitalograph.ie Technical Support
www.vitalograph.ie Tel: +353 65 6864111
Tel: +353 65 6864111
Email: technical.support@vitalograph.ie
© Copyright Vitalograph 2019
Current Edition (Issue 22, 27-Nov-2019)
Cat. No. 07402
Vitalograph is a registered trademark

Vitalograph Spirotrac Instructions for Use
IFU Part No.: 07402
Issue 22
_______________________________________________________________________________________________________________
Page 3 of 78 DT_0006-15
Table of Contents
1Main Components..................................................................................................5
1.1 Features of Vitalograph Spirotrac...................................................................5
2Spirotrac Installation..............................................................................................7
2.1 Spirotrac Setup...............................................................................................7
2.2 Network Database Installation........................................................................8
3Operating Spirotrac................................................................................................9
3.1 Buttons and Icons...........................................................................................9
3.2 Start-up / Logon............................................................................................10
3.3 Conducting a Test ........................................................................................10
3.4 Subject Management....................................................................................10
3.5 Predicted Values ..........................................................................................13
3.6 Device Downloads/Uploads..........................................................................14
3.7 Exporting Data..............................................................................................15
3.8 Calibration Verification..................................................................................16
3.9 Institute and Department ..............................................................................18
3.10 Audit Trail .....................................................................................................18
3.11 Reporting and Printing..................................................................................23
3.12 Users............................................................................................................24
3.13 User Preferences..........................................................................................28
3.14 Licence Management ...................................................................................29
3.15 Language Variants .......................................................................................29
3.16 Database Management ................................................................................30
3.17 Vitalograph Spirotrac Fusion ........................................................................32
3.18 Reference Curve and Data...........................................................................33
3.19 Health Level 7 Interface................................................................................33
3.20 Interpretation Display....................................................................................35
3.21 Custom Report Template Selection..............................................................35
4Testing using Spirotrac........................................................................................36
4.1 Conducting a Spirometry Test ......................................................................36
4.2 Pulse Oximetry Testing.................................................................................44
4.3 Challenge Testing.........................................................................................45
4.4 Six Minute Walk Test....................................................................................48
4.5 Blood Pressure Management.......................................................................49
4.6 12-Lead ECG Measurements.......................................................................50
4.7 Maximum Voluntary Ventilation Testing........................................................55
4.8 Inhalation Testing with the Vitalograph Intrac...............................................55
4.9 Audiometry Testing.......................................................................................57
5Cleaning & Hygiene.............................................................................................64
5.1 Preventing Cross-Contamination of Subjects...............................................64
6Fault Finding Guide .............................................................................................64
6.1 Software Check/Technical Support ..............................................................66
7Customer Service................................................................................................67
8Consumables and Accessories............................................................................67
9Disposal...............................................................................................................68
10 Explanation of Symbols....................................................................................68
11 Description of the Vitalograph Spirotrac...........................................................69

Vitalograph Spirotrac Instructions for Use
IFU Part No.: 07402
Issue 22
_______________________________________________________________________________________________________________
Page 4 of 78 DT_0006-15
11.1 Indications for Use........................................................................................69
12 Technical Specification.....................................................................................69
13 Contraindications, Warnings, Precautions and Adverse Reactions..................70
14 CE Notice.........................................................................................................72
15 FDA Notice.......................................................................................................72
16 Declaration of Conformity.................................................................................72
17 Guarantee........................................................................................................73
18 Appendix..........................................................................................................74
18.1 Connecting to a network database with Spirotrac on PC..............................74
18.2 Connecting to a network database with Spirotrac on a COMPACT device...74
18.3 Install Drivers: Vitalograph Pneumotrac/Intrac on PC...................................74
18.4 Install Drivers: Vitalograph In2itive/Alpha USB on PC..................................75
18.5 Install Drivers: Nonin Pulse Oximeter on a PC.............................................75
18.6 Install Drivers: Supplied by Vitalograph technical support on COMPACT ....75
18.7 Connect Device: Vitalograph Pneumotrac USB to PC..................................76
18.8 Connect Device: Serial Vitalograph Pneumotrac to PC................................76
18.9 Connect Device: Serial Vitalograph 2120 to PC/Vitalograph COMPACT .....76
18.10 Connect Device: Vitalograph In2itive/Alpha to PC/Vitalograph COMPACT..77
18.11 Connect Device: Nonin Pulse Oximeter to PC/Vitalograph COMPACT........77
18.12 Connect Device: Vitalograph Gold Standard to PC......................................77
18.13 Setting up Vitalograph COMPACT for Wireless Networking.........................78
18.14 Configuration Mode on the Vitalograph COMPACT Device..........................78

Vitalograph Spirotrac Instructions for Use
IFU Part No.: 07402
Issue 22
_______________________________________________________________________________________________________________
Page 5 of 78 DT_0006-15
1 Main Components
Figure 1
1. Spirotrac® software and drivers on USB key
2. USB Cable
3. *Pneumotrac™ Base
4. Flowhead Connection Tubing
5. *Pneumotrac Flowhead
6. Bacterial Viral Filter (BVF™)
*For other devices see the specific guidance included with the device
1.1 Features of Vitalograph Spirotrac
The features are:
•Auto-recognition of FVC single or multi-breath testing
•VC single or multi-breath testing
•Trending of test results
•Child incentive displays
•Audit Trail log
•Configurable Subject Demographics
•Different spirometry report layouts
•Automatic storage of all test data
•Configurable Spirometry Reports
•Bronchodilator responsiveness testing

Vitalograph Spirotrac Instructions for Use
IFU Part No.: 07402
Issue 22
_______________________________________________________________________________________________________________
Page 6 of 78 DT_0006-15
•Fully networked database (optional) / Multi-User Support (via Microsoft SQL Server
2008 R2)
•Subject Data Migration from Spirotrac 4
•Ability to link external documents to subject info as attachments
•Implementation of ATS/ERS 2005 guidelines on Test QA
•Pulse Oximetry Testing (SpO2)
•Addition of the Vitalograph 2120 as a device
•Addition of the Vitalograph Alpha as a device
•PCF (Peak Cough Flow) Test
•Challenge Testing – Mannitol, ATS 5-breath dosimeter, 2-min tidal breathing and
Exercise challenge
•Six Minute Walk Testing
•In2itive Device Downloads/Uploads module
•Alpha Touch Device Downloads/Uploads Module
•Alpha Touch integration with Spirotrac as a dumb flow head
•In2itive integration with Spirotrac as a dumb flow-head
•asma-1 Device Downloads/Uploads Module
•Simulation of ATS/ISO waveforms
•Manual Data Entry Utility
•Manual Blood Pressure Monitor entry
•Model 2160 Gold Standard Plus Device Downloads/Uploads Module
•12-Lead ECG module
•Support for the Health Level 7 (HL7) and GDT communication standards
•Maximum Voluntary Ventilation (MVV) Test

Vitalograph Spirotrac Instructions for Use
IFU Part No.: 07402
Issue 22
_______________________________________________________________________________________________________________
Page 7 of 78 DT_0006-15
2 Spirotrac Installation
Note: Spirotrac must be installed by a User with Administrative privileges on a PC.
The Vitalograph COMPACT is supplied with a full installation of Spirotrac including all
device drivers and a test station licence
Figure 2
To install:
1. Remove Vitalograph® USB drive from packaging.
2. Insert USB drive into USB port on computer.
3. Browse USB Drive and click Setup.
4. Select Install Spirotrac. Follow on-screen instructions to complete installation.
(This may take some time.)
5. Close installation and select the Vitalograph Spirotrac icon from the desktop.
6. Remove USB drive from USB port.
7. **Use the Flowhead Connection Tubing to connect the Pneumotrac Base to the
Pneumotrac Flowhead.
8. **Use the USB cable provided to connect the Pneumotrac Base to USB port on
the computer.
9. **For each subject insert a new BVF (Bacterial Viral Filter) in the flowhead.
Vitalograph recommends using a BVF to protect the subject, the operator and
the device against cross contamination during spirometry manoeuvres.
** Note: Instructions are for the Vitalograph Pneumotrac. For all other Vitalograph
devices see Appendix and the instructions included with the device.
2.1 Spirotrac Setup
1. Select Spirotrac icon on the desktop.

Vitalograph Spirotrac Instructions for Use
IFU Part No.: 07402
Issue 22
_______________________________________________________________________________________________________________
Page 8 of 78 DT_0006-15
2. Confirm database connection details. For Network Installation, please refer to
Network Database Installation or contact Vitalograph for support.
3. Enter System Administrator Username and Password. Select Continue. Note:
Selecting Disable User Logon option here allows the application to be used with
reduced security and is not recommended.
4. Enter institution details and Continue.
5. Enter department details and Continue.
6. User ID will be pre-populated with the ID of the last user. If required, replace
this with your user ID. Other user IDs, including technicians, are created by the
administrator using Tools > User Management.
7. Enter the Serial Number of the Vitalograph device to be used with Spirotrac,
and the user’s email address. Entering a valid Device Serial Number allows
Spirotrac to be used as a local test station. Alternatively click Skip to use
Spirotrac only as a local review station.
8. To activate Spirotrac for use on a network as a multi-user review station, enter
the Network Licence Key exactly as provided.
Additional support documentation is available on the installation media. See the
following headings on the installer: ‘Release Notes’, ‘Spirometry Guidelines’ and ‘Other
Manuals’.
2.2 Network Database Installation
Consult with your SQL Server Database Administrator before setup.
Note: A Network Licence must be purchased prior to installation (see Consumables
and Accessories).
2.2.1 Configuring Spirotrac to Use Network Database on PC/Vitalograph
COMPACT
A Network Licence key is required to use a network database with Spirotrac. This may
be obtained from technical support +44 1280 827177 or email
tech.support@vitalograph.co.uk. To activate your network licence, follow instructions
in the Licence Management section.
2.2.2 PC Network Database Installation during first setup
1. If the user has previously entered a valid Network Licence Key the user will be
able to enter the Server Name of the SQL Server host. Enter the SQL Server
Instance name if required (default SQLEXPRESS). Consult with your SQL
Server Database Administrator for these settings.
2. If Database already exists Spirotrac will connect to and use the Database.
3. If a Database from a previous version of Spirotrac exists,Spirotrac will
automatically migrate the data to the current version of the Database.
4. If Database does not exist Spirotrac will create a Database automatically. The
User must have the appropriate privileges to perform this action. Consult with
your SQL Server Database Administrator for these privileges.
5. The user will be prompted to supply the Administrator password. This account
should later be used to setup other Spirotrac users.
6. Follow on-screen instructions to enter institution and department details.

Vitalograph Spirotrac Instructions for Use
IFU Part No.: 07402
Issue 22
_______________________________________________________________________________________________________________
Page 9 of 78 DT_0006-15
Refer to the Appendix 18.1 for setup details on a network database after
installation.
3 Operating Spirotrac
3.1 Buttons and Icons
The following are buttons available on the main toolbar:
Create a New Subject
VC Testing
FVC Testing
Bronchodilator Responsiveness Testing
PCF Test
MVV Test
Inhaler Test
Challenge Test
12-Lead ECG
Recall/View 12-Lead ECG
Audiometry
Recall/View Audiometry
Pulse Oximetry Testing
Six Minute Walk Test

Vitalograph Spirotrac Instructions for Use
IFU Part No.: 07402
Issue 22
_______________________________________________________________________________________________________________
Page 10 of 78 DT_0006-15
Manual Entry Blood Pressure Test
Print current session report
Print current session report to PDF
Send sessions to over-read
Perform an Accuracy Check on the Vitalograph Pneumotrac
3.2 Start-up / Logon
Note: In order to use Spirotrac, the user must:
•Have full administrative rights on the PC or
•Be added to the SQLServerMSSQLUser group or
•Be added to the SQLServer’s Security-Login with full read/write access to the
SpirotracV database (for upgrades) and SpVDefault database.
If User Logon is enabled a username and password must be entered in order to logon
to the application.
3.3 Conducting a Test
1. Select the subject in the subject list on the main screen (if not already selected).
The subject becomes the current subject.
2. Ensure that the required demographic information is up-to-date.
3. Select one of the test icons on the main toolbar to activate the required test.
See Testing using Spirotrac for more details.
3.4 Subject Management
3.4.1 Auto generation of Subject IDs
Each subject created within Spirotrac must be allocated a subject ID. Spirotrac can
automatically generate the subject ID if required, via Tools > Options > Subject Entry >
Subject ID Auto Generate.

Vitalograph Spirotrac Instructions for Use
IFU Part No.: 07402
Issue 22
_______________________________________________________________________________________________________________
Page 11 of 78 DT_0006-15
3.4.2 Creating a Subject
When creating a new subject, the Subject ID is mandatory. All other details are
optional.
1. To enter a new subject, select the new subject icon
2. Complete subject demographics. Use Tab to move between fields.
1. Enter details for each field as follows: -
a. Subject ID - a unique number for each subject, this will be generated
automatically if auto-generation is enabled, but the user may change this
ID if required. Note: On Swedish and Norwegian variants, Swedish and
Norwegian ID formats are supported here.
b. Sex - Male or female (dropdown list).
c. First Name - Subject's first name.
d. Middle Name - Subject's middle name.
e. Last Name - Subject’s last name.
f. Population group – Dropdown list with predicted values associated with
each group. This field is optional (see Subject Data Setup).
g. Alternative Subject ID - an alternative identifier for the subject. This field
is optional (see Subject Data Setup).
h. Date of birth - (DD-MMM-YYYY)
i. Height – Subject’s height in either cm or inches. Unit of measurement is
configurable (see Subject Data Setup)
j. Weight – Subject’s weight in either kg or lbs. Unit of measurement is
configurable.
k. Smoking Information – Smoking status: Smoker, Non-smoker or Ex-
smoker (dropdown list).
l. Pacemaker Detection – Indicate whether the subject has a pacemaker
(checkbox).
m. Notes – notes/comments can be entered for the subject
n. Attachments – Attach external documents linked to subject information.
Select Tools > Options > Subject Entry to enable/disable.
o. User Field1 – Field added for extra information, The Label is configurable
(see Subject Data Setup). The label can be up to 20 characters in length,
the data associated with the label can also be up to 20 characters in
length.
p. User Field2 - Field added for extra information, The Label is configurable
(see Subject Data Setup). The label can be up to 20 characters in length,
the data associated with the label can also be up to 20 characters in
length.
2. Select OK when all fields are complete.
3. The subject is now the Current Subject and shows in the Subject Demographics
tab.
Note: If the date of birth, sex, height or population group of the subject is
unpopulated, the predicted values for the subject will not be calculated.

Vitalograph Spirotrac Instructions for Use
IFU Part No.: 07402
Issue 22
_______________________________________________________________________________________________________________
Page 12 of 78 DT_0006-15
3.4.3 Editing a Subject
1. Right click on subject in the subject list on the main screen. Select Edit Subject.
Or
Select subject in the subject list on the main screen. Select Edit button in the
subject demographics panel.
Or
Select subject in the subject list on the main screen. Select Edit >Subject
Details.
2. The Subject’s information displays. See Creating a Subject for details on fields.
Edit as required.
3. Click OK to save the changes. Click Cancel to undo.
Note: If the date of birth, sex, height or population group of the subject is changed,
the predicted values for the subject will recalculate.
3.4.4 Selecting/Viewing a Subject
When a subject is selected, you may perform a test on the subject, view his/her
sessions, select a session for print and/or view his/her trend data.
1. Select the subject in the subject list on the main screen.
2. The corresponding subject demographics appear for that subject, with any
previously modified data appearing in green, and with all his/her sessions
appearing in the lower left panel.
Note: Click on to expand tree and view sessions.
3. A trend of previous subject’s sessions displays on the lower main panel.
Note: This trend information is configurable. Click Tools > Options > Advanced
>Trending > Manage.
3.4.5 Finding a Subject
A search facility is available above the subject list.
1. Using the radio buttons, select to search by either Subject ID or Last Name.
2. Enter relevant search information in the space provided and select Search.
3. The search arrow will automatically move to the first subject found beginning
with the information entered in the search field.
Note: If no subject with matching Subject ID is found, Spirotrac will search for a
subject with a matching Alternative ID.
3.4.6 Deleting a Subject
1. Select the Subject to be deleted from subject list.
2. Right-click the Subject and select Delete Subject.
3. Select Yes to delete or No to cancel.
3.4.7 Subject Data Setup
1. Select Tools > Options from Main Menu and select Subject Entry.
2. The following may be configured:

Vitalograph Spirotrac Instructions for Use
IFU Part No.: 07402
Issue 22
_______________________________________________________________________________________________________________
Page 13 of 78 DT_0006-15
a. Name fields: any/all of last name, first name and/or middle name as part
of the subject demographics.
b. Unit of Height: height in cm or inches.
c. Weight: enter weight or exclude as part of subject demographics. When
checkbox is ticked, weight can be entered/displayed/printed for subjects.
d. Unit of Weight: weight in kg or lbs.
e. Alternative Subject ID: an alternative subject number as part of subject
demographics. When 'Display/Report On' is selected, this alternative
number will be displayed/printed for the subject.
f. Population Group: enter Population Group as part of subject
demographics. When Select Population Group for Subject is ticked, a
Population Group can be selected, displayed and printed for a subject.
g. Extra Subject Information: enter extra subject information as part of the
subject demographics. When ‘Display Subject Attachments’ is ticked this
allows attachments to be associated with the subject. The Extra Subject
Information section also provides the ability to add two additional fields to
the New Subject dialog by ticking the enabled checkboxes for User Field
1 and User Field 2. Names can be specified for each of these fields in
the spaces provided.
h. Smoking Information: enter smoking information as part of the subject
demographics.
i. Notes: enter comments/notes as part of the subject demographics.
j. Validate Subject Id: select whether Subject IDs may be validated for
Sweden and Norway.
k. Subject ID Auto Generate: allow Spirotrac to automatically create
Subject IDs for new subjects.
l. Alternative IDs: When enabled, the Subject ID Configurable label and the
ALT ID Configurable label values defined here will replace the standard
Subject ID and ALT ID in the application and in reports.
3. Click OK to save or Cancel to undo.
4. Subject Data entry settings may be reset by selecting Reset Subject Settings.
3.5 Predicted Values
3.5.1 Population Group Setup
1. Select Tools > Options from Main Menu.
2. Select General.
3. Select Manage in the Population Groups & Regression Sets section.
4. To add new population group:
a. Select New. Enter name.
b. Select corresponding Regression Set from dropdown list.
c. Enter correction factor (the % to multiply the predicted value by).
d. Select OK to save or Cancel to undo.
5. To edit a population group:
a. Select Population Group from the list.
b. Select Edit.
c. Enter the new name if necessary.
d. Select new Regression Set from the dropdown list.
e. Enter new correction factor.

Vitalograph Spirotrac Instructions for Use
IFU Part No.: 07402
Issue 22
_______________________________________________________________________________________________________________
Page 14 of 78 DT_0006-15
f. Select OK to save or Cancel to undo.
6. To delete a population group:
a. Select Population Group from the list.
b. Select Delete.
c. Select Yes to delete or No to undo.
NOTE: If a Population Group is assigned to a subject, it cannot be deleted.
3.6 Device Downloads/Uploads
This provides the user with the ability to:
•Download subjects from Vitalograph In2itive/Alpha Touch/2120/2160.
•Upload subjects to Vitalograph In2itive/Alpha Touch/2120/2160.
•Download tests (parameters and curves) from Vitalograph In2itive/Alpha
Touch/2120/2160.
•Download calibration/accuracy check data from Vitalograph In2itive/ Alpha
Touch.
•Upload subject history to Vitalograph In2itive/ Alpha Touch.
Device Download/Upload Options are configurable. Select Tools > Options and click
Communications Icon. The following options are available:
In2itive/Alpha Touch
•Synchronisation Mode - When selected, synchronisation automatically occurs
on connecting the Vitalograph In2itive/Alpha Touch device.
•Copy Subjects and Tests - Both Subject and Test data is copied from the
In2itive/Alpha Touch device to Spirotrac and the original data remains stored on
the device.
•Move Tests - Test data is transferred from the In2itive/Alpha Touch device to
Spirotrac and the original test data is deleted from the device. This is the
default mode.
•Move Subjects and Tests - Subject and Test data is transferred from the
In2itive/Alpha Touch device to Spirotrac and both the original subject and test
data is deleted from the device.
2120/2160
•Detect COM Port button – Automatically detects the COM port that the
Vitalograph 2120/2160 device is connected to. Displays an error message if
device is not connected.
•Copy Subjects and Tests - Both Subject and Test data is copied from the
2120/2160 device to Spirotrac and the original data remains stored on the
device.
•Move Tests - Test data is transferred from the 2120/2160 device to Spirotrac
and the original test data is deleted from the device. This is the default mode.
•Move Subjects and Tests - Subject and Test data is transferred from the
2120/2160 device to Spirotrac and both the original subject and test data is
deleted from the device.
asma-1

Vitalograph Spirotrac Instructions for Use
IFU Part No.: 07402
Issue 22
_______________________________________________________________________________________________________________
Page 15 of 78 DT_0006-15
•Detect COM Port button – Automatically detects the COM port that the
Vitalograph asma-1 device is connected to. Displays an error message if device
is not connected.
•Connection – indicates whether the asma-1 device used is USB, Serial or
Bluetooth.
•Copy Data - Test data is copied from the asma-1 device to Spirotrac and the
original data remains stored on the device.
•Move Data - Test data is transferred from the asma-1 device to Spirotrac and
the original test data is deleted from the device.
On selecting Download Tests Spirotrac connects to the appropriate device, downloads
subject and test session data and presents a dialog containing a list of Subjects and
tests downloaded. On selecting Save the subject(s) selected and associated test
sessions are saved to the Spirotrac database.
On selecting Upload Subjects,Spirotrac lists all subjects in the Spirotrac database.
The user may then select the subject(s) that they wish to send to the Vitalograph
device. On selecting Upload these subjects are saved to the Vitalograph device. Test
sessions are not saved.
If Synchronisation mode is not selected in Options, the user can manually perform a
sync by selecting Tools > Device Downloads/Uploads > In2itive (or relevant device).
3.7 Exporting Data
The user can select session(s) for subject(s) and export that data.
1. To export session(s) to a CSV format:
a. Select the subject.
b. Select File > Export > Spirotrac Format.
c. Select All for all sessions in the database OR Selected to filter the export
based on subjects and sessions.
2. To export session(s) to the NIOSH format
a. Select File > Export > Niosh Format.
b. Select All for all sessions in the database OR Selected to filter the export
based on subjects and sessions.
3. To export the best test parameters to a CSV format:
a. Select File > Export > Best Format.
b. Select All for all sessions in the database OR Selected to filter the export
based on subjects and sessions.
4. To print a session report to pdf in the NIOSH report format:
a. Select the required Subject and Session from the visit tree
b. Select File > Niosh Reports > Print Spirometry Report.
Note: The software will require the user to confirm whether or not sensitive personal
identifying information should be exported.

Vitalograph Spirotrac Instructions for Use
IFU Part No.: 07402
Issue 22
_______________________________________________________________________________________________________________
Page 16 of 78 DT_0006-15
Spirotrac provides a technical support menu function which provides information to
Vitalograph support to help with customer support queries.
To export Log Files:
1. Select Help > Technical Support.
2. Select the Export Logs.
3.8 Calibration Verification
All spirometry standards (e.g. ATS/ERS/BTS/ANZRS) recommend checking the
accuracy of lung function measuring devices at least daily with a 3-L syringe to verify
that the instrument is measuring accurately. The system should never be outside
accuracy limits unless the measuring device is damaged or in a faulty condition. In this
event, see the Fault Finding Guide.
Mandatory daily accuracy checking can be set in Spirotrac. When this option is on, the
user will not be able to proceed to testing until an accuracy check has been performed
for that day. To set:
1. Select Tools > Options > General tab > Perform Accuracy Check Daily
Note: It is recommended that the Vitalograph 3 Litre Syringe be used when performing
an accuracy check. This has an accuracy of +/-0.5%.
Figure 3
3.8.1 Calibration Verification Check
1. Select Accuracy Check button on main toolbar or select Tools >
Accuracy Check from the menu
2. Attach the device flow head to the syringe with a BVF fitted as per Figure 3.
3. Pump air through the flowhead to bring it to ambient temperature.
4. If the flowhead has very recently been used for testing or has come from a cold
environment, its temperature should be equilibrated by pumping air through it
from the syringe several times.
5. Enter syringe reference and syringe volume in L (1-9).
6. Click on Check button and follow instructions on screen. (For the Vitalograph
Intrac device: see Note below for differences on steps 7 & 8).
7. Make sure plunger is out fully and inject the syringe when prompted.

Vitalograph Spirotrac Instructions for Use
IFU Part No.: 07402
Issue 22
_______________________________________________________________________________________________________________
Page 17 of 78 DT_0006-15
8. Press in the syringe with a smooth, firm stroke (not too slowly).
9. Follow the instructions on screen. Three repeatable syringe strokes are
required.
10.If the accuracy is outside the limits, it is suggested that you perform another
check before updating the device.
11.If three consecutive strokes are not reproducible within 3%, an error message
displays.
12.It is possible to view and print Accuracy Check results at the end of the
procedure. To re-check the accuracy select Re-Check button.
Note: When performing an accuracy check using the Vitalograph Intrac device:
1. (step 7) Ensure the plunger is fully pressed into the syringe before starting the
accuracy check.
2. (step 8) Withdraw the syringe while maintaining the flow rate within the
highlighted band on screen.
3.8.2 Calibration update
NOTE: This should only be conducted by or under the guidance of Vitalograph Service
Agents.
1. Select Tools > Calibration Adjustment from the menu.
2. Perform steps 2-9 as per Calibration Verification Check.
3. If the accuracy is outside the limits the user is presented with an option to adjust
the calibration, only after a re-check has been performed.
4. If performing a Re-Check, step 2 (3-10 as per Calibration Verification Check)
will be performed again but this time the user will not be prompted to re-check if
a calibration adjustment is recommended.
a. If three consecutive strokes are reproducible within 3%, but the overall %
difference is greater than 25%, the user is not allowed to adjust the
calibration. This may be as a result of faulty technique or faulty
equipment (see Fault Finding Guide).
5. Results may be viewed and printed at the end of the procedure.
3.8.3 Viewing/Printing accuracy log
Spirotrac maintains an Accuracy Check Log which is updated each time an accuracy
check is performed with the Pneumotrac in Spirotrac.
1. Select View > Accuracy Check Log from the menu.
2. Select the device ID from dropdown list or select All Devices to view the entire
accuracy log.
3. The log may be filtered by User, device serial number, date/time of the
accuracy check.
4. Select the Report icon to print the accuracy log.
5. You may view an individual accuracy check and flow volume curves by double
clicking on an individual check.

Vitalograph Spirotrac Instructions for Use
IFU Part No.: 07402
Issue 22
_______________________________________________________________________________________________________________
Page 18 of 78 DT_0006-15
3.9 Institute and Department
3.9.1 Viewing Institution or Department Details
1. Select Institution Details or Current Department in the View menu.
2. The institution or department information displays.
3. Click OK when finished.
3.9.2 Editing Institution or Department Details
1. Select Institution Details or Department Details in the Edit menu.
2. The institution or department information displays.
3. Make changes required (any non-editable fields will be greyed out).
4. Select OK to save or Cancel to undo.
3.9.3 Department Management
The Institute can have multiple Departments, which are managed through the
'Department Management' screen.
1. Select Tools > Department Management.
2. Select New to add new department. Enter department details. Select OK.
3. To switch to another department, select department name from the list and
press Select button. When prompted select Yes to switch departments or No to
keep current department active.
4. Click Close button to return to main screen.
3.10Audit Trail
3.10.1 Audit Trail Codes
Note: The user will only be prompted to enter a reason for a change where 'User
Annotation' below is indicated with a 'Yes' and User Annotation is ON.
Activity Grade Activity Description System Annotation User
Annotation
AC01 User Logon No
AC02 User Logoff
/Application exit Switch User
only when user is logged off due to a
switch in user
No
AC03 Institute Create Institute ID No
AC04 Institute Edit Institute Name, Field modified:
From<previous value> To <updated
value>
No
AC05 Department Create Department Name No

Vitalograph Spirotrac Instructions for Use
IFU Part No.: 07402
Issue 22
_______________________________________________________________________________________________________________
Page 19 of 78 DT_0006-15
Activity Grade Activity Description System Annotation User
Annotation
AC06 Department Edit Department Name, Field name
modified: From<previous value> To
<updated value>
Yes
AC07 Subject Create Subject Create: Subject ID No
AC08 Subject Edit Subject ID, Field name modified:
From<previous value> To <updated
value>
Yes
AC09 Subject Delete Subject Number: Subject ID Yes
AC10 User Create User ID = ID of new user No
AC11 User Edit User ID, <Password Change> Yes
AC12 User Delete User ID = ID of deleted user Yes
AC14 Session Create Subject ID = Subject ID, Session Type No
AC15 Session Edit Subject ID=Subject
ID, Session=Session Date/Time Field
modified
From<previous value> To <updated
value>
Yes
AC16 Calibration Update Device Name Device
ID=device serial number Yes
AC17 Add Population Group <Regression Set Map, Population
Group Name: New Population Groups
Name,Regression Set: Regression Set
Name, Correction Factor: Correction
Factor>
No
AC18 Edit Population
Group Field modified From <previous value>
To <updated value> Yes
AC19 Delete Population
Group <Regression Set Map, Population
Group Name: name of the deleted
population group, Regression
Set: name of the regression set the
deleted population group was mapped
to, Correction Factor: the correction
factor of the deleted population group>
Yes
AC21 Date/Time Change No

Vitalograph Spirotrac Instructions for Use
IFU Part No.: 07402
Issue 22
_______________________________________________________________________________________________________________
Page 20 of 78 DT_0006-15
Activity Grade Activity Description System Annotation User
Annotation
AC20 Software Update No
AC22 Test Performed
Outside Temp Subject ID=Subject ID,
Session=Session Date/Time No
AC23 Calibration
Update Outside
Temp
Pneumotrac Device
ID=device serial number Yes
AC24 Manual Test
Temperature
Update
Temperature modified
From <previous value> To <updated
value>
No
AC25 Manual Cal/Acc
Temperature Update Manually changed temperature from
<previous value> to <updated value> No
AC26 In2itive Upload # Subject(s) uploaded successfully to
In2itive No
AC27 In2itive Download # Subject(s) downloaded No
AC28 In2itive
Synchronisation # Subject(s) successfully synchronised No
AC29 2120 Upload # Subject(s) uploaded successfully to
2120 No
AC30 2120 Download # Subject(s) downloaded.
Source = 2120 No
AC31 Subject Move From department<old dept> To
department<new department>: Subject
Number(s)<list of subject numbers
moved>
Yes
AC32 Model 4000 Download # Test(s) Downloaded No
AC33 MDE Subject Create Subject ID=subject id No
AC34 MDE Subject Edit Subject ID=subject id No
AC35 MDE Test Addition Subject ID=subject id No
AC36 Alpha Accuracy Log
Download ALPHA accuracy log downloaded No
Table of contents
Other Vitalograph Measuring Instrument manuals
Vitalograph
Vitalograph Vitalograph micro User manual
Vitalograph
Vitalograph asmaPLAN+ User manual
Vitalograph
Vitalograph 6000 User manual

Vitalograph
Vitalograph micro 6300 User manual
Vitalograph
Vitalograph In2itive 2120 User manual

Vitalograph
Vitalograph micro 6300 User manual
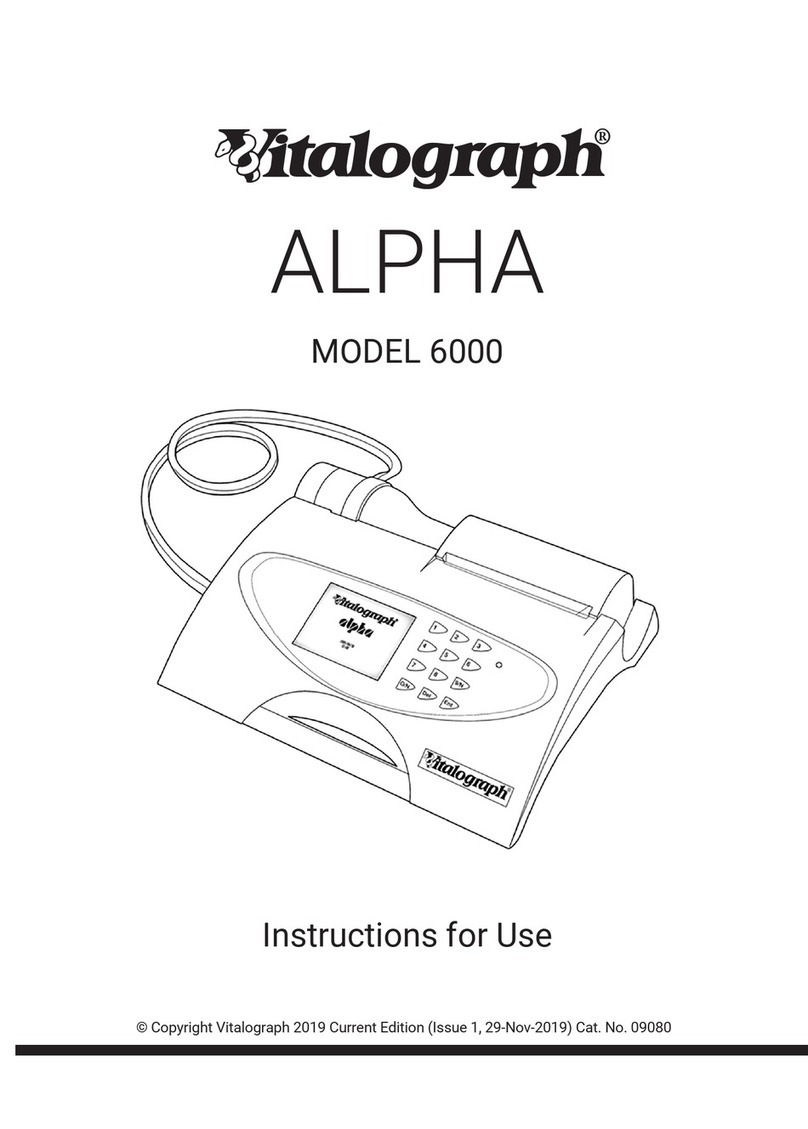
Vitalograph
Vitalograph alpha 6000 User manual
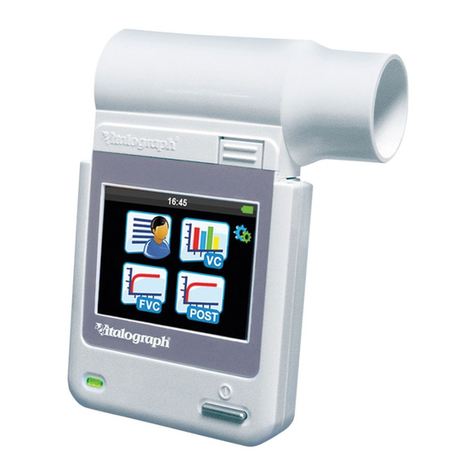
Vitalograph
Vitalograph micro 6300 User manual
Vitalograph
Vitalograph copd-6 User manual
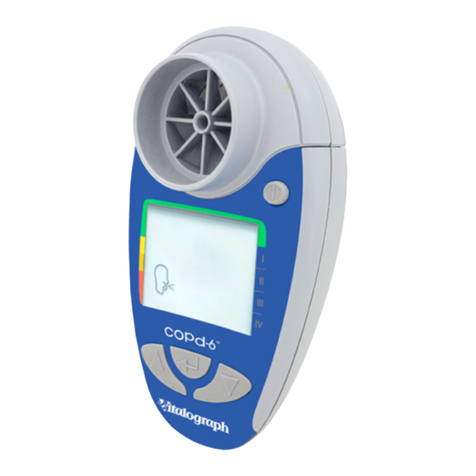
Vitalograph
Vitalograph copd-6 4000 User manual
