Vitalograph micro 6300 User manual

micro
Instructions for Use
MODEL 6300
© Copyright Vitalograph 2022 Current Edition (Issue 2, 29-Jun-2022) Cat. No. 09360

ENG
2Page of 44 DT_0006 Issue 16
A Global Leader in Respiratory Solutions
Vitalograph Ltd, UK
Maids Moreton, Buckingham
MK18 1SW
England
Tel: 01280 827110
Fax: 01280 823302
E-mail: [email protected]
www.vitalograph.co.uk
Technical Support
Tel: 01280 827177
Email: [email protected]
Vitalograph Ltd, International
Maids Moreton, Buckingham
MK18 1SW
England
Tel: +44 1280 827120
Fax: +44 1280 823302
E-mail: [email protected]
www.vitalograph.eu
Technical Support
Tel: +353 65 6864111
Email: [email protected]
Vitalograph GmbH
Rellinger Straße 64a
D-20257 Hamburg
Germany
Tel: +49 40 547391-0
Fax: +49 40 547391-40
www.vitalograph.de
Technical Support
Telefon: +49 40 547391-14
E-mail: [email protected]
Vitalograph Inc.
13310 West 99th Street
Lenexa, Kansas, 66215
USA
Toll Free: 800 255 6626
Tel: (913) 730 3200
Fax: (913) 730 3232
E-mail: [email protected]
www.vitalograph.com
Technical Support
Tel: (913) 730-3205
Email: [email protected]
Vitalograph (Ireland) Ltd
Gort Road Business Park
Ennis, Co Clare, V95 HFT4
Ireland
Tel: +353 65 6864100
Fax: +353 65 6829289
E-mail: [email protected]
www.vitalograph.ie
Technical Support
Tel: +353 65 6864111
Email: [email protected]
© Copyright Vitalograph 2022
Current Edition (Issue 2, 29-Jun-2022)
Cat. No. 09360
Vitalograph is a registered trademark.
Vitalograph Branch Addresses

ENG
3Page of 44
09360 Issue 2
Vitalograph micro - Instructions for Use
Contents
1. Indications for Use .................................................................. 4
2. Contraindications, Warnings, Precautions and Adverse
Reactions................................................................................. 4
3. Main Components of the Vitalograph micro ......................... 7
3.1. Features of the Vitalograph micro........................ 8
4. Setting Up the Vitalograph micro ........................................... 8
5. Operating Instructions ............................................................ 9
5.1. Entering Subject Data.......................................... 10
5.2. Conducting a Test................................................ 11
5.3. Reporting.............................................................. 16
5.4. CalibrationVerication........................................ 17
5.5. CongurationOptions ......................................... 19
6. Power Management.............................................................. 23
6.1. Battery Power Indications ................................... 23
6.2. Power Save Mode................................................ 24
7. Cleaning & Hygiene ............................................................... 24
7.1. Preventing Cross-Contamination of Subjects.... 24
7.2. Inspection of the Vitalograph micro ................... 26
8. Fault Finding Guide ............................................................... 27
8.1. Software Check.................................................... 28
8.2. Product Useful Life Checks ................................ 28
9. Customer Service.................................................................. 29
10. Consumables and Accessories............................................ 29
11. Disposal ................................................................................. 30
12. Explanation of Symbols ........................................................ 30
13. Description of the Vitalograph micro................................... 31
14. TechnicalSpecication......................................................... 32
15. CE Notice ............................................................................... 34
16. FDA Notice............................................................................. 37
17. EU Declaration of Conformity............................................... 38
18. Guarantee .............................................................................. 39

ENG
4Page of 44 DT_0006 Issue 16
A Global Leader in Respiratory Solutions
1. Indications for Use
The device is a spirometer which measures patient respiratory
parameters including FVC, FEV1, FEV6, PEF, MVV and VC. The
Vitalograph micro is a handheld spirometer designed for lung
function testing for use on adults and paediatrics, 5 years and
older, in a variety of environments such as hospital wards,
health centres and private homes under the supervision of a
healthcare provider.
2. Contraindications, Warnings, Precautions and Adverse
Reactions
1. Nomodicationofthisequipmentisallowed.Any
unauthorised changes to the device may compromise product
safety and/or data and as such Vitalograph cannot be held
responsible and the device will no longer be supported.
2. The micro is not designed as a sterile device. Always follow the
safety guidelines given by the manufacturer of cleaning and
disinfectant chemicals.
3. Vitalograph intends that a new Bacterial Viral Filter (BVF™) be
used for every subject to prevent cross contamination. Using
anewBVFprovidesasignicantlevelofprotectionofthe
subject, the device, and the user against cross contamination
during spirometry manoeuvres. A BVF is for single use only.
4. Spirometry may support or exclude diagnosis, but it cannot
make one (ATS/ERS 20191).
5. The device is marked as “Rx Only” and therefore may only be
sold in the USA by or on the order of a physician.
6. Whenusingtheremoteowheadensurethattheowhead
connecting tube is not pinched or trapped as spirometry results
may be affected, or a false reading may be detected.
7. The USB cable supplied with the device has the potential to be
a strangulation hazard and therefore should be kept out of the
reach of children and pets.
8. The device is rated to IP22 which protects it from solids
>12.5mm and dripping water however it is not designed
tobewaterproof.Donotgetthedevicewetoruseinitawet
environment (e.g., in the rain, in a shower). If the device does
1 ATS/ERS Standardisation of Spirometry Eur Respir J 2019

ENG
5Page of 44
09360 Issue 2
Vitalograph micro - Instructions for Use
get wet, it may cease to function however there is no safety
risk or potential harm to the user. If the device does get wet,
contact the device manufacturer.
9. Takecarenottoblocktheowheadconewithtongueor
teeth during testing. A ‘spitting’ action or cough will give false
readings.
10. Subject fatigue may occur during spirometry testing depending
on the subject’s characteristics e.g., age, health status. For
safety reasons, testing should be preferably done in the sitting
position, using a chair with arms and without wheels. Subject
may also take a break between tests. The maximum number
of efforts for each of the test modules (SVC, FVC and Post) on
the micro is 20 manoeuvres.
11. All values displayed are expressed as BTPS values.
12. Time zero is determined using the back-extrapolated method,
from the steepest part of the curve.
13. Thedeviceshouldnotbeusedinthepresenceofammable
liquidsorgases,dust,sand,oranyotherchemicalsubstances.
14. All Spirometry standards recommend completing a calibration
vericationoflungfunctionmeasuringdevicesdailywitha3-L
syringe to validate that the instrument is measuring accurately.
The device should never be outside accuracy limits. A
calibrationvericationshouldalsobecompletedaftercleaning
or disassembling the spirometer, after adjusting calibration or
iftheowheadordevicehasbeendropped.
15. Service and repairs should be carried out only by the
manufacturer or by Service Agents approved by Vitalograph.
16. Maintenance must not be performed while the device is in use
by a subject.
17. Do not disconnect the device or USB cable from the computer
running the software during data transfer or printing.
18. ThedevicecontainsaLithiumcoincellbatterywhichisnot
accessible by the user. Any suspected battery faults should be
reportedtothemanufacturer.
19. The device contains uses 4 x 1.5V non-rechargeable IEC60086
certiedAAAalkalinebatteries.
20. The AAA batteries should be removed if the micro is intended
to be stored, without use, for an extended period.

ENG
6Page of 44 DT_0006 Issue 16
A Global Leader in Respiratory Solutions
21. When replacing the batteries all 4 should be replaced together,
use batteries from the same manufacturer, never mix new
and old batteries, make sure all 4 batteries are inserted in the
correct orientation.
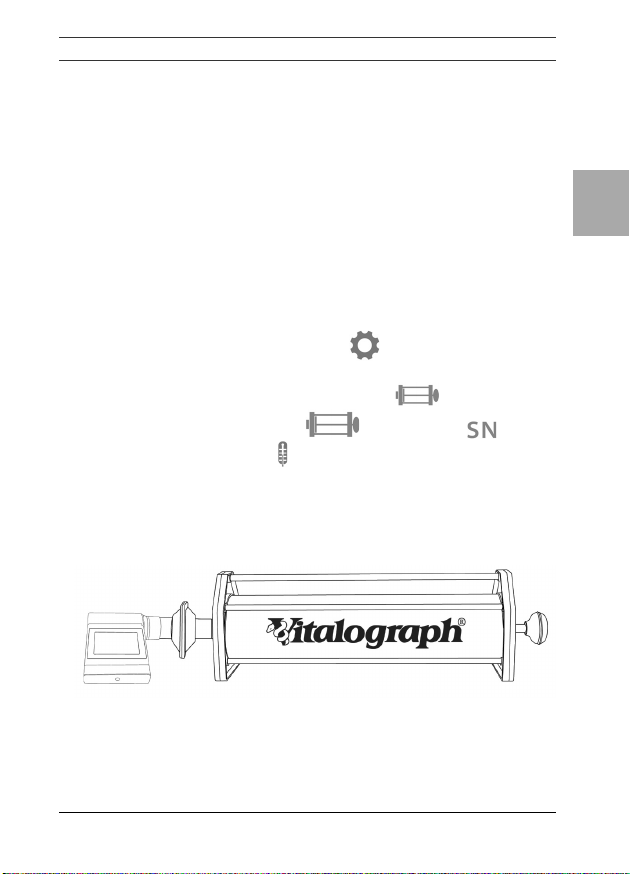
22. Iftheowheadisremovedfromthemicro(when
disassembling for cleaning and/or to attach the remote
owheadadaptor),careshouldbetakenwiththeexposed
edges. During normal use, these edges are covered, are not
accessible by the user or subject.
23. Useofaccessoriesandcablesotherthanthosespecied
orprovidedbyVitalographforthisequipmentcouldresult
in increased electromagnetic emissions or decreased
electromagnetic immunity of the device and result in improper
operation.
24. Non-medicalequipmentmustbekeptoutsidethesubject
environment i.e., any area in which intentional or unintentional
contact between the subject and parts of the system, or some
other persons touching part of the system, can occur.
25. PortableRFcommunicationsequipment(includingperipherals
such as antenna cables and external antennas) should be
used no closer than 30 cm (12 inches) to any part of the
device,includingcablesspeciedbyVitalograph.Otherwise,
degradationoftheperformanceofthisequipmentcouldresult.
26. Useofthisequipmentadjacenttoorstackedwithother
equipmentshouldbeavoidedbecauseitcouldresultin
improperoperation.Ifsuchuseisnecessary,thisequipment
andtheotherequipmentshouldbeobservedtoverifythatthey
are operating normally.
27. Avoid exposure to known sources of EMI (electromagnetic
interference) such as diathermy, lithotripsy, electrocautery,
RFID(RadioFrequencyIdentication),andelectromagnetic
security systems such as anti-theft/electronic article
surveillance systems, metal detectors. Note that the presence
of RFID devices may not be obvious. If such interference is
suspected,repositiontheequipmentifpossible,tomaximize
distances.
28. This device is ‘MR Unsafe’, do not use it in an MRI environment.
29. Theappliedpartistheowheadanddevicebody.These,along

ENG
7Page of 44
09360 Issue 2
Vitalograph micro - Instructions for Use
with the BVF, are the contact points for the subject during
a spirometry session. There are no adverse effects if the
subject comes into contact with any other part of the device.
3. Main Components of the Vitalograph micro
The micro is a standalone spirometer. Device Studio software
allows the micro to generate reports to a computer after testing is
complete,butitisnotrequiredforthedevicetofunction.Themain
components of the micro are:
Figure 1 Vitalograph micro Components
1USB Flash Drive containing Device Studio Software and
manuals
2 Power (On/Off) Button
3 Micro USB Port
4 Plinth
5 Flowhead
6 Flowhead Cone
7 LCD/Touch Panel Display
8 Battery Compartment (4 x 1.5V AAA batteries)
Note: Computer shown for illustration purposes only and not
supplied.

ENG
8Page of 44 DT_0006 Issue 16
A Global Leader in Respiratory Solutions
3.1.Features of the Vitalograph micro
The features include:
• Fleisch Pneumotachograph
• Removableowhead
• Touch screen colour display
• Choice of predicted values
• Report generation through Device Studio software
• Storage of tests and demographic information
4. Setting Up the Vitalograph micro
Check that the contents of the packaging match those listed on the
contents label on the inside of the carton.
Preparing for use:
1. Insert 4 x 1.5V AAA batteries into the battery compartment on
rear of device.
2. Alternatively, the device may be powered using the USB cable
supplied. Connect one end of the USB cable into a USB port on
a computer and the other end into the micro USB connector on
the device.
3. Press the On/Off switch to turn the device on.
4. Install Device Studio on the Computer following instructions
supplied with the software.
5. To use Device Studio, the micro must be connected to the
Computer via USB cable (via ports marked with the
symbol).
If the device has just been unpacked or transported, ensure that
it is left sitting, fully powered and is at room temperature prior to
testing.
Ensureacalibrationvericationiscompletedoneachtesting
day, prior to using the device (see Section 5.4 Calibration
Verication).
Ifusingwiththeremoteowhead(notincludedasstandard):
1. Removetheowheadfromthemainbodyofthedeviceby

ENG
9Page of 44
09360 Issue 2
Vitalograph micro - Instructions for Use
grippingandslidingitrmlyinthedirectionoftheowhead
cone (6).
2. Connecttheremoteowheadadaptor(4)tothebaseofthe
owhead(5),connectthedevicecap(2)tothedevice(1).
3. Unwraptheowheadconnectiontubing(3)andconnectone
endtodevicecap(2)andtheotherendtotheremoteowhead
adaptor (4). See Figure 2. The tubing is keyed, so it will only
connect one way.
Figure 2 micro with remote owhead
1 micro Device
2 Device Cap
3Flowhead Connection Tubing
4 Remote Flowhead Adaptor
5 Flowhead
6 Flowhead Cone
5. Operating Instructions
Onrsttimeuse,themicroopensontheSetupscreenforDateand
Time . Enter the current date and time.
Press the forward button tosave.
Continuetothetemperatureentryscreen .
Enter the temperature.

ENG
10Page of 44 DT_0006 Issue 16
A Global Leader in Respiratory Solutions
Presstheforwardbuttontosave.
Continue to the Main Menu screen which includes the following
options:
New Subject
VC Test
FVC Test
Post Test .
The test icons will appear greyed out and can’t be selected until a
subject is created. The Post Test icon becomes active when an FVC
pre-test is performed.
The status bar at the top of the screen shows the following after
tests have been completed:
1. V - indicating a VC test has been performed.
2. F - indicating an FVC has been performed.
3. P - indicating a Post test has been performed.
5.1.Entering Subject Data
1. Select New Subject on the Main Menu.
2. Theavailableinformationeldsavailableare:DateofBirth
,Height , Birth Sex / , Weight ,Population
. Weight and Population Group are on the second
screenandmaybeenabledinthecongurationmenu
(Subject Options ).
3. To enter information for Date of Birth, Height and Weight,
touchtheblankeldonscreentoopenthetouchscreen
keyboard. Use the keyboard to enter the information. Units
willautomaticallyswitchbetweencm/kgandin/lbs.
4. Select Birth Sex by pressing the male , or female icon.
5. Select Population Group by pressing the appropriate option
on screen. Use the select arrow on the right of the screen to
access additional Population Groups.

ENG
11Page of 44
09360 Issue 2
Vitalograph micro - Instructions for Use
6. Press the forward button to save the subjects details.
7. If a value is not entered for Birth Sex, Height or Date of Birth
then an Error Icon willappearnexttotheemptyeld.If
the information is not entered then the predicted values will
not appear in test results.
8. To exit the new subject screen,press the forward button.
5.2.Conducting a Test2
To prepare for a test session:
1. Ensure that the accuracy of the device has been checked.
(Refertosection5.4onCalibrationVerication)
2. Ensure the subject’s details have been entered on the micro.
Atestsessioncanbeperformedwithoutllinginanydetails
forthesubjectbutthisisnotrecommended.
3. FitadisposableBVFtotheowhead.Adisposablenoseclip
may also be used.
4. Select the test option ‘VC’ or ‘FVC’. Instruct and demonstrate
the test as detailed below.
5. Testing may begin when the ‘Exhale to Begin’ icon appears
.
6. The subject should:
• Sit upright and maintain this posture throughout the test.
• Fit the noseclip and relax.
• Place BVF in mouth and close lips around the
mouthpiece.
• Seal lips around the mouthpiece and keep the tongue
down.
5.2.1. VC Test
To perform a VC test (ensure Volume/time (V/t) is selected):
1. Instruct the subject to breathe normally.
2. The subject should inhale completely, with a brief pause
whenlungsarecompletelyfull(≤2secs).
2 Derived from terminology and guidance taken from ATS/ERS Standardisation of
Spirometry 2019 Update Am J Respir Crit Care Med 2019 Vol 200, Iss 8 pp e70-e88

ENG
12Page of 44 DT_0006 Issue 16
A Global Leader in Respiratory Solutions
3. Then exhale in a relaxed manner with no hesitation until
no more air can be expelled. It is vital that the operator
encourages the subject to keep exhaling to ensure all
air is expelled (when a plateau has been reached or
expiration time reaches 15 seconds).
4. Results may be viewed as either: Volume/time (V/t)
or Volume Bar graph by pressing the icon on
thesidemenu.Thesearenotenabledduringtest.
5. View a full screen graph by using the zoom button
at the side of the test screen. Zoom in to return to
normalmode.Thesearenotenabledduringtest.
6. The results summary at the top of the screen shows
theVCofthelastblow.Thenumberofblowsisshown
nexttothelasttestVC.
7. The best three tests are shown on the graph in order of
rank (best 1, 2, 3 etc.). A legend at the top of the graph
explains the order of the tests.
8. Select results fromthesidemenutoviewresults.
• Use the left/right arrows to select which test results
to view.
• The tests are shown in order of rank (best is ranked
number 1 then 2, 3 etc.).
9. Todeletethecurrentblow:
• SelecttheDeleteoptionfromthesidemenu.Two
delete icons will appear:
Delete (green) :Presstoconrmthedeletion.
Delete (red) : Press to cancel the deletion.
Toclear/deleteallthesessionsonthedevice,connectto
Device Studio as outlined in section 5.3 and move all data
toDeviceStudiotoclearitfromthedevice.
10. After performing the VC tests, press the enter button to
exit the VC Test screen and return to the Main Menu.

ENG
13Page of 44
09360 Issue 2
Vitalograph micro - Instructions for Use
Note: Single breath technique may also be performed.
5.2.2. FVC Test
To Perform an FVC test :
1. Instruct the subject to breathe normally.
2. The subject should inhale completely and rapidly, with a
briefpausewhenlungsarecompletelyfull(≤2secs).
3. Then exhale with maximal effort until no more air can
be expelled (when a plateau has been reached or forced
expiratory time (FET) reaches 15 seconds).
4. It is vital that the operator encourages the subject
to keep exhaling to ensure all air is expelled. The
operator should repeat instructions as necessary, with
enthusiasm.
5. Breathe in with maximal effort until completely full. The
manoeuvre is now complete, remove the mouthpiece
from the mouth.
6. Listen for two beeps. The device is now ready for the
next blow.
7. Repeat for a minimum of three manoeuvres, up to a
maximum of 20.
8. The results may be viewed as either a Volume/time (V/t)
or Flow/Volume (F/V) by pressing the icons
on the side menu. These are not enabled during test.
9. The graph may be changed to a full screen graph
by using the zoom button on the side menu.
Zoom in to return to normal mode. These are not
enabledduringtest.
10. The results summary at the top of the screen shows the
FVCandFEV1ofthelastblow.
11. The number of tests (for VC) or the number of usable
tests or bad blow ‘!’ indicator (for FVC) are shown next to
the last test results.
12. The best three tests are shown on the graph in order of
rank (best 1, 2, 3 etc.). A legend on the top of the graph

ENG
14Page of 44 DT_0006 Issue 16
A Global Leader in Respiratory Solutions
explains the order of the tests.
13. Select on the side menu to view results.
• Use the left/right arrow to select which test to view.
• Scroll through the results for each test using the up/
down arrows. The number of parameters displayed
willdependontheconguredparameters.
• The tests are shown in order of rank (best is ranked
number 1 then 2, 3 etc.).
• The results screen has several columns, arranged
inasimilarmannertotheprintout.Therstcolumn
displays the parameter name, the second displays
the units, the third the test value and the fourth
column shows the %Pred or Z-value, depending on
theconguration.
14. Todeletethecurrentblow:
• SelecttheDeleteoptionfromthesidemenu.Two
Delete icons will appear:
Delete (green) :Presstoconrmthedeletion.
Delete (red) : Press to cancel the deletion.
• To clear/delete all the sessions on the device (with
the exception of the latest FVC Pre-test), connect to
Device Studio as outlined in section 5.3 and move all
datatoDeviceStudiotoclearitfromthedevice.
15. After performing the FVC tests press the enter button to
exit the FVC Test screen and return to the Main Menu.
Note: Single breath technique may also be performed.
Note: Dierent tests conducted during the same session i.e. VC
and FVC, will be treated as a single session, with a report for
that session. A Post test will be treated as a single session, with
a report for that session. If more than one test is required for the
same subject, the device should be switched o and on again

ENG
15Page of 44
09360 Issue 2
Vitalograph micro - Instructions for Use
between tests so that they are registered as separate sessions and
separate reports can be generated.
Note: A session ends and is saved when one of the following occur:
the device is turned o, a new subject is created, the device is
connected to Device Studio.
5.2.3. Post Bronchodilator (Post) Test
A Post test session may be performed on the last FVC pre-test
session performed. The device will retain the last pre-bronchodilator
test (pre-test) even when it is turned o and on again and/or the
data has been transmitted to Device Studio.
To perform a Post test :
1. Select ‘Post Mode’ from the Main Menu.
2. Perform the Post FVC test as outlined in section 5.2.2
Performing an FVC Test.
Note: A Post Test may only be selected if an FVC pre-test has been
completed. When leaving the Post FVC test screen and returning to
the main menu the user will notbe able to select either the VC or
FVC test (they will be greyed out) as the micro is still in Post mode,
unless the pre-FVC contains VC data in which case the VC will still be
available.
5.2.4. Saving the Test Session
The micro has the capacity to store a maximum of 325 subject
entries with the corresponding session data. Only the best 3 blows
will be stored with each session. The session information will also
include the subject details entered and the best pre-test if there is a
Post-test session.
The micro is intended to be used as a temporary storage device.
It may be connected to Device Studio to produce pdf reports of
the session data, this will move all subject/sessions to the Device
Studioapplicationandagthemasdeletedonthedeviceexceptfor
the last FVC Pre-test.

ENG
16Page of 44 DT_0006 Issue 16
A Global Leader in Respiratory Solutions
Note: If more than the maximum subject/session entries are stored
on the device the existing subject/sessions entries will be deleted on
a First In First Out (FIFO) basis i.e. the rst session entered will be
the rst to be deleted.
5.3.Reporting
The micro prints reports to an external printer through the Device
Studio application.
To generate PDF reports:
1. Connect the micro to a computer running Device Studio.
2. The Device Studio application should be open, the micro
switchedonandinthemainscreen.
3. When connected, the remote mode icon will display on the
micro.
4. Device Studio will search for assessments on the device. The
user will be presented with the download screen for each
report.
5. Additional information may be added such as name, user
interpretation and comments.
6. Device Studio may also be used to print/save calibration
vericationreportsanddownload/printallassessments.
ThesettingsoptiononDeviceStudioallowstheusertocongure
information displayed on the session report.
Additional guidance on using Device Studio can be found in the
InstructionsforUsesuppliedontheDeviceStudioUSBashdrive
and in the software help menu.
Note: Do not disconnect the device or USB cable from the computer
during data transfer or printing.
Note: When the micro is connected to Device Studio it will move,
not copy, the stored sessions, with the exception of the latest FVC
Pre-session.
Note: Different tests conducted during the same session i.e. VC and
FVC, will be treated as a single session, with a report for that session.
A Post test will be treated as a single session, with a report for that
session. If more than one test is required for the same subject the

ENG
17Page of 44
09360 Issue 2
Vitalograph micro - Instructions for Use
micro should be switched off and on again between tests so that
they are registered as separate sessions and separate reports can be
generated.
5.4.Calibration Verication
The Vitalograph micro should never be outside accuracy limits
unless damaged or in a fault condition. In normal use, it is
recommendedthatadailycalibrationvericationisperformedon
thedevice.ISO26782recommendationsrequirethatthedifference
between the volume measured by the spirometer and the volume
pumped into the spirometer from a syringe is within 3%.
Tocompleteacalibrationverication:
1. SelecttheCongurationbutton on the main menu
screen.
2. Selectthecalibrationvericationicon .
3. Enter the Syringe volume , serial number and
ambient temperature using the touchscreen keypad.
4. Connecttheowheadtothesyringeandpumpairthrough
theowheadtobringittoambienttemperature.Ifthe
owheadhasveryrecentlybeenusedfortestingorhas
come from a cold environment, pump air through it several
timestoequilibrateitstemperature.
Figure 3: micro device connected to a 3L syringe
5. Press the ‘Forward’ key to move to the Calibration
Verication screen, follow the on-screen instructions.

ENG
18Page of 44 DT_0006 Issue 16
A Global Leader in Respiratory Solutions
6. The result of each stroke, expiratory (E) and inspiratory (I)
displays on the top of the screen with the number of strokes
shown in between. If they are reproducible and within 3% this
will be displayed on the top of the screen, and a syringe with
a green tick pass will display. Pressing the forward
keywillreturntothemainCongurationmenuandthe
CalibrationVericationpassisrecorded.
In the unlikely event the result is outside 3% or non-
reproducible, anerror icon will display.
Successfulverication(greensyringewitha
tick).
Non-reproducible syringe strokes (red syringe
with ‘information’ in centre, after the 5th Stroke).
Outside25%(poortechnique,repeatverication
oranissuewiththeowhead/device,contact
technical support).
Outside 3%, 6% (purple syringe, and shows >3%,
>6% on the top of the screen). The higher the %,
the more severe the issue.
Over3%,repeatcalibrationverication.
Over6%mayindicatethedevicerequirescleaning
or maintenance.
The following icons display after the calibration update:
Calibration update (purple syringe with purple tick
in a circle, % shown on top of screen).

ENG
19Page of 44
09360 Issue 2
Vitalograph micro - Instructions for Use
Non-reproducible syringe strokes (red syringe
with ‘information’ in centre, after the 5th Stroke).
Outside 25%.
The following displays on power on if the previous calibration
vericationhasfailed:
Calibrationvericationfailed(orangesyringewith
triangular warning symbol).
ACalibrationVericationreportmaybeprintedorsavedifrequired,
see section 5.3 Reporting.
If the procedure was followed correctly and the error icon is
showing,thecalibrationvericationshouldberepeated.Ifthe
error continues to show, contact Vitalograph using the contact
information at the start of this document.
Note: To exit the Calibration Verication screen without performing
a check, press the forward key again toreturn to the Conguration
Menu screen. The Calibration Verication will not be logged to the
device memory in this case.
Note: A calibration verication is recommended daily, if the device
has been stored or transported, if the owhead is dropped or
replaced, and if EMI (Electromagnetic Interference) is suspected or
possible.
5.5.Conguration Options
ToaccesstheCongurationmenu,pressthe icon on the main
screen.
Therearefourcongurationoptions:
1. The Subject option tocongure:

ENG
20Page of 44 DT_0006 Issue 16
A Global Leader in Respiratory Solutions
a. Posture: set the posture for the session to sitting or
standing .
b. Weight: turn on to enter the subject’s weight or off
ifnotrequired.
c. Population Group: turn on to enter the subject’s
populationgrouporoff ifnotrequired.
2. The Device settings option tocongure:
a. The device which includes:
• Selecting between % Predicted or Z-score .
The parameter selected will then be displayed in the
resultsscreen.
• Audio: turn audio off and put the micro into silent
mode.
• User Passcode: use to lock the device so that
any user will be prompted for a passcode on start up.
• Temperature: enter the temperature, up to 2
decimal places. The default setting is 23oC.
b. Parameters: Choose to select which parameters to
display on the results screen, use the left/right arrows to
navigate between screens. A maximum of 8 parameters
can be selected.
The following are all available parameters:
Parameter Denition
VC Vital capacity (L)
Other manuals for micro 6300
2
Table of contents
Other Vitalograph Measuring Instrument manuals

Vitalograph
Vitalograph micro 6300 User manual

Vitalograph
Vitalograph In2itive 2120 User manual

Vitalograph
Vitalograph 6000 User manual

Vitalograph
Vitalograph micro 6300 User manual

Vitalograph
Vitalograph copd-6 4000 User manual

Vitalograph
Vitalograph alpha 6000 User manual

Vitalograph
Vitalograph Spirotrac 7000 User manual

Vitalograph
Vitalograph copd-6 User manual

Vitalograph
Vitalograph asmaPLAN+ User manual

Vitalograph
Vitalograph Vitalograph micro User manual