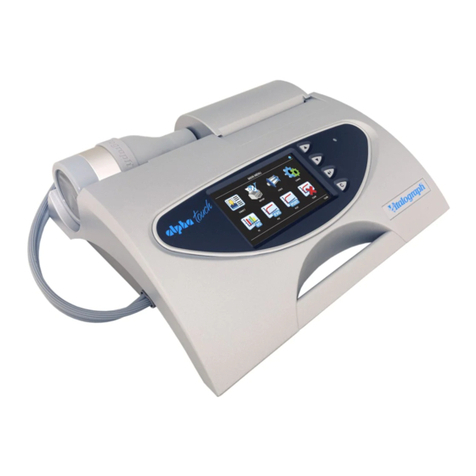
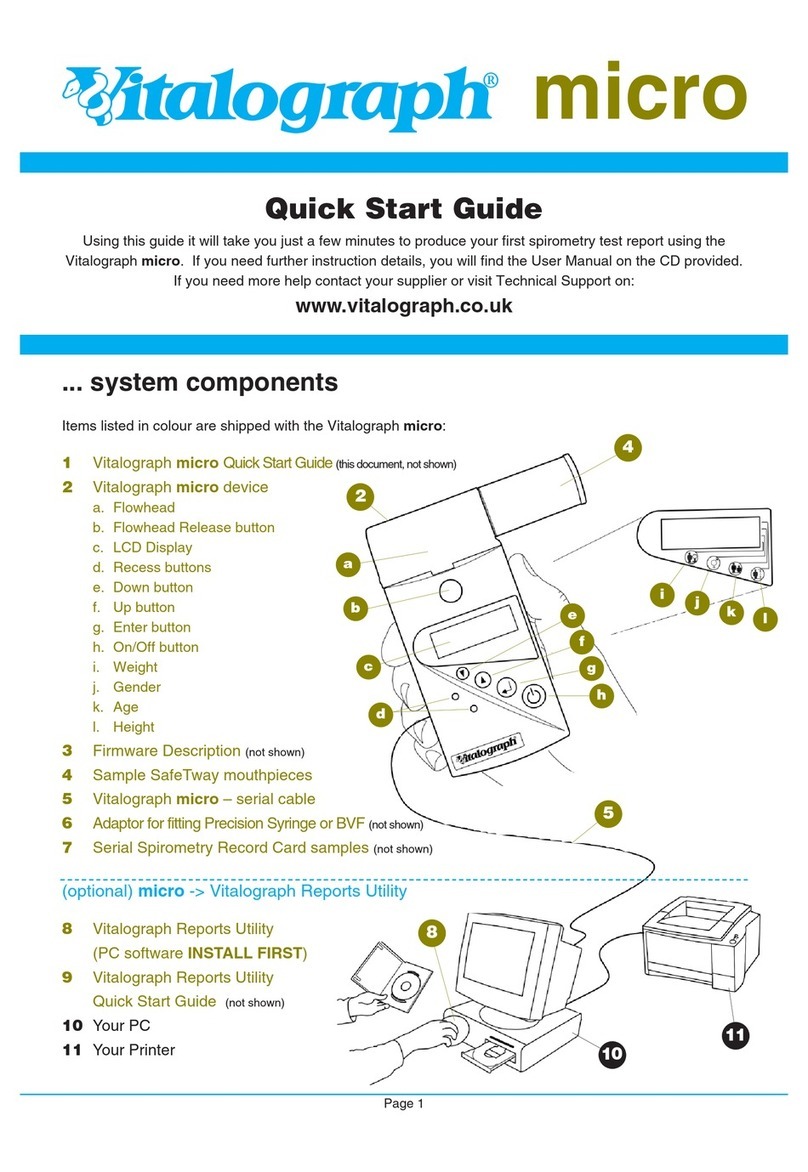
Vitalograph micro 6300 User manual

micro
Instructions for Use
MODEL 6300
© Copyright Vitalograph 2020 Current Edition (Issue 2, 22-May-2020) Cat. No. 09200

ENG
2Page of 40 DT_0006 Issue 15
A Global Leader in Respiratory Solutions
Vitalograph Ltd, UK
Maids Moreton, Buckingham
MK18 1SW
England
Tel: 01280 827110
Fax: 01280 823302
E-mail: [email protected]
www.vitalograph.co.uk
Technical Support
Tel: 01280 827177
Email: [email protected]
Vitalograph Ltd, International
Maids Moreton, Buckingham
MK18 1SW
England
Tel: +44 1280 827120
Fax: +44 1280 823302
E-mail: [email protected]
www.vitalograph.eu
Technical Support
Tel: +353 65 6864111
Email: [email protected]
Vitalograph GmbH
Rellinger Straße 64a
D-20257 Hamburg
Germany
Tel: +49 40 547391-40
Fax: +49 40 547391-40
www.vitalograph.de
Technical Support
Telefon: +49 40 547391-14
E-mail: [email protected]
Vitalograph Inc.
13310 West 99th Street
Lenexa, Kansas, 66215
USA
Toll Free: 800 255 6626
Tel: (913) 730 3200
Fax: (913) 730 3232
E-mail: [email protected]
www.vitalograph.com
Technical Support
Tel: (913) 730-3205
Email: [email protected]
Vitalograph (Ireland) Ltd
Gort Road Business Park
Ennis, Co Clare, V95 HFT4
Ireland
Tel: +353 65 6864100
Fax: +353 65 6829289
E-mail: [email protected]
www.vitalograph.ie
Technical Support
Tel: +353 65 6864111
Email: [email protected]
Vitalograph Ltd, Hong Kong/China
P.O. Box 812
Shatin Central Post Oce
Hong Kong
E-mail: [email protected]
www.vitalograph.cn
Technical Support
Tel: +353 65 6864111
Email: [email protected]
© Copyright Vitalograph 2020
Current Edition (Issue 2, 22-May-2020)
Cat. No. 09200
Vitalograph is a registered trademark.
Vitalograph Branch Addresses

ENG
3Page of 40
09200 Issue 2
Vitalograph micro - Instructions for Use
Contents
1. Main Components .................................................................. 4
1.1. Features ................................................................. 5
2. Set Up ...................................................................................... 5
3. Operating the Vitalograph micro ............................................ 6
3.1. Entering Subject Data............................................ 6
3.2. Conducting a Test.................................................. 8
3.3. Reporting.............................................................. 12
3.4. Calibration Verication........................................ 13
3.5. Setting up a New Flowhead ................................ 15
3.6. Conguration Options ......................................... 16
4. Power Management in the Vitalograph micro..................... 21
4.1. Batteries ............................................................... 21
4.2. Power Save Mode................................................ 22
5. Cleaning & Hygiene ............................................................... 22
5.1. Preventing Cross-Contamination of Subjects.... 22
5.2. Inspection of the Vitalograph micro ................... 23
6. Remote Flowhead ................................................................. 23
7. Fault Finding Guide ............................................................... 24
8. Customer Service.................................................................. 26
9. Consumables and Accessories............................................ 26
10. Disposal ................................................................................. 27
11. Explanation of Symbols ........................................................ 27
11.1. Icons used in the Vitalograph micro .................. 28
12. Description of the Vitalograph micro................................... 31
12.1. Indications for Use............................................... 31
13. Technical Specication......................................................... 32
14. Contraindications, Warnings, Precautions and
Adverse Reactions ................................................................ 34
15. CE Notice ............................................................................... 36
16. FDA Notice............................................................................. 38
17. EU Declaration of Conformity............................................... 38
18. Guarantee .............................................................................. 39

ENG
4Page of 40 DT_0006 Issue 15
A Global Leader in Respiratory Solutions
1. Main Components
Figure 1 The main components of the Vitalograph micro.
1 PC Software
2 Flowhead
3 Flowhead Release Button
4 LCD/Touch Panel Display
5 Mini USB Port
6 On/Off Button
7 LED
8Battery compartment (4 x 1.5VAAA Batteries)
Note: Computer not supplied.
1
2
3
8
6
5
7
4

ENG
5Page of 40
09200 Issue 2
Vitalograph micro - Instructions for Use
1.1.Features
• Fleisch Pneumotachograph
• Removable owhead
• Touch screen color display
• Choice of predicted values
• Report generation through Vitalograph Reports software
• Storage of tests and demographic information
2. Set Up
1. Insert 4 x 1.5V AAA batteries into the battery compartment.
Alternatively the micro may be powered from the user’s
computer via the mini USB port in the base using the USB
cable supplied. Press the On/Off button on the front face of the
instrument.
2. When rst turned on, the date and time setup screen is
presented. Use the up/down buttons to enter the current date
and time, and press enter to save these settings.
3. The Vitalograph® micro is now ready for use.
4. To use with the Vitalograph Reports Application, install the
software provided with the micro following the instructions
supplied with the software.
5. Connect the micro to the computer using the USB cable (via
ports marked with the symbol).
If the device has just been unpacked or transported, ensure that it
is left sitting, fully powered so that it is at room temperature prior to
testing.

ENG
6Page of 40 DT_0006 Issue 15
A Global Leader in Respiratory Solutions
3. Operating the Vitalograph micro
The Main Menu screen includes the following options - New
Subject, VC Test, FVC Test and Post Test (for bronchodilator
responsiveness testing).
When turning the device on for the rst time the test screen icons
will appear greyed out and can’t be selected until a subject is
created. The Post Test icon will stay greyed out until an FVC pre-test
is performed.
In addition to displaying the time and the battery icon the status
bar at the top on the screen will show various icons to indicate the
following:
1. V - indicates a VC test has been performed
2. F - indicates an FVC has been performed
3. P - indicates post mode (for bronchodilator responsiveness
testing)
The icons will only appear after the test has been completed.
3.1.Entering Subject Data
1. Select the New Subject button on the Main Menu, to
open the New Subject screen.
2. The Subject information elds available are as follows:
Age Height Gender Weight Ethnicity

ENG
7Page of 40
09200 Issue 2
Vitalograph micro - Instructions for Use
3. Age, Height and Genderare on the rst screen and are
enabled by default. Weight and Ethnicity are on the second
screen and are not enabled by default.Enable options by
selecting:
Conguration menu Subject Options
4. To enter information for Age, Height and Weight select the
appropriate icon and type in the information using the touch
panel keypad.
• Units automatically switch between cm/in and kg/lbs.
• Gender is selected by pressing either
Female or Male
• Ethnicity is selected from a list by pressing the
appropriate option on screen. To access additional
Ethnicities select the arrow on the right of the screen.
5. To save the subject details and return to the Main menu
press the Enter button
6. If a value is not entered for Age, Height or Gender, an Error
Icon will appear next to the empty eld when the
enter button is pressed, this is to indicate that the predicted
values will not appear in the results of any testing done.
7. To exit the new subject screen press the enter button again.
Note:The micro retains data for the last subject until a new subject
is created. Therefore, with the exception of the rst use of the device
or after clearing the memory, when the user enters the New Subject
Screen the elds appeargreyed out to indicate that data is retained.
Selecting age, height or weight boxes will move the last subject data to
the device memory to allow the user to enter new subject information.
All subject details need to be completed in order to continue.

ENG
8Page of 40 DT_0006 Issue 15
A Global Leader in Respiratory Solutions
3.2.Conducting a Test
Before starting a test session:
1. Ensure that the accuracy of the device was checked recently.
(Refer to the section on Calibration Verication).
2. Select a subject and ensure the required demographic
information is entered.
3. Wash hands (operator and subject).
4. Fit a new Bacterial Viral Filter (BVF™) to the owhead for
each test subject. The use of a disposable noseclip is
recommended.
5. Instruct and demonstrate the test.
3.2.1. Testing
1. From the Main Menu select either
VC Test or FVC Test
2. Wait for the ‘Blow Now’ icon to appear
The device is now ready to accept a blow.
Example script1:
• Sit upright with back straight and feet at on oor. Fit the
nose clip and relax.
• Place BVF in mouth and close lips around the
mouthpiece.
• Seal your lips around the mouthpiece and keep your
tongue down.
• Breathe normally
VC test session (with V/T graph display selected):
1. Inhale completely with a brief pause when your lungs are
completely full (≤ 2 secs).
2. Exhale with no hesitation until no more air can be expelled
while maintaining an upright posture.
1 Derived from terminology and guidance taken from ATS/ERS Standardisation of
Spirometry 2019 Update Am J Respir Crit Care Med 2019 Vol 200, Iss 8 pp e70-e88

ENG
9Page of 40
09200 Issue 2
Vitalograph micro - Instructions for Use
It is vital that the operator encourages the subject to keep exhaling to
ensure all air is expelled (when a plateau has been reached or forced
expiratory time (FET) reaches 15 seconds). The operator should
repeat instructions as necessary, coaching vigorously.
3. Listen for two beeps. This indicates that device is ready for the
next blow.
4. Repeat for a minimum of three manoeuvres, usually no more
than eight for adults.
5. Check VC repeatability and perform more manoeuvres as
necessary.
Note: A single-breath VC technique may also be performed on the
device.
FVC test session:
1. Inhale completely and rapidly with a brief pause when your
lungs are completely full (≤ 2 secs).
2. Exhale with maximal effort until no more air can be expelled
while maintaining an upright posture.
It is vital that the operator encourages the subject to keep exhaling to
ensure all air is expelled (when a plateau has been reached or forced
expiratory time (FET) reaches 15 seconds). The operator should
repeat instructions as necessary, coaching vigorously.
3. Breathe in with maximal effort until completely full. The
manoeuvre is now complete and the BVF is removed from the
mouth.
4. Listen for two beeps. This indicates that device is ready for the
next blow.
5. Repeat for a minimum of three manoeuvres, usually no more
than eight for adults.
6. Check FEV1 and FVC repeatability and perform more
manoeuvres as necessary.
Note: A single-breath FVC technique may also be performed on the
device.
When testing is complete, press the enter button to exit
thetestscreen and return to theMain Menu.

ENG
10Page of 40 DT_0006 Issue 15
A Global Leader in Respiratory Solutions
3.2.2. Saving the Test Session
The Vitalograph micro has capacity to store 750subject entries with
corresponding session data. Only the best 3 blows will be stored
with each session. Stored session information includes subject
details and best pre-test if it is a bronchodilator responsiveness
testing session.
The Vitalograph micro is intended to be used to store test data
temporarily. When the device is connected to Vitalograph Reports
to produce pdf reports of the session data, all subject/sessions are
moved to Vitalograph Reports and cleared from the device with the
exception of the last FVC Pre-test done.
If more than 750 subject/session entries are stored on the device
the existing subject/sessions entries will be deleted on a First In
First Out (FIFO) basis i.e. the rst session entered will be the rst to
be deleted.
3.2.3. Bronchodilator Responsiveness Testing
Bronchodilator responsiveness testing can be performed on the
most recent FVC pre-test session performed. The device will retain
the last pre-test even when it is turned off and on again and/or the
data has been transmitted to Vitalograph Reports.
To perform a bronchodilator responsiveness test:
1. From the Main Menu select ‘Post Mode’
2. Perform the Post FVC Test Session following the
example script for ‘FVC test session’ in section 3.2.1.
Note: Post Mode may only be selected if a FVC Pre-test has been
completed. When returning to the main menu from the Post FVC test
screen it is not possible to select either the VC or FVC test as the
device is still in Post mode. These options will be greyed out.
3.2.4. Viewing VC Test Results
Results may be viewed as either a Volume/time (V/t) or Volume Bar
graph by pressing the graph button on the side of the test screen. It
is not possible to change the view of results during testing.

ENG
11Page of 40
09200 Issue 2
Vitalograph micro - Instructions for Use
Volume/time (V/t) Volume bar graph
1. The graph may be changed to a full screen graph by
using the zoom button on the side of the test screen. To
return to normal mode select the zoom in button.
2. The results summary on the bottom of the screen shows
theVCof the last blow.The number ofblows is shown
in a separate box next to the last test VC.
3.2.5. Viewing FVC Test Results
The results may be viewed as either a Volume/time (V/t)or Flow/
Volume (F/V)graph by pressing the graph button on the side of the
test screen. It is not possible to change the view of results during
testing.
Volume/time (V/t) Flow/Volume (F/V)
1. The graph may be changed to a full screen graph by
using the zoom button on the side of the test screen. To
return to normal mode select the zoom in button.
2. The results summary on the bottom of the screen shows
the FVC and FEV1 of the last blow.
3. The number of usable blows and bad blow indicator (!)
are shown in a separate box next to the last test FVC and
FEV1.
4. The best three tests are shown on the graph in order
of rank (best 1, 2, 3...). A key is shown at the top of the
graph to help identify the tests.

ENG
12Page of 40 DT_0006 Issue 15
A Global Leader in Respiratory Solutions
5. To view results as a table, select the results button on
the side of the test screen
a. Select the test results for viewing by using the left/
right arrows.
b. Scroll though the results for each test by using
the up/down arrows. The number of parameters
displayed will depend on the congured parameters.
c. Tests are shown in order of rank (best is ranked
number 1 then 2, 3....).
6. The results screen has several different columns:
• Parameter name
• Units
• Test value (Pre and Post for bronchodilator
responsiveness testing)
• %Pred or Z-value (depending on the conguration)
3.2.6. Deleting Test Results
To delete the current blow:
1. From the menu on the side of the test screen, select
thedelete button.
2. To conrm the deletion of the blow press the Delete icon
with a green tick .
3. To cancel the deletion select the Delete icon with a red
cross X.
3.2.7. Ending a Test Session
A session ends and is saved when one of the following occur:
• The device is turned off
• A new subject is created
• The device is connected to Vitalograph Reports
3.3.Reporting
Generating PDF reports from the micro requires a computer running
Vitalograph Reports.
Different tests conducted during the same session ie VC, FVC,

ENG
13Page of 40
09200 Issue 2
Vitalograph micro - Instructions for Use
Post are treated as a single session and are printed as one report.
If more than one test report is required for the same subject, the
device should be switched off and on again betweentests so that
they are registered as separate sessions and separate reports can
be generated.
1. To produce PDF reports from the micro, connect it to a
computer using the USB cable supplied with the device.
2. Run Vitalograph Reports on the computer.
3. Ensure the micro is switched on and in the home screen.
4. Guidance on using Vitalograph Reports can be found in the
Vitalograph Reports instruction for Use and in the software
help menu.
5. Connect to Vitalograph Reports and select to move all data
to clear/delete all the sessionsfrom the device.
Note:When the micro is connected to Vitalograph Reports it will
move, not copy, the stored sessions with the exception of the latest
FVC Pre-session.
3.4.Calibration Verication
1. Select Conguration button at the top right corner of the
main menu.
2. Select Calibration Verication
3. Enter the Syringe volume and reference using the touch
panel keypad.
4. Enter the ambient temperature using the touch panel keypad.
5. Attach the owhead to the syringe with a BVF tted as
shown in gure 2.

ENG
14Page of 40 DT_0006 Issue 15
A Global Leader in Respiratory Solutions
Figure 2. Calibration verication
6. Pump air through the owhead to bring it to ambient
temperature. If the owhead has very recently been used
for testing or has come from a cold environment, its
temperature should be equilibrated by pumping air through it
from the syringe several times.
7. Press the Enter key to open theCalibration
Vericationscreen and follow the on-screen instructions.
8. The calibration verication result is shown in % in the top
right corner of the screen. If it is reproducible and within
3% a green tick will show. PressEnter to return to the main
Conguration menu. The verication pass is recorded.
9. If the Calibration verication result is outside 3% the error
icon will show. Consult the micro fault nding guide at
section 7. Press the Enter key to proceed to the calibration
update routine.
10. The Calibration Update screen shows the volume (L) at the
top left corner of the screen, next to the number of strokes.
11. The procedure is the same as for the Accuracy Check. If two
strokes are within 3% of the reference volume, pressEnter
to return to the Conguration menu. The Calibration factor is
not updated and a pass is recorded. If outside 3%, the error

ENG
15Page of 40
09200 Issue 2
Vitalograph micro - Instructions for Use
icon is shown. Press Enter to return to the Conguration
menu. The Calibration factor is updated and the Calibration
update is recorded.
Note:To exit the Calibration verication screen without performing
a check, press the Enter key toreturn to theConguration Menu
screen. The calibration verication will not be logged where the
calibration verication routine has not been completed.
When to check accuracy:
• In accordance with establishment procedures
• After service checks
• After cleaning or disassembling spirometer for any reason
• After adjusting calibration
• If the owhead or device has been dropped
• If a new owhead has been tted
3.5.Setting up a New Flowhead
After tting a New Flowhead to the Vitalograph micro it is necessary
set up the owhead with the device.
Follow these steps when setting up a new owhead.
1. Perform a full calibration verication as per section 3.4.
above.
2. Select the Accuracy/Calibration icon again and repeat steps
from section 3.4. up to step 7.
3. Instead of continuing to follow on-screen instructions,
withdraw the syringe fully and follow instructions below:
4. Select the New Flowhead icon.
5. Slowly push in the syringe fully and then withdraw fully,
keeping the ow rate below the 0.75 L/sec limit lines on the
graph. If this is performed correctly new limit lines of 2.50 L/
sec will appear.
6. Using a medium speed push in the syringe fully and then
withdraw fully, keeping the ow rate between the 0.75 L/sec
and 2.50 L/sec limit lines on the graph. If this is performed
correctly new limit lines of 10.00 L/sec will appear.

ENG
16Page of 40 DT_0006 Issue 15
A Global Leader in Respiratory Solutions
7. Using a fast stroke push in the syringe fully and then
withdraw fully, keeping the ow rate between the 2.50 L/sec
and 10.00 L/sec limit lines on the graph.
8. The result is shown in % on the bottom of the screen. If
it is within 3% a green tick icon will be shown to indicate
successful setup of the new owhead. Press the Enter key to
return to the main Conguration menu.
9. If the result is outside 3% the error icon will be shown. Press
Enter to proceed to the new owhead set-up screen.
Only complete the next step where result is outside 3%
10. Repeat steps 5-8. At the end of the procedure a green
tick icon will appear. Press the enter key to return to the
Conguration menu.
Note:To exit the New Flowhead screen, press the Enter key again to
return to the Conguration Menu screen. The result will not be logged
to the Vitalograph micro memory in this case.
3.6.Conguration Options
To access the Conguration menu select theconguration icon
on the top right corner of the main screen.
In the Conguration menu there are fouroptions:
• Subject options (top left icon)
• Device settings (top right icon)
• Accuracy and Calibration
(bottom left icon)
• About box (bottom right icon)

ENG
17Page of 40
09200 Issue 2
Vitalograph micro - Instructions for Use
1. Subject Options
• Posture - sets Posture to be
recorded as sitting or standing.
• Weight - turn on to enable the
option to enter Weight in the
subject screen.
• Population Group - turn on
to enable the option to enter
Ethnicity in the subject screen.
Note: Default Posture is sitting. Default for Weight and Ethnicity is Off.
2. Device Settings
Results Options
• Display % Predicted or Z-score
in the results screen.
• Turn Sounds on or off.
• Device lock on or off. Turning
on requires the user to enter a
passcode.
• Set Temperature (up to 2
decimal places). The default
setting is 23°C.

ENG
18Page of 40 DT_0006 Issue 15
A Global Leader in Respiratory Solutions
Parameters (See Parameters
section)
• Select the parameters to be displayed in results.
• Use the left/right arrows to navigate between the screens.
• A maximum of 8 parameters can be selected.
Date/Time
• Select this option to set or change the Date and/or Time.
• Use the up/down arrows to edit these elds.
• Date format is YYYY/MM/DD, Timeis in 24 hour format.
Service/Technician Mode
• An 8 digit passcode is required to enter this mode.
3. Accuracy/Calibration
• The user may perform calibration verication and calibration
by selecting this option (See calibration verication section for
detail).
• Spirometry standards recommend checking the accuracy
of lung function measuring devices at least daily with a
3-L syringe to validate that the instrument is measuring
accurately.

ENG
19Page of 40
09200 Issue 2
Vitalograph micro - Instructions for Use
4. About Box
• Information about the software
can be obtained from the
About box. This information
is required for queries to
Vitalograph or a service agent.
• Information includes the Model
number (6300), Serial number
of the device, the Software
reference number, date of the
last Calibration verication and
the Service Due date.
3.6.1. Parameters
Parameters available in the Vitalograph micro:
Parameter Denition
VC Vital capacity (L)
FVC Forced vital capacity (L)
FEV1 Forced expiratory volume after 1 second (L)
FEV1R FEV1 divided by the largest VC from the VC
or FVC manoeuvre.
PEF L/s Peak expiratory ow (L/sec)
PEF L/min Peak expiratory ow (L/min)
FEF25-75
Maximal mid expiratory ow: the mean FEF in
the time interval between 25% and 75% of the
FVC (L/sec)
FEF75-85
Forced late expiratory ow: the mean FEF in
the time interval between 75% and 85% of the
FVC (L/sec)
EVC Expiratory vital capacity (L)
IVC Inspiratory vital capacity (L)

ENG
20Page of 40 DT_0006 Issue 15
A Global Leader in Respiratory Solutions
FIVC Forced inspiratory vital capacity (L)
FIVC/FVC Ratio FIVC of FVC
FEV.5 Forced expiratory volume after 0.5 seconds (L)
PIF L/s Peak inspiratory ow (L/sec)
FMFT Forced mid-expiratory ow time (sec)
FET Forced expiratory time (sec)
FEV.5/FVC Ratio FEV 0.5 of FVC
FEV.75 Forced expiratory volume after 0.75 seconds (L)
FEV.75/FVC Ratio FEV 0.75 of FVC
FEV1/VC Ratio FEV1 ofVC
FEV1/IVC Ratio FEV1 of IVC
FEV1/FVC Ratio FEV1 of FVC
FEV1/FIVC Ratio FEV1 of FIVC
FEV1/FEV6 Ratio FEV1 of FEV6
FEV1/PEF Ratio FEV1 of PEF
FEV3 Forced expiratory volume after 3 seconds (L)
FEV3/VC Ratio FEV3 of VC
FEV3/FVC Ratio FEV3 of FVC
FEV6 Forced expiratory volume after 6 seconds (L)
FEF25 Forced expiratory ow at 25% of the FVC (L/sec)
FEF50 Forced expiratory ow at50% of the FVC (L/sec)
FEF75 Forced expiratory ow at 75% of the FVC (L/sec)
FEF0.2-1.2 Mean forced expiratory ow in the volume
interval between 0.2 and 1.2 L of the test (L/sec)
FEF 25-75/FVC Ratio FEF25-75 of FVC
FIV1 Forced inspiratory volume after 1 second (L)
FIV1/FVC Ratio FIV1 of FVC
FIV1/FIVC Ratio FIV1 of FIVC
PIF L/min Peak inspiratory ow (L/min)
FIF25 Forced inspiratory ow at 25% of the FVC (L/sec)
FIF50 Forced inspiratory ow at50% of the FVC (L/sec)
Other manuals for micro 6300
2
Table of contents
Other Vitalograph Measuring Instrument manuals

Vitalograph
Vitalograph In2itive 2120 User manual

Vitalograph
Vitalograph Spirotrac 7000 User manual

Vitalograph
Vitalograph copd-6 User manual

Vitalograph
Vitalograph 6000 User manual

Vitalograph
Vitalograph micro 6300 User manual

Vitalograph
Vitalograph asmaPLAN+ User manual

Vitalograph
Vitalograph copd-6 4000 User manual

Vitalograph
Vitalograph micro 6300 User manual

Vitalograph
Vitalograph Vitalograph micro User manual

Vitalograph
Vitalograph alpha 6000 User manual