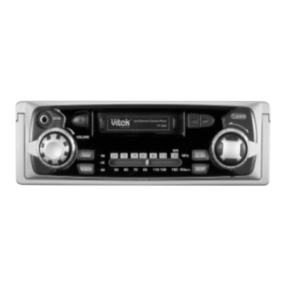
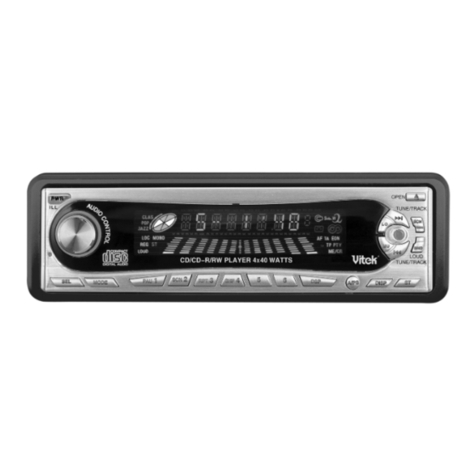
Vitek VT-3633 User manual

MANUAL INSTRUCTION
ИНСТРУКЦИЯ ПО ЭКСПЛУАТАЦИИ
АВТОМОБИЛЬНЫ РАДИОПРИЕМНИК
СО СЪЕМНО ПЕРЕДНЕ ПАНЕЛЬЮ
AUTOREVERSE STEREO CAR RECEIVER
AND DETACHABLE FRONT PANEL
МОДЕЛЬ VT,3633
3633.qxd 16.02.04 16:14 Page 2

15
LOCATION AND FUNCTION OF CONTROL
1. POWER ON/OFF
2. SELECT BUTTON: BASS/TREBLE/BALANCE/FADER (SEL)
3. VOL UP/VOL DOWN FOR BASS/TREBLE/BALANCE/FADER
4. LOUDNESS BUTTON
5. LCD DISPLAY
6. BAND SELECTOR SWITCH
. TUNING CONTROLS (MANUAL AND AUTOMATIC)
8. "SCAN" AUTOMATIC TUNING CONTROL
9. SETTING STATION PRESETS (MANUAL MEMORY METHOD)
10. PRESET SCAN/AUTO STORE (A/PS)
11. LOCAL/DISTANT BUTTON
12. STEREO/MONO SELECTOR
13. MODE BUTTON
14. DISPLAY BUTTON
15. MUTE BUTTON
16. CASSETTE SLOT
1 . TAPE EJECT
18. FAST FORWARD/REWIND/PROGRAM
19. PANEL RELEASE BUTTON
2
ENGLISH
3633.qxd 16.02.04 16:14 Page 2

INSTALLATION
PRECAUTIONS
•Choose the mounting location carefully so that the unit will not interfere with the normal driving func
tions of the driver.
•Avoid installing the unit where it would be subject to high temperatures, such as from direct sunlight
or hot air from the heater, or where it would be subject to dust, dirt or excessive vibration.
•Use only the supplied mounting hardware for a safe and secure installation.
•Be sure to remove the front panel before installing the unit.
NOTE: Inclination angle for car radio installation must not exceed 30° otherwise the front panel will not
open.
Note: Keep the release ey in the safe place, as you may need it in future to remove the unit from the car.
TO SUPPORT THE UNIT
3
ENGLISH
14
1. UNIT
2. RELEASE CASE
3. HEX NUT
4. LOCK WASHER
5. PLAIN WASHER
6. CAR BODY
. REAR SUPPORT STRAP
8. TAPPING SCREW
9. M5 X 15 HEX BOLT
ПОДСОЕДИНЕНИЕ 4 ДИНАМИКОВ
СТАНДАРТНЫ СОЕДИНИТЕЛЬНЫ ПРОВОД (ISO)
4 SPEAKER WIRING
ISO CONNECTOR
ПОДСОЕДИНЕНИЕ 2 ДИНАМИКОВ
СТАНДАРТНЫ СОЕДИНИТЕЛЬНЫ ПРОВОД (ISO)
2 SPEAKER WIRING
ISO CONNECTOR
СТОРОНА A
4: Желтый
5: Голубой
: Красный
8: Черный
СТОРОНА B
1: Фиолетовый
2: Фиолетовый/Черный
3: Серый
4: Серый/Черный
5: Белый
6: Белый/Черный
: Зеленый
8: Зеленый/Черный
СТОРОНА A
4: Желтый
5: Голубой
: Красный
8: Черный
СТОРОНА B
3: Серый
4: Серый/ Черный
5: Белый
6: Белый/ Черный
SIDE A
4: Yellow
5: Blue
: Red
8: Black
SIDE B
3: Gray
4: Gray/Black
5: White
6: White/Black
SIDE A
4: Yellow
5: Blue
: Red
8: Black
SIDE B
1. Violet
2. Violet/Black
3. Gray
4. Gray/Black
5. White
6. White/Black
. Green
8. Green/Black
LINE OUT GREY: RED (R)
WHITE (L)
3633.qxd 16.02.04 16:14 Page 4

13
Detaching and attaching the front panel
The front panel of this unit can be detached in order to prevent
the unit from being stolen.
DETACHING THE FRONT PANEL
Before detaching the front panel, be sure to press the POWER
OFF button first. Then press the button (19) and detach the
panel by pulling it towards you as illustrated.
Note:
Be sure not to drop the panel when detaching it from the unit.
•Ma e sure that the front panel is the right way up when
attaching it to the unit as it cannot be attached upside
down.
•Do not press the front panel hard against the unit when
attaching it. It can be easily attached
by pressing it lightly against the unit.
•When you carry the front panel with you, put it in the sup
plied front panel case.
•Do not press hard or give excessive pressure to the dis
play window of the front panel when attaching it to the unit.
1. POWER ON/OFF (PWR)
By pressing this key, the unit is on and off. This unit is turned on by pressing any key.
2. SELECT BUTTON: BASS/TREBLE/BALANCE/FADER (SEL)
Press to select the desired mode:
VOLUME BASS TREBLE BALANCE FADER VOLUME
AUDIO DSP CONTROLS (2)
When press the SEL button for more than 2 seconds, it is activated as selecting mode of these function.
DSP can be selected by VOL UP and DOWN key. POP MROCK MCLASSFLAT MDSP OFF
BEEP MODE (2)
When press the SEL button for more than 2 seconds, it is activated as selecting mode of these function.
BEEP ON: BEEP sound can be heard from speaker when the buttons are pressed.
SEEK MODE (2)
When press the SEL button for more than 2 seconds, it is activated as selecting mode of these function.
SEEK 1: When SEEK 1 mode is activated, AUTO SEEK SCAN is stopped when station is detected even
user still push SEEK button.
SEEK 2: Auto SEEK SCAN is not stopped even station is detected if user push SEEK button. When release
this SEEK button, then stop when station is defected.
VOL LAST/ADJUST (2)
When press the SEL button for more than 2 seconds, it is activated as selecting mode of these function.
4
ENGLISH
18. КНОПКИ УСКОРЕННО ПЕРЕМОТКИ ВПЕРЕД / НАЗАД И РЕВЕРСА
При нажатии на одну из этих кнопок включается ускоренная перемотка вперед или назад .
Для остановки перемотки слегка нажмите на соседнюю кнопку. При окончании перемотки
магнитофонной ленты в кассете, магнитола автоматически включится в режим воспроизведения.
В режиме воспроизведения кассеты, при нажиме на обе кнопки перемотки одновременно,
движение кассеты будет изменено на противоположное "реверс". Функция "автореверс"
включается при окончании ленты в кассете.
19. КНОПКА ОТСОЕДИНЕНИЯ ПАНЕЛИ (REL)
Выключите аппарат кнопкой (PWR), нажмите кнопку отсоединения панели, после чего переднюю
панель можно снять.
ТЕХНИЧЕСКИЕ ДАННЫЕ
СРОК СЛУЖБЫ АВТОМАГНИТОЛЫ НЕ МЕНЕЕ 3Х ЛЕТ
РУССКИ
SEL DSP +/VOL POP M ROCK M CLASS FLAT M DSP OFF
SEL DSP SEL BEEP +/VOL ON/OFF
SEL DSP SEL BEEP +/VOL
SEL SEEK SEEK1/SEEK2
FM ДИАПАЗОН
Частотный диапазон
Промежуточная частота
Предельная чувствительность
(сигнал/шум 30 дБ)
Коэффициент подавления зеркальной частоты
Коэффициент подавления помех
на промежуточной частоте
MW ДИАПАЗОН
Частотный диапазон
Промежуточная частота
Предельная чувствительность
ОБЩИЕ ХАРАКТЕРИСТИКИ
Источник питания/Напряжение
Напряжение линейного выхода
Сопротивление катушки динамика
Максимальная выходная мощность
Установочные размеры
65108 МГц
10. МГц
менее 3 мкВ
45 дБ
60 дБ
5221620 КГц
450 КГц
50 дБ
DC 12 В (с отрицательным заземлением на массу)
300 мВ±3 дБ
48 Ом
4 x 25 Вт (Макс.) при 4Ом
Рама 1 8 x 50 x 150 мм;
передняя часть 188 x 58 x 20 мм
3633.qxd 16.02.04 16:14 Page 6

9. ПРЕДУСТАНОВЛЕННЫЕ РАДИОСТАНЦИИ
Шесть пронумерованных кнопок (9) предварительной установки могут заносить в память и
вызывать из памяти радиостанции в любом из имеющихся диапазонов.
Занесение радиос анции в памя ь:
1. Выберите диапазон (при необходимости).
2. Настройтесь на передающую радиостанцию (пункт или 8).
3. Нажмите на любую кнопку предустановленных радиостанций (9) более одной секунды. Как
только радиостанция занесена в память, ее номер высветится на дисплее.
Вызов с анций из памя и:
1. Выберите диапазон (при необходимости).
2. Для того чтобы вызвать из памяти радиостанцию, нажмите любую кнопку с номером менее
одной секунды.
10. НАСТРО КА С АВТОПОИСКОМ (AS/PS)
Кратковременно нажмите на кнопку (AS/PS) для того, чтобы приемник начал поиск
предустановленных радиостанций. Поиск предустановленных радиостанций, может
сопровождаться достаточно высоким уровнем шумов, и при этом каждая найденная
радиостанция будет включена на 5ть секунд.
Если Вы нажмете на кнопку (AS/PS) более 1й секунды, то 6 самых сильных радиостанций будут
настроены и занесены в память под номерами предварительной установки.
По завершении работы режима автопоиска, радиоприемник начнет работать с установленными
радиостанциями.
11. КНОПКА МЕСТНОГО/ДАЛЬНЕГО ПРИЕМА
Для прослушивания радиостанций с сильным и устойчивым сигналом нажмите кнопку
местного/дальнего приема (LO/DX). На дисплее появится символ (LOCAL). Для прослушивания
станций в обычном режиме нажмите кнопку повторно (DX).
12. ВЫБОР РЕЖИМА СТЕРЕО / МОНО (ST)
Режим СТЕРЕО возможен только при прослушивании FMрадиостанций. Используйте функцию
МОНО, если при прослушивании FMрадиостанций звук сопровождается шумовыми помехами
или шипением. Для возврата к стереофоническому воспроизведению звука, нажмите кнопку (ST)
повторно.
13. КНОПКА ВЫБОРА РЕЖИМА РАБОТЫ (MODE)
Нажимая эту кнопку, Вы можете выбрать режим прослушивания радио или воспроизведения
кассеты (TAPE).
14. ДИСПЛЕ (DISP)
Нажмите кнопку (DISP), чтобы получить информацию о текущем времени. Порядок установки
текущего времени: нажмите кнопку (DISP), на дисплее появится текущие время, нажмите кнопку
(DISP) еще раз и удерживайте ее (при этом дисплей начинает мигать) для установки часов
нажимайте кнопку увеличения громкости (VOL +), для установки минут кнопку уменьшения
громкости (VOL ).
15. КНОПКА MUTE (ОТКЛЮЧЕНИЕ ЗВУКА)
Нажмите кнопку (MUTE) для отключения звука. Повторное нажатие кнопки (MUTE) включает звук.
16. ОТСЕК ДЛЯ КАССЕТЫ
17. КНОПКА ВЫБРОСА КАССЕТЫ
Нажмите кнопку для выброса кассеты.
12
РУССКИ
VOL LAST: The volume level which user adjust lately is selected whenever power is ON and OFF.
VOL ADJ: The initial volume level (user can adjust) is selected whenever power is ON and OFF
3. VOL UP/VOL DOWN FOR BASS/TREBLE/BALANCE/FADER
Press + or button to adjust VOLUME, BASS, TREBLE, BALANCE and FADER.
4. LOUDNESS BUTTON
Press this button to operate. The bass and treble response will be boosted. Push this button again to
return the player to its normal operation. This function is useful when listening at low levels. Loudspeakers
are inefficient at low power levels and will tend to sound flat. The loudness control will boost the bass and
treble response thus giving a more lively performance. While this function is operating, the display shows
"LOUD ON".
5. LCD DISPLAY
Shows the radio frequency and the functions.
6. BAND SELECTOR SWITCH
Push this switch to select the desired band. Selection is made in regular sequence as FM1 FM2 FM3
OIRT MW1 MW2.
7. TUNING CONTROLS (MANUAL AND AUTOMATIC)
With this control it is possible to tune higher or lower frequencies than the frequency shown on the dis
play. Then, depending on the time this control is pressed, it is possible to tune in "MANUAL" or "AUTO"
mode.
MANUAL TUNING
Each time you press and release this button the frequency will change by 9 kHz in MW and 0.05 MHz in
FM. Press TUNING for the next highest frequency. Press TUNING for next lowest frequency.
AUTO TUNING
Press for more than 0.5 seconds and release. The tuner will automatically search the next higher or lower
station on the selected band.
8. "SCAN" AUTOMATIC TUNING CONTROL
This function can be used for a fast access to available stations, before deciding which stations will be
stored into preset memory button.
Press the 'SCN' button and the tuner will search for the next strongest station. Each station will be audi
tioned for 5 seconds. Press 'SCN' again to defeat this function.
9. SETTING STATION PRESETS (MANUAL MEMORY METHOD)
1) Select the band required by pressing the (BAND) button.
2) Tune the radio to the desired radio station.
3) Press and hold the preset button "1" (the audio will mute for 5 seconds). The station is now entered
into the preset memory. Tune the radio to your 2nd choice then press and hold preset "2" for 5 seconds.
Repeat steps 1, 2, and 3 to set stations for presets 3 through 6.
NOTE:
If an incorrect entry is made, tune the radio to the correct station and repeat step 3 for the desired pre
set (16).
5
ENGLISH
SEL DSP SEL BEEP +/VOLSEL SEEK VOL LAST/VOL ADJSEL VOL LAST
3633.qxd 16.02.04 16:14 Page 8

активизируется режим поиска. Выбор режима поиска (SEEK 1 или 2), осуществляется нажатием
кнопок регулировки громкости.
РЕЖИМ ПОИСКА 1(SEEK 1): автоматическое сканирование прекращается после настройки на
станцию.
РЕЖИМ ПОИСКА 2 (SEEK 2): автоматическое сканирование не прекращается после настройки на
станцию. Сканирование прекратится после настройки на все станции.
РЕГУЛИРОВКА ГРОМКОСТИ: ВОЗВРАТ К ПОСЛЕДНЕ УСТАНОВКЕ/РЕЖИМ НАСТРО КИ
Нажмите и удерживайте кнопку (SEL) в нажатом состоянии более 2 сек, повторными нажатиями
активизируется режим настроек (VOL LAST/VOL ADJ), выбор режимов, осуществляется нажатием
кнопок регулировки громкости:
ВОЗВРАЩЕНИЕ К ПОСЛЕДНЕЙ УСТАНОВКЕ (LAST): При включении и отключении аппарата
происходит возврат к уровню громкости, который был установлен во время прослушивания.
РЕЖИМ НАСТРОЙКИ (ADJ): В режиме (ADJ) нажмите кнопку (SEL), кнопками регулировки
громкости установите желаемый уровень громкости. При включении магнитолы уровень
громкости будет соответствовать заданному уровню.
3.КНОПКИ УВЕЛИЧЕНИЯ / УМЕНЬШЕНИЯ ГРОМКОСТИ (VOL +/VOL ,) / РЕГУЛИРОВКА
НИЗКИХ ЧАСТОТ (BAS) / ВЫСОКИХ ЧАСТОТ (TRE) / СТЕРЕОБАЛАНСА (BAL) /
ЗВУКОМИКШЕРА (FAD)
Кнопкой (SEL) выберите необходимую функцию, кнопками увеличения (VOL +)/ уменьшения
(VOL ) громкости осуществляется регулировка выбранной функции.
4. ТОНОКОМПЕНСАЦИЯ (LD)
Нажмите эту кнопку для того, чтобы выбрать функцию ТОНОКОМПЕНСАЦИЯ (LOUD). При
активировании этой функции, на дисплее появится надпись (LOUD ON). При этом увеличивается
подъем низких частот.
5. ДИСПЛЕ
Жидкокристаллический дисплей отображает все необходимые параметры работы аппарата.
6. ДИАПАЗОН (BAND)
Нажмите эту кнопку для того, чтобы выбрать желаемый диапазон. Выбор диапазона
осуществляется в следующей последовательности: FM1, FM2, FM3, FM, MW1, MW2.
7. АВТОМАТИЧЕСКАЯ ИЛИ РУЧНАЯ НАСТРО КА (TUNE ИЛИ TUNE , ПОИСК ЧАСТОТЫ
ПО НАПРАВЛЕНИЮ ВПЕРЕД ИЛИ НАЗАД)
В РЕЖИМЕ ПРОСЛУШИВАНИЯ РАДИО
Если Вы нажмете на одну из этих кнопок менее 1й секунды, то она будут функционировать как
кнопка ручной настройки или подстройки частот принимаемых радиостанций. Если Вы нажмете и
удерживаете одну из этих кнопок более 1й секунды, то она будет функционировать как кнопка
автоматической настройки.
8. КНОПКА ПОИСКА (SCAN)
Для поиска радиостанций, нажмите кнопку (SCAN), найденная радиостанция включится на 5
секунд, затем продолжится поиск следующей радиостанции. Повторное нажатие на кнопку
(SCAN), "фиксирует" найденную радиостанцию.
11
РУССКИ
10. PRESET SCAN/AUTO STORE (A/PS)
PRESET SCAN
Press and release the A/PS button (10) immediately to scan the preset programs. During preset scan
ning, it will stop at each program for five seconds and the number of the channel being scanned flashes
on the display. To stop the scan operation, press either the A/PS button (10) again or any of the preset
buttons (9)
AUTO STORE
This function will automatically locate and store up to 6 radio stations in order of reception and signal
strength into the 6 preset buttons. This process can be repeated to store 6FM1 / 6FM2 / 6FM3 / 6OIRT /
6MW1 / 6MW2 stations. You will find this feature extremely useful when operating the radio in different
locations.
1) Select the band required to be memorised (FM1 / FM2 / FM3 / OIRT / MW1 / MW2) by pressing the
(BAND) button.
2) Press and hold the A/PS button for at least 3 seconds. The audio will mute, and the frequency shown
in the display will rapidly change. As each station is located, a preset number will flash in the display. After
a short time, the radio will automatically play each station located in the preset memory buttons for 5 sec
onds, this indicates that the programming sequence has been completed and that 6 radio stations have
been placed in the 6 preset buttons.
3) To check if the stations have been entered correctly. Briefly press the A/PS button again. The radio will
automatically play each station located in the preset memory buttons for 5 seconds. Press the A/PS but
ton again to return the radio to normal operation.
4) In the same manner as described above, repeat the automatic memory store operation but this time
select the next band until finally all bands are entered into the preset memory.
To listen to the memorized stations select the band required (FM1 / FM2 / FM3 / OIRT / MW1 / MW2) and
then press preset 1, 2 or 3 etc...
Notes:
The automatic memory store system will only store the first 6 strongest stations located during the scan
ning period. If two presets have the same station stored or you desire a different station to be stored, fol
low the directions for SETTING STATION PRESETS.
11. LOCAL/DISTANT BUTTON
Press the Local/Distance (LOC) button to select tuner operation between Local (strong) stations and
Distance (weak) stations.
Press this button again (distant mode) for operation to return to normal.
12. STEREO/MONO SELECTOR
This function will only affect the FM reception. Press this button if the FM reception becomes noisy/hissy.
If the station being received is in stereo, it will now be played in mono. Press this button again to return
the receiver to normal reception.
13. MODE BUTTON
By pressing this key, user can select. RADIO mode or CASSETTE mode.
14. DISPLAY BUTTON
Press this button to show time. To set the clock:
Press DISP (14) and keep pressed until display blinks. Set the hours with VOL + key. Set the minutes with
the VOL .
15. MUTE BUTTON
Press this button to mute the sound at once. Press again to return to previous volume level.
6
ENGLISH
SEL DSP SEL BEEP +/VOLSEL SEEK VOL LAST/VOL ADJSEL VOL LAST
3633.qxd 16.02.04 16:14 Page 10

Отсоединение и прикрепление передней панели
Во избежание кражи магнитолы, Вы можете отсоединить
переднюю панель.
ОТСОЕДИНЕНИЕ ПЕРЕДНЕЙ ПАНЕЛИ
Перед отсоединением передней панели нажмите кнопку
выключения питания (PWR). Затем нажмите кнопку (19) и
отсоедините переднюю панель, слегка потянув ее на себя, как
показано на рисунке.
Примечания:
•Будьте внимательны, не уроните переднюю панель во время отсоединения.
•Прикрепляя переднюю панель к аппарату, убедитесь, что она находится в правильном
положении.
•Прикрепляя переднюю панель, не прижимайте ее к аппарату слишком сильно. Легкого
нажатия вполне достаточно.
•Унося переднюю панель с собой, обязательно поместите ее в специально предназначенный
футляр.
1. ВКЛЮЧЕНИЕ / ВЫКЛЮЧЕНИЕ ПИТАНИЯ (PWR)
Нажимая кнопку (PWR), Вы можете включить или выключить магнитолу. Магнитола может быть
включена нажатием любой кнопки.
2. КНОПКА ВЫБОРА (SEL):
Нажимая эту кнопку, Вы можете выбрать желаемую функцию для регулировки:
ГРОМКОСТЬ (VOL) НИЗКИЕ ЧАСТОТЫ (BAS) ВЫСОКИЕ ЧАСТОТЫ (TRE) СТЕРЕОБАЛАНС (BAL)
ЗВУКОМИКШЕР (FAD) ГРОМКОСТЬ (VOL).
Регулировка выбранной функции осуществляется кнопками увеличения/уменьшения громкости
(VOL +/VOL ).
НАСТРО КИ ЗВУКА
Нажмите и удерживайте кнопку (SEL) более 2 сек, при этом активизируется режим настроек звука
(DSP).
Нажимая кнопки регулировки громкости, Вы можете выбрать один из эквалайзеров: ПОП (POP),
РОК (ROCK), КЛАССИЧЕСКИЙ (CLASS), ОБЫЧНЫЙ (FLAT), либо для отключения данной функции
(DSP OFF).
РЕЖИМ ПОДАЧИ ЗВУКОВОГО СИГНАЛА
Нажмите и удерживайте кнопку (SEL) в нажатом состоянии более 2 сек, повторным нажатием
активизируется режим подачи звукового сигнала (BEEP).
Если данный режим активизирован, то при каждом нажатии на кнопки управления из динамиков
будет слышен звуковой сигнал
РЕЖИМ ПОИСКА
Нажмите и удерживайте кнопку (SEL) в нажатом состоянии более 2 сек, повторными нажатиями
10
РУССКИ
16. CASSETTE SLOT
Insert the cassette through this door and into the cassette player. The unit will automatically switch from
radio to tape play and one direction > will illuminate on the digital display.
17. TAPE EJECT
Press the button completely IN to remove the cassette and switch the unit back to radio.
NOTE: Always remove the cassette before releasing the detachable front panel.
18. FAST FORWARD/REWIND/PROGRAM
Press the FAST FORWARD button to rapidly advance the tape. Press the REWIND button to release
the fast forward button.
REWIND
Press the REWIND button to rapidly rewind the tape. Press the FAST FORWARD button to release
the rewind button.
Program
Press the FAST FORWARD and REWIND buttons simultaneously to reverse the cassette direction
and to play either side of the tape. The direction the tape travel is indicated by the arrows on the display.
The right arrow indicates the normal tape direction.
Note: When using METAL tape, first press the SEL (2) button more than 2 sec. and select MTL mode by
SEL (2) button. MTL ON/OFF mode can be selected using volume + or button.
19. PANEL RELEASE BUTTON
Press the release button and the righthand section of the panel will release.
SPECIFICATION
SERVICE LIFE OF THE AUTOREVERSE STEREO CAR RECEIVER NOT LESS THAN 3 YEARS
ENGLISH
FM SECTION
Frequency Range
Intermediate Frequency
Usable Sensitivity (S/N 30dB)
Image Rejection Radio
IF Rejection Ratio
MW SECTION
Frequency Range
Intermediate Frequency
Usable Sensitivity
TAPE SECTION
Tape speed
Wow & Flutter
Cross Talk
S/N Ratio
Frequency Response
GENERAL
Power Supply
Voltage
Line Output Sens
Speaker Impedance
Maximum Output
Power Dimensions
65108 MHz
10. MHz
less then 3µV
45 dB
60 dB
5221620 KHz
450 KHz
32 dB
4. 5 cm/sec.
0.25%
40 dB
45 dB
100 Hz 10 KHz + 3 dB
DC 12 V
300mV±3dB
48 ohm
4 x 25 W (MAX)
Chassis 1 8(W) x 50(H) x 150(D) mm
Nose piece 188(W) x 58(H) x 20(D) mm
SEL DSP +/VOL POP M ROCK M CLASS FLAT M DSP OFF
SEL DSP SEL BEEP +/VOL ON/OFF
SEL DSP SEL BEEP +/VOL
SEL SEEK SEEK1/SEEK2
3633.qxd 16.02.04 16:14 Page 12

УСТАНОВКА
ПРЕДОСТЕРЕЖЕНИЯ
•Тщательно продумайте место установки магнитолы оно не должно препятствовать
нормальной работе водителя. Не устанавливайте магнитолу в таких местах, где она может
быть подвержена воздействию высоких температур, например, рядом с отопительным
прибором или под прямыми солнечными лучами, а также там, где она может быть подвержена
воздействию пыли, грязи или повышенной вибрации.
•Чтобы обеспечить надежную и безопасную установку магнитолы, пользуйтесь только
предложенными крепежными приспособлениями. Перед установкой магнитолы обязательно
снимите переднюю панель.
ПРИМЕЧАНИЕ: Угол наклона магнитолы не должен превышать 30°, иначе передняя панель не
будет отсоединяться.
Примечание: Храните ключ разъединения в надежном месте, так как он может понадобиться для
извлечения аппарата из автомобиля.
КОМПЛЕКТ ДЛЯ УСТАНОВКИ МАГНИТОЛЫ
9
РУССКИ
РЕГУЛИРОВКИ И ФУНКЦИИ
1. ВКЛЮЧЕНИЕ / ВЫКЛЮЧЕНИЕ ПИТАНИЯ (PRW)
2. КНОПКА ВЫБОРА (SEL): НИЗКИЕ ЧАСТОТЫ (BAS)/ ВЫСОКИЕ ЧАСТОТЫ (TRE)/ СТЕРЕОБАЛАНС
(BAL)/ ЗВУКОМИКШЕР (FAD)
3. КНОПКИ УВЕЛИЧЕНИЯ / УМЕНЬШЕНИЯ ГРОМКОСТИ (VOL +/VOL ), РЕГУЛИРОВКА НИЗКИХ
ЧАСТОТ (BAS)/ ВЫСОКИХ ЧАСТОТ (TRE)/ СТЕРЕОБАЛАНСА (BAL)/ ЗВУКОМИКШЕРА (FAD)
4. ТОНОКОМПЕНСАЦИЯ (LD)
5. ЖИДКОКРИСТАЛЛИЧЕСКИЙ ДИСПЛЕЙ (LCD)
6. ДИАПАЗОН (BND)
. АВТОМАТИЧЕСКАЯ ИЛИ РУЧНАЯ НАСТРОЙКА (TUNE ИЛИ TUNE ПОИСК ЧАСТОТЫ ПО
НАПРАВЛЕНИЮ ВПЕРЕД ИЛИ НАЗАД)
8. ПОИСК РАДИОСТАНЦИЙ (SCN)
9. ПРЕДУСТАНОВЛЕННЫЕ РАДИОСТАНЦИИ (1,2,3,4,5,6)
10. НАСТРОЙКА С АВТОПОИСКОМ (A/PS)
11. КНОПКА МЕСТНОГО/ДАЛЬНЕГО ПРИЕМА (LOC)
12. ВЫБОР РЕЖИМА СТЕРЕО / МОНО (ST)
13. КНОПКА ВЫБОРА РЕЖИМА РАБОТЫ (MD)
14. КНОПКА ДИСПЛЕЯ (DSP)
15. КНОПКА ОТКЛЮЧЕНИЕ ЗВУКА (MUTE)
16. ОТСЕК ДЛЯ КАССЕТЫ
1 . КНОПКА ВЫБРОСА КАССЕТЫ
18. КНОПКИ УСКОРЕННОЙ ПЕРЕМОТКИ ВПЕРЕД / НАЗАД , РЕВЕРС
19. КНОПКА ОТСОЕДИНЕНИЯ ПАНЕЛИ
8
РУССКИ
1. МАГНИТОЛА
2. МОНТАЖНЫЙ КОЖУХ
3. ШЕСТИГРАННАЯ ГАЙКА
4. ПРУЖИНЯЩАЯ ШАЙБА
5. ПЛОСКАЯ ШАЙБА
6. КОРПУС АВТОМОБИЛЯ
. ЗАДНЯЯ ОПОРНАЯ
ЛЕНТА
8. КРЕПЕЖНЫЙ ШУРУП
9. ШПИЛЬКА M5 X15
Перед установкой
автомагнитолы
НЕОБХОДИМО выкрутить
2 транспортировочных
винта (рис.1)
3633.qxd 16.02.04 16:14 Page 14
Table of contents
Other Vitek Car Receiver manuals

Vitek
Vitek VT-3607 User manual

Vitek
Vitek VT-3602 User manual

Vitek
Vitek VT-3620 User manual

Vitek
Vitek VT-3622 User manual

Vitek
Vitek VT-3620 User manual

Vitek
Vitek VT-3632 User manual

Vitek
Vitek VT-3601 User manual

Vitek
Vitek VT-3614 User manual

Vitek
Vitek VT-3608 User manual

Vitek
Vitek VT-3629 User manual

Vitek
Vitek VT-3631 User manual

Vitek
Vitek VT-3606 User manual

Vitek
Vitek VT-3622 User manual

Vitek
Vitek VT-3601 User manual

Vitek
Vitek VT-3605 User manual

Vitek
Vitek VT-3621 BK User manual

Vitek
Vitek VT-3641 User manual

Vitek
Vitek VT-3603 User manual

Vitek
Vitek VT'3642 User manual

Vitek
Vitek VT-3607 User manual