manuals.online logo
Brands
  1. Home
  2. •
  3. Brands
  4. •
  5. Phonocar
  6. •
  7. Car Receiver
  8. •
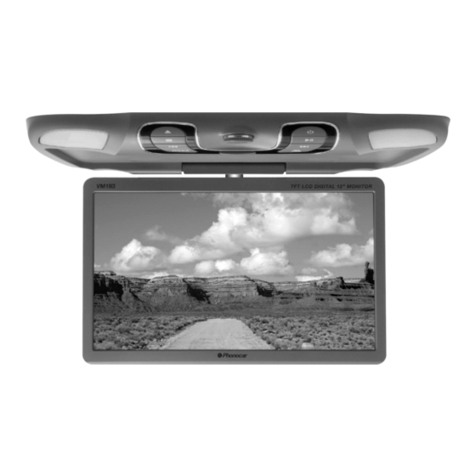
  9. Phonocar VM 195 User manual

Phonocar VM 195 User manual

MONITOR
USB/SD PLAYER
15,6” - TFT/LCD
ISTRUZIONI DI MONTAGGIO
MOUNTING INSTRUCTIONS
INSTRUCTIONS DE MONTAGE
MONTAGE-ANLEITUNGEN
INSTRUCCIONES PARA EL MONTAJE
VM 195
ITALIANO
ENGLISH
FRANÇAIS
DEUTSCH
ESPAÑOL
3
TELECOMANDO • REMOTE CONTROL • TÉLÉCOMMANDE • FERNBEDIENUNG • MANDO DISTANCIA
1)Selecciona fuentes AV
2)ON/OFF
3)Adelante - Atrás
4)Repite
5)Confirma selección
6)Desplazamiento del cursor
7)Función precedente
8)Menú de configuración
9)Teclado numérico
1) Select Sources
2) ON/OFF
3) Forward / Backward
4) Repeat
5) Confirm selection
6) Cursor-moving keys
7) Back to previous function
8)Setup
1) Sélectionne Sources
2) ON/OFF
3) Forward / Backward
4) Repeat
5) Confirm selection
6) Déplacement curseur
7) Fonction précédente
8)Menu configuration
1) Quelle wählen
2) ON/OFF
3) Vorwärts / Rückwärts
4) Repeat
5) Wahl bestätigen
6) Läufer-Bewegungstasten
7)Vorherige Funktion
8) Konfigurations-Menü
1)Selezione sorgenti
2)ON/OFF
3)Avanti - Indietro
4)Ripeti
5)Conferma selezione
6)Tasti direzionali
7)Funzione precedente
8)Menù configurazione
1) Luci di cortesia
2) Non utilizzare
3) Stop
4) Precedente o Indietro veloce
5) Seleziona sorgente
6) Premere per Menu base
Ruotare per VOL+/VOL-
7) Apertura schermo LCD
8) Per selezionare USB o SD
9) Successivo o avanti veloce
10) Pausa e riproduzione
11) Accensione / Spegnimento
12) Slot SD Card
13) Porta USB
Courtesy-lights
Dot not use
Stop
Previous or fast Rewind
Select source
Press to enter basic Menu
Rotate to enter VOL+/VOL-
Opening the LCD screen
To select USB or SD
Next or fast Forward
Pause and Play
ON/OFF
SD CARD slot
USB port
Lumière de courtoisie
Ne pas utiliser
Stop
Précédente ou Revient rapide
Sélectionne Sources
Appuyez pour entrer base Menu
Tournez pour VOL + / VOL-
Touche ouverture LCD
Pour sélectionner USB ou SD
Successive ou Avance rapide
Pause et Reproduction
ON/OFF
Slot Carte SD
Port USB
Luces de cortesía
No utilizar
Stop
Canción precedente / Atrás
Selecciona fuentes
Presionar para Menú de base
Girar para VOL + / VOL -
Abertura pantalla LCD
Seleccione USB o SD
Canción siguiente / Adelante
Pausa / Reproducción
ON/OFF
Ranura SD CARD
Puerto USB
Stand-Licht
Verwenden Sie keine
Stop
Titel vorher / Rückwärts
Quelle wählen
Drücken Sie Menü
Wenden Sie sich an VOL+ / VOL-
LCD-Bildschirm öffnen
Auf USB oder SD wählen
Titel nachher / Vorwärts
Pause und Wiedergabe
ON/OFF
SD CARD-Öffnung
USB-Öffnung
COLLEGAMENTI • CONNECTIONS • CONNEXIONS • ANSCHLÜSSE • CONEXIONS
I
E
D
GB
FR
GND NERO/BLACK
+12V DC SOTTOCHIAVE / INJECTION KEY
LUCI DI CORTESIA / COURTESY LIGHT
ENTRATA/INPUT
A/V
NON UTILIZZARE/ DO NOT USE
ROSSO/RED
ROSSO/RED
BIANCO/WHITE
GIALLO/YELLOW
GIALLO/YELLOW
BLU/BLUE
1 1
72 6
3 10
5 84 11 12 13
9
2
1
3
4
6
7
9
10
11
14
1312
15
16
8
5
FUNZIONI / FUNCTIONS / FONCTIONS / FUNKTIONEN / FUNCIÓNES
9)Tastiera numerica
10) Volume - / Volume +
11) Menù regolazioni
12) Ferma riproduzione
13) Riproduzione / Pausa
14) Tr. succ. / prec.
15) Silenzia audio
16) Seleziona USB / SD
9) Number-keys
10) Vol - / Vol +
11) Settings menu
12) Stop playback
13) Play / Pause
14) Track after / before
15) Mute
16) Select sources USB/SD
9) Clavier numérique
10) Vol - / Vol +
11) Menu paramètres
12) Stop reproduction
13) Reproduction / Pause
14) Tr. successive / précédente
15) Mute
16) Sélectionne USB/SD
9) Nummern-Tasten
10) Laut - / Laut +
11) Setup-Menü
12) Wiedergabe stoppen
13) Wiedergabe / Pause
14) Titel nachher / vorher
15) Mute
16) Wählen Sie USB / SD
10) Volumen - / Volumen +
11) Ajustes del menú
12) Stop reproducción
13) Pausa / Reproducción
14) Canción precedente
Canción siguiente
15) Mute
16) Selección USB / SD
I GB FR D E
3
EXIT
I
• Premere il tasto (6) sul pannello per visualizzare il MENU regolazioni. • Premere per scegliere.
• Ruotare per regolare dal pannello o sul telecomando i tasti .
GB
• Press key (6) on the pannel, to visualize the SET-UP-Menu. • Press to select.
• To effect settings, rotate knob on the panel or press keys on the remote-control.
FR
• Appuyer la touche (6) sur le panneau pour visualiser le MENU des réglages. • Appuyer pour choisir.
• Tourner pour régler les touches à partir du panneau ou sur la télécommande .
D
• Um das Einstellungs-MENÜ (6) auszuweisen, Taste auf dem Bedienteil drücken. • Wahl erfolgt durch Tasten-Druck.
• Um Einstellungen vorzunehmen, Knopf auf dem Bedienteil drehen oder Tasten der Fernbedienung verwenden.
E
• Presionar el mando giratorio (6) en teclado para visualizar el MENU de configuración. • Presionar para elegir.
Girar para ajustar desde la pantalla o bien con las teclas<> desde el mando a distancia
.
IMPOSTAZIONI DI SISTEMA • SYSTEM SET-UP • REGLAGE SYSTEME
SYSTEM-EINSTELLUNGEN • CONFIGURACIÒN DEL SISTEMA
52%
BRIGHTNESS
50%
CONTRAST
50%
SATURATION LANGUAGE
ITALIANO
IR
2.3-2.8MHZ 3.2-3.8MHZ
OK
RESET
IMPOSTAZIONI • SETUP • REGLAGE • EINSTELLUNGEN • CONFIGURACIÓN
I
• Per accedere al Menu premere il tasto MENU sul telecomando.
• Per selezionare il sottomenu premere i tasti sul telecomando.
• Per selezionare la funzione premere ENTER o sul Telecomando.
• Per modificare i valori premere sul telecomando oppure ruotare il tasto rotativo sul pannello e confermare con tasto
ENTER sul Telecomando.
• Per uscire dal menù impostazioni premere il tasto MENU sul telecomando oppure tasti / / sul pannello.
GB
• To get the Menu, press MENU-key on the remote control.
• To select the requested Sub-Menu press the keys on the remote-control.
• To select the requested Function, press ENTER or on the remote-control.
• To modify the settings, press remote-control-keys or rotate knob on the panel. Then confirm by pressing ENTER
on the remote-control.
• To quit the Set-Up-Menu, press MENU on the remote control or / / on the panel
F
• Pour accéder au Menu, appuyer la touche MENU sur la télécommande.
• Pour sélectionner le sous-menu désiré appuyer les touches sur la télécommande.
• Pour sélectionner la fonction désirée, appuyer ENTER ou sur la télécommande.
• Pour modifier les valeurs, appuyer sur la télécommande ou tourner le bouton rotatif sur le panneau et valider avec la
touche ENTER sur la télécommande.
• Pour sortir du menu des réglages, appuyer la touche MENU sur la télécommande ou la touche / / sur le
panneau.
D
• Um das Menü zu betreten, MENÜ-Taste auf dem fernbedienung drücken.
• Um das gewünschte Unter-Menü zu betreten die Tasten oder die Richtungs-Tasten auf der Fernbedienung.
• Um die gewünschte Funktion zu wählen, Taste ENTER oder auf der Fernbedienung drücken.
• Um Einstellungen abzuändern, Fernbedienung oder Drehknopf auf dem Bedienteil verwenden. Dann mit ENTER-
Taste auf der Fernbedienung bestätigen.
• Um das Einstellungs-Menü wieder zu verlassen, oder Taste MENU auf dem Fernbedienung / / auf dem
Bedienteil drücken
E
• Para acceder al Menú presionar la tecla MENU en el mando distancia.
• Para seleccionar el submenú deseado presionar las teclas en el mando a distancia.
• Para seleccionar la función deseada presionar ENTER o en el mando a distancia.
• Para modificar los valores presionar en el mando a distancia, o bien girar el mando giratorio y confirmar con la
tecla ENTER en el mando a distancia.
• Para salir del menú de ajuste presionar la tecla MENU en el mando a distancia o / / en el panel.
A/V
USB / SD CARD
I
• Per accedere alla sorgente MEDIA (USB/SD) premere il tasto MODE sul pannello o sul telecomando.
• Per selezionare il sottomenu desiderato premere i tasti sul telecomando.
• Per selezionare la funzione desiderata premere sul Telecomando.
• Per modificare i valori premere sul telecomando oppure ruotare il tasto rotativo sul pannello e confermare con tasto
ENTER sul Telecomando.
• Per uscire dal menù impostazioni premere il tasto SETUP sul telecomando oppure tasti / / sul pannello.
GB
• To enter the MEDIA-source (USB/SD), press MODE on the panel or on the remote-control.
• To select the requested sub-Menu, press related key on the remote-control.
• To select the requested function, press related key on the remote-control.
• To modify the settings, use on the remote-control or rotate knob on the panel. Then Confirm by pressing ENTER
on the remote-control.
• To quit the SET-UP-Menu, press SETUP on the remote-control or press / / on the panel.
CARATTERISTICHE TECNICHE • TECHNICAL SPECIFICATIONS • CARACTERISTIQUES TECHNIQUES
TECHNISCHE DATEN • CARACTERISTICAS TECNICAS
FUNZIONI • FUNCTIONS • FONCTIONS • FUNKTION • FUNCION USB / SD CARD
I
• Dopo aver inserito USB o SD CARD la riproduzione si attiverà in automatico con i brani musicali.
• Per tornare al menu USB / SD Card premere due volte il tasto sul pannello o sul telecomando.
• Per muoversi nel menù USB/ SD usare i tasti sul telecomando oppure / sul pannello.
• Per confermare la scelta premere ENTER sul telecomando.
• Per muoversi nell’elenco dei: brani / immagini / giochi / video / ebook usare i tasti .
• Per riprodurre premere il tasto ENTER o sul telecomando, oppure sul pannello.
GB
• Once USB or SD have been introduced, reproduction starts automatically from the musical tracks.
• To return to the USB/SD-Menu, press related key twice, either on panel or on remote-control.
• To move within the USB/SD-Menu, press key on remote-control or / on the panel.
• To confirm selection, press ENTER on the remote-control.
• To move within the lists: Tracks / Pictures / Games / Videos / e-books, use related keys .
• To start reproduction, press ENTER on remote-control or on the panel.
F
• Après avoir insérée la USB ou Carte SD, la reproduction s’activera automatiquement en commençant par les chansons.
• Pour retourner au menu USB/Carte SD, appuyer deux fois la touche sur le panneau ou sur la télécommande.
• Pour parcourir le menu USB/SD utiliser les touches sur la télécommande ou / sur le panneau.
• Pour confirmer le choix, appuyer ENTER sur la télécommande.
• Pour parcourir la liste des: morceaux / images / jeux / vidéo / ebook, utiliser les touches .
• Pour reproduire, appuyer la touche ENTER ou sur la télécommande, ou sur le panneau.
D
• Nachdem USB oder SD eingegeben worden sind, startet die Wiedergabe automatisch bei den Musikstücken.
• Zurück zum USB/SD-Menü: Taste 2 Mal drücken, entweder auf Bedienteil oder Fernbedienung.
• Bewegungen innerhalb des USB/SD-Menüs: Fernbedienung verwenden oder / auf dem Bedienteil.
• Wahl bestätigen: ENTER auf der Fernbedienung drücken.
• Register-Handhabung: Stücke / Bilder / Spiele / Videos / E-books, Tasten verwenden.
• Wiedergabe starten: ENTER drücken, auf Fernbedienung oder Bedienteil.
E
• Después de introducir la USB o SD CARD la reproducción se activara automáticamente con los archivos de música.
• Para volver al menú USB / SD Card presionar dos veces la tecla en el teclado de la pantalla o bien en el mando a distancia.
• Para desplazarse en la USB/ SD usar las teclas en el mando a distancia o bien / mediante las teclas de la pantalla.
• Para confirmar la elección presionar ENTER en el mando a distancia.
• Para desplazarse en el listado de las canciones / imágenes / juegos / video / ebook usar las teclas .
• Para reproducir presionar la tecla ENTER o en el mando a distancia o bien en el teclado de la pantalla.
• Formato / Aspect ratio 16:9-4:3 • Sistema / System PAL/NTSC auto-switch • Risoluzione / Resolution RGB 1920 (H) x 1080 (V) • Angolo di visione / View angle 60°-70° orizzont. - 45-60° vertic.
• Regolazioni colore/contrasto/luminosità / Regulations color/contrast/brightness • Trasmettitore IR integrato per cuffie senza fili/ Built in infrared transmitter for wireless headphones
• Trasmettitore IR 2 canali / Double channel IRtransmitter • 1 Porta / Port USB 8 GB MAX • 1 Slot SD Card 8 GB MAX • Con 2 altoparlanti integrati / With 2 integrated speakers
• Memoria ultima posizione / Last memory position • Menù multilingue / Multilanguage menu • Telecomando infrarossi con tutte le funzioni / Full Function Wireless Remote Control
•
Interruttore luci /Car lighting switch
• 1 Ingresso / Input Audio/Video • 1 Uscita / Output Audio/Video • Alimentazione / Power DC12 • Dimensioni / Dimensions: L. 410 - P. 360 - H. 60 mm.
• Compatibilità / Compatible: MP3-MP4-MP5-JPEG-JPG-TXT-PDF
F
• Pour accéder à la source MEDIA (USB/SD) appuyer la touche MODE sur le panneau ou sur la télécommande.
• Pour sélectionner le sous-menu désiré, appuyer les touches sur la télécommande.
• Pour sélectionner la fonction désirée, appuyer sur la télécommande
• Pour modifier les valeurs, appuyer sur la télécommande ou tourner le bouton rotatif sur le panneau et valider avec la
touche ENTER sur la télécommande.
• Pour sortir du menu réglages, appuyer la touche SETUP sur la télécommande ou les touches / / sur le
panneau.
Il prodotto non deve essere smaltito con i rifiuti domestici. Si ricorda che le pile/accumulatori devono essere rimosse dall’apparecchiatura prima che questa sia conferita come riuto. Per rimuovere le pile/ accumulatori
fare riferimento alle speciche indicazioni del costruttore. L’utente dovrà, pertanto, conferire gratuitamente l’apparecchiatura e la pila giunta a ne vita agli idonei centri comunali di raccolta differenziata dei riuti elettrici ed
elettronici, oppure riconsegnarle al rivend itore. L’adeguata raccolta differenziata contribuisce ad evitare possibili effetti negativi sull’ambiente e sulla salute e favorisce il reimpiego e/o riciclo dei materiali di cui essi sono
composti. Per ulteriori informazioni consultare il sito www.phonocar.it
This product must NOT be treated as a domestic waste. Please remember that batteries/chargers must be extracted from the appliance before throwing the appliance away. How to extract batteries/chargers: please follow the
manufacturer’s specic instructions. The end-user is requested to carry the appliance and its related battery, with no cost, to the municipal waste-recycling-spots for electrical and electronic parts, or take them to the related Retailer
shop. Recycling-spots help to avoid negative effects on the environment & health and promote the re-use and/or recycling of the various materials. For further information, please read homepage www.phonocar.it
Via F.lli Cervi, 167/C • 42124 Reggio Emilia (Italy) • Tel. ++39 0522 941621 • www.phonocar.com • e-mail:info@phonocar.it
D
• Um MEDIA-Quelle (USB/SD) zu betreten, MODE auf Fernbedienung oder Bedienteil drücken.
• Um ein bestimmtes Unter-Menü zu wählen, betreffende Taste auf der Fernbedienung drücken.
• Um eine bestimmte Funktion zu wählen, betreffende Taste auf der Fernbedienung drücken.
• Um die Einstellungen zu ändern, Fernbedienung oder Drehknopf auf dem Bedienteil verwenden. Dann, mit ENTER-Taste der Fernbedienung, bestätigen.
• Um das Einstellungs-Menü wieder zu verlassen, SETUP auf der Fernbedienung drücken, oder die Tasten / / auf dem Bedienteil.
E
• Para acceder a la función MEDIA (USB/SD) presionar la tecla MODE en el teclado de la pantalla o bien en el mando a distancia.
• Para seleccionar el submenú deseado presionar las teclas en el mando a distancia.
• Para seleccionar la función deseada presionar en el mando a distancia.
• Para modificar los valores presionar en el mando a distancia o bien girar el mando giratorio en el teclado de la pantalla y confirmar con la tecla ENTER
en el mando a distancia.
• Para salir del menú de configuración presionar la tecla SETUP en el mando a distancia o bien las teclas / / en el teclado de la pantalla.
DICHIARAZIONE DI CONFORMITÀ aIle direttive 1999/5/EC R&TTE
DECLARATION OF CONFORMITY to the directives 1999/5/EC R&TTE
EN55013:2001+A1:2003+A2 :2006 • EN61000-3-2:2006+A2:2009+A2 :2009
EN61000-3-3:2008 • EN55020:2007+A11 :2011
IT Phonocar dichiara che il VM195 è conforme ai requisiti essenziali e a tutte le altre disposizioni pertinenti stabilite dalla direttiva 1999/5/CE. GB Phonocar declares that this unit VM195 is in compliance with the essential requirements and other
revelant provisions of Directive 1999/5/EC. FR Phonocar dèclare que l’appareil VM195 est conforme aux exigences essentielles et aux autres dispositions pertinentes de la directive 1999/5/EC.
DPhonocar erklärt, dass dieser VM195 in Übereinstimmung ist mit den grundlegenden Anforderungen und den anderen relevanten Vorschriften der Richtlinie 1999/5/EC. E Phonocar declara que el VM195 cumple con los requisitos esenciales y cua-
lesquiera otras disposiciones aplicables o exigibles de la Directiva 1999/5/EC.

Other Phonocar Car Receiver manuals

Phonocar VM083 Instruction manual

Phonocar

Phonocar VM083 Instruction manual

Phonocar VM 020 User manual

Phonocar

Phonocar VM 020 User manual

Phonocar VM 040 Simple manual

Phonocar

Phonocar VM 040 Simple manual

Phonocar VM085 Instruction manual

Phonocar

Phonocar VM085 Instruction manual

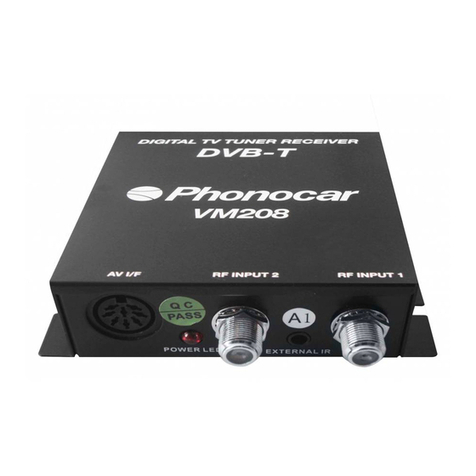
Phonocar VM208 Use and care manual

Phonocar

Phonocar VM208 Use and care manual

Phonocar vm 066 User manual

Phonocar

Phonocar vm 066 User manual

Phonocar VM 070 User manual

Phonocar

Phonocar VM 070 User manual

Phonocar VM 026 User manual

Phonocar

Phonocar VM 026 User manual

Phonocar VM 061 User manual

Phonocar

Phonocar VM 061 User manual

Phonocar VM 024 User manual

Phonocar

Phonocar VM 024 User manual

Phonocar VM012 User manual

Phonocar

Phonocar VM012 User manual

Phonocar VM 024 User manual

Phonocar

Phonocar VM 024 User manual

Phonocar 89956 User manual

Phonocar

Phonocar 89956 User manual

Phonocar VM 027 User manual

Phonocar

Phonocar VM 027 User manual

Phonocar VM 071 User manual

Phonocar

Phonocar VM 071 User manual

Phonocar VM 023 Simple manual

Phonocar

Phonocar VM 023 Simple manual

Phonocar VM 080 User manual

Phonocar

Phonocar VM 080 User manual

Phonocar VM 051 User manual

Phonocar

Phonocar VM 051 User manual

Phonocar VM 017 User manual

Phonocar

Phonocar VM 017 User manual

Phonocar VM002D User manual

Phonocar

Phonocar VM002D User manual

Phonocar VM 149 User manual

Phonocar

Phonocar VM 149 User manual

Phonocar VM 017 User manual

Phonocar

Phonocar VM 017 User manual

Phonocar VM001 User manual

Phonocar

Phonocar VM001 User manual

Phonocar 4/020 User manual

Phonocar

Phonocar 4/020 User manual

Popular Car Receiver manuals by other brands

Alpine CDA-7852R owner's manual

Alpine

Alpine CDA-7852R owner's manual

JVC KD-S577 Service manual

JVC

JVC KD-S577 Service manual

Blaupunkt OSAKA 300 Operating and installation instructions

Blaupunkt

Blaupunkt OSAKA 300 Operating and installation instructions

JVC KD-LX10R instructions

JVC

JVC KD-LX10R instructions

Kenwood KDC-8021 Service manual

Kenwood

Kenwood KDC-8021 Service manual

Pioneer DEH-1950/XU/CN5 Service manual

Pioneer

Pioneer DEH-1950/XU/CN5 Service manual

JVC KW-XG701E Service manual

JVC

JVC KW-XG701E Service manual

Cantaloupe Radio BA32 Factory+ owner's manual

Cantaloupe Radio

Cantaloupe Radio BA32 Factory+ owner's manual

Pioneer DEH-240F Service manual

Pioneer

Pioneer DEH-240F Service manual

Teac CR-L600 Service manual

Teac

Teac CR-L600 Service manual

Hyundai Mobis AM1A0SLAN user manual

Hyundai Mobis

Hyundai Mobis AM1A0SLAN user manual

Panasonic CR-W405U Service manual

Panasonic

Panasonic CR-W405U Service manual

JVC KD-ADV6160 Installation & connection manual

JVC

JVC KD-ADV6160 Installation & connection manual

VDO CD 2100 - datasheet

VDO

VDO CD 2100 - datasheet

Milennia MIL-MR60 Operation manual

Milennia

Milennia MIL-MR60 Operation manual

Sony CDX-GT410U - Fm/am Compact Disk Player Installation/connections

Sony

Sony CDX-GT410U - Fm/am Compact Disk Player Installation/connections

Sony Xplod CXS-GT2316F brochure

Sony

Sony Xplod CXS-GT2316F brochure

Panasonic CQC800U - AUTO RADIO/CD DECK operating instructions

Panasonic

Panasonic CQC800U - AUTO RADIO/CD DECK operating instructions

manuals.online logo
manuals.online logoBrands
  • About & Mission
  • Contact us
  • Privacy Policy
  • Terms and Conditions

Copyright 2025 Manuals.Online. All Rights Reserved.