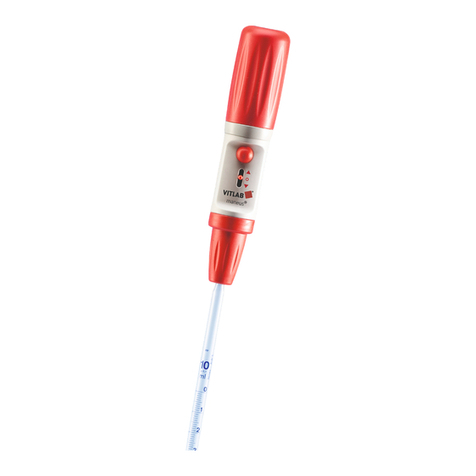
Vitlab maneus User manual

Pipettierhelfer / Pipette Controller /
Auxiliaire de pipetage / Auxiliar de pipeteado
移液管控制器 /ɩɢɩɟɬɨɤ
maneus®
Gebrauchsanleitung
Operating Manual
Mode d’emploi
Instrucciones de manejo
操作手册ɂɧɫɬɪɭɤɰɢɹɩɨɷɤɫɩɥɭɚɬɚɰɢɢ
VITLAB GmbH
Linus-Pauling-Str.1
63762 Grossostheim
Germany
Telefon: +49 6026 97799-0
Fax: +49 6026 97799-30
E-mail: info@vitlab.com
Internet: www.vitlab.com

Contents
1. Safety Instructions 20
2. Application 21
3. Limitations of use 21
4. Operating Exclusions 21
5. Storage conditions 21
6. Components 22
7. Pipetting 23
7.1. Compress the suction bellows 23
7.2. Attach the pipet 23
7.3. Fill the pipet 24
7.4. Adjust the meniscus 24
7.5. Discharge the pipet 25
7.6. After pipetting 25
8. Maintenance / Cleaning 26
9. Replacing the membrane filter / 27
Cleaning the adapter
10. Replace the valve unit 30
11. Checking for leaks 31
12. Troubleshooting 32
13. Ordering Information 33
14. Repair service 34
15. Warranty 34
19

1. Every user must read and un-
derstand this operating manual
before operation.
2. Observe general instructions
for hazard prevention and
safety instructions; e.g., wear
protective clothing, eye protec-
tion and gloves.
3. Carefully observe the operating
manual and information from
reagent manufacturers.
4. Use the instrument only for
pipetting liquids, with strict
regard to the defined limita-
tions of use. Observe operating
exclusions (s. page 21)! If in
doubt, contact the manufac-
turer or supplier.
5. Always use the instrument in
such a way that neither the
user nor any other person is
endangered. Avoid splashes.
Only use suitable vessels.
6. Never use force on the instru-
ment!
7. Use only original manufactur-
er’s accessories and spare parts.
Do not attempt to make any
technical alterations. Do not
dismantle the instrument any
further than is described in the
operating manual!
8. Always check the instrument
for visible damage before use.
If there is a sign of a poten-
tial malfunction, immediately
stop pipetting. Consult the
‘Troubleshooting’ section of
this manual (see page 32), and
contact the manufacturer if
needed.
1. Safety Instructions
This instrument may sometimes be used with hazardous materials,
operations and equipment. This Manual does not purport to address
every safety issue which may arise during use. It is the responsibility of
the user of this instrument to consult and establish appropriate safety
and health practices and determine the applicability of regulatory limita-
tions prior to use.
20

4. Operating Exclusions
The instrument must never be used with liquids that
may release vapors which attack PP, PTFE or silicone. The
instrument is not designed for Pasteur pipettes.
3. Limitations of use
The instrument is designed for pipetting liquids, observ-
ing the following physical limits:
– +10 °C to +40 °C (50 °F to 104 °F)
(of instrument and reagent)
– Vapor pressure up to max. 500 mbar.
Aspirate slowly above 300 mbar, in order to prevent
the liquid from boiling.
– Density up to 2.4 g/cm3
5. Storage conditions
Store the instrument and accessories only in cleaned con-
dition in a cool and dry place.
Storage temperature: -20 °C to +50 °C (-4 °F to +122 °F).
2. Application
The instrument serves to facilitate the pipetting of liquids
with graduated pipettes, volumetric pipettes and blow-
out pipettes made of glass or plastic within the volume
range of 0.1 ml to 200 ml with a suction tube outer
diameter < 9.2 mm for measuring liquids. If the instru-
ment is correctly used, the liquid will not come in contact
with the instrument.
21

1
3
4
5
6
2
3a
7
1. suction bellows
2. blow-out button
3. valve unit
3a. filteradapter
4. pipetting knob
5. membrane filter
6. adapter
7. adapter support
6. Components
22

7. Pipetting
Attention!
Never use force. Glass and plastic pipets
can break and cause injury.
– Hold the pipet near the top and insert
into the adapter (6) until it fits tightly.
– Once the pipette has been attached,
always hold the instrument in a vertical
position, tip pointing downwards.
7.2 Attaching the pipet
7.1 Compress the suction bellows
– Before attaching the pipette, squeeze the
suction bellows (1).
The instrument is now ready to aspirate
liquid.
23

7.3 Filling the pipet
– Immerse the tip of the pipet into the
liquid.
– Move the pipetting lever (4) upwards.
– Fill the pipet to just above the desired
mark.
Attention!
Do not over aspirate and allow any liquid
to enter the instrument.
This would impair the filtering function (5)
and reduce the suction capacity. If liquid
does enter the instrument, exchange the
membrane filter (5) (pages 27-29).
Note:
– The fill/delivery rate is continuously
variable with the upward/downward
pressure on the pipetting lever.
– In the case of large pipettes
> 50 ml the vacuum contained in the
suction bellows (1) is not sufficient to
draw in all the liquid at once. There-
fore, squeeze the suction bellows (1)
again and continue drawing up liquid.
7.4 Adjusting the meniscus
– Use a suitable tissue to wipe the pipet tip.
Push down the pipetting lever (4) slowly
until the meniscus is exactly level with the
desired mark.
24

7.5 Discharging the pipet
Hold the collecting vessel at an angle. Place
the pipet tip against the inner wall of the
vessel, push down the pipetting lever (4) to
dispense the liquid.
● Free discharge for pipets with waiting
time (Imprint e.g.“Ex+ 15 s”)
– As soon as the meniscus stops moving,
start the necessary waiting time
(e.g. 15 sec).
– Wipe the pipet tip along the wall of the
vessel by sliding upwards a few millime-
ters.
7.6 After pipetting
To remove the pipet, gently grasp near the
top and carefully remove with a twisting
motion.
●Blow-out pipettes
(Imprint "ausblasen – blow out"):
– As soon as the meniscus in the pipette
tip comes to a standstill, press the blow-
out bellows (2) once.
– Wipe the pipette tip a few millimeters
upward along the wall of the vessel.
25

8. Maintenace & Cleaning
With normal use, the instrument is mainte-
nance-free. The exterior may be wiped with a
damp cloth. The complete instrument is au-
toclavable at 121 °C (250 °F), 2 bar absolute
(30 psi) with a holding time of at least
15 minutes according to DIN EN 285.
For autoclaving remove suction (1) bellow.
26

Attention!
When cleaning and/or exchanging the
membrane filter (5), wear hand and eye
protection to avoid the risk of splashes
and contamination. Remaining liquid can
run out.
9. Replacing the membrane filter/
Cleaning the adapter
If liquid has entered the adapter (6) or rather
the membranfilter (5) or if the aspirating ef-
ficiency has decreased, proceed as follows:
1. Hold the instrument over a suitable
vessel to allow all liquid to drain from the
pipette.
2. Grip the pipet as near the top as possible
and carefully pull it out while turning.
3. Unscrew the adapter support (7).
4. Pull out the membrane filter (5).
5. Remove the adapter from the adapter
support (7) by pushing it upwards.
6. To clean adapter (6), carefully rinse it by
using an appropriate compatible solvent
(e.g., water) in a wash bottle.
Blow out the liquid and allow to dry
completely.
7. Place the new membrane filter (5) with
the thicker end facing downwards into
the adapter (6) (with the smaller conical
side up).
27

8. Screw in the adapter support (7) hand
tight.
9. The entire instrument incl. membrane
filter is autoclavable at 121 °C (2 bar)
according to DIN EN 285.
For autoclaving remove suction (1) bellow.
Note:
Not every membrane filter is suitable.
Use only genuine manufacturer’s recom-
mended accessories. Membrane filters of
a pore size of 3 µm are a standard equip-
ment of the instrument. Up to 5 times,
the membrane filter can withstand steam
sterilization at 121 °C (2 bar absolute, i.e.
1 bar above atmospheric pressure) for
20 minutes. It is the user’s responsibility to
ensure effective autoclaving.
28

Attention!
Never use force! While mounting the
housing it has to be paid attention for
that the pipetting lever is loosely hanging.
Then place the pipetting lever scheduledly
between the valves and close the housing
(s. figure). Does the pipetting lever not
hang loosely, but has twisted itself, the
valve unit can be damaged sustainably!
10. Check for leaks.
29

If liquid has entered the valve unit proceed as
described below:
1. Unscrew the suction (1) bellows and the
adapter support (7).
2. Take off the upper part of the housing.
Carefully pull out the valve system and
replace it.
3. Reassemble the instrument in reverse
order and carry out leak test.
Attention!
When cleaning and/or exchanging the
valve unit, wear hand and eye protection
to avoid the risk of splashes and contami-
nation. Remaining liquid can run out.
10. Replace the valve unit
30

11. Checking for leaks
When the pipet has been filled, no liquid
should drip unless the pipetting lever is de-
pressed.If leaking occurs, carefully pull out
the pipet while turning and dismantle the
instrument again. If necessary replace mem-
brane filter (5), clean adapter (6) or replace
valve unit (3).
31

12. Troubleshooting
Trouble Possible Cause Action to be taken
Suction capacity
impaired
– membrane filter (5) dirty
or
– valve unit (3) damaged
–replace membrane
filter (5)
–replace valve unit (3)
Pipette drips
– pipette not inserted far
enough or
– membrane filter (5) not
properly positioned or
– valve unit (3) damaged
– carefully push pipet
further into securing
sleeve or
– insert membrane filter
(5) or
– replace valve unit (3)
Pipette not held
properly
–adapter (6)
damaged
– replace adapter (6)
Compressed
suction bellows
(1) take in air
automatically
– suction (1) bellows
or
– valve unit (3) damaged
– replace suction
bellows (1) or
– replace the valve unit
(3)
Note: If recommendations in the Trouble Shooting do not resolve
current problems, contact your supplier.
32

13. Ordering Data
maneus®1630500
complete, with membrane filter
Spare Parts:
Spare membrane filter (5),
3 µm, sterile, hydrophobic,
PTFE (10 per pack)
1670650
Suction bellows (1),
complet, red
1670201
Adapter (6),
silicone
1670301
Valve unit (3)
complete
1655590
33

Clean the instrument thoroughly. If the instrument has
been contaminated with infectious, genetically modified
or biologically active or radioactive substances, the instru-
ment must be decontaminated in addition.
Return instrument along with a description of the mal-
function and dispensed liquids. Return instrument along
with a description of the malfunction, the dispensed
liquids and the complete „Declaration on the Absence of
Health Hazards“ to the manufacturer or supplier.
Ask your supplier or the manufacturer for forms. The
forms can also be downloaded on www.vitlab.com.
Attention!
Only cleaned and decontaminated instru-
ments can be evaluated/repaired.
14. Repair service
15. Warranty
We shall not be liable for the consequences of improper
handling, use, servicing, operation or unauthorized re-
pairs of the instrument or the consequences of normal
wear and tear especially of wearing parts such as pistons,
seals, valves and the breakage of glass as well as the fail-
ure to follow the instructions of the operating manual.
We are not liable for damage resulting from any actions
not described in the operating manual or if non-original
parts have been used.
34
Other manuals for maneus
2
Table of contents
Other Vitlab Controllers manuals
