2 3
If you do not understand these directions, or if you have any doubts about the safety of the installation, please call a qualified
technician. Check carefully to make sure there are no missing or defective parts. Improper installation may cause damage or
serious injury. Do not use this product for any purpose that is not explicitly specified in this manual and do not exceed weight
capacity. We cannot be liable for damage or injury caused by improper mounting, incorrect assembly, or inappropriate use.
WARNING!
REMOTE CONTROL INSTRUCTIONS
Button Functions
Setting Up & Pairing the Remote Reset Mode
Troubleshooting
UPWARD
MOVEMENT
NOTE: SIDE
ARROWS HAVE
NO FUNCTION
USING ARROW KEYS
Press and hold the button for the mount to begin
liing. Release when at desired height. To lower the
mount, press and hold the button until desired
height reached.
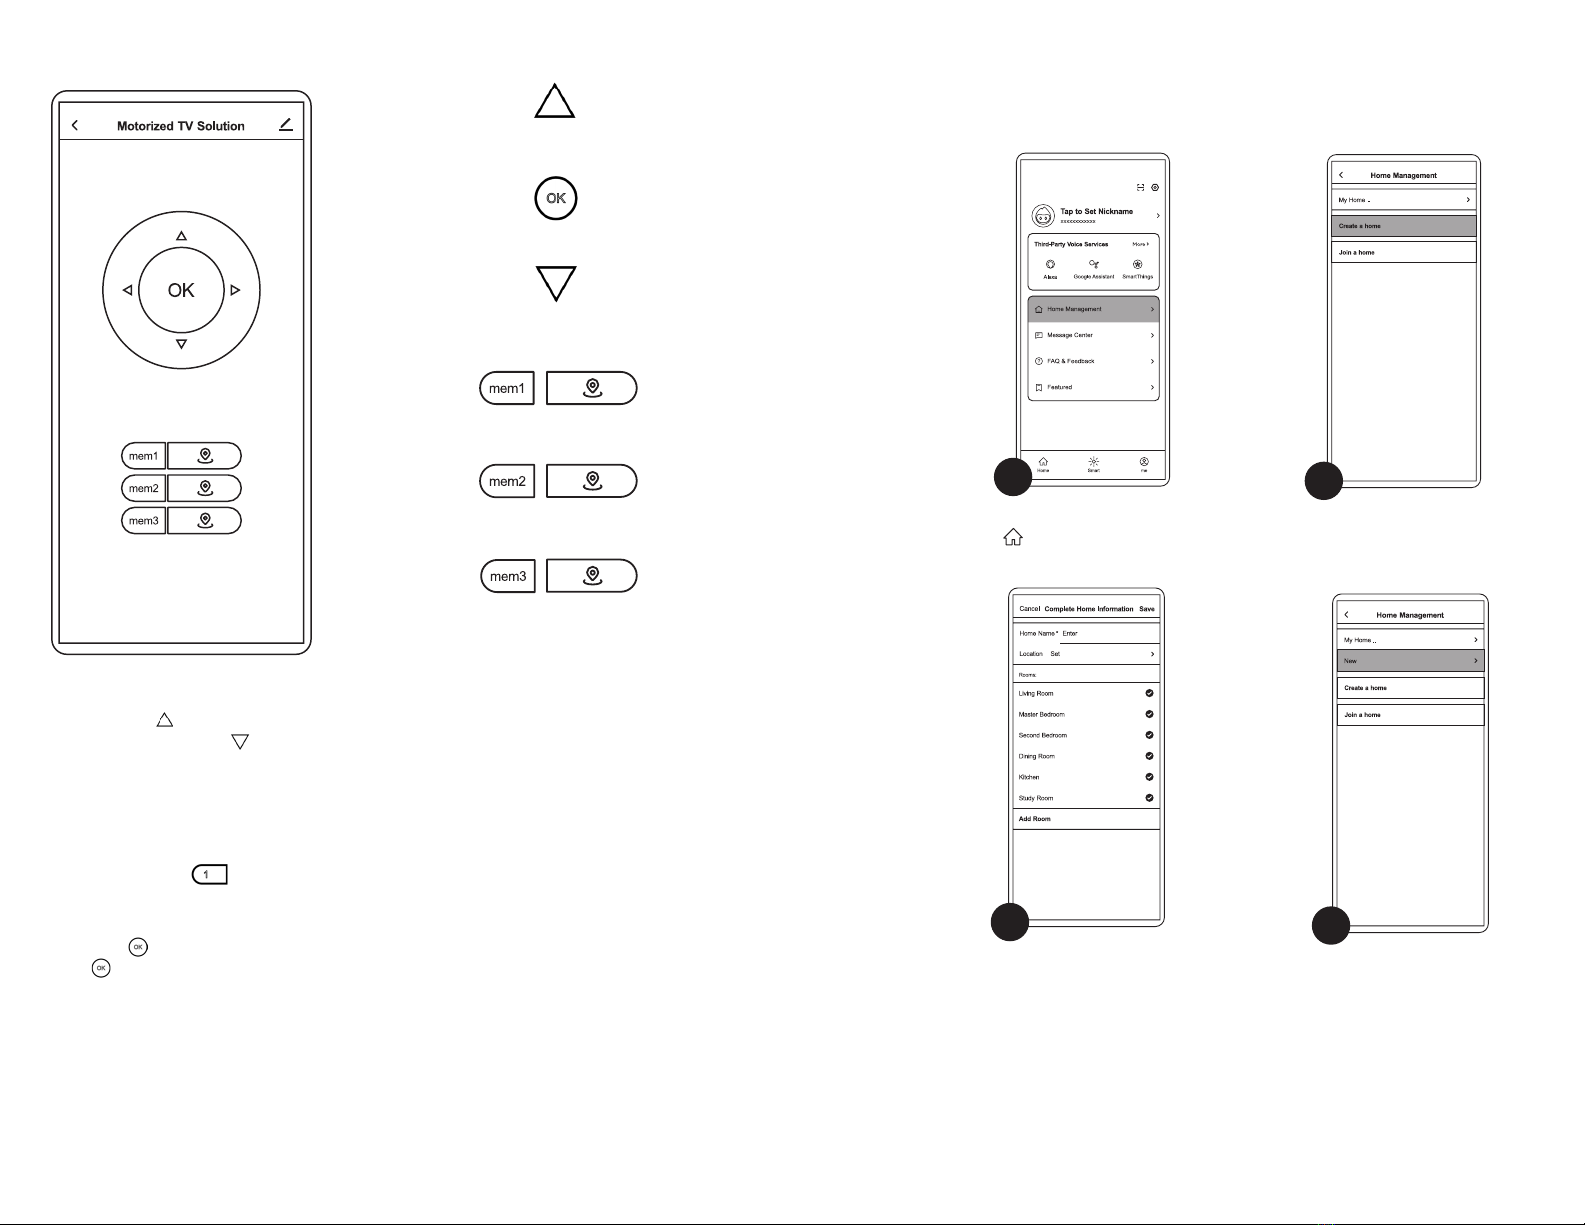
USING MEMORY FUNCTIONS
Use the up and down arrow buttons to set your desired TV height. Then press and hold any of the
Memory Buttons for 3 seconds. The mount will beep once to indicate that the location has been
saved. To return to a preset, simply press the acommpanying recall button. For example, to return to
Memory Setting 1, press .
LOWEST HEIGHT LIMIT SETTING
Short press the button 5 times. The mount will beep aer each press, with a two beeps emitted
at final press. This indicates the current height is now saved as the lowest height setting. the lowest
height limit will be erased if the li is ever reset.
The Mount Does Not Respond to Remote Control
Solutions - TV Mount
1. System Error: The system may have encountered an error. If the mount emits three
beeps aer pressing a button on the remote, the system needs to be reset. Please
follow the instructions above for resetting the mount.
2. Overheated: If the mount beeps four times aer pressing a button on the remote,
the system has overheated. Allow the mount to cool down for 30 minutes before
attempting to use again.
3. Disconnected Cord: A cord may be loose or no longer connected. Check all power
connections and proceed.
4. Incorrect Operation: If the mount emits one beep aer attemping to perform
a function, it may be an incorrect operation attempted. Please refer to “Button
Functions” for proper functions of remote.
Solutions - Remote Control
1. Operating Distatance: The remote may be too far away from the mount and out of
proper range. Move closer to the mount so that you are within the 30 (10m) range of
remote.
2. Low Batteries: Batteries may be low or dead. Replacement batteries and attempt use
again.
3. Broken Remote: If not LED light is found on remote when in use, the remote
may be faulty. Please contact our Product Support Team at 309-278-5303
or help@vivo-us.com.
DEFAULT SETTING
Short press the button and the mount will automatically retract to the lowest position. To stop it,
press the again.
DOWNWARD
MOVEMENT
MEMORY
SET
MEMORY
SET
MEMORY
RECALL
MEMORY
RECALL
STOP/RETRACT/
RESET
SET
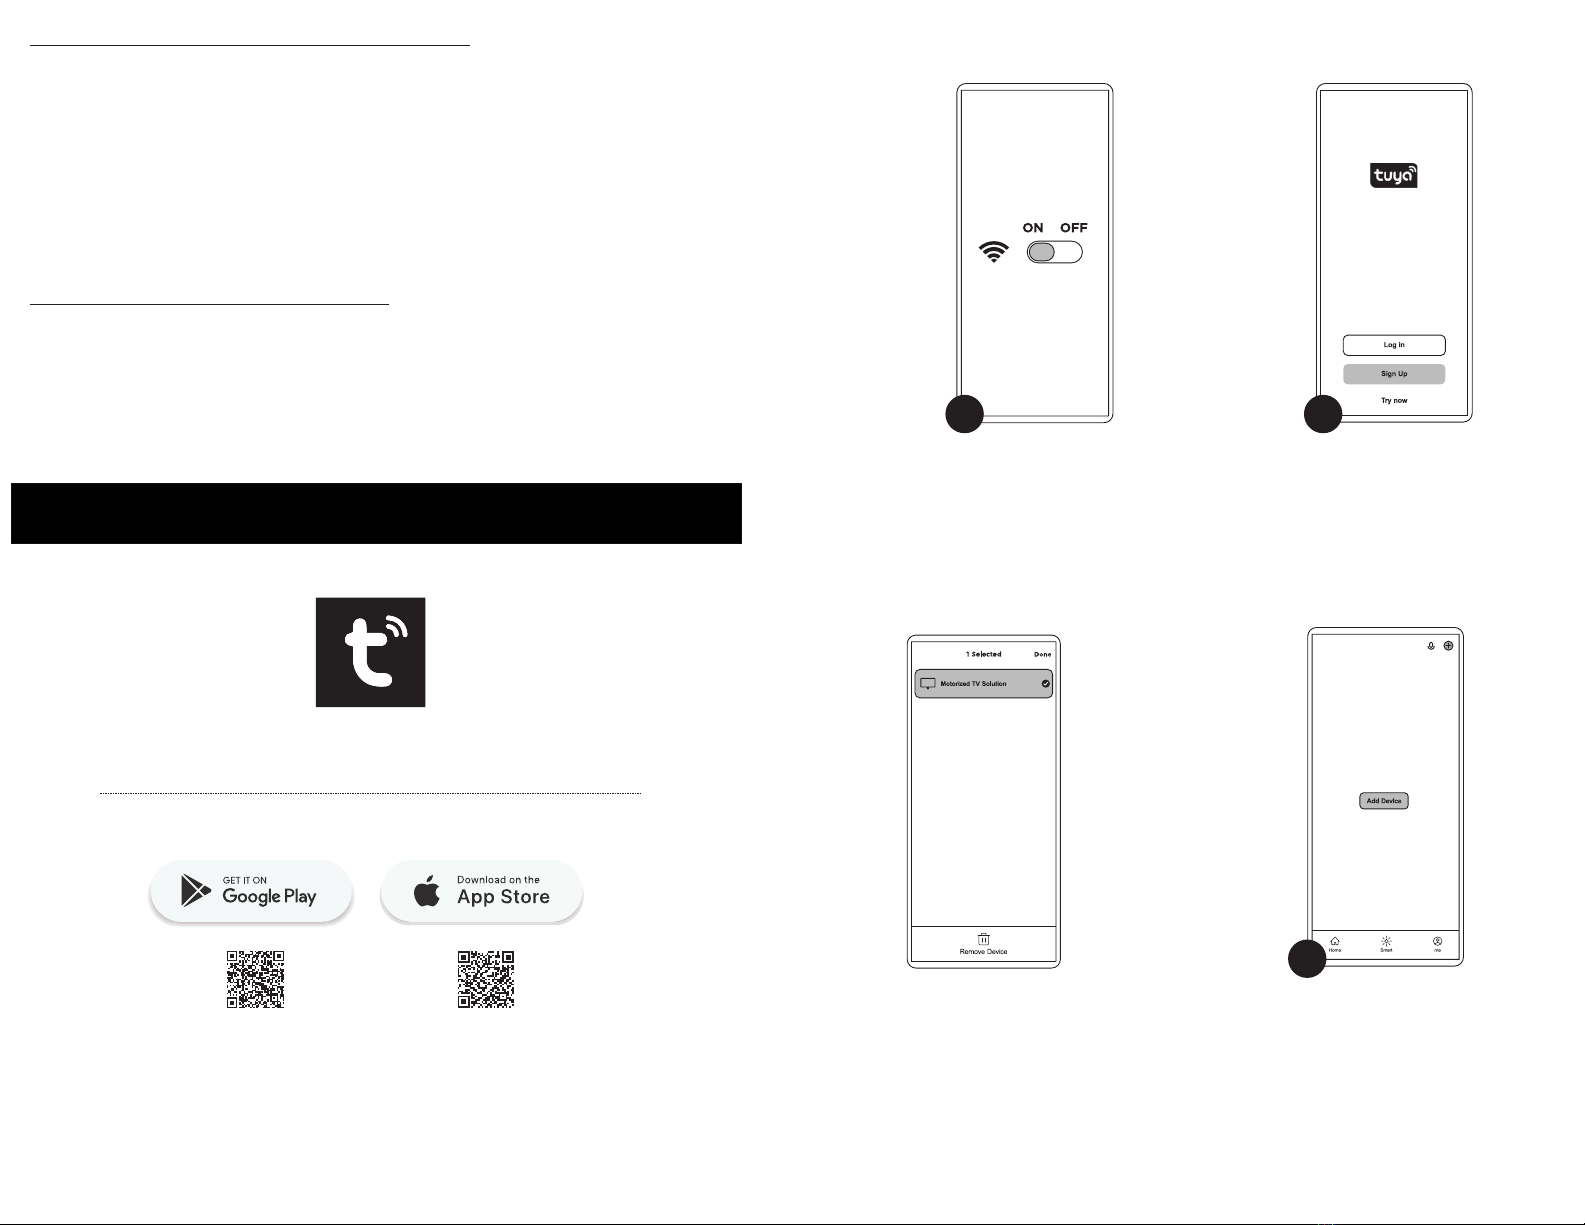
Install two AAA batteries (not included) in the
remote. Plug the mount in.
Press the side button on Control Unit (G) using
a pencil or small tool. The li will beep once,
indicating the li is ready to be paired with the
Remote (K). Press the button on the remote.
The li will beep for 10 seconds, and then emit
one final beep to indicate successful paring.
Long press the button for 3 seconds until you hear a beep and the mount begins to move
downwards. Once it reaches the bottom, it will pop up slightly and stop. The mount will emit two beets
indicating sucessful reset.
SETSET
K
G
SETSET