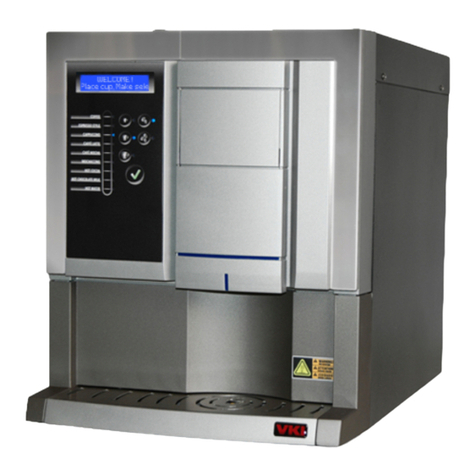
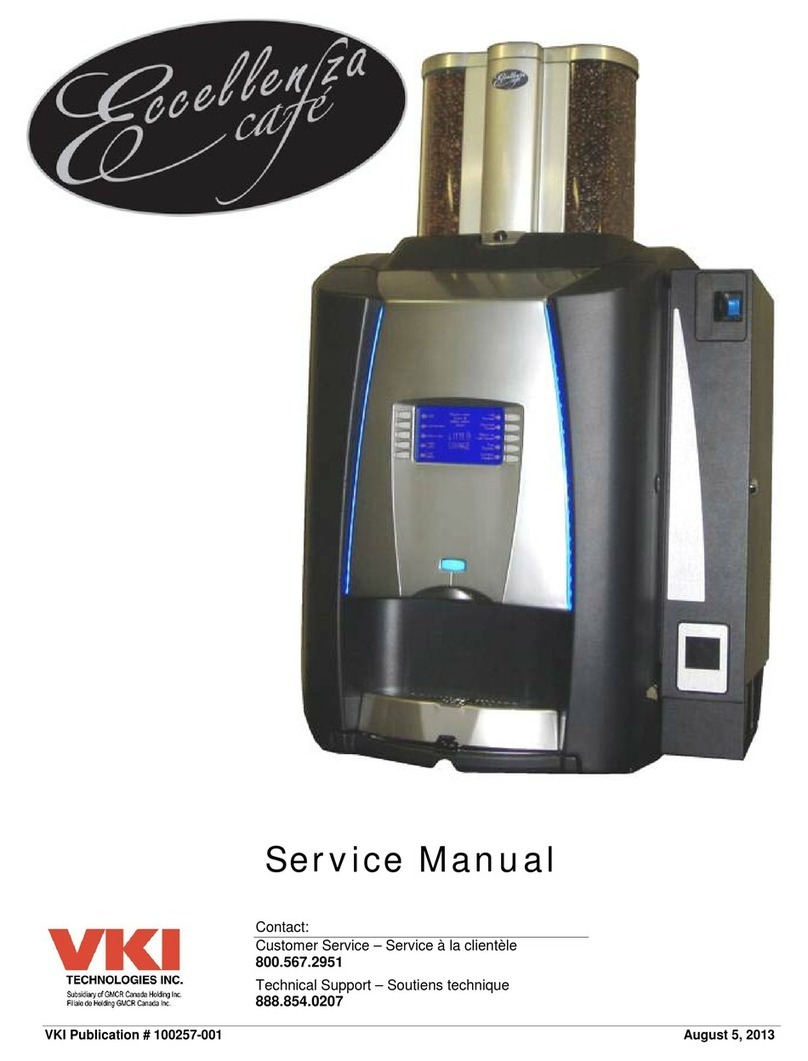
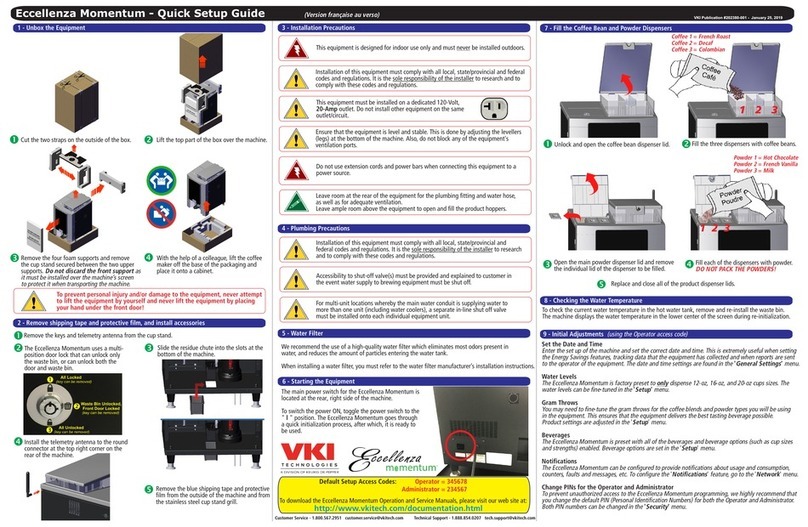
VKI Technologies Eccellenza Cafe User manual

VKI Publication # 100256-001 March 3, 2014
Operating Manual
Contact:
Customer Service – Service à la clientèle
800.567.2951
Technical Support – Soutiens technique
888.854.0207

Eccellenza Café – Operating Manual
2March 3, 2014

Eccellenza Café – Operating Manual
March 3, 2014 3
Table of Contents
Safety Information..............................................................................5
Specifications......................................................................................7
Equipment Overview (Exterior)...........................................................8
Equipment Overview - Standard Model (Interior) ...............................9
Equipment Overview - Zavida Model (Interior) .................................10
Unpacking .........................................................................................11
Plumbing the Machine.......................................................................12
Water Filter.......................................................................................14
Scalehammer™..................................................................................14
Filling the Coffee Bean Hoppers ........................................................15
Filling the Powder Hoppers ...............................................................17
Replacing the Flavoring Bottles - Standard Model (if applicable)...........18
Replacing the Flavoring Bottles - Zavida Model (if applicable) ..............19
Priming the Flavor System................................................................20
Checking the Water Temperature......................................................21
Initial Coffee Water Level Adjustment ..............................................22
Emptying the Waste Bin ....................................................................23
Viewing and Resetting the Counters .................................................24
Error Counter .................................................................................25
Vend Counter .................................................................................26
Total Counter..................................................................................28
Clearing Message Counters...............................................................29
Programming ....................................................................................30
Enter the Set-Up Menu Password ......................................................30
Set-Up Menu Structure ....................................................................33
Set Coffee Menu..............................................................................34
Set Coffee Product .....................................................................34
Set Coffee Water........................................................................34
Set Grinder Time........................................................................34
Beverage Product and Water Settings...........................................35
Set Powder Menu ............................................................................39
Set Powder Product ....................................................................39
Set Powder Water ......................................................................39
Set Powder Pulses......................................................................39
Secondary Settings ....................................................................40
Set Flavor and Set Hot Water Menus .................................................41
Set Flavor Times ........................................................................41
Set Hot Water Times ..................................................................41
Set Press & Hold Hot Water .........................................................41
Secondary Settings ....................................................................42
Set Brewer Menu.............................................................................42
Set Top Pause............................................................................42
Set Bottom Pause.......................................................................42
Set Pouring Time........................................................................42
Set Max Carafe ..........................................................................42
Brewer Settings .........................................................................43
Double Cup Setting ....................................................................46
Eccellenza Café – Operating Manual
4March 3, 2014
Table of Contents
Set Interface Menu..........................................................................47
Language Setting.......................................................................47
Interface Settings ......................................................................48
Enable/Disable Buttons...............................................................48
Moving Cup Size Button Position ..................................................51
Set Default Cup Size & Strength...................................................53
Setting the Clock........................................................................54
Set Message Menu ..........................................................................55
Enable/Disable Messages ............................................................55
Setting Message Timers ..............................................................55
Message Settings .......................................................................55
Setting the Message Counters......................................................57
Waste Container Message Settings if Using a Waste Chute ..............59
Counters Menu................................................................................60
Error Counters...........................................................................60
Beverage Counters.....................................................................60
Cash Counters ...........................................................................60
Resetting Counters.....................................................................60
Set Vending Menu ...........................................................................61
Set Beverage Prices....................................................................61
Force Vending............................................................................61
Money System Type ...................................................................61
Bill Denomination Setting............................................................61
Secondary Settings ....................................................................62
Set Gram Throws Menu....................................................................63
Set Gram Throws – Coffee...........................................................63
Set Gram Throws - Powder..........................................................63
Set Powersaving Mode.....................................................................66
Water Tank Temperature Setting ......................................................67
Empty Water Tank (to Valve Level) ...................................................68
Rinse Cycles ......................................................................................70
Brewer Rinse Cycle..........................................................................70
Quick Brewer Rinse Cycle.................................................................71
Powder (Whipper) Rinse Cycle ..........................................................72
Sanitize FL Pumps...........................................................................72
Maintenance......................................................................................73
Daily..............................................................................................73
Weekly ..........................................................................................73
Monthly .........................................................................................74
Every 6-12 Months..........................................................................74
Sanitization – Milk System ...............................................................75
Sanitization – Flavor Pumps and Tubes ..............................................76
Removing the Brewer........................................................................78
Installing the Brewer ........................................................................80
Draining the Water Tank ...................................................................82
Error Messages..................................................................................83
Information in this document is subject to change without notice.

Eccellenza Café – Operating Manual
March 3, 2014 5
Safety Information
Your safety is very important to us. It is imperative that you read and understand
this safety information before proceeding with the installation and operation of this
coffee maker.
This coffee maker is designed for indoor use ONLY and must never be
installed outdoors.
The installation of this equipment must comply with all municipal,
state/provincial, and federal electrical and plumbing codes.
Installation and servicing of this equipment must only be
performed by qualified personnel.Do not attempt to install or service
this equipment if you are not qualified as it may result in personal injury.
There are no user-serviceable parts inside the equipment.
This equipment must be installed in a location with an ambient
temperature between 5°C-35°C (40°F-95°F).
The main water supply pressure must be between a minimum of 20psi
and a maximum of 100psi.
This equipment must be positioned so that the wall plug and the main
power switch are both easily accessible.
Do not connect the coffee maker to a voltage supply other than the
voltage indicated on the serial number decal.
Do not immerse this coffee maker or any part of this equipment in liquid.
Do not install the equipment in an area where water spray is present.
This coffee maker must be installed securely on a level surface. If it does
not appear to be a stable location, select another installation location.
Keep hands clear of the dispensing area at the front of the coffee maker.
Liquids being dispensed are extremely hot and can cause severe
burns.
Never disconnect the coffee maker by pulling on the service cord, and
never use the coffee maker if the service cord is damaged.
If the service cord is damaged, it must be replaced with a new service
cord that is available from your distributor or the manufacturer of this
equipment.
This equipment must be used specifically for the purpose for which it is
designed. The manufacturer is not responsible for damage or injury
resulting from improper use of this equipment.

Eccellenza Café – Operating Manual
6March 3, 2014
Safety Information
Never attempt to override the safety features incorporated into the
equipment. They are there for your protection and should never be
bypassed under any circumstances.
Always switch the power off and disconnect the service cord when
cleaning the interior of the coffee maker. Components inside the coffee
maker can cause electrical shock resulting in personal injury.
If the coffee maker is not working properly or appears to have a fault,
switch off the power, disconnect the service cord and call an authorized
technician immediately for service. Only qualified personnel should
perform service on this equipment.
Use caution when servicing the water heater or the outlet valves as they
may be extremely hot and can cause severe burns.
Use caution when working inside the coffee maker as there may be sharp
edges on some components that can cause cuts.
To prevent electrical shock, remove all jewelry (rings, watches, etc.) when
servicing the coffee maker.
Use only original manufacturer replacement parts in this coffee
maker. Unapproved replacement parts can result in personal injury, fire
and/or further damage to the equipment.
Do not allow children to access this equipment. They are not aware of the
potential dangers that exist.
Never use ammonia based cleaners on machine surfaces as they will
become discolored and/or damaged permanently. Use milder cleaning
products, such as dish soap.
Unauthorized modifications made to this coffee maker can result in
serious personal injury and/or damage to the equipment, and voids all
warranties and certifications.

Eccellenza Café – Operating Manual
March 3, 2014 7
Specifications
Voltage Rating
120 Volts AC @ 60hz (120 Volt Model)
240 Volts AC @ 50hz (240 Volt Model)
Heater Wattage
1100 Watts
Weight
120 lbs (54.5 kg)
Coffee Bean Hopper
Capacity (2
- outer)
4.5 liters
– approximately 3.0 lbs (1.36 kg)
Coffee Bean Hopper
Capacity (center)
3.2 liters
– approximately 2.0 lbs (908 g)
Powder Capacity (2)
2.0 liters – approximately 2.0 lbs (908 g)
Flavor Bottles (3)
Variable capacity (depends on type of bottle used)
Cup Sizes
Variable capacity
Brewing Capacity
60 x 8.0 oz. (240ml) cups/hour
Water Tank Capacity
1.9 gallons (7.3 liters)
Temperature Control
Electronic Probe
Heating Time
40 minutes after install
Brew Temperature
194°F (90°C)
Brew Time
Approximately 30 seconds (default)
Heater Protection
Yes
Overflow Protection
Yes
Circuit Protection
Yes
Certifications/Listings
UL, CSA, CE, NSF, NAMA
Coffee Maker Dimensions
Height:
38.2” (97 cm)
Width:
20” (51 cm)
Depth:
25” (63.5 cm)
Installation Requirements
Height:
48” (122 cm)
Width:
22.5” (57 cm)
Depth:
30” (76 cm)
NOTE: Any references made in this manual to coffee blends, powder products
and flavorings are for example purposes only. The actual products used in the
equipment may be different than the examples used in this manual.

Eccellenza Café – Operating Manual
8March 3, 2014
Equipment Overview (Exterior)
Coffee Bean
Hoppers
Bean Hopper
Lock
Selection
Buttons
LCD Display
Screen
<START>
Button
Cup Stand /
Drip Tray

Eccellenza Café – Operating Manual
March 3, 2014 9
Equipment Overview - Standard Model (Interior)
Coffee Bean
Hoppers
Flavor Bottles
Powder Hoppers
Interior Buttons
Bean Grinder
Drip Tray
Overflow Probes
Whipper
Waste Bin
Brewer
NOTE: Any references made in this manual to coffee blends, powder products
and flavorings are for example purposes only. The actual products used in the
equipment may be different than the examples used in this manual.

Eccellenza Café – Operating Manual
10 March 3, 2014
Equipment Overview - Zavida Model (Interior)
Coffee Bean
Hoppers
Flavor Bottles
Powder Hoppers
Interior Buttons
Bean Grinder
Drip Tray
Overflow Probes
Whipper
Waste Bin
Brewer
NOTE: Any references made in this manual to coffee blends, powder products
and flavorings are for example purposes only. The actual products used in the
equipment may be different than the examples used in this manual.

Eccellenza Café – Operating Manual
March 3, 2014 11
Unpacking
1. Cut the two straps on the outside of the box.
2. Open the flaps on the top of the box and use them to lift the box up and off of
the machine.
3. With the help of a colleague, lift and place the coffee maker onto a
workbench or cabinet. Do not attempt to lift the machine by yourself.
4. Open the outer door - the keys are in a small envelope attached to the
service cord.
5. Remove all the shipping tape from the outside and inside of the machine.
6. Remove the cardboard support from between the powder dispensers and the
machine ceiling.
7. Remove the cup tray shipped inside the coffee maker and install it onto the
front door.
WARNING: DO NOT lift the coffee maker by placing your hand underneath
the front door. It is not designed to support the weight of the machine, and
serious personal injury and/or damage to the unit may occur.
NOTE: Prior to signing for the delivery, check the shipping carton for
damage. Indicate any damage on the delivery slip and have the driver sign
acknowledging it. Damages during shipping
must be claimed with the
carrier, and not with VKI Technologies.
NOTE: Keep all packaging material in case the equipment must be transported
or shipped. Also, when transporting the unit for installation, leave it on the base
of the packaging to reduce the risk of damage to the levelers.

Eccellenza Café – Operating Manual
12 March 3, 2014
Plumbing the Machine
1. Specifications and Limitations:
The total overall length of installed section of water tubing should never exceed 25 feet
(7.6 meters) per unit. In the event more than 25 feet (7.6 meters) of conduit tubing is
required, as measured from the water supply connection (building plumbing) to the
brewing equipment or cooler unit, the customer should be required to sign a waiver
document thus releasing your company from any and all responsibility in the event
damage is incurred as a result of a water leak from installed water tubing and/or fittings
and/or equipment.
2. Water Supply & Tubing - Material Requirements (Conforms to NSF-51 & NSF-61):
NOTE: The main water supply pressure must be between a minimum of 20 psi and a
maximum of 100 psi.
Water supply connection (building plumbing to water tubing conduit):
►PREFERENCE: 2” copper shunt & compression tee fitting (multi unit location)
►ALTERNATE: Self-piercing valve (single unit locations only)
Water tubing (water supply to water filter – water filter to brewing equipment):
►NSF CERTIFIED: 3/8” I.D. Reinforced PVC Beverage grade hose tubing
NOTE: If as a result of either building or municipal codes or both, that a copper
conduit connection is deemed required, customer is subsequently
responsible for providing required copper tubing length according to the
customer site’s needs along with a shut-off valve for each individual unit to
be installed at said location.
3. Water Filter - Material Requirements (Conforms to NSF-42 & NSF-53):
Water filter & filter head:
►NSF CERTIFIED: EVERPURE 4H, or 4K-Plus, or 2K-Plus, or OCS
►An Everpure QL3 head with integrated shut-off valve must be installed
NOTE: Accessibility to shut-off valve(s) must be provided and explained to
customer in the event water supply to brewing or cooler equipment must
be shut off.
Installation of this equipment must comply with all local, state/provincial
and federal plumbing codes. It is the responsibility of the installer (and not
VKI Technologies) to research and to comply with all of these codes.
NOTE: When installing the Eccellenza Café onto a cabinet or countertop,
ensure that the machine is level. This is done by adjusting the levelers (legs) at
the bottom of the machine.

Eccellenza Café – Operating Manual
March 3, 2014 13
NOTE: For multi-unit locations whereby the main water conduit is supplying
water to more than one unit (including water coolers), a separate in-line
shut off valve must be installed onto each individual equipment unit.
4. Water Fittings & Valves - Material Requirements (Conforms to NSF-51 & NSF-61):
Fittings & valves (water supply connection - water filter head - brewing equipment):
►NSF CONFORMING: BARB type fittings with OERTIKER clamps
►PREFERENCE: Custom nickel plated brass
►ALTERNATE: Stainless Steel (much more costly)
NOTE: Water cooler equipment arriving pre-fitted with quick connect type fittings
must have them replaced by approved fittings prior to being installed at
customer location(s).
NOTE: The shut-off valve must be easily
accessible by the customer, who
must be informed of its location
during the installation.
MATERIAL REQUIREMENTS:
EQUIPMENT FITTING:Male 3/8 inch NPTF
TUBING (WATER SUPPLY TO FILTER): Reinforced PVC Beverage grade
TUBING (WATER FILTER TO EQUIPMENT): Stainless steel braided hose
Quick-
connect type fittings are not approved for use with any VKI
manufactured equipment.

Eccellenza Café – Operating Manual
14 March 3, 2014
Water Filter
We recommend the use of a high quality water filter (such as Everpure™ Filters)
which will eliminate most odors present in water, and reduce the amount of particles
entering the water tank. The following are basic instructions for installing a cartridge
type filter using a head bracket (Everpure™ type filter).
1. Assemble the retaining bracket to the filter head.
2. Insert the cartridge into the filter head and turn the cartridge clockwise.
3. Apply Teflon tape to the threaded portion of two 3/8" x 1/4" fittings and
screw each into the filter head.
4. Mount the water filter at an easily accessible place for servicing, such as:
(a) Under the sink against the back or side wall,
(b) On the back of a utility cabinet,
(c) On the back of the coffee maker,
(d) Any location generally within 20 feet of the machine.
Scalehammer™
VKI also recommends the use of the Scalehammer electronic scale treatment device.
The Scalehammer™ electronically treats incoming water, preventing scale particles
from sticking to the water tank, valves, tubing, etc. As scale is one of the largest
causes of service calls on these types of equipment, using the Scalehammer™ keeps
the equipment working efficiently and free of scale related problems.
Installation instructions are provided in the box with every Scalehammer™ device.
Should you require additional copies, log on to www.scalehammer.com to download
the electronic version of the manual.
NOTE: When the filter is installed or replaced, make sure to write the
installation date in the provided area on the filter cartridge. Follow the
manufacturer’s recommendations for filter replacement intervals.

Eccellenza Café – Operating Manual
March 3, 2014 15
Filling the Coffee Bean Hoppers
1. Unlock the coffee bean hopper cover.
2. Lift the cover straight up to remove it, and set it aside.
3. Remove the individual hopper lids and set them aside.
4. Fill the hoppers with fresh coffee beans.
a) Colombian*beans in the left hopper (labeled Coffee 1).
b) Decaf*beans in the center hopper (labeled Coffee 2).
c) French Roast*beans in the right hopper (labeled Coffee 3).
*For reference purposes only. Different blends can be used in each of the hoppers.
123
1 - Unlock
2 - Lift Up

Eccellenza Café – Operating Manual
16 March 3, 2014
5. Replace the individual hopper lids.
6. Replace the coffee bean hopper cover and lock it in place.
7. Open the front door and press the “CYCLE BREWER” button. The brewer will
cycle and stop, and the screen now displays the following:
a) Press the “Clear Coffee 1” button to reset the “Refill” reminder
message for Colombian*.
b) Press the “Clear Coffee 2” button to reset the “Refill” reminder
message for Decaf*.
c) Press the “Clear Coffee 3” button to reset the “Refill” reminder
message for French Roast*.
8. Press the “CYCLE BREWER” button once more to cycle the brewer back to the
home position and exit back into standby mode.
9. Close the front door and lock it.
*For reference purposes only. Different blends can be used in each of the hoppers.
NOTE: Any references made in this manual to coffee blends, powder products
and flavorings are for example purposes only. The actual products used in the
equipment may be different than the examples used in this manual.

Eccellenza Café – Operating Manual
March 3, 2014 17
Filling the Powder Hoppers
1. Open the front door and turn both powder product hopper spouts upwards.
2. Lift the front of the milk hopper and pull to remove it.
3. Remove the hopper lid and set it aside.
4. Fill the hopper with dehydrated milk and re-install the hopper cover.
5. Slide the milk hopper into position making sure the hopper is coupled to the motor.
6. Lower the front of the hopper and lock it in place – a pin at the bottom of the
hopper will enter a hole in the hopper base, locking it in place.
7. Turn the hopper spout so it is directed into the whipper bowl.
8. Repeat the same procedure for the chocolate hopper.
9. Press the “CYCLE BREWER” button. The brewer will cycle and stop, and the
screen now displays the following:
a) Press the “Clr Powder 1” button to reset the “Refill” reminder
message for Milk.
b) Press the “Clr Powder 2” button to reset the “Refill” reminder
message for Chocolate.
10. Press the “CYCLE BREWER” button once more to cycle the brewer back to the
home position and exit back into standby mode.
11. Perform a “Powder Rinse” cycle to flush any powder that fell into the whipper
bowl [see “Rinse Cycle” section in this manual].
Powder 1 = Milk*
Powder 2 = Hot Chocolate*
*For reference purposes only.

Eccellenza Café – Operating Manual
18 March 3, 2014
Replacing the Flavoring Bottles - Standard Model (if applicable)
1. Unlock and open the front door.
2. Remove the Flavor 1 bottle (bottom bottle) from its support on the inside of the
front door.
a) Flavor 1 = Hazelnut
b) Flavor 2 = French Vanilla
c) Flavor 3 = Irish Cream
3. Pull the silicone cap from the empty bottle, making sure to leave the tube
with the silicone cap. Do not pull the tube out of the silicone cap!
NOTE: Place a paper towel below the cap and tube as residual
flavoring may drip onto the counter.
1
1
1
2
2
2
3
3
3

Eccellenza Café – Operating Manual
March 3, 2014 19
4. Remove the cap and foil from the new bottle. This cap is not required.
5. Install the silicone cap and tube removed from the old bottle onto the new
bottle.
6. Re-install the new flavor bottle onto the support.
7. Check to make sure the tube is pushed completely to the bottom of the
bottle.
8. Repeat this procedure for the other two bottles (Flavor 2 and Flavor 3). It is
recommended to do one bottle at a time so as not to mix up the initial
locations of the bottles.
9. Once all are done, close and lock the front door.
Replacing the Flavoring Bottles - Zavida Model (if applicable)
1. Unlock and open the front door.
2. Remove the tubing from the Flavor 1 bottle (bottom bottle) by holding the bottle
and pulling the tubing off of the small fitting on top of the bottle.
a) Flavor 1 = Hazelnut*
b) Flavor 2 = French Vanilla*
c) Flavor 3 = Irish Cream*
*For reference purposes only. Different flavors can be used (if available).
1
1
1
2
2
2
3
3
3

Eccellenza Café – Operating Manual
20 March 3, 2014
3. Remove the cap from the new bottle and install the bottle on its respective
support.
NOTE: Place a paper towel below the tube as residual flavoring
may drip from the tubing.
4. Carefully push the flavor tube completely onto the small fitting on top of the
flavor bottle.
5. Repeat this procedure for the other two bottles (Flavor 2 and Flavor 3). It is
recommended to do one bottle at a time so as not to mix up the initial
locations of the bottles and the flavor tubes.
6. Once all are done, close and lock the front door.
Priming the Flavor System
When first installing the Eccellenza Café, the flavor system must be primed.
This is done by entering the Programming section and following the path
indicated below.
SET PRODUCT
Capp Regular (or any other beverage)
Set Flavor
Flavor 1 Time
Test Quantity
The “Test Quantity” button will dispense the required amount of flavor for
the beverage selected. Once the flavor begins to exit the spout, you may exit
this menu and repeat for the remaining flavors.
NOTE: The flavorings used in the Eccellenza Café are NOT sweeteners.
Increasing the quantity of flavoring dispensed into the cup will not make the
beverage any sweeter.
Table of contents
Other VKI Technologies Coffee Maker manuals

VKI Technologies
VKI Technologies Eccellenza Express User manual

VKI Technologies
VKI Technologies Eccellenza touch User manual

VKI Technologies
VKI Technologies Eccellenza Pod User manual

VKI Technologies
VKI Technologies CAFFE MIO Installation and operating instructions

VKI Technologies
VKI Technologies Eccellenza Pod User manual

VKI Technologies
VKI Technologies 2001 Operation manual

VKI Technologies
VKI Technologies Eccellenza Express User manual

VKI Technologies
VKI Technologies Eccellenza cafe User manual

VKI Technologies
VKI Technologies Eccellenza touch User manual

VKI Technologies
VKI Technologies Eccellenza Momentum User manual