Volk PICTOR Prestige User manual

1 Volk Pictor Prestige
USER MANUAL
volk.com
®

2 Volk Pictor Prestige

3 Volk Pictor Prestige
User manual for Volk Pictor Prestige ophthalmic camera
Pictor Prestige™
Volk Optical, Inc.
7893 Enterprise Drive
Mentor, OH 44060
USA
volk.com
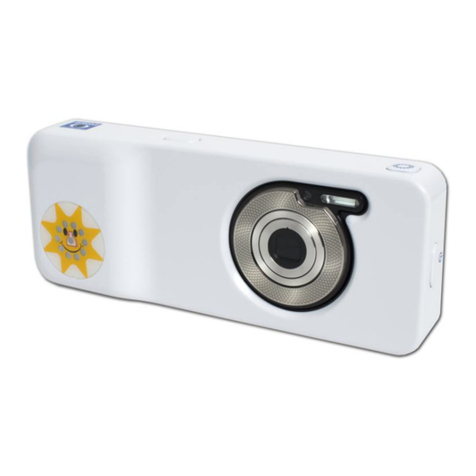
volk@volk.com
Toll Free USA: +1 (800) 345-8655
Phone: +1 (440) 942-6161
2019 12

4 Volk Pictor Prestige

5 Volk Pictor Prestige
CONTENTS
1 Safety.............................................................................6
1.1 Symbols.....................................................................................6
1.2 Intended use............................................................................10
1.3 Contraindication....................................................................10
1.4 Precautions...............................................................................11
2 Device overview..........................................................13
2.1 Controls and display icons...............................................14
3 Getting started............................................................16
3.1 Part list and unpacking.......................................................16
3.2 Preparations.............................................................................16
4 Features........................................................................19
4.1 Quick menu..............................................................................19
4.2 Camera settings.....................................................................21
4.3 Optics settings for Pictor Retina Module..................23
4.4 Optics settings for Pictor Anterior Module..............25
5 Imaging with Pictor....................................................26
5.1 Retina Module.........................................................................27
5.2 Anterior Module.....................................................................28
5.3 After imaging..........................................................................29
6 Important information...............................................30
6.1 Environmental conditions.................................................30
6.2 Error messages......................................................................30
6.3 Cleaning.....................................................................................32
6.4 Service and repair.................................................................33
6.5 Battery........................................................................................33
6.6 Disposal......................................................................................34
6.7 Technical description...........................................................34
6.8 Electromagnetic compatibility........................................37
6.9 Compliance..............................................................................41
6.10 Warranty....................................................................................42
A Appendix - WLAN......................................................43
A.1 Wireless settings...................................................................43
A.2 Volk Client PC software.....................................................44
Notes............................................................................................45
Index.............................................................................................46

6 Volk Pictor Prestige
1. SAFETY
The information in this manual applies to the Volk Pictor Prestige ophthalmic camera. The
specifications in this manual are subject to change without prior notice due to continuing
product development. The latest version of this manual can be downloaded at www.volk.
com/support where you can also find more training materials.
This user manual explains the safety precautions and introduces the device and its proper
operation. The device must be used according to this user manual. The user manual and
other documentation enclosed with the Pictor Prestige should be kept accessible to users
at all times to ensure that the information required for use of the device is readily available.
CAUTION!
Read the user manual carefully before commissioning this device. It contains
important information regarding user and patient safety.
1.1 SYMBOLS
The symbols used in this user manual or on device labels refer to important safety information
or manufacturing information. Whenever you see these symbols, read the accompanying
information carefully and observe all safety notes and information in this user manual and
on device labels.
WARNING!
Indicates a hazardous situation which could result in patient injury, harm or
death if appropriate safety precautions are not followed.
CAUTION!
Indicates a situation which could result in device harm, damage or
malfunction if the appropriate precautions are not followed.
NOTE!
Important information: please read and follow carefully.

7 Volk Pictor Prestige
Read the instructions for use carefully
Failure to follow these instructions could place the patient or operator at risk.
Radio frequency radiation
The device has WLAN functionality. Electromagnetic interference may occur in
the vicinity of equipment.
FCC Declaration of conformity
The device emits RF radiation. Electromagnetic interference from the device is
under limits approved by the Federal Communications Commission.
Prescription device
Symbol for : “Caution: Federal law restricts this device to sale by or on the
order of a physician or licensed practitioner.”
Type BF applied parts
The eye cup which is in physical contact with the patient, is electrically isolated
and protected against electric shock.
Class II power supply
For indoor use only
Power supply designed primarily for indoor use only according to IEC 60417
Plug socket for power supply (Positive polarity)
Voltage and current
Disposal specification
European directive on waste electrical and electronic equipment (WEEE)
2012/19/EU specifies the disposal.

8 Volk Pictor Prestige
Battery disposal specification
The device has a rechargeable lithium-ion battery which can be recycled.
Manufacturer
The symbol is accompanied by the date of the manufacture, and the name
and the address of the manufacturer.
Serial number
The first four digits of the serial number indicates the week (digits 1-2) and
year (digits 3-4) of the manufacture.
Global trade item number
Reference number
GS1 Unique Device Identification
Keep away from water
Disposal specification
European directive on waste electrical and electronic equipment (WEEE)
2008/19/EU specifies the disposal.

9 Volk Pictor Prestige
Do not use hand hooks
Keep out of direct sunlight
Number of units packed
Temperature limitations
Humidity limitations
Atmospheric pressure limitations
Fragile
Handle with care.

10 Volk Pictor Prestige
1.2 INTENDED USE
Volk Pictor Prestige is a medical digital camera that is used with dedicated optics modules
intended to capture images and video of the fundus of the eye and surface of the eye.
Volk Pictor Prestige Camera with Volk Pictor Prestige Retina Module is intended to capture
digital images and video of the fundus of the human eye.
Volk Pictor Prestige Camera with Volk Pictor Prestige Anterior Module is intended to
capture digital images and video of the surface of the human eye and surrounding areas.
1.3 CONTRAINDICATION
Volk Pictor Prestige is classified as Group 2 based on standard ISO 15004-2:2007. The daily
usage time and maximum allowed number of pulses presented below is calculated on the
basis of optical classification results.
WARNING!
The light emitted from this instrument is potentially hazardous. The longer the
duration of exposure and the greater the number of pulses, the greater the risk
of ocular damage. Exposure to light from this instrument when operated at
maximum output will exceed the safety guideline after:
Pulsed light
• 6300 still images / eye / day for Pictor Retina Module
• 250 still images / eye / day for Pictor Anterior Module
Or alternatively continuous light
• 90 min video recording / eye / day for Pictor Retina Module
• 8 min video recording / eye / day for Pictor Anterior Module
Please note that the exposure time in video recording and the number of pulses in still
imaging from all light sources are cumulative and additive. If the intensity of any of the
light sources is reduced to half of the maximum output, the exposure time or number of
pulses for that light source to reach the exposure safety guideline is doubled.
Since prolonged intense light exposure can cause ocular damage, the use of the device
for ocular examination should not be unnecessarily prolonged, and the brightness setting
should not exceed what is needed to provide clear visualization of the target structures.
Infants, persons with aphakia or diseased eyes will be at greater risk of ocular damage. The
risk may also be increased if the person being examined has had any exposure with the
same instrument or any other ophthalmic instrument using a visible light source during the
previous 24 hours.

11 Volk Pictor Prestige
1.4 PRECAUTIONS
WARNING!
Volk Pictor Prestige is not suitable for use in explosion risk areas or in the presence
of flammable anesthetics.
WARNING!
Place the PC and Pictor Charging Station outside the patient environment (at a
distance of at least 1.5 meters from the patient).
WARNING!
To avoid contamination, clean the eye cup before each use with a new patient.
WARNING!
Do not leave the eye cup in direct sunlight as it may heat up and cause burns.
WARNING!
In order to avoid touch current during imaging, do not touch the system connector
and the patient simultaneously.
CAUTION!
Volk Pictor Prestige is intended for use inside, in normal room temperature, and
normal humidity. Do not use the device in an environment where there is a possibility
of water condensation on or inside the device.
CAUTION!
The device may only be used for the specified purpose and according to national
regulations, consistent with the applicable industry standards and occupational
safety and accident prevention regulations.
CAUTION!
Federal law restricts this device to sale by or on the order of a physician or licensed
practitioner.
CAUTION!
No modification of this equipment is allowed.
CAUTION!
Only use accessories and battery provided by Volk with this product.

12 Volk Pictor Prestige
CAUTION!
Only use USB cable and the power source provided by Volk with this product.
If you need replacement USB cable or power source, please contact the manufacturer
or your local distributor. USB cable must be connected only to the USB port of a PC
that complies with the IEC 60950 standard. Only connect Pictor Charging Station to
an electricity supply which corresponds to the supply voltage of the device.
CAUTION!
The connection between the camera and the PC is USB and/or WLAN. Any
authorization procedures should be carried out in the PC. If the PC is connected to a
customer network, make sure the appropriate safety measures are applied, such as
Antivirus and Firewall protection.
CAUTION!
If there are breaks in device covers or other visual defects, contact Volk Customer
Service or a Volk-certified service facility.
CAUTION!
Repair and maintenance work may only be performed by authorized specialists.
Contact your Volk representative for repairs and maintenance work on the device.

13 Volk Pictor Prestige
2. DEVICE OVERVIEW
Volk Pictor Prestige is a modular ophthalmic camera that is designed for use in a medical
environment. It is intended to capture digital images and video of the fundus of the eye
and surface of the eye for documentation and consultation. Pictor Camera is used with
interchangeable optics modules Pictor Retina Module and Pictor Anterior Module. Optics
modules are attached to the camera with bayonet connectors.
Pictor Camera has a WLAN module which enables wireless data transfer to a PC. Captured
images and recorded videos can also be transferred to a PC via USB connection when the
camera is placed on Pictor Charging Station. In addition, Pictor Charging Station is a dual
charger used for charging the battery inside the camera and spare battery.
Pictor Retina Module is intended for non-mydriatic fundus imaging. In non-mydriatic
imaging no mydriasis is needed because infrared light is used for targeting the fundus and
white light is flashed when an image is taken. The pupil does not respond to the infrared
light so examination is convenient for the patient. With small pupils it is recommended to
use mydriatic drops. Pictor Retina Module has nine internal fixation targets for the patient to
fixate on during imaging. The middle fixation target provides a macula-centred image.
Pictor Anterior Module is intended for imaging the surface of the eye and surrounding areas.
Pictor Anterior Module has two light sources for imaging: white and cobalt blue. Cobalt blue
light enables capturing of fluorescent images. There are four focus windows to focus the
image.
NOTE!
The device may only be operated by persons who have been properly trained or
who have the required knowledge and experience to do so. The device may only be
used in accordance with its intended use.

14 Volk Pictor Prestige
Patient
Power button
Battery
charging
indicator LED
Navigation Roller
WLAN indicator
Back button
Battery level
Fixation target
Brightness level
Diopter value
Dual action shutter
Eject button

15 Volk Pictor Prestige
2.1 CONTROLS AND DISPLAY ICONS
Battery level, WLAN, patient, fixation target, brightness level and diopter value indicators
are shown on the camera display.
Pictor Camera is powered on and o by pressing the power button. Opening the camera
menu is done by pressing the Central Navigation Roller, which is also used for navigating in
the menu together with back button.
Images are captured by pressing the dual action shutter. If the performance of Pictor
Camera is abnormal, it can be forced to shut down by pressing the power and back buttons
simultaneously for seven seconds or longer.
The battery charging indicator LED is on when the camera is placed on Pictor Charging
Station for charging. There is also an LED indicator in Pictor Charging Station for indicating
spare battery charging.
Optics modules are detached by pressing the eject button on the top of the camera.
Back button
Open camera menu and navigatePower on
Forced shutdown
Shutter button for image capture
Press eject button Detach the module

16 Volk Pictor Prestige
3.1 PART LIST AND UNPACKING
The Volk Pictor Prestige sales package contains the
following items:
DEVICES
1. Camera
2. Retina Module
3. Anterior Module
ACCESSORIES
4. Charging Station
5. USB Cable
6. Power Supply
7. Eye Cup (2 pcs)
8. Battery (2 pcs)
9. USB Flash Drive
10. Cleaning Cloth
11. User Manual and other material
Open the sales packaging. Remove Volk Pictor Prestige and accessories from the sales
package and check that all parts are present and undamaged. Packaging materials should
be retained for future relocation or repair.
3.2 PREPARATIONS
Place Charging Station (4) next to the PC. Charging Station must be outside the patient
environment at a distance of least 1.5 meters from the patient. Connect the USB cable (5)
and the power supply cable (6) to Charging Station and to the PC and to the mains.
NOTE!
Position the power supply so that the mains plug is easily disconnected.
11
10
4
5
1
7
3
29
8
6
3. GETTING STARTED

17 Volk Pictor Prestige
Both Retina Module (2) and Anterior Module (3) are attached to Pictor Camera (1) by
connecting firmly the bayonet legs of the optics module to the bayonet holes of the
camera. Avoid touching the camera lens with bayonet legs in order to prevent scratches.
To detach the optics module, press the eject button on the top of the camera and take the
camera and optics module apart.
Place the eye cup (7) on the optics ring of Pictor Retina Module (2).
Install the battery (8) in Pictor Camera (1). Ensure that the camera is powered o when
placing the battery. Open the battery cover by sliding the battery cover release knob.
Insert the battery and press the cover firmly into place.
Place the camera on Charging Station (4) for charging. The camera will fit on Charging
Station when Retina Module (2) is attached. Place the handle of the camera carefully onto
the connector of Charging Station and move the front part of the optics module onto the
support. Excessive force should be avoided in order to prevent the camera and Charging
Station connectors from breaking. Pictor Camera is in power save mode while placed on
Pictor Charging Station and it is powered on when lifted from Pictor Charging Station.
The battery charging indicator LEDs on the handle of the camera blink when the battery is
being charged. When the battery is fully charged, all indicator LEDs are lit. When charging
for the first time, charge the battery fully. In daily use, charge the battery when the battery
level is low. Charging the battery at any level is not harmful for the battery.

18 Volk Pictor Prestige
Pictor Charging Station can be used as an external charger for the spare battery. Set the
spare battery (8) connectors to the Charging Station (4) connectors and put the spare
battery in place. The spare battery charging indicator LED on Charging Station blinks
when the battery is being charged, and is lit when the spare battery is fully charged.
Remove Pictor Camera from Charging Station by first lifting the optics module from the
support and then lifting carefully the handle of the camera from the Charging Station
connectors.
It is recommended to create a new study for each patient. A new study is created in
the
patients menu
by selecting the ‘New patient study’ item. It is also recommended
that image data storage is always erased between patients after the images have been
transferred to the PC.
If Pictor Camera is not used for more than two minutes, the device will go into power save
mode. It is powered on from power save mode by using any control button. Pictor Camera
will power o if not used for more than 10 minutes.
Pictor Camera has a WLAN module which enables wireless data transfer to the PC. The
separate PC software needs to be installed on the PC to allow wireless data transfer.
Instructions on the operation of wireless settings and PC software are in Appendix A.

19 Volk Pictor Prestige
4. FEATURES
When Pictor Camera is powered on, enter
the menu by either pressing or rotating
navigation roller.
To move between menu items, turn navigation
roller to the left or right.
Press navigation roller to select the item. Exit
the menu level by pressing the back button.
4.1 QUICK MENU
FOCUS
Change focus mode by selecting the focus item by pressing navigation
roller and choose either manual or autofocus. When focus mode is set to
manual, a diopter scale is shown on the screen and focus can be adjusted
from –20 to +20 diopters. Accept the selection by pressing navigation
roller. In autofocus mode, the camera finds correct focus automatically.
The autofocus range is from -15 to +10 diopters.
BRIGHTNESS
Imaging light brightness for Pictor Retina Module can be adjusted
from 0 to 10 and the default value is 5. It is also possible to reduce
the brightness setting below 1, to 0.8, 0.6, 0.4, and 0.2, if needed. To
adjust brightness, select the brightness item, choose a suitable value
by turning navigation roller and press navigation roller to set the value.
For Pictor Anterior Module, it is possible to change the imaging LED
between white and blue. When the desired LED is selected, the imaging
light brightness can be adjusted from 0 to 10 in a similar way as
described above.
SETTINGS
To change camera- or optics-specific settings, select the ‘
Settings’
item
by pressing navigation roller. Camera and optics-specific settings are
described in the following chapters.

20 Volk Pictor Prestige
PATIENTS
In the
patients menu
, it is possible to create a new study for images, to
preview captured images or to select four image sequence (only when
Volk Pictor Retina Module is used).
A new study is recommended for each patient. Select the ‘
New patient
study
’ item by pressing navigation roller to create a new study. An
anonymous study is created for the patient unless there is a patient list
where you can select the patient by using navigation roller. A patient
can also be deleted from the patient list.
Select ‘
Image browser’
item by pressing navigation roller to preview
captured images. To view the latest captured images in current
patient study, select ‘
IMG
’. If you want to preview images from other
studies, select the study/patient whose images you wish to preview.
Then select the desired image from the selected study by using the
navigation roller. When the image is shown, the image can be zoomed
by pressing the navigation roller. It is also possible to delete complete
studies or single images.
When imaging with Volk Pictor Retina Module, there is a possibility to
select the ‘
Four image sequence
’ item by pressing navigation roller.
By selecting four image sequence, a new patient study is created and
the camera will guide to take both macula and disc centered images
from patient’s right and left eyes. After each capture, the image can be
zoomed, retaken or you can choose to continue to the next sequence.
TARGET LEDS FOR PICTOR RETINA MODULE
Volk Pictor Retina Module has nine internal fixation targets for the pa-
tient to fixate on during imaging. The middle fixation target is on by
default and it provides a macula centred image. To change the fixation
target, select the target LEDs item, then turn navigation roller left or
right to choose the suitable LED and press navigation roller to set the
fixation target.
FOCUS WINDOWS FOR PICTOR ANTERIOR MODULE
Volk Pictor Anterior Module has four focus windows for the user to
focus the image on dierent areas during autofocus imaging. The right
focus window is selected by default and the image is focused to the
right side. To change the focus window, select focus window item, then
turn navigation roller left or right to choose a suitable area and press
navigation roller to set the focus window area.
Other manuals for PICTOR Prestige
1
Table of contents
Other Volk Medical Equipment manuals
Popular Medical Equipment manuals by other brands

Atmos
Atmos S 201 Thorax operating instructions

FujiFilm
FujiFilm VisualSonics Vevo MD Getting started guide

Guldmann
Guldmann Active Vest Kids manual

Ultrasound Technologies
Ultrasound Technologies PD1+ combi operating instructions

US endoscopy
US endoscopy Co2mpact Endoscopic Insufflator Operator's manual

human care
human care IV Pole user manual

GlobalMed
GlobalMed CVL ClearSteth user manual

Thuasne
Thuasne Schulter-Fix Basic Instructions for use

medi
medi Lumbamed basic Instructions for use

Elephant
Elephant SELF-HEALTH KIOSK user guide

de smit medical
de smit medical CUBESCAN BioCon-500 Quick reference guide

Medline
Medline HEMO-FORCE MDS600INT2 user manual