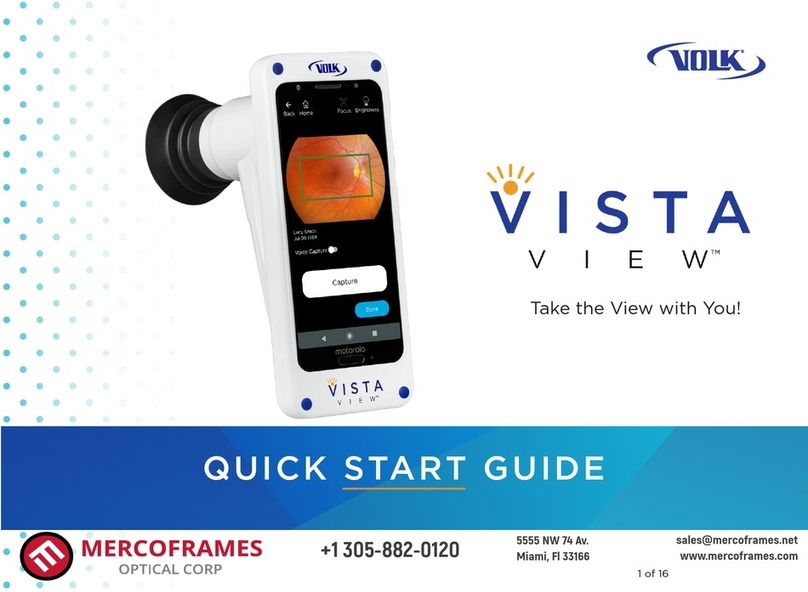
Volk VistaView User manual

Volk VistaView 1
Instructions for Use
Hand-Held Mydriatic Fundus Camera

Volk VistaView 2
Instructions for Use for VistaView Hand-Held Mydriatic Fundus Camera
Volk VistaView ™
Volk Optical Inc.
7893 Enterprise Drive
Mentor, OH 44060 USA
volk.com
volk@volk.com
Toll Free USA: +1 (800) 345-8655
Phone: +1 (440) 942-6161

Volk VistaView 3
1Product Description....................................................................
1.1 General.....................................................................................
1.2 Important Symbols...............................................................
1.3 Warnings and Cautions.......................................................
1.4 Contraindications of Use....................................................
1.5 Usage Environment Requirements..................................
1.6 Package Contents.................................................................
2Operating Instructions...............................................................
2.1 Unpacking the Product........................................................
2.2 Charging the Device..............................................................
2.3 Eye Cup Installation...............................................................
2.4 Powering On the Device.....................................................
2.5 Start Up Messages................................................................
2.6 Setting Up the VistaView App..........................................
2.7 Selecting a Patient................................................................
2.8 Capturing Images..................................................................
2.9 Reviewing Images and Adding Notes.............................
2.10 Creating a Report..................................................................
2.11 Managing Patients.................................................................
2.12 Exporting Patient Data.......................................................
2.13 Wireless Transfer of Patient Data.....................................
2.14 Wired Transfer to Windows PC........................................
2.15 Wired Transfer to Mac.........................................................
2.16 Updating the App.................................................................
2.17 Reinstalling the App.............................................................
3Maintenance...................................................................................
3.1 General Maintenance............................................................
3.2 Cleaning Instructions............................................................
Contents
5
5
5
6
8
8
9
10
10
10
10
11
11
13
15
17
20
21
22
23
25
30
33
36
37
38
38
38

Volk VistaView 4
4Technical Description................................................................
4.1 Specifications.........................................................................
4.2 Operating and Storage Environments...........................
4.3 Transportation Environment..............................................
4.4 Expected Service Life.........................................................
4.5 Disposing of the Device......................................................
5Compatibility and Compliance...............................................
5.1 Electromagnetic Compatibility.........................................
5.2 Compliance..............................................................................
6Troubleshooting............................................................................
6.1 Device Errors..........................................................................
6.2 Image Quality.........................................................................
6.3 System Messages..................................................................
7Warranty..........................................................................................
7.1 Warranty Terms......................................................................
8Support and Servicing...............................................................
39
39
40
40
40
40
41
41
47
48
48
49
50
53
53
54

Volk VistaView 5
1. Product Description
1.1 General
The Volk VistaView is a mydriatic fundus camera capable of taking
high quality images with large 55° field of view. The device uses
precision optics and on-board electronics coupled with an integrated
smartphone to capture images of the retina, macula, and optic disc.
The Volk VistaView requires the eye to be dilated and is intended to be
used by trained professionals in professional healthcare environments
only.
It is the responsibility of the health care provider to protect patient
health information and comply with local regulations regarding patient
health information. The images on the Volk VistaView may contain
identifiable patient information, and it is the responsibility of the health
care provider to ensure that data safeguards are implemented to
protect patient health information.
1.2 Important Symbols
DescriptionSymbol
The device has been tested and conforms to the
provisions noted within the 93/42/EEC Medical Device Directive.
Important operating instructions are included in this
Instructions for Use (IFU). Failure to follow these instructions could
place the patient or operator at risk.
Consult this IFU for important cautionary information. The user is
advised of important operating and maintenance instructions.
A part of the device which in normal use comes into physical contact
with the patient.
Mandatory to refer to this IFU.

Volk VistaView 6
The device requires dilation of the patient’s eye for imaging.
1.3 Warnings and Cautions
The Volk VistaView should be used in accordance with the instructions,
warnings, and caution statements presented in this IFU for the most
eective and safe results. Before using the device, you must familiarize
yourself with all warnings, cautions, and with all sections of this IFU.
Specific warnings and cautions are also found throughout this IFU.
The symbol is accompanied by the name and the address of the
manufacturer.
Dispose of device in the proper manner and ensure to comply with all
laws and regulations applicable to your area.
Authorized representative in the European Community accompanied
by the name and the contact information of the authorized
representative.
Fragile, handle with care.
Keep dry.
Symbols found on and in the smartphone are not included. Please visit
the smartphone manufacturer website for instructions on how to use
the smartphone.
Radio frequency radiation: Electromagnetic interference may occur in
the vicinity of equipment.
Caution: Federal law restricts this device to sale by or on the order of a
physician or licensed practitioner.
The Volk VistaView device is only intended to be used for mydriatic
imaging of the retina.

Volk VistaView 7
Do not connect the device to computers, laptops, power supplies, or
electrical equipment while the device is inside the patient environment
(within 4 feet of the patient).
Only use the accessories and parts provided or specified by Volk
Optical with this product.
The device cannot be used to capture any images of the fundus while
plugged into a computer or power supply.
All servicing and repair of this equipment is to be performed by Volk
Optical Inc. or by a center approved by Volk Optical Inc. only.
The device is not intended to be sterilized using autoclave, ETO gas, or
any other sterilization means beyond the cleaning and sanitation
procedures discussed in Section 3. Maintenance on page 37 of this IFU.
User should not change the smartphone’s Bluetooth settings. The
Bluetooth connection should be active and connected automatically.
This is needed for the device to functional properly and must be
connected at all times. If there is an issue with Bluetooth settings,
please reference Section 6.1 Device Errors on page 48 of this IFU.
Only use the power supply provided in the sales package. If you need
a replacement power supply, please contact Volk Optical Inc. or your
local distributor.
No unauthorized modification of the device is allowed.
Only use cleaning instructions provided in Section 3. Maintenance on
page 37 of this IFU.
To avoid the risk of cross-contamination and irritation, clean the
eye cup after each patient exam using the cleaning instructions
provided in Section 3. Maintenance on page 37 of this IFU.
Deleting the pre-installed Volk VistaView smartphone application will
delete all patient data and images because the application stores all
the data in the encrypted application memory. The user should never
delete or uninstall the smartphone application o of the VistaView.
It is the responsibility of the user to make sure that they are exporting,
saving, and creating regular backups of data to prevent loss of data.
It is the responsibility of the user to keep track of the data export
password to prevent loss of data.

Volk VistaView 8
Avoid subjecting the device to vibrations or electrical shocks.
Do not submerge the device in liquid or allow liquid to enter the
interior of the device.
Do not expose the device to rain or high moisture environments.
Avoid using the device in a dusty environment.
The light emitted from this instrument is potentially hazardous by way
of causing ocular damage if the exposure duration exceeds 7 hours and
7 minutes of continuous use at the maximum setting.
1.5 Usage Environment
Requirements
The Volk VistaView is intended to be used indoors in normal
temperature and humidity conditions by trained professionals in
professional healthcare environments only.
Volk VistaView is not suitable for use in the presence of flammable
anesthetics and/or a mixture of air, oxygen, or nitrous oxide; in oxygen
enriched environments; or in any other potentially explosive/flammable
environment.
1.4 Contraindications of Use
To avoid prolonged light exposure, the use of the device for ocular
examination should not be unnecessarily prolonged, and the brightness
setting should not exceed what is needed to provide clear visualization
and imaging of the target structures.
The Volk VistaView is classified as Group 1 light exposure limits based
on the standard ANSI Z80.36-2016. The Volk VistaView is classified as
Group 2 light exposure limits based on the standard ISO 15004-2:2007.
Avoid leaving the eye cup in direct sunlight, as there may be a risk of
skin burn.

Volk VistaView 9
Use only CE marked USB-C cables with this device.
Only connect the device to computers, laptops, and power supplies
outside the patient environment that have passed the safety standard
for information technology equipment IEC 60950-1, EN 60950-1, and
UL 60950-1 to ensure the safety of the USB-C electrical connection.
If operated within an electromagnetic environment, the device must be
used in accordance with instructions and guidelines set forth in Section
5. Compatibility and Compliance on page 41 of this IFU.
• Volk VistaView device
• Silicone eye cup
• Lens cap
• Volk VistaView IFU
• Volk VistaView Quick Start Guide
• Charger
• USB-C cable
• Volk VistaView case
1.6 Package Contents
The Volk VistaView product package includes the following items.

Volk VistaView 10
2.2 Charging the Device
Charge the device with the USB-C cable as shown, connecting one end
to the USB-C connector on the Volk VistaView and the other end to the
wall charger or USB-C on computer. When the device is fully charged,
disconnect the charger from the USB-C connector on the device.
2.3 Eye Cup Installation
Mount the eye cup onto the end of the VistaView as shown. Use of the
eye cup is optional as it helps block stray room light and stabilizes the
device during alignment.
2. Operating instructions
2.1 Unpacking the Product
Confirm that all purchased items are included in the packaged case,
and there is no visible damage to any of the parts.

Volk VistaView 11
2.4 Powering On the Device
Power on the device by pressing the power button as shown.
The default password is 1234. To change the password, navigate to
phone settings by swiping down from the top of the screen, clicking
the settings gear button, and searching for “screen lock”.
2.5 Start Up Messages
Once the device is on, navigate to the VistaView application installed
on the device. The home screen should be visible on the screen as
shown below.

Volk VistaView 12
Upon set up, the application will request user to carefully read and
understand the Volk Optical Inc. VistaView™ Terms and Conditions. The
user must select I Understand and Agree before proceeding.
After agreeing to the Volk Optical Inc. VistaView™ Terms and
Conditions, the user is informed of warnings associated with password
protected exports. Ensure that the password is stored in a safe location
and only share the password with trusted individuals.
Please note that it is the responsibility of the user to use the password
protected export in a manner compliant with their practices.
The user is prompted to input a password at least 8 characters long
with at least one of each of the following: upper-case letter, lower-case
letter, number, and special character.
Please note that it is the responsibility of the user to store the
password in a safe location to avoid loss of any data.

Volk VistaView 13
Once the application has started, navigate to the settings menu on
screen by selecting the Settings icon in the top right-hand corner, as
shown above. It is recommended that the user only change or update
the Clinic Settings, Image Settings, and Export Settings as needed.
The user can change Image Settings to export either JPEG or DICOM
compressed images and raw images.
If DICOM files are needed, choose the DICOM setting before imaging.
Images cannot be converted to DICOM after imaging.
The Raw Image Acquisition setting allows the user to automatically
export the raw images in a digital negative format (DNG) that
correspond to the compressed JPEG or DICOM images. If raw image
export is turned O, the user risks losing raw image traceability.
The user can change Export Settings to enable password protected
export. To change the password for password protected export, select
Change Password.
2.6 Setting Up the VistaView
App
Before starting an imaging session with a patient, the user must always
check that the device status is Active in the bottom left-hand corner
on the home screen. If the device status is Inactive, please refer to the
troubleshooting tips in Section 6.1 Device Errors on page 48 of this IFU.

Volk VistaView 14
The above screenshots indicate the default settings for Clinic Settings
and Image Settings.
The device has been calibrated and paired via Bluetooth during
manufacturing by Volk, and the user is advised not to change the
Calibrate or Bluetooth settings unless instructed to do so by Volk
Optical customer care. Please reference Section 6.1 Device Errors on
page 48 of this IFU for troubleshooting tips.
The Factory Reset option deletes all patient data from the application
memory and from the exported data folder. Transfer patient data to a
PC, as well as a safe location, before performing Factory Reset to avoid
loss of important data.
Input the old password, enter a new password, and confirm new
password.
It is the responsibility of the user to keep track of passwords to avoid
loss of data.

Volk VistaView 15
Setting Function
Add and edit clinic information to
organize information and data obtained
from multiple clinics.
Clinic Settings
Adjust JPEG quality, enable DICOM
export and enable Raw Image Acquisition.
Image Settings
Change password for password protected
export.
Export Settings
Manually check for application updates.Check for Updates
VistaView application version number.About
Link to online IFU, Terms and Conditions,
Third Party Licenses, and Volk customer
care contact information.
Support
Erase all patient information and images
from the application.
Clear Patient Data
Calibrate the VistaView imaging window.Calibrate
Pairing and connection to device.Bluetooth
Reset all data and settings.Factory Reset
It is the responsibility of the user to make sure they are exporting,
saving, and creating regular backups of data to prevent loss of data,
especially before a factory reset.
2.7 Selecting a Patient
Select Start Imaging on the home screen. Choose between New Patient
and Existing Patients depending on the patient being examined.
When imaging a new patient, enter the requested patient information.
Mandatory fields are First Name, Last Name, Patient ID, Gender, Date
of Birth, and “Imaged By” (name of operator/user). Each patient should
have a unique Patient ID.
Factory Reset resets all user settings, except Bluetooth and Calibration
Settings. Factory Reset can be used to reset the data export password
if it is lost or forgotten, but will lead to loss of all data.

Volk VistaView 16
Note: If no clinic has been set up, the device will prompt the user to
add a clinic. Select Yes to set up a clinic before proceeding or select
No to proceed without a clinic. Check Don’t Ask Me Again if you do
not want to see this message again. The user can still add a clinic by
accessing the clinic settings through the settings gear icon on the
home screen.
When imaging an existing patient, search the patient database and
select the patient to image.
Once all details have been entered, select Save and Begin Imaging to
proceed to the imaging screen.

Volk VistaView 17
2.8 Capturing Images
On the imaging screen, select desired settings. The focus mode and
brightness are user adjustable.
To adjust the focus mode, select the Focus icon then select Auto or
Manual mode.
To adjust the brightness, select the Brightness icon. Start with the
lowest brightness and increase as needed.
If needed, turn on the Voice Capture feature by activating the toggle
button, as shown. Simply say the word “Capture” to capture an image
once lined up and in focus.
To image a patient, the patient and examiner should be seated facing
each other. Use your dominant hand to hold the VistaView and use
your non-dominant hand to stabilize the device by positioning
the fingers just behind the eye cup.
Ask the patient to look over your shoulder or to fixate at a spot near
your ear. Approach the pupil, keeping the device vertical and in a
portrait orientation. Stabilize by resting fingers on patient’s forehead.

Volk VistaView 18
Slowly, move the device closer to the eye while keeping the pupil in the
center of the screen. Locate the retina, which can be seen as a small
reflection within the pupil. Keep the retina reflection in the middle of
the display screen and slowly advance the device closer to the pa-
tient’s eye.
The correct imaging distance is reached when the retina completely
fills the imaging window. Do not be afraid to gently push the device
closer to the patient - the eye cup is flexible and the device will not
touch the patient’s eye. If auto-focus is enabled, tap anywhere on the
screen to focus, except for a button. A green box will appear when the
retina is in focus.

Volk VistaView 19
A green box appears when in focus. If using manual focus, use the
buttons on the right-hand side of the screen to increase or decrease
the focus by one diopter increments.
To capture an image, ensure that the full field-of-view is illuminated
with no dark spots, reflections, or shaded regions appearing toward
the boundaries during preview. Press the Capture button on screen.
The device will flash and capture an image. If Voice Capture is on, take
an image by saying the word “Capture”.
Note: Inform the patient being imaged that they will see a bright
flash. This will help them to be prepared and attempt to avoid reflex
movements that may compromise the image.
An image preview will appear. The user can zoom into the image by
spreading two fingers to check for quality before accepting the image
and assigning it to the OD (right) eye, or the OS (left) eye, or to reject
the image. All options return the user to the imaging screen where
more images can be captured if desired.

Volk VistaView 20
On the patient exam review screen, the user can tap on the thumbnail
to enlarge the image. The user can also spread and pinch to zoom in
and out of the image.
Checking the red free box below the image adds a red free version of
the original retina image for ease of analysis if needed.
Tap the Delete icon to delete the image from the device.
2.9 Reviewing Images and
Adding Notes
Once all images have been captured, select Done on screen, which will
take the user to the patient exam review screen.
On the patient exam review screen, the user can add optional notes.
The user is responsible for the accuracy of any notes.
The content of exam notes represents the opinion of the person
who entered the notes, and does not reflect the opinions, views, or
recommendations of Volk Optical Inc.
The user will be required to fill “Noted By” (name of operator/user) if
notes are added. Then, select Generate Report or Home.
Report notes cannot be edited or deleted once saved to enhance
traceability. Additional notes can be added.
This manual suits for next models
1
Table of contents
Other Volk Medical Equipment manuals
Popular Medical Equipment manuals by other brands

CARING MILL
CARING MILL TENS 25517 instruction manual

Consort
Consort EHS1000 Series manual

Mortara Instrument
Mortara Instrument Quinton Q-Stress 4.0 Additional Information for the User's Guide and Service Manual

Norma
Norma Face Shield instructions

Synthes
Synthes UNIUM Instructions for use

Innovaid
Innovaid Treax Pads Instructions for use

Siemens
Siemens SOMATOM Sensation 16 Application guide

CA.MI
CA.MI NEW ASKIR 20 instruction manual

CEFLA
CEFLA GiANO HR installation instructions

Sartorius Stedim Biotech
Sartorius Stedim Biotech QuickSeal Cutter operating manual

Interacoustics
Interacoustics Titan ABRIS quick guide

Delsys
Delsys Trigno Avanti FSR Adapter user guide