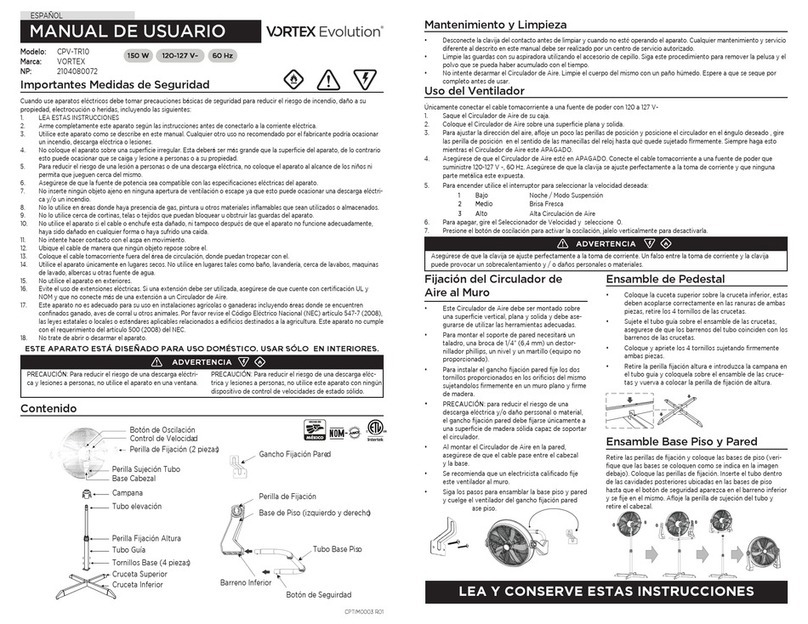
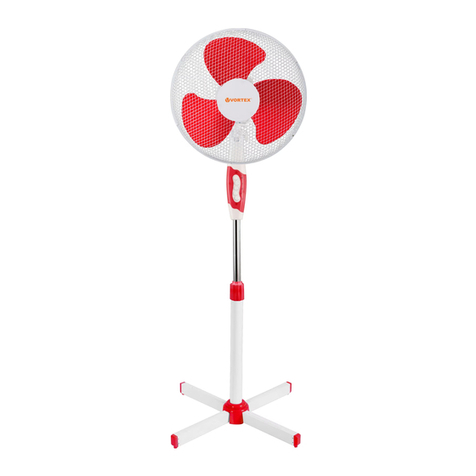
Vortex VO4229 User manual

Ventilator tip turn VO4229
1
VO4229
Ventilator tip turn

Ventilator tip turn VO4229
1
1. Simboluri de averzare
Ciți instrucțiunile
Atenție
Clasa II de electrosecuritate
2. Instrucțiuni generale de siguranță
Ciți cu atenție acest manual de instrucțiuni înainte de a uliza aparatul și salvați-l pentru referințe viitoare
și dacă este necesar, transmiteți manualul de instrucțiuni către o terță parte.
ATENȚIE: Când ulizați un aparat electric, trebuie întotdeauna respectate măsurile de siguranță pentru a
reduce riscul de incendiu, electrocutare și vătămări personale.
1) Generale
Vericați dacă specicațiile electrice ale acestui aparat sunt compabile cu instalația dvs.
Acest aparat poate utlizat de către copiii cu vârstă de peste 8 ani şi de către persoane cu capacităţi zice,
senzoriale sau mentale reduse sau lipsite de experienţă şi de cunoșnţe, dacă acestea au fost supravegheate
sau pregăe în vederea utlizării aparatului în condiţii de siguranţă şi dacă înţeleg riscurile asociate.
Copiii nu se vor juca cu aparatul.
Curățarea și întreținerea aparatului nu va realizată de către copii fără a supravegheați.
Pentru a vă proteja împotriva pericolului de electrocutare, nu îl scufundați în apă sau în alte lichide. Nu
ulizați în apropierea apei.
Acest apparat este desnat exclusive ulizării interioare.
Nu plasați alte obiecte pe carcasa unității aparatului.
Nu scoateți aparatului din priză dacă aveți mâinile umede, deoarece există riscul de electrocutare.
Nu transportați aparatul în mpul funcționării.
Puneți-l într-o zonă sigură și nivelată. A nu se lăsa la îndemâna copiilor pentru a preveni orice risc de
accident.
Ulizarea neautorizată și modicările tehnice aduse aparatului, pot conduce la pericol pentru viață și
sănătate.
Nu împingeți niciun obiect în aparat. Nu dezasamblați aparatul.
2) Siguranță împotriva electrocutării
În cazul în care cablul de alimentare este deteriorat, acesta trebuie înlocuit de producător, agentul său de
service sau de persoane calicate în mod similar pentru a evita producerea unui accident.
3) Instalare / Asamblare / Componente / Machete
PORNIRE ȘI SPECIFICAȚII

Ventilator tip turn VO4229
2
a- Panou de control b- Mâner (în spatele aparatului) c- Fantă de admisie aer d- Suport
e- Fantă de evacuare a aerului f- Display j- Telecomandă
Asamblare:
Scoateți venlatorul din pachet și vericați dispozivul, precum și sfera de ulizare menționată mai sus. Vă
rugăm să contactați vânzătorul dacă lipsește o piesă sau a fost deteriorată.
Mai întâi asamblați piedestalul. Apoi montați-l pe venlator. Asigurați-vă că dirijați cablul prin strângere și nu
deteriorați cablul în acest proces.
Fixați piedestalul de venlator folosind șuruburile de montare.
Suport:
Suportul trebuie montat pe venlator înainte de ulizare. Suportul este furnizat în două secțiuni: superior și
inferior. Secțiunea inferioară include un ghid pentru cablul de alimentare.

Ventilator tip turn VO4229
3
Cablu de alimentare Șuruburi de asamblare
Așezați un prosop sau o pernă moale pentru protecție și poziționați venlatorul pe suprafața superioară,
asel încât baza să e vizibilă. Un asistent este de ajutor pentru a menține venlatorul nemișcat în mp
ce suportul este montat.
Așezați jumătatea superioară a suportului pe baza venlatorului. Aceasta se va alinia cu trei dintre stâlpii
de xare de la bază.
Puneți jumătatea inferioară a bazei peste jumătatea superioară,
asigurându-vă că, cablul de alimentare nu este prins sub suport.
Folosiți cele patru șuruburi lungi pentru a xa suportul de
venlator, apoi cele două șuruburi scurte pentru a xa cele două
jumătăți ale suportului.
Introduceți cablul de alimentare, asel încât să e ținut aproape
de partea inferioară și să poată ieși prin fanta suportului, așa
cum este arătat.

Ventilator tip turn VO4229
4
TELECOMANDĂ
Montarea bateriei telecomenzii:
Apăsați. În mp ce țineți apăsat, deschideți ușa pentru introducerea bateriei.
a
b
Montați bateria cu marcajul + în sus. Când înlocuiți bateria, ulizați doar același p de baterie CR2025.
a
b
Eliminarea bateriei:
Aruncați bateriile uzate conform reglementărilor de reciclare din zona dvs. NU scurtcircuitați bateriile și nu le
aruncați în apă, gunoi sau într-un incendiu.
6. Instrucțiuni de ulizare
1. Poziționați venlatorul pe o suprafață uscată.
Conectați cablul la o priză de curent alternav 220-240V.
2. Porniți venlatorul apăsând butonul de pornire de pe telecomandă sau de pe panoul de control.
Indicatorul LED corespunzător din partea de sus a venlatorului se va aprinde. Opriți venlatorul apăsând din
nou butonul de pornire.
3. Viteza este reglată prin apăsarea repetată a butonului Viteză ’’Speed’’, de pe telecomandă sau de pe
panoul de control. Indicatorul LED corespunzător din partea de sus a venlatorului se va aprinde.
4. Telecomanda:
Buton Funcție
PORNIRE Pornește sau oprește aparatul
VITEZĂ Schimbă nivelul vitezei de
venlare -I-II-III
MOD Schimbă modul de venlare
TEMPORIZATOR Pornește funcția de
temporizare: 0.5-7.5h
OSCILAȚII Pornește sau oprește
oscilațiile

Ventilator tip turn VO4229
5
AJUSTARE
Control viteză
Viteza este ajustată apăsând în mod repetat butonul Viteză ’’Speed’’, de pe telecomandă sau de pe panoul
de control. Indicatorul LED corespunzător din partea de sus a venlatorului se va aprinde.
Control oscilații
Pentru a porni și a opri oscilația corpului venlatorului, apăsați butonul OSC de pe telecomandă sau de pe
panoul de control.
Indicatorul LED corespunzător din partea de sus a venlatorului se va aprinde.
Control temporizare
Pentru a porni și a opri cronometrul, apăsați butonul Temporizare ’’Timer’’ de pe telecomandă sau panoul
de control pentru a parcurge setările cronometrului (de la 0,5 ore la 7,5 ore)
Indicatorul LED corespunzător din partea din față a venlatorului se va aprinde.
Controlul modului natural/baleere
Pentru o mișcare natural de baleere, apăsați o dată butonul Mod ’’Mode’’. Aceasta va varia automat viteza
venlatorului într-un mod mai rapid sau mai lent.
Apăsați din nou butonul Mod ’’Mode’’ pentru a acva controlul somnului. Această funcție încenește viteza
venlatorului Apăsați butonul Mod ’’Mode’’ de 3 ori consecuve pentru a opri funcțiile.
Indicatorul LED corespunzător din partea de sus a venlatorului se va aprinde
7. Întreținere / Curățare
Urmați aceste instrucțiuni pentru îngrijirea corectă și sigură a venlatorului. Luați aminte:
• Deconectați întotdeauna venlatorul înainte de curățare sau asamblare.
• Nu lăsați apa să se scurgă pe sau în carcasa motorului venlatorului.
• Asigurați-vă că folosiți o cârpă moale, umezită cu o soluție pe bază de detergent neutru.
• Nu folosiți niciuna dintre următoarele elemente ca un produs de curățare: petrol, diluant sau benzină.
Caracterisci:
Design avansat, modern și durabil
Motor cu eciență ridicată, zgomot
redus, ux puternic de aer
Bază detașabilă
3 trepte de viteză
Timer 7,5 ore
Mișcare oscilatorie
Telecomandă
Specicații tehnice:
Tensiune alimentare: 220V~/50Hz
Putere: 45W
Nivel de zgomot (dB(A)): ≤60
Viteză rotație: 900-1300 (±50) rpm
Temperatură maximă: <90°C
Înălțime: 81,5 cm
Lungime cablu alimentare: 1,5m
Clasă protecție: II
G.B./G.N. (kg): 2,6/2,2
Dimensiuni (mm): 175x170x815
Fabricat în China

Ventilator tip turn VO4229
6
AVERTISMENT: Acest aparat poate fi utilizat de către copiii cu vârstă
de peste 8 ani și de către persoane cu capacităţi fizice, senzoriale
sau mentale reduse sau lipsite de experienţă și de cunoștinţe, dacă
acestea au fost supravegheate sau pregătite în vederea utilizării
aparatului în condiţii de siguranţă și dacă înţeleg riscurile asociate. Copiii nu se
vor juca cu aparatul. Curăţarea și întreţinerea nu vor fi realizate de către copii
nesupravegheaţi.
RECICLAREA ECHIPAMENTELOR ELECTRICE ȘI ELECTRONICE
UZATE
Acest simbol prezent pe produs sau pe ambalaj semnifică faptul că
produsul respectiv nu trebuie tratat ca un deșeu menajer obișnuit.
Nu aruncați aparatul la gunoiul menajer la sfârșitul duratei de
funcționare, ci duceți-l la un centru de colectare autorizat pentru
reciclare. În acest fel veți ajuta la protejarea mediului înconjurător și
veți putea împiedica eventualele consecințte negative pe care le-ar avea asupra
mediului și sănătății umane.
Pentru a afla adresa celui mai apropiat centru de colectare :
Contactați autoritățile locale;
Accesați pagina de internet: www.mmediu.ro
Solicitați informații suplimentare la magazinul de unde ați achiziționat produsul
Acest aparat este conform cu standardele Europene de securitate și
conformitate electromagnetică
Acest produs nu conține materiale periculoase pentru mediul
înconjurător (plumb, mercur, cadmiu, crom hexavalent și agenți
inflamabili bromurați: PBB și PBDE).

Ventilator tip turn VO4229
7
Complet Electro Serv S.A.
•Voluntari- Șos. București Nord, 10 Global
City Business Park, Corp 011, et. 10
•Telefon relatii clienți: 0374168303
•email: office@ces.nt.ro
DECLARATIE UE DE CONFORMITATE N r. 2 0 20/TF997
Noi, Complet Electro Serv S.A., Voluntari- Șos. București Nord, 10 Global City
Business Park, Corp 011, et. 10, in calitate de producator al brandului Vortex, marca
inregistrata numarul 154837, declaram pe propria raspundere ca obiectul declarației:
Tip Produs
Brand
Model
Ventilator turn
Vortex
VO4229
descris mai sus, este în conformitate cu legislația relevantă de armonizare a Uniunii Europene:
2014/30/EU – EMC
2014/35/EU - LVD
2011/65/EU – RoHS si amendamentul 2015/863/EU
si standardele Europene:
Categorie
Tip Produs
Standarde applicate
EMC
Ventilator turn
EN 55014-1:2017
EN 55014-2:2015
EN 61000-3-2:2014
EN 61000-3-3:2013
LVD
Ventilator turn
EN 60335-1:2012 + A11:2014 + A13:2017
EN 60335-2-80:2003 + A1:2004 + A2:2009
EN 62233:2008
RohS
Ventilator turn
IEC 62321
Aparatul poarta marcajul CE respectand toate standardele UE.
Prezenta declaratie a fost completata de catre Producator in baza rapoartelor de testare.
Locul si data emiterii declaratiei Bucuresti, 03-02-2020
Cristian Camara
Director Exevutiv
Bucuresti
03-02-2020

Tower Fan VO4229
8
VO4229
Tower fan

Tower Fan VO4229
1
1. Warning symbols
Read the instrucons
Cauon
Class II Equipment
2. General Safety Instrucons
Read this instrucon manual thoroughly before using the appliance and save it for future reference and if
necessary pass the instrucon manual on to a third party.
WARNING: When using an electrical appliance, basic safety precauons should always be followed to reduce
the risk of re, electrical shock and personal injury.
1) General
Check if the electrical specicaons of this appliance are compable with your installaon.
This appliance can be used by children aged from 8 years and above and persons with reduced physical,
sensory or mental capabilies or lack of experience and knowledge if they have been given supervision or
instrucon concerning use of the appliance in a safe way and understand the hazards involved.
Children shall not play with the appliance.
Cleaning and user maintenance shall not be made by children without supervision
To protect against electrical hazard, do not immerse in water or other liquids. Do not use near water.
This appliance is for indoor use only.
Do not place objects on top of the unit.
Do not unplug the unit if your hands are wet, electrical shock could occur.
Do not carry the appliance while it is operang.
Place it in a secure and level area. Keep out of reach of children to prevent any accident.
Unauthorized use and technical modicaons to the appliance can lead to danger to life and health.
Do not push any object into the appliance. Do not disassemble the appliance.
2) Electrical safety
If the supply cord is damaged, it must be replaced by the manufacturer, its service agent or similarly quali-
ed persons in order to avoid a hazard.
3) Installaon / Assembly / Parts Idencaon / Drawings :
CONTROLS AND FEATURES.

Tower Fan VO4229
2
a-Control panel b.-Handle (behind unit) c-.Air inlet d.-Stand e.-Air outlet
f- Display j- REMOTE CONTROL
Assembly:
Take the fan out of the package and check the device as well as the scope of de- livery menoned above.
Please contact the vendor if any part is missing or has been damaged.
First assemble the pedestal. Then mount the pedestal to the fan. Make sure that you route the cable
through the strain-relief, ghten it and do not damage the cable in the process.
Then x the pedestal to the fan using the mounng screws
.

Tower Fan VO4229
3
Stand:
The stand must be ed to the fan before use.The stand is supplied in two secons, upper and lower. The
lower secon includes a guide for the power cable.
Lay down a so towel or cushion for protecon and stand the fan on its top surface so that the base is visi-
ble. An assistant is helpful to hold the fan steady while the base is being ed.
Place the upper half of the stand onto the base of the fan. This will align with three of the xing pillars on
the base.
Place the lower half of the base over the upper half, ensuring that the power cable is not trapped under the
stand.
Use the four long screws to secure the stand to the fan, then the two
short screws to x the two halves of the stand together.
Tuck the power cord into the guide so that it is held close to the un-
derside and exits through the slot in the side of the stand as shown.

Tower Fan VO4229
4
REMOTE CONTROL
Fing the remote control baery:
Press the catch across.While holding the catch, open the baery door.
a
b
Fit the baery with the + marking upwards. When replacing the baery,
use only the same CR2025 type.
a
b
Baery disposal:
Dispose of used baeries with regard to the recycling regulaons in your area. Do NOT short circuit baeries
or throw them into water, the general rubbish or in a re.
5. Operang instrucons
1. Set the fan on a dry level surface.
Plug the cord into a suitable 220-240V AC outlet.
2. Turn the fan on by pressing the Power buon on the remote control
or on the control panel. The appropriate LED indicator on the top of the fan
will illuminate. Turn the fan O by pressing the Power buon again.
3. The speed is adjusted by repeatedly pressing the Speed buon on the remote control
or on the control panel. The appropriate LED indicator on the top of the fan will illuminate.
4. remote control:
Key Funcon
POWER Switches the device on
or o
SPEED Changes the speed level of
the fan 0-I-II-III
MODE Changes the mode of
the fan
TIMER Turns the mer funcon on.
0.5-7.5h
OSCILLATIONS Turns the oscillaon on or o

Tower Fan VO4229
5
ADJUSTMENT
Speed control
The speed is adjusted by repeatedly pressing the Speed buon on the remote control or on the control pan-
el. The appropriate LED indicator on the top of the fan will illuminate.
oscillaon control
To start and stop oscillaon of the fan body, push the OSC buon on the remote control or on the control
panel.
The appropriate LED indicator on the top of the fan will illuminate.
Timer control
To start and stop the mer, press the TIMER buon on the remote control or control panel to cycle through
the mer (from 0.5 hour to 7.5 hours, in 0.5 hour increments) sengs.
The appropriate LED indicator on the front of the fan will illuminate.
Natural / Sleep breeze control
For a natural breeze movement, press the MODE buon once. This will automacally vary the fan speeds
faster and slower.
Press the MODE buon again to acvate the sleep control. This funcon slows the fan speed down Push the
MODE buon a 3d me to switch o the natural and sleep funcons.
The appropriate LED indicator on the top of the fan will illuminate
7. Maintenance / Cleaning
Follow these instrucons to correctly and safely care for your fan. Please remember:
• Always unplug the fan before cleaning or assembly.
• Do not allow water to drip on or into the fan motor housing.
• Be sure to use a so cloth, moistened with a mild soap soluon.
• Do not use any of the following as a cleaner, petrol, thinner or benzine.
Features:
Advance design, fashion and
durable
Excellent eecve motor, low noise,
strong wind
Separate base
3 Speed control
7,5 h mer
Oscillaon movement
Remote control
Basic specicaons:
Voltage: 220V~/50Hz
Power: 45W
Noise level (dB(A)): ≤60
Speed: 900-1300 (±50) rpm
Maximum temperature: <90°C
Height: 81.5 cm
Power cord length: 1.5m
Protecon class: II
GW/NW (kg): 2.6/2.2
Measurement (mm): 175x170x815
Made in China

Tower Fan VO4229
6

Tower Fan VO4229
7
PRODUCĂTOR:
S.C. COMPLET ELECTRO SERV S.A.
Voluntari- Șos. Bucureș Nord, 10
Global City Business Park, Corp 011, et. 10
Telefon relai clienți: 0374168303
e-mail: relaiclien@ces.nt.ro
România
Table of contents
Languages:
Other Vortex Fan manuals
Popular Fan manuals by other brands

Bryant
Bryant ERVBBSVB Product data

RenewAire
RenewAire DN-Series Installation, operation and maintenance manual

dreo
dreo DR-HTF008 user manual

RenewAire
RenewAire BR70 SERIES Guide specifications

Fanimation
Fanimation Air Shadow FP820 Series Specification sheet

Fanimation
Fanimation Windpointe MA7300 Specification sheet

Nicotra Gebhardt
Nicotra Gebhardt EC FAN RDP operating manual

Honeywell
Honeywell HS-2007 Series owner's manual

MECHLINE
MECHLINE HYGENIKX+ Installation & operating manual

Carrier
Carrier 42EP Installation, operation and maintenance instructions

Honeywell
Honeywell HSF1630E Operation instructions

ALPFA FAN
ALPFA FAN F180 instruction manual