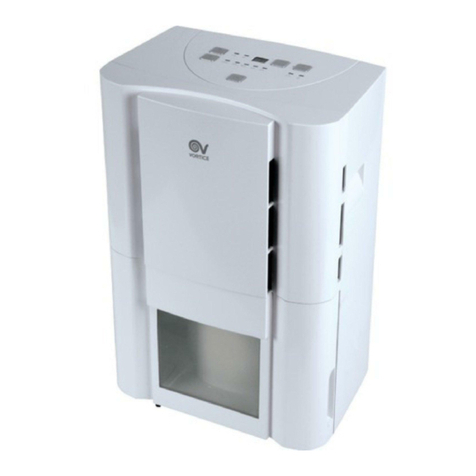
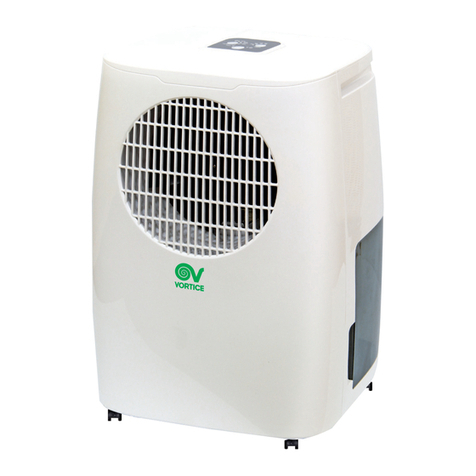
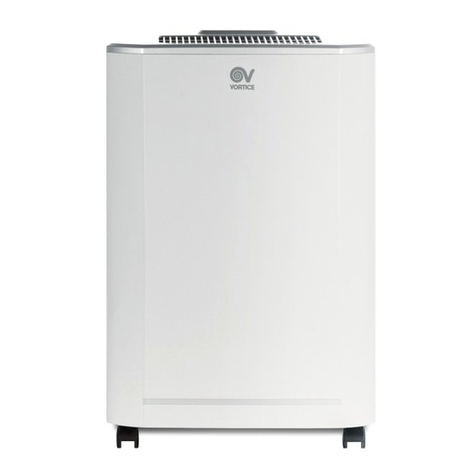
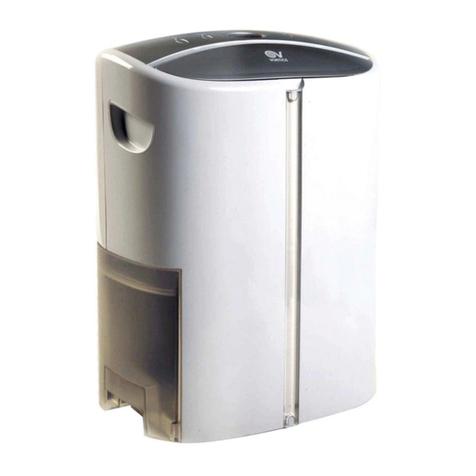
Vortice DEUMIDO M20 User manual

Manual de instrucciones
Instruction booklet
DEUMIDO
M20
COD. 5.471.084.707 15/06/2017

2
Antes de instalar y conectar el producto,
leer atentamente estas instrucciones.
Vortice no es responsable de los
eventuales daños a personas o cosas
causados por la falta de aplicación de
los contenidos de este folleto.
Para asegurar la duración y la eficiencia
eléctrica y mecánica del producto, es
necesario seguir todas las
instrucciones. Conservar siempre este
folleto de instrucciones.
ES
3
4
6
7
8
10
11
Índice
Descripción y operación. . . . . . . . . . . .
Seguridad . . . . . . . . . . . . . . . . . . . . . . .
Componentes . . . . . . . . . . . . . . . . . . . .
Panel de control . . . . . . . . . . . . . . . . . .
Operación . . . . . . . . . . . . . . . . . . . . . . .
Mantenimiento y Limpieza . . . . . . . . . .
Resolución de problemas . . . . . . . . . . .
ead these instructions carefully before
installing and connecting this appliance.
Vortice cannot assume any
responsibility for damage to property or
personal injury resulting from failure to
abide by the instructions given in this
instruction booklet. Following these
instructions will ensure a long working
life and overall electrical and
mechanical reliability. Keep this
instruction booklet in a safe place
for reference purposes.
EN
12
13
15
16
17
19
20
Table of contents
Description and operation . . . . . . . . .
Safety . . . . . . . . . . . . . . . . . . . . . . . . .
Components . . . . . . . . . . . . . . . . . . . .
Control panel . . . . . . . . . . . . . . . . . . . .
Operation . . . . . . . . . . . . . . . . . . . . . .
Maintenance and cleaning . . . . . . . .
Troubleshooting . . . . . . . . . . . . . . . .

Descripcion y operación
Este producto es un deshumidificador.
Controla la humedad relativa pasando el aire
a través de la unidad, forzando el exceso de
humedad a condensarse sobre los
elementos de enfriamiento. El contacto con
la superficie fría hace que la humedad en el
aire se condense. Luego, esta agua
condensada se drena, en forma segura, al
tanque de agua. Luego, el aire seco pasa a
través del condensador donde es levemente
temperado y entra de nuevo al recinto a una
temperatura ligeramente elevada.
El exceso de humedad viajará a través de su
casa, de la misma forma en que los olores
de la cocina se esparcen en el aire a cada
aposento de la casa. Por esta razón, el
deshumidicador debe ser posicionado de manera que pueda extraer esta humedad
del aire hacia si desde todo el recinto. Alternativamente, si tiene un problema serio en
un área, usted puede empezar posicionando el deshumidicador cerca a esta área, y
luego, moverlo a un punto más central.
Al posicionar el deshumidicador, asegúrese de que esté colocado sobre una
supercie nivelada y que haya un mínimo de 10 cm (4") de espacio a cada lado de la
unidad para permitir la eciencia en el ujo de aire. El deshumidicador es ajustado
con ruedas para movilidad extra. Si usted mueve la unidad, ésta debe primero ser
desenchufada y el tanque de agua vaciado. No recomendamos el uso de extensión
eléctrica, de manera que la unidad esté lo sucientemente cerca de un toma-corriente
jo principal. Si fuera necesario usar una extensión, por favor, asegúrese de que el
diámetro de los cables sea de al menos 1 mm. Cuando el deshumidicador esté en
operación, las puertas y ventanas al exterior deben ser cerradas cuando sea necesario
para un uso más eciente.
3
ESPAÑOL
11
SALIDA
DE AIRE
ALETA
PALAS
MOTOR
COMPRESOR
ILTRO
DE AIRE
ENTRADA
DE AIRE
CONDENSADOR
EVAPORADOR
DEPÓSITO
DE AGUA

Securidad
• Asegúrese de que haya al menos 300 mm (1’) entre los lados del aparato y
cualquier material inamable o fuente de calor.
• No es adecuado para uso en gabinetes, botes, tráileres o lugares similares.
• La fuente de energía principal debe cumplir con la especicación mostrada en
la placa de proporciones que está detrás la unidad.
• Evite los circuitos de sobrecarga que son causados por el uso amperios demás
de lo que su cableado puede soportar. La sobrecarga de cables eléctricos
puede causar
calor excesivo y fuegos eléctricos.
• Evite sobre-torcer, evite el exceso de enrollado, halar el cable de la energía,
nunca use nylon o cables de hierro para amarrar los cordones de la energía.
• No deje el aparato enchufado, desenchufe del toma cuando no esté en uso y
antes del mantenimiento. Conecte solo al toma de tierra.
• Si el cordón de aprovisionamiento de energía es dañado, debe ser reemplazado
por un representante de servicio autorizado, o persona similar capacitada para
evitar el peligro.
• Nunca use el toma para arrancar o apagar la unidad. Use siempre el switch en
el panel de control.
• Antes de mover la unidad, apague todos los controles, luego desconecte y
vacíe el tanque del agua.
• No use rociadores para insectos o limpiadores en la unidad.
• Nunca rocíe o vierta agua sobre la unidad.
• Este aparato puede ser usado por niños desde 8 años en adelante, personas
con poco conocimiento o sus capacidades físicas, sensoriales o mentales
reducidas solo si se les da supervisión e instrucción relacionadas al aparato en
una forma segura y que entiendan los peligros que involucra. Los niños no
deben jugar con el aparato. La limpieza y el mantenimiento no deben ser
realizadas por niños sin supervisión.
•¡ESTÉ ALE TA! Vea lo que esté haciendo y use el sentido común. No use el
aparato cuando esté cansado, distraído, o bajo la inuencia de drogas, alcohol
o medicamentos. Estos causan reducción de control.
• Solo un profesional autorizado debe desmantelar o modicar el aparato.
4
ESPAÑOL
!
Atenci n:
este simbolo indica precauciones que sirven
para evitar daños al usuario

• Mantenga la unidad siempre en posición vertical y sobre una supercie rme
todo el tiempo.
• No la coloque sobre supercies suaves.
• No cubra las parrillas de entrada o salida del aparato.
• Es solo para uso en interiores.
• Deje la unidad ‘en reposo’ por una hora antes de conectar a la fuente principal
después de haber sido transportada o después de haber sido recostada (por
ejemplo, después de una limpieza).
• No obstruya los tomas de aire ni los escapes.
• Evite salpicaduras sobre el aparato.
• Examine el cordón cuidadosamente. Asegúrese de que no esté perforado ni
roído. Inspeccione el enchufe para asegurar que ‘los dientes’ estén jos y el
caucho alrededor no esté resquebrajado. Evite pasar los cordones debajo de
alfombras y otras condiciones que no le permitan chequear regularmente su
condición.
• Sugiera que se envíe el aparato para mantenimiento profesional
periódicamente.
NOTA: para prevenir la formación de hielo en el evaporador, no utilizar el
producto en ambientes cuya temperatura no supere los 5 °C.
5
Advertencia:
este simbolo indica precauciones que sirven
para evitar daños en el producto
!
ESPAÑOL
2
2
Exposed to the
weather outdoors
Near water If the power cable
wires are frayed or cut
Where small children
may be left
unattended
If an extension lead
may become
overloaded
Were the power cable
may be damaged
On a slope or uneven
surface
Where there is risk
of water falling on
the unit
Where it may be
damaged by
chemicals
Where there is a risk
of interference by
foreign objects
This product is not
made for DIY repair
If there is a risk
of water falling on
the unit
Expuesto al
clima exterior Cerca del
agua Cables de
energía rasgados Niños pequeños
dejados
sin atender
Si una regleta
pueda ser
recargada
Donde un cable
pueda ser
dañado
Sobre una pendlente
o superficie
dispareja
Donde hay riesgo
que caiga agua
sobre la unidad
Donde pueda
ser dañado
por quím
Donde hay riesgo
de interferencia
por obj. extraño
Este product no
debe ser raparado
por cualquiera
Si hay riesgo que
caiga agua sobre
la unidad

Componentes
6
ESPAÑOL
33
1
2
3
4
5
Atrás (fig.4)
1. Aleta
2. Manija
3. iltro aria (entrada)
4. Pantalle de nivel de
agua
5. Depósito de agua
Frente (fig.3)
1. Panel de control
2. Luz ambiental
3. Panel frontal
4. Rueda giratoria
5. Panel trasero
55
44
1
2
3
4
5
Accesorios (fig.5)
1. iltro de carbón
activo.

7
1. Botón de ajuste de la humedad
2. Indicador de modo de trabajo
(trabajo continuo, humedad 40%,
50%, 60%, 70%)
3. Despliegue de humedad / temperat.
4. Indicador de oper. del temporizador
5. Botón de despliegue de la temperat.
6. Ionizador o indicador TiO2 (función
opcional dependiendo del modelo
que usted compró)
7. Indicador de secador
8. Indicador de secado
Panel de control
ESPAÑOL
66
9. Indicador de ventilación alta
10.Botón de velocidad / ventilación
11.Indicador de ventilación baja
12.Indicador de energía
13.ON/O (botón de encendido)
14.Indicador de “Tanque lleno”
15.Botón de temporizador
16.Botón ionizador o TiO2 (esta
función es opcional dependiendo
del modelo que usted compró)

8
Operación
1. Enchufe la unidad en el toma de la corriente principal. (Por favor, reérase a
la etiqueta de datos en la parte de atrás de la unidad para un voltaje /
frequencia correctos.)
2. Presione ON/O para encender la unidad. El compresor empezará a
trabajar.
3. Presione botón de ajuste de humedad para ajustar el modelo de trabajo
que usted necesita: trabajo continuo, humedad 40%, 50%, 60% ó 70%. El
indicador relativo se encenderá.
4. Presione botón velocidad / ventilación para ajustar la velocidad de la
ventilación, alta o baja. El indicador relativo se encenderá.
5. Presione el botón TIMER para ajustar la hora de operación que usted necesita
(1~24 horas). La ventana mostrará la(s) hora(s) que usted ajustó en lo que
presiona el botón TIMER, después de liberarlo por 8 segundos, más o menos,
la pantalla regresará a la humedad del aposento. En lo que se ha ajustado el
tiempo, el compresor dejará de trabajar automáticamente.
6. Presionado el botón ”TEMP”, la pantalla mostrará la temperatura del
aposento; después de liberar el botón por alrededor de 8 segundos, la
pantalla regresará a la humedad de la habitación.
7. La función „Secador de ropa‟es turbo ventilación para secar la humedad
en el aire continuamente, por lo que puede ayudar a secar la ropa.
8. Se recomienda que las ventanas y puertas estén cerradas para mayor
eciencia.
9. Para apagar la unidad, presione el botón ON/O de nuevo.
10. unción de pre-ajuste: Presionando el botón TIMER, pero sin encender las
otras funciones (incluyendo el botón ON/O ), usted puede PRE-AJUSTAR el
tiempo para que la máquina trabaje. Por ejemplo, si usted presiona el
temporizador a '2', la unidad trabajará automáticamente después de 2 horas.
11.Por favor note que el indicador en el plato frontal se encenderá en 3 diferentes
colores para reejar el nivel de humedad
ambiente. A través de esto, el usuario puede
inmediatamente entender cuál es la condición
de la humedad ambiente:
ESPAÑOL
77
Luz azul = humedad del aposento >70%
Luz verde = humedad del aposento > 50 ÷ 70%
Luz roja = humed. del aposento < 50%
Parpadeo de luz roja = alarma de agua llena
9
Drenaje
Mientras que el tanque de agua esté lleno, el compresor se detendrá para auto-
protección y el ‘indicador tanque lleno’ (Water ull) se pondrá en rojo. Para
mover el tanque de agua, hálelo completamente de la unidad. Después de vaciar
el tanque de agua, colóquelo en el espacio. Asegúrese de que esté
apropiadamente posicionado de manera que la señal 'water full' aparezca y su
deshumidicador esté en operación.
NOTA: en caso de que el tanque de agua no haya sido bien posicionado, el
indicador ‘water full’ (tanque lleno) se pondrá rojo.
Cuando el deshumidicador sea operado a niveles muy altos de humedad, el
tanque de agua requerirá drenaje más frecuente. En esta situación, podría ser
más conveniente ajustar la unidad para el drenaje continuo con el siguiente
procedimiento:
1. Hale el tanque de agua. (g. 8)
2. Conecte el hueco del drenaje al tubo de agua de menor diámetro: 11mm. (El tubo
de agua no es suplido con la unidad).
3. Asegúrese de que el agua drenará siempre
libremente y que el tubo permanecerá en el lugar
correcto.
NOTA: en condiciones de clima muy frío, se deberá
tomar precauciones para evitar que el tubo de agua
se congele.
4. Ponga el tanque de agua de nuevo en su lugar
(g.9)
ESPAÑOL
88
99

10
Mantenimiento y limpieza
NOTA: Desconecte siempre la unidad de la fuente de corriente eléctrica principal
antes de llevar a cabo cualquier mantenimiento o limpieza de la unidad.
Limpieza de aparato
Use una tela suave para limpiar la unidad. No use nunca químicos volátiles, gasolina,
detergentes, tejidos tratados químicamente u otras soluciones de limpieza. Todo lo
anterior podría dañar el compartimiento.
Limpieza del Filtro
Este deshumidificador está
equipado con dos filtros
(fig 10):
filtro anti-polvo:
- extraiga el soporte del
filtro, retire el filtro de
carbón activo;
- Use una aspiradora o
golpee el filtro
suavemente para una
limpieza fácil. Si el filtro
está particularmente
sucio, use agua caliente
con cierta cantidad de
aplicación de fuerza;
- asegúrese de que el filtro
esté completamente seco antes de reemplazar;
- no exponga el filtro a la luz del sol.
iltro de carbón activo:
(Para atrapar las partículas de polvo suspendidas en el aire y evitar la producción de
bacterias).
El filtro de carbón activo colocado debajo del filtro anti-polvo no es lavable. Su periodo
de vida es variable y depende de las condiciones del ambiente donde la unidad sea
usada. El filtro debe ser chequeado periódicamente y ser reemplazado si fuera
necesario.
Almacenamiento
Si usted no usa la unidad por un periodo extendido de tiempo, por favor:
- apague la unidad, desconecte y recoja el cordón AC;
- vacíe el tanque de agua completamente y límpielo;
- cubra la unidad y almacénela donde no reciba la luz directa del sol.
ESPAÑOL
1010
filtro de
carbón activo
filtro de plástico
lavable

11
esolución de problemas
LA UNIDAD NO FUNCIONA:
-¿Está enchufada?
-¿Hay energía en el recinto?
- ¿Está la temperatura ambiente por debajo de 5ºC, o sobre 32ºC? Si es así, entonces
está fuera del rango de trabajo de la unidad.
-Asegúrese de que el switch ON/O esté encendido.
-Chequee que el tanque de agua esté posicionado apropiadamente en la unidad y
que no esté lleno.
-Asegúrese de que la entrada y la salida de aire no estén obstruidas.
SI LA UNIDAD PA ECE NO ESPONDE NADA:
-¿Está el ltro para polvo contaminado?
-¿Están la entrada y salida de aire bloqueadas?
-¿Está la humedad de la sala ya bastante baja?
LA UNIDAD PA ECE ESPONDE POCO:
- ¿Hay demasiadas ventanas o puertas abiertas?
-¿Hay algo en el recinto produciendo mucha humedad?
LA UNIDAD ESTÁ DEMASIADO UIDOSA:
- Chequee que la unidad esté colocada sobre una superficie nivelada.
LA UNIDAD ESTÁ GOTEANDO
- Asegúrese de que la unidad esté en buenas condiciones.
ESPAÑOL

12
Description and operation
This product is a dehumidifier. It controls
relative humidity by passing the air
through the unit, forcing the excess
moisture to condensate over the cooling
elements. Contact with this cold surface
causes the moisture in the air to
condense. This condensed water then
drains safely into the water tank. The
dried air then passes through the
condenser where it is slightly warmed
and re-enters the room at a slightly
elevated temperature.
Excess moisture will travel throughout
your home, in the same way that cooking
smells waft to every room in the house.
or this reason, the dehumidier should
be positioned, so that it can draw this moist air towards it from all over the home.
Alternatively, if you have a serious problem in one area you can begin by
positioning the dehumidier close to this area and later moving it to a more
central point. When positioning the dehumidier, ensure that it is placed on a
level surface and that there is a minimum of 10 cm (4") of space on either side of
the unit to allow for efcient airow.
This dehumidier is tted with castors for extra mobility, if you move the unit, it
should rst be switched off and the water tank emptied.
We do not recommend the use of an extension lead, so please try to ensure that
the unit is sufciently close to a xed mains socket. If it is necessary to use am
extension lead, please ensure the diameter of the wires of the cable is at least 1
mm2.
When the dehumidier is in operation, outside doors and windows should be
closed when necessary for most efcient use.
ENGLISH
11

13
Safety
• Ensure that there is at least 300mm (1’) between the sides of the appliance and
any ammable, heating materials.
• Not suitable for use in cabinet, boats, caravans or similar locations.
• The mains supply must conform to the specication shown on the rating plate
at the back of the unit
• Avoid overloading circuits, which is caused by using more electrical amps than
your wiring can support. Overloading electrical wires can cause excessive heat
and electrical res.
• Avoid over-twisting, -coiling, -pulling the power cord, never use nylon or iron
wire to tide the power cord.
• Do not leave appliance when plugged in, unplug from outlet when not in use
and before servicing. Connect to a grounded outlet only.
• If the supply cord is damaged, it must be replaced by an approved service
representative or a similar qualied person in order to avoid a hazard.
• Never use the plug to start and stop the unit. Always use switch on the control
panel
• Before moving the unit, turn off all controls, then unplug and empty the water
tank.
• Don't use bug sprays or other ammable cleaners on the unit
• Never pour or spray water over the unit
• This appliance can be used by children aged from 8 years and above
and persons with reduced physical, sensory or mental capabilities or lack
of experience and knowledge if they have been given supervision or
instruction concerning use of the appliance in a safe way and understand the
hazards involved. Children shall not play with the appliance. Cleaning and user
maintenance shall not be made by children without supervision,
• STAY ALERT! Watch what you are doing and use common sense. Do not use
the appliance when you are tired, distracted or under the inuence of drugs,
alcohol or medication causing diminished control..
• Only a licensed professional is allowed to dismantle or modify the appliance.
ENGLISH
Attention:
this symbol indicates that care must be taken
to avoid injury to the user
!

14
• Always keep the unit in vertical position and on a rm at surface at all times.
• Do not place on soft surfaces.
• Do not cover the appliances intake or outlet grilles.
• or indoor use only
• Leave the unit to stand for one hour before connecting to the mains supply after
transport or when it has been tilted (e.g. during cleaning).
• Do not obstruct the air intakes and exhausts
• Avoid the appliance from splash.
• Examine the cord carefully. Make sure that it is not punctured or frayed. Inspect
the plug to ensure that the prongs are secure and the plastic surrounding it is
not cracked. Avoid running cords under carpets and other areas where you
cannot regularly check their condition
• Suggest to send the appliance for professional maintenance periodically.
NOTE: to prevent ice from forming on the evaporator, never use the appliance in
surroundings with temperatures lower than 5°C.
ENGLISH
Caution:
this symbol indicates that care must be taken
to avoid damaging the appliance
!
22
Exposed to the
weather outdoors
Near water If the power cable
wires are frayed or cut
Where small children
may be left
unattended
If an extension lead
may become
overloaded
Were the power cable
may be damaged
On a slope or uneven
surface
Where there is risk
of water falling on
the unit
Where it may be
damaged by
chemicals
Where there is a risk
of interference by
foreign objects
This product is not
made for DIY repair
If there is a risk
of water falling on
the unit

15
Components
ENGLISH
33
1
2
3
4
5
ear (fig.4)
1. Wind flap
2. Handle
3. Air filter (air inlet)
4. Water level display
5. Water tank
Front (fig.3)
1. Control panel
2. Ambient light
3. ront plate
4. Caster wheel
5. Rear plate
55
44
1
2
3
4
5
Accessories (fig.5)
1. Active carbon filter

16
ENGLISH
1. Humidity setting button
2. Working mode indicator (continuous
working, humidity 40%, 50%, 60%,
70%)
3. Humidity/Temperature display
4. Timer operation indicator
5. Temperature display button
6. Ionizer or TiO2indicator (these are
optional function depending on the
model you purchased)
7. Dryer indicator
8. Dryer button
Control panel
66
9. High ventilation indicator
10.Speed/Ventilation button
11.Low ventilation indicator
12.Power indicator
13.ON/O (power button
14.“ ull water” indicator
15.Timer button
16.Ionizer or TiO2button (these are
optional function depending on the
model you purchased)

17
Operation
1. Plug the unit into a correct mains socket. (Please refer to the rating label at
the rear of the unit for correct voltage/frequency.)
2. Press ON/O button to turn on the unit. The compressor will start to work.
3. Press humidity setting button to set the working model you need:
continuous working, humidity 40%, 50%, 60% or 70%. The relative indicator
will light on.
4. Press speed/ventilation button to set the ventilation speed, high or low.
The relative indicator will light on.
5. Press the TIMER button to set the operating hour you need (1~24 hours). The
display window will show the hour(s) you set as you press the TIMER button,
after releasing it for 8 seconds around, the display window will return to the
room humidity. As the set time has been reached, the compressor will stop
working automatically.
6. By pressing the ”TEMP” button, the display window will show the room
temperature, after releasing the button for 8 seconds around, the display
window will return to the room humidity.
7. DRYER function is turbo ventilation to dry the moisture in the air
continuously, so it could help to dry the laundry.
8. or a better performance close windows and doors.
9. To turn off the unit, press ON/O button again.
10.Pre-setting function By pressing TIMER button but without turning on the
other functions (including ON/O button), you can PRE-SET the time for the
machine to work. or example, if you press the timer to '2', the unit will work
automatically after 2 hours.
11.Please note, the indicator in the front plate will light on in 3 different colors to
reect the ambient humidity level. By this, the user can understand
immediately what the ambient humidity
condition is:
ENGLISH
77
Blue light= room humidity > 70%
Green light= room humidity > 50 ÷ 70%
Red light= room humidity < 50%
Red light ash= water full alarm

18
Drainage
While the water tank is full, the compressor will stop for self-protection and the
water full indicator will turn into red.
To move the water tank, pull it out squarely from the unit.
After empting the water tank, place the water tank into space. Make sure it is
properly positioned, in order for the 'water full' sign to go out and your
dehumidier is operating.
NOTE: in case, the water tank has not been positioned well, the water full
indicator will turn into red.
When the dehumidier is operated at very high humidity levels, the water tank will
require more frequent drainage. In this situation, it may be more convenient to set
the unit up for continuous drainage with the following procedure:
1. Pull out the water tank (g.8)
2. Connect the drain hole with water tube of inner diameter: 11mm. (The water
tube is not supplied with the unit).
3. Ensure the water will always drain away freely and the tube will remain in right
place.
NOTE: in very cold weather conditions,
precautions should be taken to prevent the water
tube from freeing.
4. Put the water tank back to its position (g.9)
ENGLISH
88
99

19
Maintenance and cleaning
Always unplug the unit from the mains before carrying out any maintenance or
cleaning of the unit.
Cleaning the body
Use soft cloth to wipe the unit clean.
Don't ever use volatile chemicals, gasoline, detergents, chemically treated
clothes, or other cleansing solutions. These all could possibly hurt the cabinet.
Cleaning the filter
This dehumidifier is
equipped with two filters
(fig 10):
anti-dust filter:
- extract the filter holder,
remove the active
carbon filter;
- use a vacuum cleaner
or tap the filter lightly
for easy cleaning. If the
filter is particularly dirty,
use warm water with a
small amount of
medium strenght.
- Make sure the filter is
completely dry before
replacing.
- Do not expose the filter to sunlight.
activ carbon filter
(for capturing the particles of dust suspended in the air and preventing the
production of bacteria.)
The active carbon filter placed under the anti-dust filter is not washable. Its life
span is variable and depends on the ambient conditions where the unit is used.
The filter should be checked periodically and replaced if necessary.
Storage
If not use the unit for an extended period of time, please:
- turning the nit off, unplug and tydy AC cord;
- completely empty the water tank and wipe it clean;
- cover the unit and store where it will not receive direct sunlight.
ENGLISH
1010
active carbon
filter
washable
plastic filter

20
Troubleshooting
THE UNIT DOES NOT OPE ATE:
-Is the unit plugged in?
-Is the house electricity on?
-Is the room temperature below 5oC or above 32oC? If so, then it is out of the
working range of the unit.
-Ensure the ON/O switch is turned on.
-Check the water tank is positioned properly in the unit and it is not full.
-Make sure the air inlet and outlet are not obstructed.
THE UNIT SEEMS TO DO NOTHING:
-Is the lter dusty, contaminated ?
-Is the air intake or outlet blocked up?
-Is the room humidity already quite low?
THE UNIT SEEMS TO DO LITTLE:
- Are too many windows or doors open?
-Is there something in the room producing lots of humidity?
THE UNIT IS TOO NOISY
- Check whether the unit is sitting on a level surface.
THE UNIT IS LEAKING
- Make sure the unit is in good shape.
ENGLISH
Table of contents
Languages:
Other Vortice Dehumidifier manuals

Vortice
Vortice DEUMIDO 10 EVO User manual

Vortice
Vortice Deumido Electronic E20 User manual

Vortice
Vortice DEUMIDO NG 10 User manual

Vortice
Vortice DEUMIDO 20 EVO User manual

Vortice
Vortice Deumido Electronic E10 User manual

Vortice
Vortice DEUMIDO 10 EVO User manual

Vortice
Vortice DEUMIDO COMPACT User manual

Vortice
Vortice DEUMIDO 20 EVO User manual

Vortice
Vortice DEUMIDO M10 User manual

Vortice
Vortice DEUMIDO NG 16-20 User manual