walimex Fresnel User manual

12
down. Handle the Fresnel Lens Box carefully.
ADVICE: Just use the following specified cleaning supplies.
Fresnel Lens Box Cleaning
Housing Use a wet microfiber cloth to remove light
and stubborn dirt.
Fresnel Lens Remove dirt with a wet microfiber cloth.
10. Technical Specifications
Fresnel Lens Ø approx. 22 cm
eight approx. 6,9 kg
Vertical pivoting radius 180 °
Outer dimensions (Hx xD) 31 cm x 27 cm x 31 cm
Material Metal (Housing), Glass (Fresnel Lens)
1
Copy of Instruction anual
Fresnel Lens Box with Universal Connection
Gewerbering 26
86666 Burgheim
Tel. +49/84 32 / 9489-0
Fax: +49/84 32 / 9489 - 8333
eMail: [email protected]
www.foto-walser.de

2
Inhalt
1.
How to understand the instruction manual................................... 4
1.2
Markings in the manual ..................................................................... 4
2.
Important safety notes.................................................................. 5
3.
Unpack and check the Fresnel Lens Box ........................................ 6
4.
Overview about the parts ............................................................. 7
5.
Quick start guide ........................................................................... 8
6.
Preparation for operation ............................................................. 8
6.1
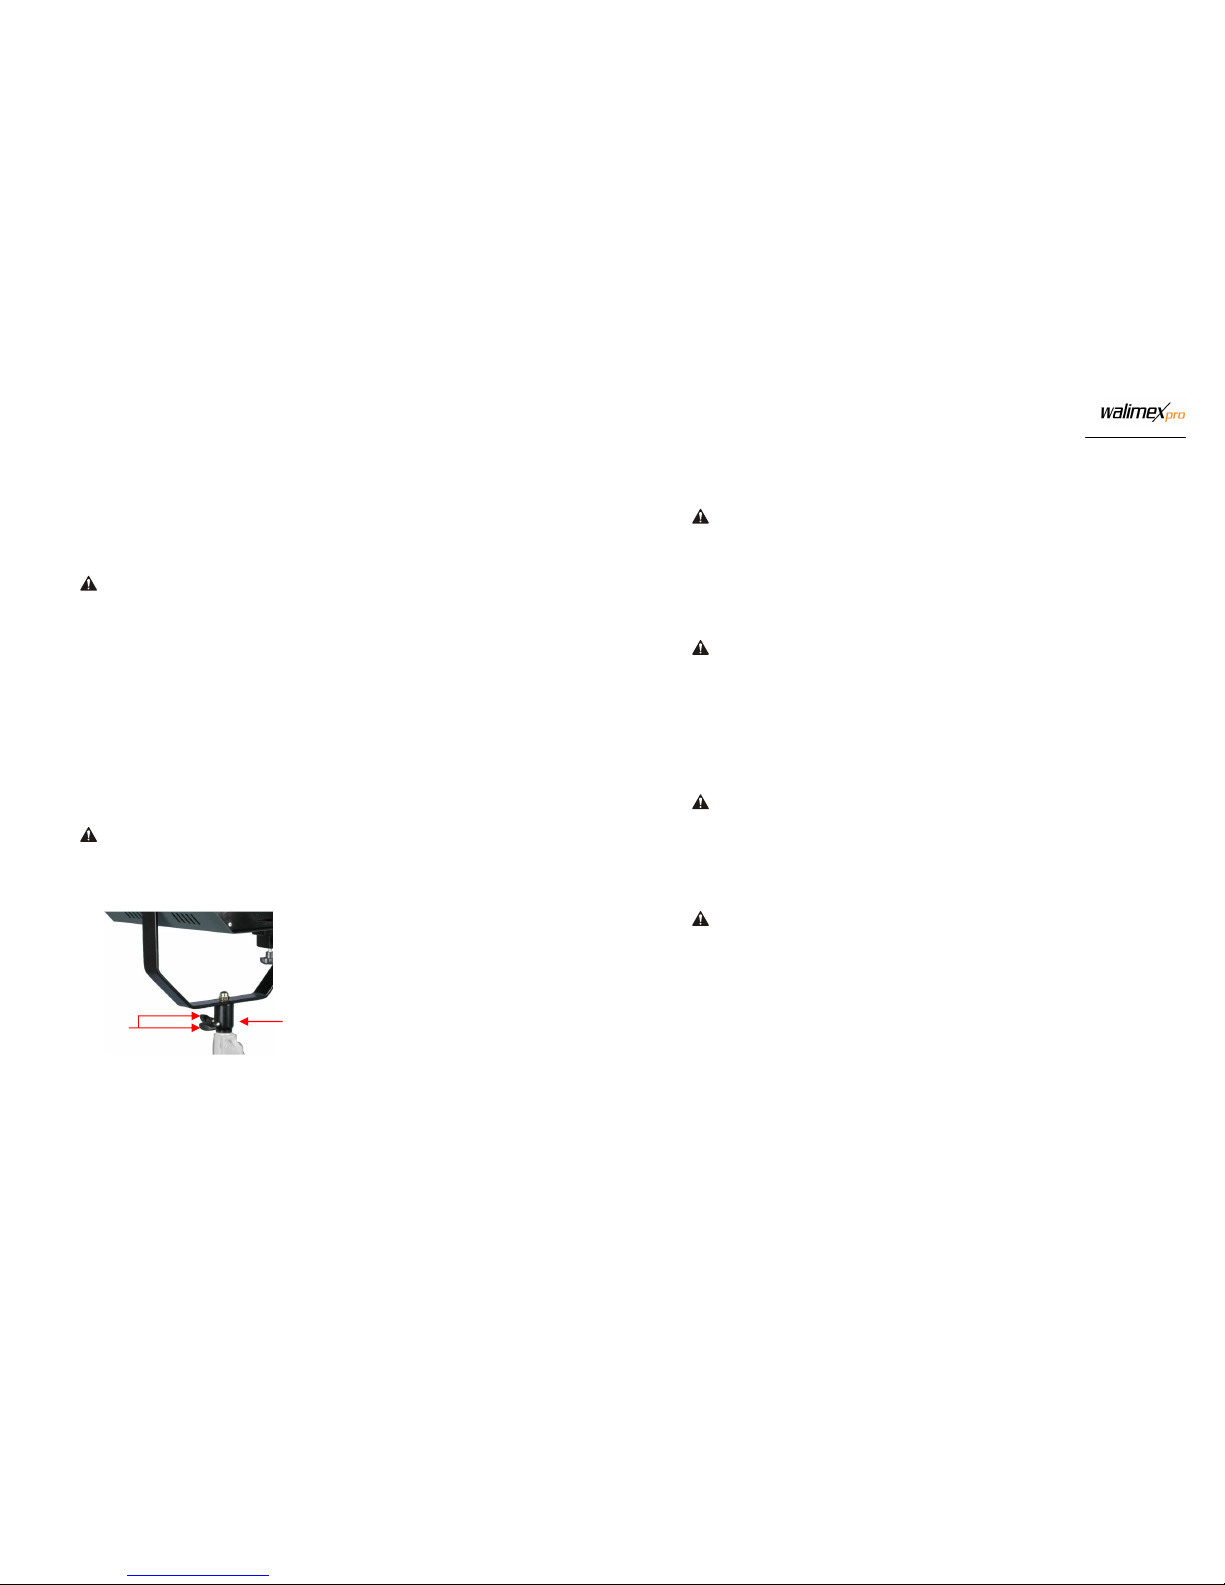
Mount on tripod (optional) ............................................................... 8
6.2
Mount guide rail ..................................... ……………………………………… .9
6.3
Mount device e.g. studio flash .......................................................... 9
7.
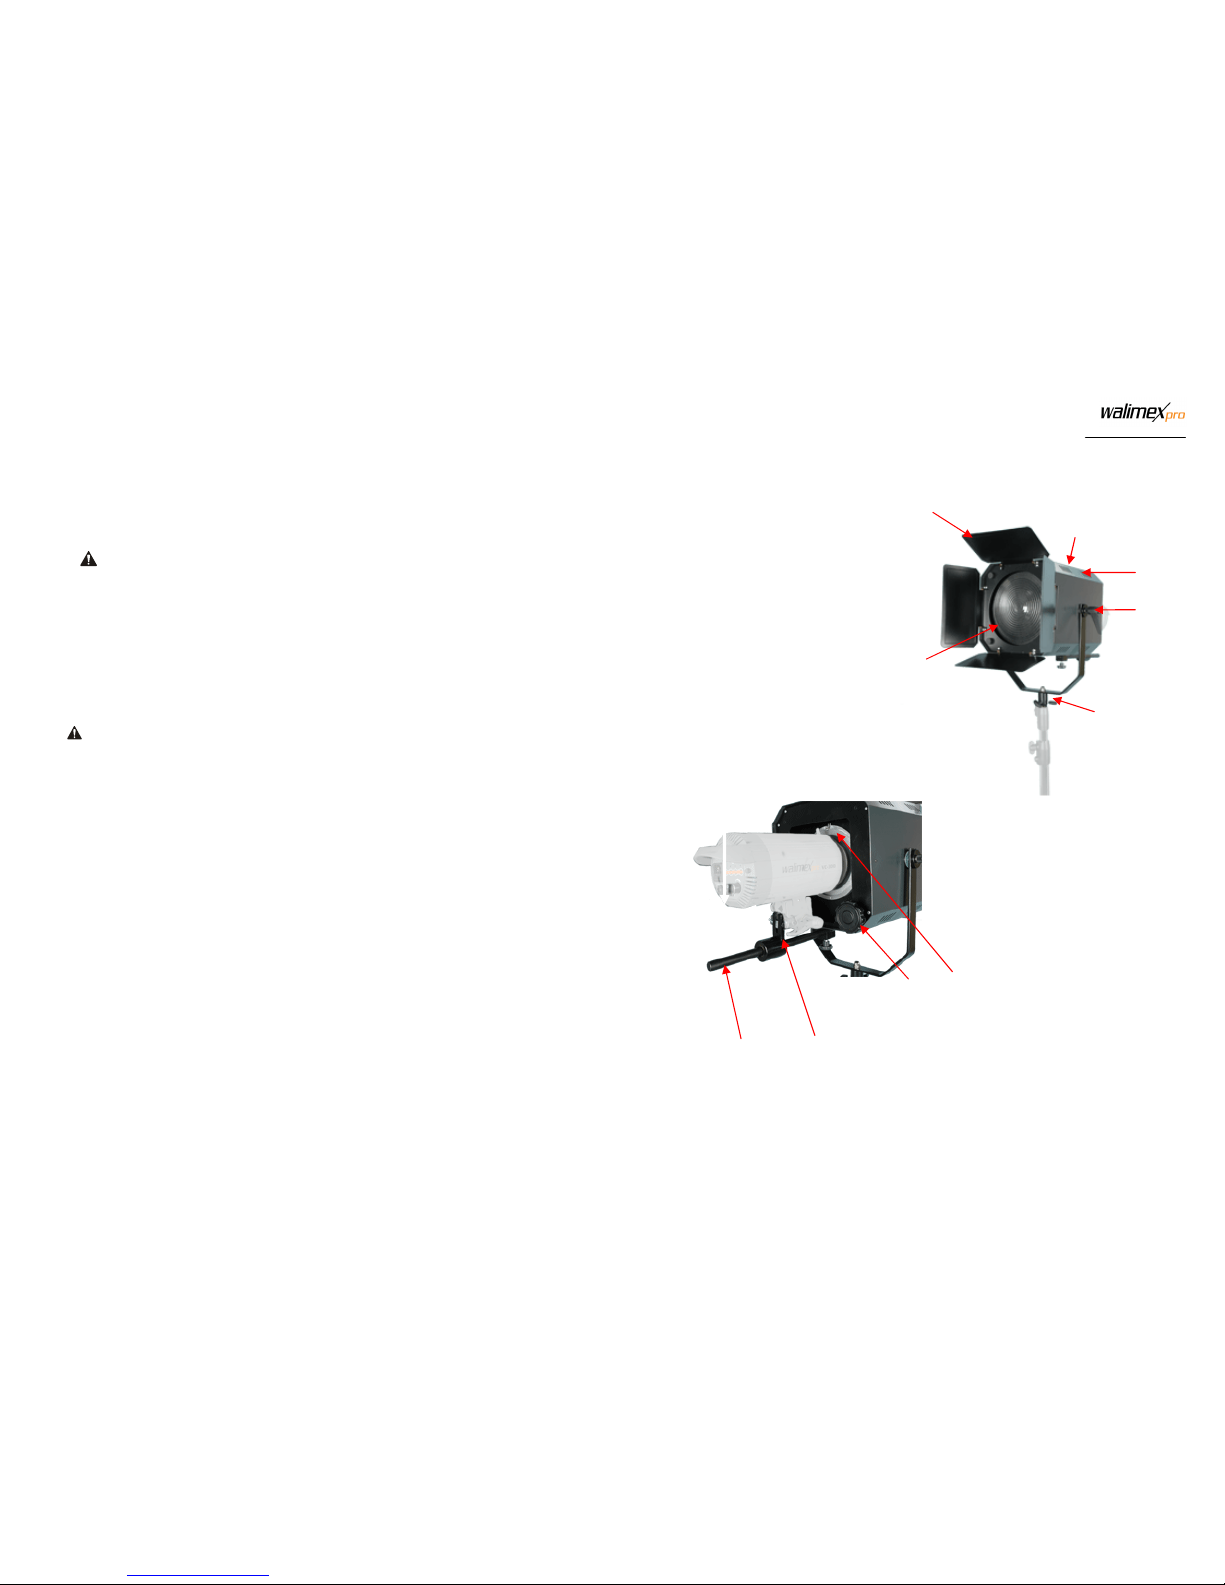
Operation of Fresnel Lens Box ..................................................... 10
7.1
Adjust tilt angle ................................................................................ 10
7.2
Change flash angle and sharpness………........................................... 10
8.
Transportation and storage ......................................................... 11
9.
aintenance ............................................................................... 11
9.1
Continuous inspections ................................................................... 11
9.2
Cleaning ........................................................................................... 11
10.
Technical Specifications .............................................................. 12
11
8. Transportation and storage
1. Let the device and Fresnel Lens Box cool down completely.
WARNING!
Danger of burning through hot parts. Let the device and Fresnel Lens
Box cool down completely.
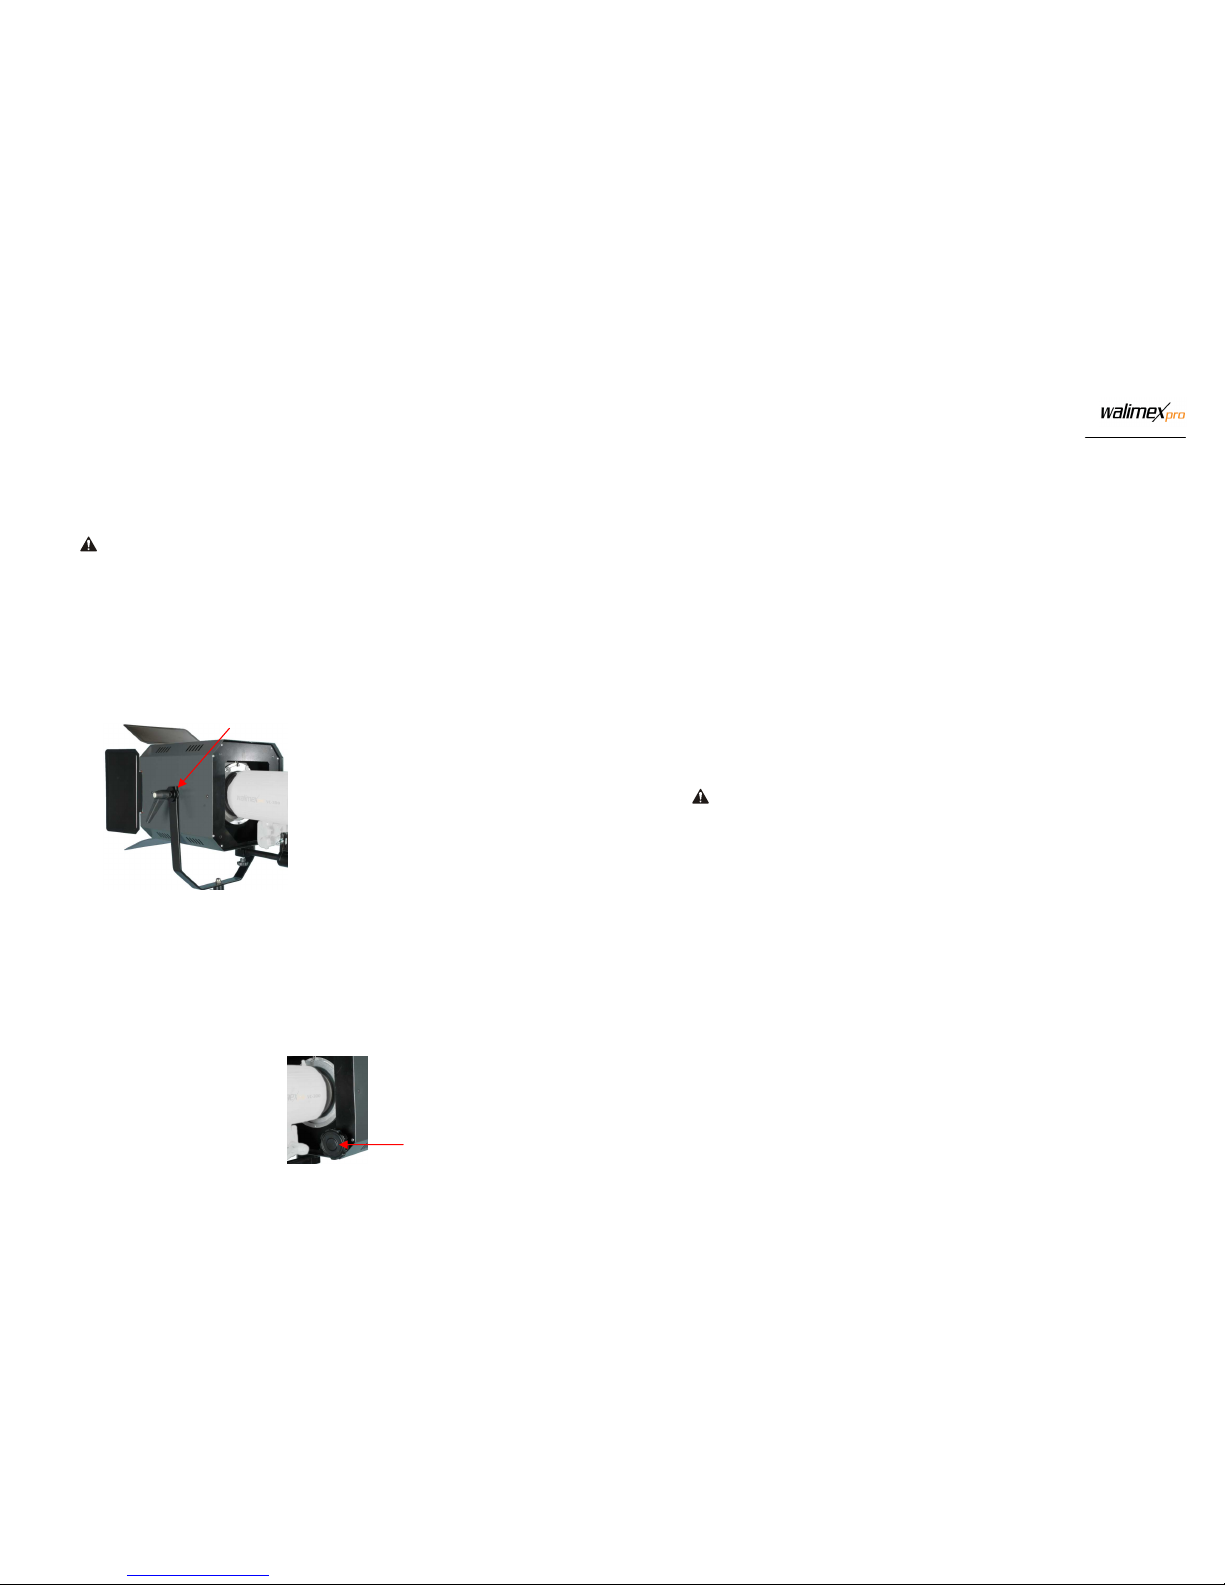
2. Demount reflector from Fresnel Lens Box.
3. Clean the Fresnel Lens Box if necessary.
See Cleaning.
4. Put the Fresnel Lens Box and all demounted elements in one carton and
carry and store them according to the requirements in the technical
specifications. See Technical Specifications.
WARNING
Danger of cutting and splitting through breaking Fresnel Lens when
falling down. Handle the Fresnel Lens Box carefully.
9. aintenance
9.1 Continuous inspections
What you should do? Before every
operation
Check all mounting parts and screws for
damages.
In case of damage:
Change mounting parts and screws
X
Check Fresnel Lens
In case of damage:
WARNING! Don´t use the Fresnel Lens
Box anymore. Contact the manufacturer
Foto- alser.
X
9.2 Cleaning
WARNING
Danger of cutting and splitting through breaking Fresnel Lens when falling

10
7. Operation of Fresnel Lens Box
7.1 Adjust tilt angle
CAUTION
Danger of burning on hot parts of the device and Fresnel Lens Box. The
Fresnel Lens Box can get hot according to the used device.
−Don´t touch the Fresnel Lens Box and device parts during operation
and cooling down.
−Let the Fresnel Lens Box, devices and accessories cool down
completely before starting any mounting or maintenance
arrangements.
A
Tilt Lever
•Open tilt lever.
•Adjust the required tilt angle.
•Tighten tilt lever.
7.2 Change flash angle and sharpness
•As to adjust the flash angle and sharpness, you have to turn the
adjusting knob to the left or right according to your requirements.
Your device will therewith be directed forward or backward on the
guide rail.
A Adjusting knob
A
A
3
Thank you very much for your confidence. e wish you much pleasure and
success with your Fresnel Lens Box.
The walimex pro Fresnel Lens Box is ideally suitable for e.g. fashion,
cosmetics, food and product photography. As main light source, the Box
can increase the colour saturation and brilliance. It can also be used as
highlight as to point out structures better.
The Fresnel Lens Box is suitable for studio flashes and continuous lights.
The use of quartz lights is due to the heat development not
recommended!
The main features of your Fresnel Lens Box as follows:
−Fresnel lens with 22cm diameter
−useable for all common studio flashes due to universal connection
−socket suitable for all common lamp tripods
−Please read these instructions carefully before using your device for
the first time. It includes everything you need to know to avoid
physical injuries and damages.
−Please pay attention to all safety notes in this instruction manual.
−Please keep this manual safe. In case of selling or leaving the device
to other persons, please don´t forget to hand this manual over as
well.

4
1. How to understand the instruction manual
1.1 Markings in the manual
arking eaning
Indicates the handling and consequences of safety
notes.
WARNING Indicates a hazardous situation, which, if not
avoided, could result in a serious injury.
CAUTION Indicates a hazardous situation, which, if not
avoided, may result in minor or moderate injury.
ADVICE
:
Indicates po
tentially physical damages and other
important information in connection with your
Fresnel Lens Box.
9
6.2 Mount guide rail
A
B
Openings for guide rail
Locking Screw for guide rail
•Put the guide rails into the openings of the Fresnel Lens Box.
•Fix the guide rail with the locking screw.
6.3 Mount device
WARNING
Danger of crashing of device. ake sure, that all locking screws are
tightened sturdily and securely.
A
B
C
Universal Connection for adapter
Guide Rail for adapter
Spigot for studio flash
•Insert the adapter with the device into the universal connection for
adapter until it snaps into place.
•Insert the device with the adapter in the guide rail.
•Push the spigot on the guide rail in the lamp socket of your device
and tighten the locking screw.
A
A
B
B
C

8
5. Quick start guide
ADVICE: The detailed instruction for the following operations can be found
in the respective chapters in this instruction anual. Keep the sequences of
the following operation steps when using the Fresnel Lens Box for the first
ti e to avoid da ages on it.
WARNING
Please note the safety notes in the respective chapters throughout
operation.
•Mount on tripod (optional).
•Mount guide rail.
•Mount e.g. studio flash.
6. Preparation for operation
6.1 Mount the Fresnel Lens Box on tripod (optional)
ADVICE: Please note the user infor ation of the tripod anufacturer.
WARNING
ount the Fresnel Lens Box on a tripod of suitable weight and
dimensions. See Technical Specifications. ake sure, that the tripod with
mounted device and Fresnel Lens Box has a tilt and skid resistant stand.
A Locking Screw
B Tripod Holder
1. Screw down locking screw.
2. Mount Fresnel Lens Box on tripod.
3. Tighten the locking screw.
A
B
5
2. Important safety notes
WARNING
Risk of eye injury
The optical radiation of the Fresnel Lens could blind your eyes and lead to
afterimages, if persons and animals look into the lens directly. This could
lead to injuries. Please avoid persons and animals looking into the lens
directly.
WARNING
Danger of crashing, entrapment and fire through the falling down of the
device with Fresnel Lens Box. The weight of the device is 6,9kg.
−ake sure, that the Fresnel Lens Box is always positioned tilt and skid
resistant and stored securely.
−Keep out of reach of children and animal. They could overturn the
device.
WARNING
Danger of burn hazard
−Switch off your device (e.g. studio flash) when it is not in use.
−Switch off your device (e.g. studio flash) before mounting and
maintenance and let it cool down completely.
WARNING
Fire danger through overheating
The Fresnel Lens Box with your device can overheat, if you operate it with
covered ventilation slots. The Fresnel Lens Box is not suitable for quartz
lights. Just use continuous lights or studio flashes, on which the
temperature of the lamps is max. 250°C. The accessories can overheat, if
it does not comply with the required specification.
The device, the Fresnel Lens Box, accessories and easy inflammable
materials in the near of the device could catch fire.
−Don´t cover the ventilation slots of the Fresnel Lens Box during
operation.

6
−Please just use accessories for the Fresnel Lens Box, which are
conform with the required specifications.
−Remove easily inflammable materials, which are near the studio flash
and Fresnel Lens Box.
CAUTION
Danger of burning on hot parts
The Fresnel Lens Box can become very hot according to the device used.
−Don´t touch the Fresnel Lens Box and parts during operation and
cooling down.
−Please cool down your Fresnel Lens Box, device and accessories
completely before starting any mounting or maintenance
arrangements.
WARNING
Danger of cutting and splitting through breaking or bursting flash tube
when falling down.
Please handle the Fresnel Lens Box carefully. See Unpack and check the
Fresnel Lens Box.
3. Unpack and check the Fresnel Lens Box
•Please unpack your device carefully.
•Please check, if the delivery is complete:
o1 Fresnel Lens Box
o1 Device Holder, Guide Rail e.g. for studio flash
o1 Instruction manual
•Please check, if the delivery is undamaged.
ADVICE: If the delivery should be unco plete or da aged, please contact
[email protected] or our service hotline with the telephone nu ber
+49 84 32 / 9489-0.
7
4. Overview about the parts
A Housing
B Barndoors
C Fresnel Lens
D Tilt lever
E Tripod Holder
F Ventilation Slots
A Guide Rail
B Adjusting Knob for guide rail
C Device Holder
D
Universal Connection for adapter
B
E
D
A
D
C
B
A
C
F
Table of contents
Other walimex Camera Accessories manuals

walimex
walimex PBS-400 User manual

walimex
walimex 16280 User manual

walimex
walimex 16 angle User manual

walimex
walimex propac p8-820 User manual

walimex
walimex GXR-400 User manual

walimex
walimex Battery Grip User manual

walimex
walimex Daylight 150 User manual

walimex
walimex CY-A User manual

walimex
walimex Daylight 250 User manual

walimex
walimex daylight 450 User manual