manuals.online logo
Brands
  1. Home
  2. •
  3. Brands
  4. •
  5. Walthers
  6. •
  7. Toy
  8. •
  9. Walthers Walthers Mainline RDC-1 User manual

Walthers Walthers Mainline RDC-1 User manual

RM582315
LUBRICATION AND CLEANING
FREQUENCY
As with any precision mechanical equipment, occasional lubrication and maintenance is
required for optimum performance.
All Walthers locomotives with their precision-engineered reduction gears, motor and chassis
need only occasional, careful lubrication and cleaning.
• Models used infrequently or not at all should not be lubricated more often than once a year.
Excessive amounts of lubricant can migrate to the driver tires and cause reduced tractive
force and grime on railheads.
• Models which are run often and pull long consists on grades should be inspected and
lubricated every two or three months.
INSTRUCTIONS
Bearing Areas.A small patch of cloth held with tweezers should be used to clean bearing
areas before lubrication. With the model upside down, place a drop of light oil at each wheel
bearing. Do no over lubricate.
Worm Gears.By removing the body shell, the snap-on cover over the drive worm can be
removed. Light grease should be applied to the worm gear with a toothpick.
Idler Gears. A drop or two of light oil can also be applied to the plastic idler gears below the
worm gear. As they are made from slippery plastic, the gears require little maintenance.
CONVERSION TO DCC
The circuit board of your WalthersMainline RDC has an 8-pin plug for simple drop-in installation
of a DCC decoder, sold separately, using a small Philips screwdriver.
Please follow these steps:
1) Remove the body shell following the Maintenance Instructions included with your model.
Carefully turn the car upside down. Remove the screws holding both coupler boxes and the
coupler assemblies. Remove two small Philips screws located behind each truck (four total,
two each at front and rear). Pull the body straight up and off the underframe.
2) Read and follow any specific instructions for installing your decoder.
3) Remove the dummy plug from the circuit board, and plug in your decoder.
4) Complete any additional decoder programming if needed, and test run your model to ensure
correct operation.
5) Replace the body and reattach all screws removed in step one.
©2013 Wm. K. Walthers, Inc.
5601 W. Florist Ave. Milwaukee, Wisconsin 53218
www.walthers.com
OOPPEERRAATTIINNGGIINNSSTTRRUUCCTTIIOONNSS
BUDD RDC Locomotive
Congratulations! You have just purchased one of a series of the finest running locomotives
available today. Equipped with a totally new diecast chassis and a state of the art drive
system, your WalthersMainline locomotive will give you years of enjoyment.
Your new HO Scale BUDD RDC diesel has been carefully assembled and tested before
leaving our modern factory. Additionally, it has been engineered to provide virtually trouble-
free service and operation.
Removing Shell For Maintenance
Turn the locomotive upside down and remove the couplers by unscrewing the screws
located on the bottom of the coupler boxes. Now locate the four screws (two near each
truck) that attach the body to the chassis. Remove these four screws and pull the body
straight up.
Important: Retain package and all packing materials in case you need to ship
locomotive for servicing.
14
Budd RDC i-sheet revised 3-6-13 3/6/13 2:14 PM Page 1
1A
1A
2A
2A
2A
1A
1A
2A
1B
1B
2B
2B
1B
1B
2B
1C
1C
2C
2C
2C
1C
1C
1C
2C
2C
2C
1C
RDC-1
RDC-2
RDC-3
3
4
6
8
11
5
8
7
9
10
Key # RM # Description
1A 922-581965 RDC1 body shell, pilots, doors & detail parts
1B 922-581966 RDC2 body shell, pilots, doors & detail parts
1C 922-581967 RDC3 body shell, pilots, doors & detail parts
2A 922-581968 RDC1 windows
2B 922-581969 RDC2 windows
2C 922-581970 RDC3 windows
3922-581980 Printed circuit board with lights and attaching parts
4922-581972 Interior with attaching parts
5922-581973 Motor with flywheel and mounting parts
6922-581974 Drive train parts with worm cover
7922-581975 Frame
8922-581976 ProtoMax couplers, assembled (1 pr)
9922-581977 Non-powered truck, complete, assembled
10 922-581978 Powered truck, complete, assembled, with worm cover
11 922-581979 Geared driver (2)
32
Budd RDC i-sheet revised 3-6-13 3/6/13 2:14 PM Page 3
1A
1A
2A
2A
2A
1A
1A
2A
1B
1B
2B
2B
1B
1B
2B
1C
1C
2C
2C
2C
1C
1C
1C
2C
2C
2C
1C
RDC-1
RDC-2
RDC-3
3
4
6
8
11
5
8
7
9
10
Key # RM # Description
1A 922-581965 RDC1 body shell, pilots, doors & detail parts
1B 922-581966 RDC2 body shell, pilots, doors & detail parts
1C 922-581967 RDC3 body shell, pilots, doors & detail parts
2A 922-581968 RDC1 windows
2B 922-581969 RDC2 windows
2C 922-581970 RDC3 windows
3922-581980 Printed circuit board with lights and attaching parts
4922-581972 Interior with attaching parts
5922-581973 Motor with flywheel and mounting parts
6922-581974 Drive train parts with worm cover
7922-581975 Frame
8922-581976 ProtoMax couplers, assembled (1 pr)
9922-581977 Non-powered truck, complete, assembled
10 922-581978 Powered truck, complete, assembled, with worm cover
11 922-581979 Geared driver (2)
32
Budd RDC i-sheet revised 3-6-13 3/6/13 2:14 PM Page 3
RM582315
LUBRICATION AND CLEANING
FREQUENCY
As with any precision mechanical equipment, occasional lubrication and maintenance is
required for optimum performance.
All Walthers locomotives with their precision-engineered reduction gears, motor and chassis
need only occasional, careful lubrication and cleaning.
• Models used infrequently or not at all should not be lubricated more often than once a year.
Excessive amounts of lubricant can migrate to the driver tires and cause reduced tractive
force and grime on railheads.
• Models which are run often and pull long consists on grades should be inspected and
lubricated every two or three months.
INSTRUCTIONS
Bearing Areas.A small patch of cloth held with tweezers should be used to clean bearing
areas before lubrication. With the model upside down, place a drop of light oil at each wheel
bearing. Do no over lubricate.
Worm Gears.By removing the body shell, the snap-on cover over the drive worm can be
removed. Light grease should be applied to the worm gear with a toothpick.
Idler Gears. A drop or two of light oil can also be applied to the plastic idler gears below the
worm gear. As they are made from slippery plastic, the gears require little maintenance.
CONVERSION TO DCC
The circuit board of your WalthersMainline RDC has an 8-pin plug for simple drop-in installation
of a DCC decoder, sold separately, using a small Philips screwdriver.
Please follow these steps:
1) Remove the body shell following the Maintenance Instructions included with your model.
Carefully turn the car upside down. Remove the screws holding both coupler boxes and the
coupler assemblies. Remove two small Philips screws located behind each truck (four total,
two each at front and rear). Pull the body straight up and off the underframe.
2) Read and follow any specific instructions for installing your decoder.
3) Remove the dummy plug from the circuit board, and plug in your decoder.
4) Complete any additional decoder programming if needed, and test run your model to ensure
correct operation.
5) Replace the body and reattach all screws removed in step one.
©2013 Wm. K. Walthers, Inc.
5601 W. Florist Ave. Milwaukee, Wisconsin 53218
www.walthers.com
OOPPEERRAATTIINNGGIINNSSTTRRUUCCTTIIOONNSS
BUDD RDC Locomotive
Congratulations! You have just purchased one of a series of the finest running locomotives
available today. Equipped with a totally new diecast chassis and a state of the art drive
system, your WalthersMainline locomotive will give you years of enjoyment.
Your new HO Scale BUDD RDC diesel has been carefully assembled and tested before
leaving our modern factory. Additionally, it has been engineered to provide virtually trouble-
free service and operation.
Removing Shell For Maintenance
Turn the locomotive upside down and remove the couplers by unscrewing the screws
located on the bottom of the coupler boxes. Now locate the four screws (two near each
truck) that attach the body to the chassis. Remove these four screws and pull the body
straight up.
Important: Retain package and all packing materials in case you need to ship
locomotive for servicing.
14
Budd RDC i-sheet revised 3-6-13 3/6/13 2:14 PM Page 1

This manual suits for next models

2

Other Walthers Toy manuals

Walthers Cornerstone Series User manual

Walthers

Walthers Cornerstone Series User manual

Walthers Cornerstone Series User manual

Walthers

Walthers Cornerstone Series User manual

Walthers Cornerstone 933-4600 User manual

Walthers

Walthers Cornerstone 933-4600 User manual

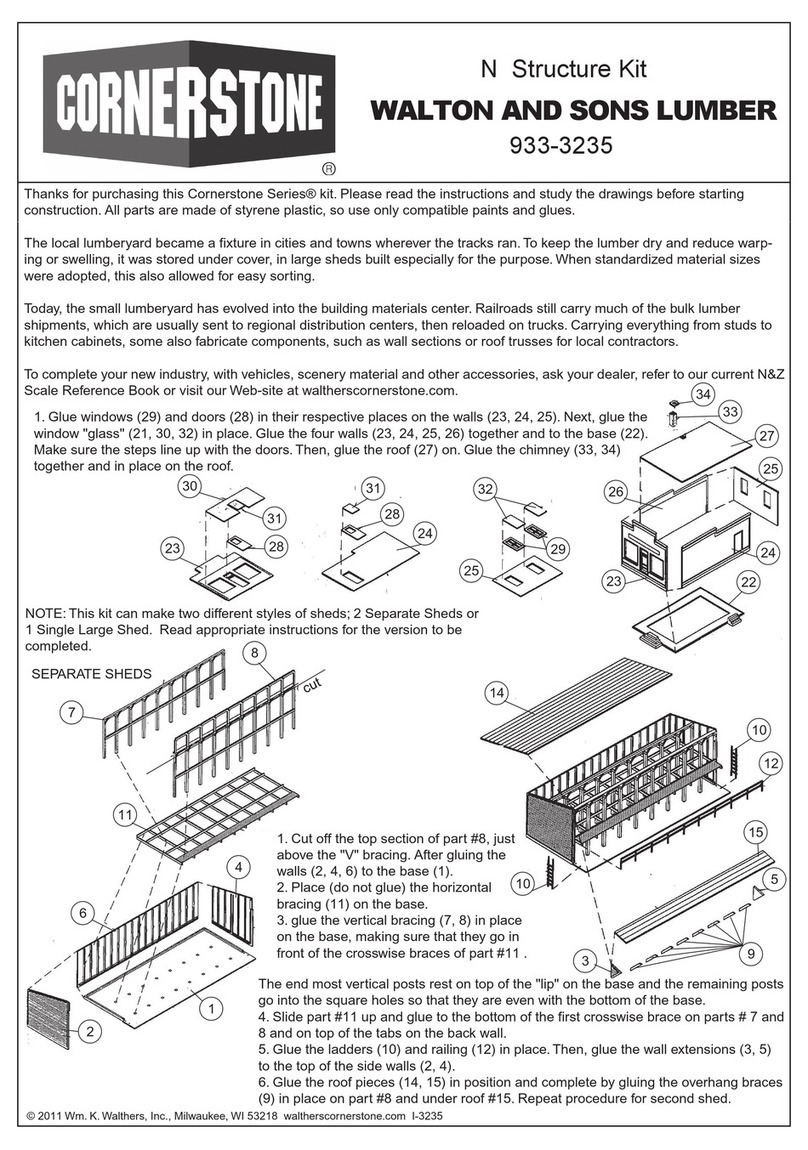
Walthers CORNERSTONE WALTON AND SONS LUMBER 933-3235 User manual

Walthers

Walthers CORNERSTONE WALTON AND SONS LUMBER 933-3235 User manual

Walthers CORNERSTONE INTERSTATE FUEL & OIL 933-3006 User manual

Walthers

Walthers CORNERSTONE INTERSTATE FUEL & OIL 933-3006 User manual

Walthers Proto 2000 Series User manual

Walthers

Walthers Proto 2000 Series User manual

Walthers Cornerstone Series Product guide

Walthers

Walthers Cornerstone Series Product guide

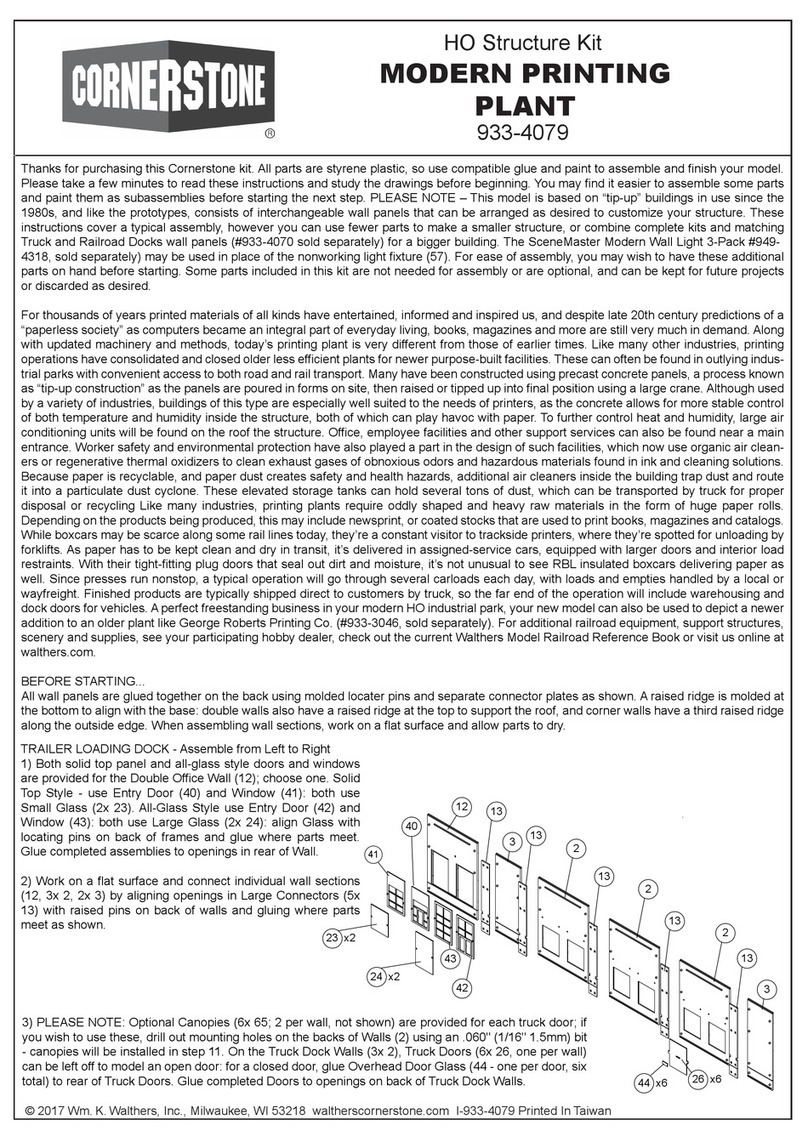
Walthers Cornerstone 933-4079 User manual

Walthers

Walthers Cornerstone 933-4079 User manual

Walthers Cornerstone Series User manual

Walthers

Walthers Cornerstone Series User manual

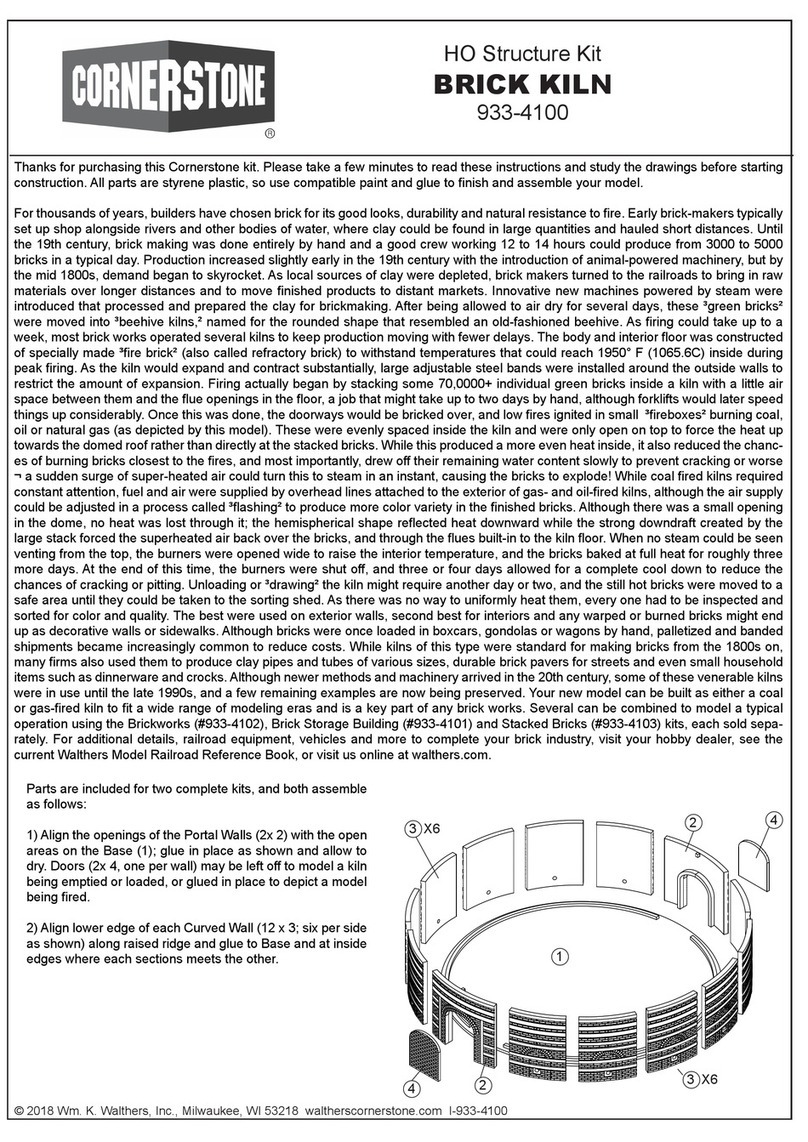
Walthers CORNERSTONE BRICK KILN 933-4100 User manual

Walthers

Walthers CORNERSTONE BRICK KILN 933-4100 User manual

Walthers Cornerstone 933-2926 Product guide

Walthers

Walthers Cornerstone 933-2926 Product guide

Walthers RAILKING EP-5 User manual

Walthers

Walthers RAILKING EP-5 User manual

Walthers GP7 Phase II User manual

Walthers

Walthers GP7 Phase II User manual

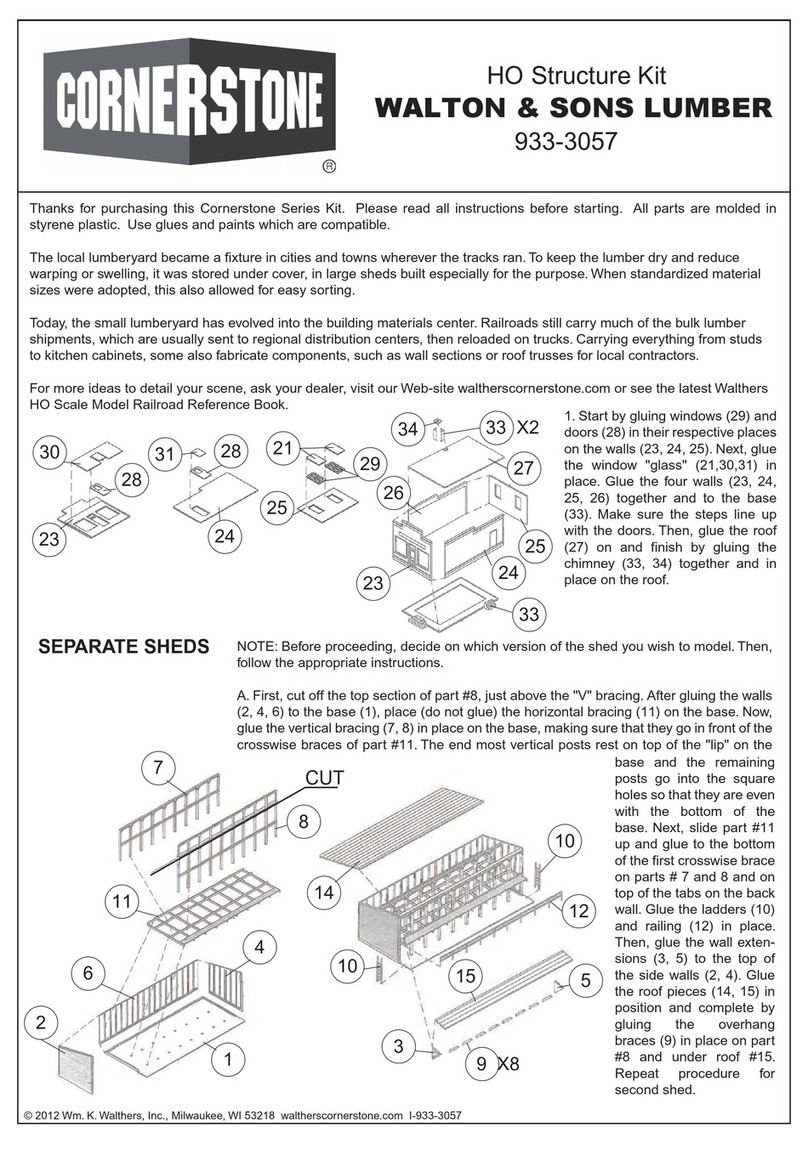
Walthers CORNERSTONE WALTON & SONS LUMBER 933-3057 User manual

Walthers

Walthers CORNERSTONE WALTON & SONS LUMBER 933-3057 User manual

Popular Toy manuals by other brands

LEGO CHIMA 70113 Building instructions

LEGO

LEGO CHIMA 70113 Building instructions

Hornby Railroad County Class Operating and maintenance instructions

Hornby

Hornby Railroad County Class Operating and maintenance instructions

Eduard SR-71A interior Assembly instructions

Eduard

Eduard SR-71A interior Assembly instructions

Fisher-Price N7321 user manual

Fisher-Price

Fisher-Price N7321 user manual

PIKO BR 103 instruction manual

PIKO

PIKO BR 103 instruction manual

REVELL Corvette C6 Convertible Assembly manual

REVELL

REVELL Corvette C6 Convertible Assembly manual

marklin 37399 instruction manual

marklin

marklin 37399 instruction manual

Hasbro FurReal Friends Newborn Lamb 76896/7687 instruction manual

Hasbro

Hasbro FurReal Friends Newborn Lamb 76896/7687 instruction manual

LEGO ninjago 9448 Building instructions

LEGO

LEGO ninjago 9448 Building instructions

tams elektronik WIB-11 manual

tams elektronik

tams elektronik WIB-11 manual

Mattel Barbie Pink Label N3930 instructions

Mattel

Mattel Barbie Pink Label N3930 instructions

Phoenix Model Classic instruction manual

Phoenix Model

Phoenix Model Classic instruction manual

Heli-Max Novus CP user manual

Heli-Max

Heli-Max Novus CP user manual

Eduard Brassin Bf109G-6 wheels quick start guide

Eduard

Eduard Brassin Bf109G-6 wheels quick start guide

marklin 36240 instruction manual

marklin

marklin 36240 instruction manual

Faller Compessor with drive quick start guide

Faller

Faller Compessor with drive quick start guide

Axial AX 10 Scorpion manual

Axial

Axial AX 10 Scorpion manual

LEGO 8109 TECHNIC Assembly guide

LEGO

LEGO 8109 TECHNIC Assembly guide

manuals.online logo
manuals.online logoBrands
  • About & Mission
  • Contact us
  • Privacy Policy
  • Terms and Conditions

Copyright 2025 Manuals.Online. All Rights Reserved.