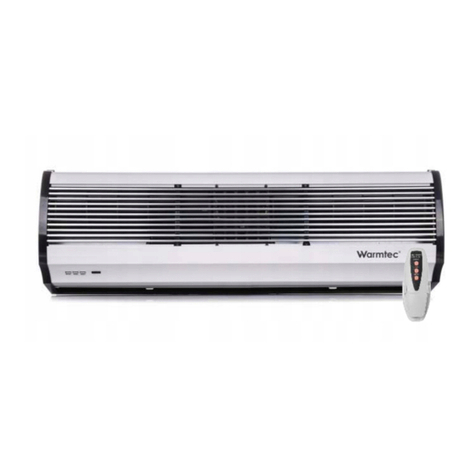
Warmtec WRS-04S User manual

v. 1.07
PL
KURTYNA POWIETRZNA
PLEN
AIR CURTAIN
With door sensor
and the possibility of connecting a thermostat
Z czujnikiem drzwiowym
i możliwością podłączenia termostatu

1. Wprowadzenie
2. Wymiary instalacyjne
2
200 mm
80 mm
173,5 mm
233 mm
90°
141 mm
800 mm
361 mm
60 mm 60 mm
Zastosowana nowoczesna grzałka PTC jest bardzo wydajna i energooszczędna, szybko podgrzewa wydmuchiwane
powietrze, dodatkowo istnieje możliwość sterowania mocą grzewczą. W kurtynie WRS-04 występuje 2 stopniowa
regulacja mocy grzewczej, a także możliwość ustawienia nawiewu bez ogrzewania (cyrkulacja powietrza w sezonie
letnim). Komfort użytkowania podnosi także wysoka kultura pracy kurtyny powietrznej WRS-04, której poziom
dźwięku nie przekracza 49 dB co można uznać za idealny wynik.
Kurtyna WRS-04 jest bardzo łatwa w obsłudze, model ten wyposażono w układ sterowania znajdujący się na przednim
panelu kurtyny. Dodatkowo kurtyna WRS-04 posiada pilota zdalnego sterowania. Dzięki niemu możliwa jest pełna
kontrola urządzenia (włączenie, wyłączenie, zmiana mocy grzewczej) w zasięgu 8m, a jego obsługa jest intuicyjna i
wygodna.
Obudowa kurtyny WARMTEC WRS-04 wykonana jest ze stali lakierowanej proszkowo, a jej stonowana stylistyka
idealnie wpasowuje się do wystroju pomieszczeń w których jest zamontowana.
Kurtyna powietrzna WARMTEC WRS-04 to bardzo nowoczesne i popularne urządzenie o maksymalnej mocy grzewczej
4kW i szerokości 80cm co czyni ją jednym z najmniejszych modeli kurtyn dostępnych na rynku, jest także najcichszą
kurtyną o tych parametrach.
Dziękujemy za zakup kurtyny powietrznej WARMTEC.
Prosimy o dokładne zapoznanie się z instrukcją przed użyciem urządzenia.
PL

3.3 Maksymalna wysokość montażowa od podłogi to
2,3 metry. W przypadku, gdy szerokość otworu drzwi
jest większa od długości urządzenia, należy
zainstalować szeregowo dwie lub większą liczbę
jednostek przy zachowaniu około 20-40 mm przerw
pomiędzy nimi.
3.4 Urządzenia instalujemy w miejscach w których
nie będą narażone na działanie wody, pary wodnej
oraz wybuchowych lub żrących gazów.
max. 2,3m
3
3. Zalecenia instalacyjne
3.1 Należy montować do stabilnego podłoża, aby
zapewnić pewne i bezpieczne zamocowanie.
Nieprawidłowe zamontowanie może być przyczyną
powstawania wibracji, a w konsekwencji także
poluzowania urządzenia na montowanej ścianie bądź
hałasu.
3.2 Montaż urządzenia dozwolony jest tylko
we wnętrzu pomieszczenia.
Wlot powietrza
Wylot powietrza
Strefa zewnętrznaStrefa wewnętrzna

4
5. Parametry techniczne
Napięcie
[V~/Hz]
Moc
silnika
Moc nagrzewnicy
[kW]
I II
Max. prędkość
powietrza
[m/s]
Max. przepływ
powietrza
3
[m /h]Poziom
hałasu
[dB]
Wymiary
mm
Waga
Model
WRS-04S 75 2 4 430 49
800x200x141
8
[kg][W]
230
6,5
4. Instalacja
stelaż montażowy
1Odkręcić stelaż montażowy od urządzenia i zainstalować go na ścianie za pomocą wkrętów montażowych
(brak w zestawie).
Upewnij się że stelaż montażowy jest przymocowany stabilnie, a następnie umieść kurtynę powietrzną na
stelażu.
2
W celu uniknięcia uszkodzenia oraz powstania wibracji (które mogą powodować uszkodzenie oraz
nadmierny hałas) upewnij się że śruby montażowe są odpowiednio dokręcone.
3
Kąt ustawienia kurtyny regulujemy za pomocą przestawienia śruby mocującej mocowania na jeden
z trzech otworów w stelażu montażowym.
4

5
6.1. Funkcje przycisków - ustawienie trybu pracy kurtyny.
a) Przycisk “ON/OFF” pozwala włączyć/wyłączyć urządzenie.
– TRYB GRZEWCZY - I GRZAŁKA (1/2 mocy grzewczej kurtyny) - zapalona jedna czerwona dioda,
źw trybie zimnym kurtyna po zaniku sygnału przechodzi w tryb wychładzania grzałek i po 30 sekundach się wyłącza.
Każde naciśnięcie przycisku “HEAT“ spowoduje zmianę trybu pracy grzałek.
b) TERMOSTAT (T) - sygnał z wejścia (załączenie termostatem) powoduje załączenie kurtyny w pełny tryb grzewczy i ma
za zadania jak najszybsze dogrzanie pomieszczenia. Kurtyna pracuje z pełną mocą (wszystkie 2 grzałki). Załączenie
kurtyny przez termostat powoduje brak reakcji na czujnik drzwiowy. Po wyłączeniu termostatu kurtyna przechodzi w
sterowanie czujnikiem drzwiowym. Załączenie kurtyny z wejścia (T) jest sygnalizowane mruganiem 2 czerwonych diod.
– TRYB GRZEWCZY - II GRZAŁKI (pełna moc grzewcza kurtyny) - zapalone dwie czerwone diody,
a) CZUJNIK DRZWIOWY (CD) - sygnał z wejścia (otwarcie drzwi) powoduje uruchomienie kurtyny w ustawionym
wcześniej trybie pracy (ilość grzałek), po zaniku sygnału kurtyna przechodzi w tryb opóźnionego wyłączania, którego
działanie jest zależne od tego, czy kurtyna jest ustawiona w trybie grzewczym, czy zimnym:
źw trybie grzewczym kurtyna po zaniku sygnału pracuje jeszcze 30 sekund w trybie grzewczym, po czym przechodzi
w 30 sekundowy tryb wychładzania grzałek i się wyłącza,
6.2. Wejścia sterujące.
c) Przycisk “HEAT” pozwala ustawić tryb pracy grzałek:
– TRYB ZIMNY (tylko cyrkulacja, bez podgrzewania) - żadna czerwona dioda nie świeci,
6. Obsługa urządzenia
On/Off COOL HEAT
PANEL
STEROWANIA
W przypadku zaniku zasilania kurtyna zapamiętuje wszystkie ustawienia i po powrocie zasilania wraca
do ustawionego wcześniej trybu pracy.
Jeśli nie chcemy korzystać z CZUJNIKA DRZWIOWEGO i TERMOSTATU należy zastosować zworkę na
wejściu czujnika drzwiowego. Można sterować ręcznie pracą kurtyny (pilotem lub przyciskami).
i

6
WHI
M
BLU
ORG
YLW-GRN
YLW
BLK
BLK
RED
BLU
BLK
RECEIVER
IC
I/O
RECEIVER
LPN N
HEATER
HEATER
C
THERMAL CUT-OUT
YLW-GRN
BLK
Zabezpieczenie przed przegrzaniem.
Urządzenie posiada zabezpieczenie przed przegrzaniem
(ponad 135°C). Gdy nagrzewnica osiągnie zbyt wysoką
temperaturę, tryb grzewczy zostanie wyłączony i
następuje automatyczne przełączanie urządzenia do
trybu pracy bez podgrzewania powietrza, co zostanie
zasygnalizowane przez przerywany sygnał dźwiękowy.
i
7. Schemat podłączenia
i
PODŁĄCZENIE NAPIĘCIA DO WEJŚĆ STERUJĄCYCH
SPOWODUJE NIEODWRACALNE USZKODZENIE UKŁADU
STEROWANIA KURTYNY.
Kurtyną może sterować tylko i wyłącznie
termostat z wyjściem BEZNAPIĘCIOWYM
(tzw. styk zwierno/rozwierny).
UWAGA! CZERWONY
NIEBIESKI
CZARNY
BIAŁY
TERMOSTAT
TERMOSTAT
WEJŚCIA STERUJĄCE
WYJŚCIE
BEZNAPIĘCIOWE
CZUJNIK
OTWARCIA
DRZWI
CZUJNIK
OTWARCIA
DRZWI
(
(

8. Ochrona środowiska i recykling
INFORMACJA O ZUŻYTYM SPRZĘCIE ELEKTRYCZNYM I ELEKTRONICZNYM
W związku z tym należy wskazać, iż gospodarstwa domowe spełniają kluczową rolę w przyczynianiu się do ponownego
użycia i odzysku, w tym recyklingu zużytego sprzętu. Użytkownik sprzętu przeznaczonego dla gospodarstw domowych
jest zobowiązany po jego zużyciu do oddania zbierającemu zużyty sprzęt elektryczny i elektroniczny. Należy jednak
pamiętać, aby produkty należące do grupy sprzętu elektrycznego lub elektronicznego utylizowane były w uprawnionych
do tego punktach zbiórki.
Niniejszym informujemy, iż głównym celem regulacji europejskich oraz ustawy z dnia 11 września 2015 r. o zużytym
sprzęcie elektrycznym i elektronicznym jest ograniczenie ilości odpadów powstałych ze sprzętu, zapewnienie
odpowiedniego poziomu zbierania, odzysku i recyklingu zużytego sprzętu oraz zwiększenie świadomości społecznej o
jego szkodliwości dla środowiska naturalnego, na każdym etapie użytkowania sprzętu elektrycznego i elektronicznego.
UWAGA! URZĄDZENIA NIE WOLNO WRZUCAĆ DO ODPADÓW DOMOWYCH.
To oznaczenie oznacza, że produkt nie może być wyrzucany razem z odpadami domowymi w całej
UE. Aby zapobiec potencjalnym szkodom dla środowiska lub zdrowia, zużyty produkt należy poddać
recyklingowi. Zgodnie z obowiązującym prawem, nie nadające się do użycia urządzenia zasilane
prądem elektrycznym należy zbierać osobno, w specjalnie do tego celu wyznaczonych miejscach,
celem ich przetworzenia i ponownego wykorzystania, na podstawie obowiązujących norm ochrony
środowiska (Dyrektywa ZSEE 2012/19/UE).
Zużyte urządzenie możesz oddać u sprzedawcy, u którego zakupisz nowe. Odbierze je Organizacja
Odzysku CCR REEWEEE, z którą mamy podpisaną umowę o odbiór zużytego sprzętu.
i
7

1. Introduction
2. Installation dimensions
8
200 mm
80 mm
173,5 mm
233 mm
90°
141 mm
800 mm
361 mm
60 mm 60 mm
WARMTEC WRS-04 Air Curtain is a modern and popular device with the maximum heating output of 4kW and the
width of 80cm what makes the product one of the smallest and also the quietest models available at the market with
these parameters.
Modern PTC Heater used in the product is highly productive and energy-saving. It heats blown out air fast and there is
also a possibility to control the heating power. WRS-04 Air Curtain has got 2- step power regulation and the possibility
to set air circulation without heating within summer season.The comfort of using the device is also increased by the
high quality of its operation. The sound level does not exceed 49 dB what is considered to be a great result.
WRS-04 Air Curtain is really simple to use. The model is equipped in the control system located on the front panel of
the curtain. In addition WRS-04 Curtain has got a remote control thanks to which the complete control of the device is
possible (turning on, turning out, changing in heating power ) in the range of 8m, and its operation is intuitive and
convenient.
The case of WARMTEC WRS-04 Curtain is made of powder coated steel and its subdued desing perfectly matches
interior decorations of rooms in which the product is mounted.
Please read this user manual carefully before using this product for the first time and keep it safe for future
Thank you for purchasing our product.
PLEN

3.3 The maximum mounng hight from the floor
is 2,3 metres. In case the door opening width is bigger
than the lenght of the device, the two or more units should
be installed in series with the breaks of 20-40 mm between
them.
3.4 The devices have to be installed in places where
they will not be exposed to water or steam and
explosive or corrosive gases.
max. 2,3m
9
3. Instalattion recommendations
3.1 The product should be mounted to the stable ground
in order to provide a safety and secure mounng.
Incorrect mounng can cause the generaon of vibraons
and in consequence also loosen the device on an installed
wall or it may also cause noise.
3.2 The device can be mounted only inside the room.
Air Input
Air Output
Outside zoneInside zone

10
5. Technical Data
Voltage
[V~/Hz]
motor
power
heang capacity
[kW]
I II
Max. Air
Velocity
[m/s]
Max. Air
Volume
3
[m /h]Noise
[dB]
Dimensions
mm
Weight
Model
WRS-04 75 2 4 430 49
800x200x141
8
[kg][W]
230
6,5
4. Installation
Mounng frame
1Unscrew the mounng frame from the device and install it on the wall using the mounng screws
(not included).
Make sure the mounng rack is aached firmly, then place the air curtain on the 2nd rack.
2
In order to avoid damage and the generaon of vibraons (which can cause damage and excessive noise),
make sure that the mounng screws are properly ghtened.
3
The angle of the curtain is adjusted by shiing the mounng screw to one of the four holes in the
mounng rack.
4

11
źin the cold mode, after the signal disappears, the curtain goes into the heater cooling mode and turns off after 30
seconds.
a) DOOR SENSOR (CD) - a signal from the input (door opening) activates the curtain at the set earlier operation mode
(speed, number of heaters), after the signal disappears, the curtain goes into the delayed shutdown mode, whose
operation depends on whether the curtain is set in heating or cold mode:
źin the heating mode, after the signal disappears, the curtain continues to work for 30 seconds in the heating mode,
and then passes into the 30 seconds heaters cooling mode and turns off,
b) THERMOSTAT (T) - the signal from the input (thermostat activation) will enable to switch on the curtain in full heating
mode and its aim is to heat the room as quickly as possible. The air curtain operates at full power (all 2 heaters). Activation
curtain by the thermostat causes no reaction to the door opening sensor. When the thermostat is turned off, the curtain
goes into door sensor control. Activation of the curtain from input (T) is signaled by blinking of 2 red diodes.
Each time the “HEAT“ button is pressed, the heating mode will change.
b) The "HEAT" button allows you to set the heater operation mode:
- COOLING MODE: (only circulation, without heating) - none of the red diode flashes,
a) The "ON / OFF" button allows to switch the device on / off - the single
green LED stays ON.
- HEATING MODE: I Heater (½ heating power of the Air Curtain ) - the single red LED stays ON,
6.1. Button functions - setting the operating mode of the curtain.
- HEATING MODE: II Heaters (the full power of the Air Curtain ) - two red LEDs stay ON,
6.2. Control inputs.
6. Operation
On/Off COOL HEAT
CONTROL
PANEL
In the case of a power failure, the curtain remembers all settings and returns when the power is
restored to the previously set operating mode.
If you do not want to use the DOOR SENSOR AND THERMOSTAT, use a JUMPER on the DOOR SENSOR
input. You can manually control the operation of the curtain (remote control or buttons).
i

12
WHI
M
BLU
ORG
YLW-GRN
YLW
BLK
BLK
RED
BLU
BLK
RECEIVER
IC
I/O
RECEIVER
LPN N
HEATER
HEATER
C
THERMAL CUT-OUT
YLW-GRN
BLK
Overheating protection
Overheang protecon. The device is protected against
overheang (over 135 ° C). When the heater reaches
too high temperature, heang mode will be turned off
and the device switches to mode of operaon without
air heang, which will be signalled by an intermient
sound signal.
i
7. Connection scheme
i
The curtain can only be controlled by the
thermostat with VOLTAGE-FREE output
(so-called normally opened/ normally
closed (NO/NC) contacts).
CONNECTION OF VOLTAGE TO CONTROL INPUTS WILL
PERMANENTLY DAMAGE THE CURTAIN CONTROL SYSTEM.
WARNING! RED
BLUE
BLACK
WHITE
TERMOSTAT
THERMOSTAT
CONTROL INPUTS
VOLTAGE FREE
OUTPUT
CZUJNIK
OTWARCIA
DRZWI
SENSOR
OPENINGS
DOOR
(
(

8. Environmental Protecon and Recycling
INFORMATION ABOUT WASTE ELECTRICAL AND ELECTRONIC EQUIPMENT
We hereby would like to inform you that the main purpose of European regulaons and the Act of September 11, 2015
on waste electrical and electronic equipment is to reduce the amount of waste arising from the equipment, to ensure an
appropriate level of collecon, reuse and recycling of spent equipment, and to increase public awareness of its
harmfulness to the natural environment at every stage of the use of electrical and electronic equipment.
Therefore, it should be pointed out that households play a key role in contribung to re-use and recovery, including
recycling of waste equipment. User of equipment intended for households is obliged to hand over the waste of
electronics that are no longer usable to an authorised collector. However, you should remember that products belonging
to the group of electrical or electronic equipment should be disposed of by an authorised person to their collecon
points.
household waste across EU. The used product must be recycled in order to prevent possible damage
to the environment or health. In accordance with applicable law, non-usable powered by electricity
devices should be collected separately, in specially designated locations, in order to process and
reuse them, on the basis of the applicable environmental standards (WEEE Directive 2012/19/EU).
ATTENTION! THE DEVICE MUST NOT BE DISPOSED IN HOUSEHOLD WASTE.
This crossed-out wheeled bin symbol indicates that the product must not be disposed of with
You can return spent device to the shop where you will also buy a new one. The CCR REEWEEE
recycling organisation, which we have signed a contract with, will pick it up.
i
13

v. 1.07
Table of contents
Languages:
Other Warmtec Heater manuals
Popular Heater manuals by other brands

Toyotomi
Toyotomi Kero Sun Omni 120 (Type C) Operation and maintenance instructions

Johnson
Johnson Kaldo Instructions for use

Bionaire
Bionaire BCH4130 instruction manual

Advers
Advers PLANAR-4D-12 Operation manual

AGI
AGI GGH-8371LO Installation, operation, and parts manual

Nu-Flame
Nu-Flame FENTON CF Use, installation & servicing instructions