Warmtec WRM06+ User manual

www.warmtec.pl
WARMTEC Sp. z o.o., Al. Jana Pawła II 27, 00-867 Warszawa
biuro@warmtec.pl
www.warmtec.pl
1
MANUAL
MANUAL
Air curtain
WRM06+
WRM08+
WRM10+
WRM12+
Thank you for buying WARMTEC Air Curtain.
Please read this manual carefully before using the appliance.
V. 1.06

www.warmtec.pl
WARMTEC Sp. z o.o., Al. Jana Pawła II 27, 00-867 Warszawa
biuro@warmtec.pl
www.warmtec.pl
2
3. Installation tips
3.1 Air curtains needs to be mounted to solid surface to
provide safe usage.
Incorrect installation can cause noises or/and
vibrations which in consequence leads to loosening
connections.
3.2 Installation is available inside the room only. Do not
install air curtain outside the building.
WARMTEC air curtains series WRM+ are professional, high-performance appliances with heating power from 6kW to 12 kW and
width from 90 cm to 180 cm long. WRM+ air curtains provide strong air stream, which creates effective barrier against heat loss
through open door and gives protection against insects, dust, smoke etc. WARMTEC air curtains are suitable to mount above door
openings in many buildings such as offices, consulting rooms, hotels, restaurants, warehouses, shops and many others.
1. Introduction
2. Dimensions
Air inlet
Air outlet
OutdoorIndoor
V. 1.06
190 mm
105 mm
260 mm
440 mm
WRM06+, WRM08+
840 mm
WRM10+, WRM12+
90 mm
1500 mm (WRM10+)
1200 mm (WRM08+)
900 mm (WRM06+)
1800 mm (WRM12+)

www.warmtec.pl
WARMTEC Sp. z o.o., Al. Jana Pawła II 27, 00-867 Warszawa
biuro@warmtec.pl
www.warmtec.pl
3
4.1.3 Screw the mounting plate with concrete anchor,
spring washer and nut.
Washer
Spring washer
Nut
Mounting plate
4.1.4 Lean the appliance on the upper edge of
mounting plate and snap it as shown below. Next
screw the mounting screws to the housing of the air
curtain.
4. Installation
4.1. Installation to a concrete wall.
Mounting plate
Plastics elements
4.1.1 To remove mounting plate unscrew the fastening
screws on the inner side of air outlet.
4.1.2 Next drill the holes for the dowels (set the holes
place with the mounting plate) and set the dowels in a
right place.
P P
P P
ºP P
concrete wall
3.3 Max. height installation is 3 meters above floor
surface. In case the opening width exceeds appliance
length, then mount the bigger air curtain or install two
or more air curtains side-by-side (keep the 20-40 cm
break between them).
3.4 Install the air curtain away from water, steam or
explosive and corrosive gases.
V. 1.06

www.warmtec.pl
WARMTEC Sp. z o.o., Al. Jana Pawła II 27, 00-867 Warszawa
biuro@warmtec.pl
www.warmtec.pl
4
4.2.2 Follow the step A.4.1.4.
Screws
Mounting plate
4.2. Installation to a wooden wall.
4.2.1 Mount the mounting plate with screws to the
wooden wall.
4.3.3 Put in the mounting plate on the prepared fixing.
Fasten the mounting plate to the mounting brackets.
Washer
Spring washer
Nut
Mounting plate
4.3.4 Follow the step A.4.1.4
4.3.2 Mounting of the mounting brackets (not
included).
4.3.1 Disconnect mounting plate from device housing.
(see. 4.1.1)
4.3. Installation to a ceiling.
Mounting plate
Fastening screw
Washer
Spring washer
Nut
V. 1.06

www.warmtec.pl
WARMTEC Sp. z o.o., Al. Jana Pawła II 27, 00-867 Warszawa
biuro@warmtec.pl
www.warmtec.pl
5
Cross section of power cords
4.4. Installation above the ceiling.
4.4.1 Follow the steps as in the case of concrete wall.
4.4.2 Feed the intake air channel according to the
drawing or use intake grill only to be installed in the
suspended ceiling.
Air chanel Inlet
5. Technical features
In case of installation above the ceiling it is
need to move the control panel outside.
Please contact our service before
installation.
i
V. 1.06
Power
supply
[V~/Hz]
Power Heater power
[kW]
I II III
Max. air
speed
[m/s]
LO HI
Max. air
flow
3
[m /h]Noise
level
[dB]
Dimensions Weight
Model
WRM06+
WRM08+
WRM10+
160
200
230
2 4 6
2,7 5,3 8
3,3 6,7 10
11,5 13,6
1200
1000
17001500
22001900
55-57
56-58
57-59
900x190x105
1200x190x105
1500x190x105
13,5
16
18,5
LO HI
400/50
230/50
[kg]
[W]
WRM12+ 300 4 8 12 2300 2700 58-60
1800x190x105
24
Power
Heater power
Cross section
Three phases (400V~ min. cross section)
N, L1, L2,L3
6 kW
2
2,5 mm
Cross section
2,5 m 2
m
8 kW
2,5 m 2
m
10 kW
4 m 2
m
12 kW
Ceiling
Outlet

www.warmtec.pl
WARMTEC Sp. z o.o., Al. Jana Pawła II 27, 00-867 Warszawa
biuro@warmtec.pl
www.warmtec.pl
6
7. Warnings
a) Make sure, that power supply is the same as mentioned on the
name label.
b) Before any maintenance turn off the power supply.
c) Maintenance should be carried out at least once a year.
d) Do not use gasoline, oil, diluent, or other such agents to clean up
the device.
e) It is forbidden to allow any water or other substances to getting
into an engine.
f) When the power supply is directly from a electrical switchtboard,
use appropriate over-current and differential-current fusses.
6. Operation
6.1. Remote control.
a) Press the “ON/OFF” button to turn on the air curtain. To confirm, that the appliance accepts the command from remote
control, air curtain will give an informative signal. Then the appliance starts working in "High Speed" mode. The green LED
diode lights up on the main control panel.
Press the “ON/OFF” button again to turn off the air curtain. The green LED diode will go off.
b) "High Speed" mode sets automatically after turning on the air curtain. To set up "Low Speed" mode, press “COOL” button.
To return to the original settings and activate "High Speed" mode, press “COOL“ button again.
c) Three-stage heating power: To activate heating mode, press “HEAT” button. The appliance confirms accepting this
command by giving the informative signal. This operation switches the mode of the device from cooling to heating (first
heating stage). The first red LED diode lights up on the main control panel.
Press the “HEAT” button the second time to set up the second stage of heating mode. The second red LED diode lights up on
the main control panel.
Press the “HEAT” the third time to set up third stage of heating mode. The third red LED diode lights up on the main control
panel.
Another pressing “HEAT” button switches operation mode from heating to cooling and lights up the green LED diode (see
a)).
d) When the air curtain is in the cooling mode (green LED diode), press “ON/OFF” button to turn of the device immediately.
e) When the air curtain is in the heating mode (red LED diode), press “ON/OFF” button to switch operation mode to cooling
stage. The green LED diode will be flashing. The air curtain will be working for 3 minutes in cooling mode for the electric
heaters to be cooled. Then the device turns off.
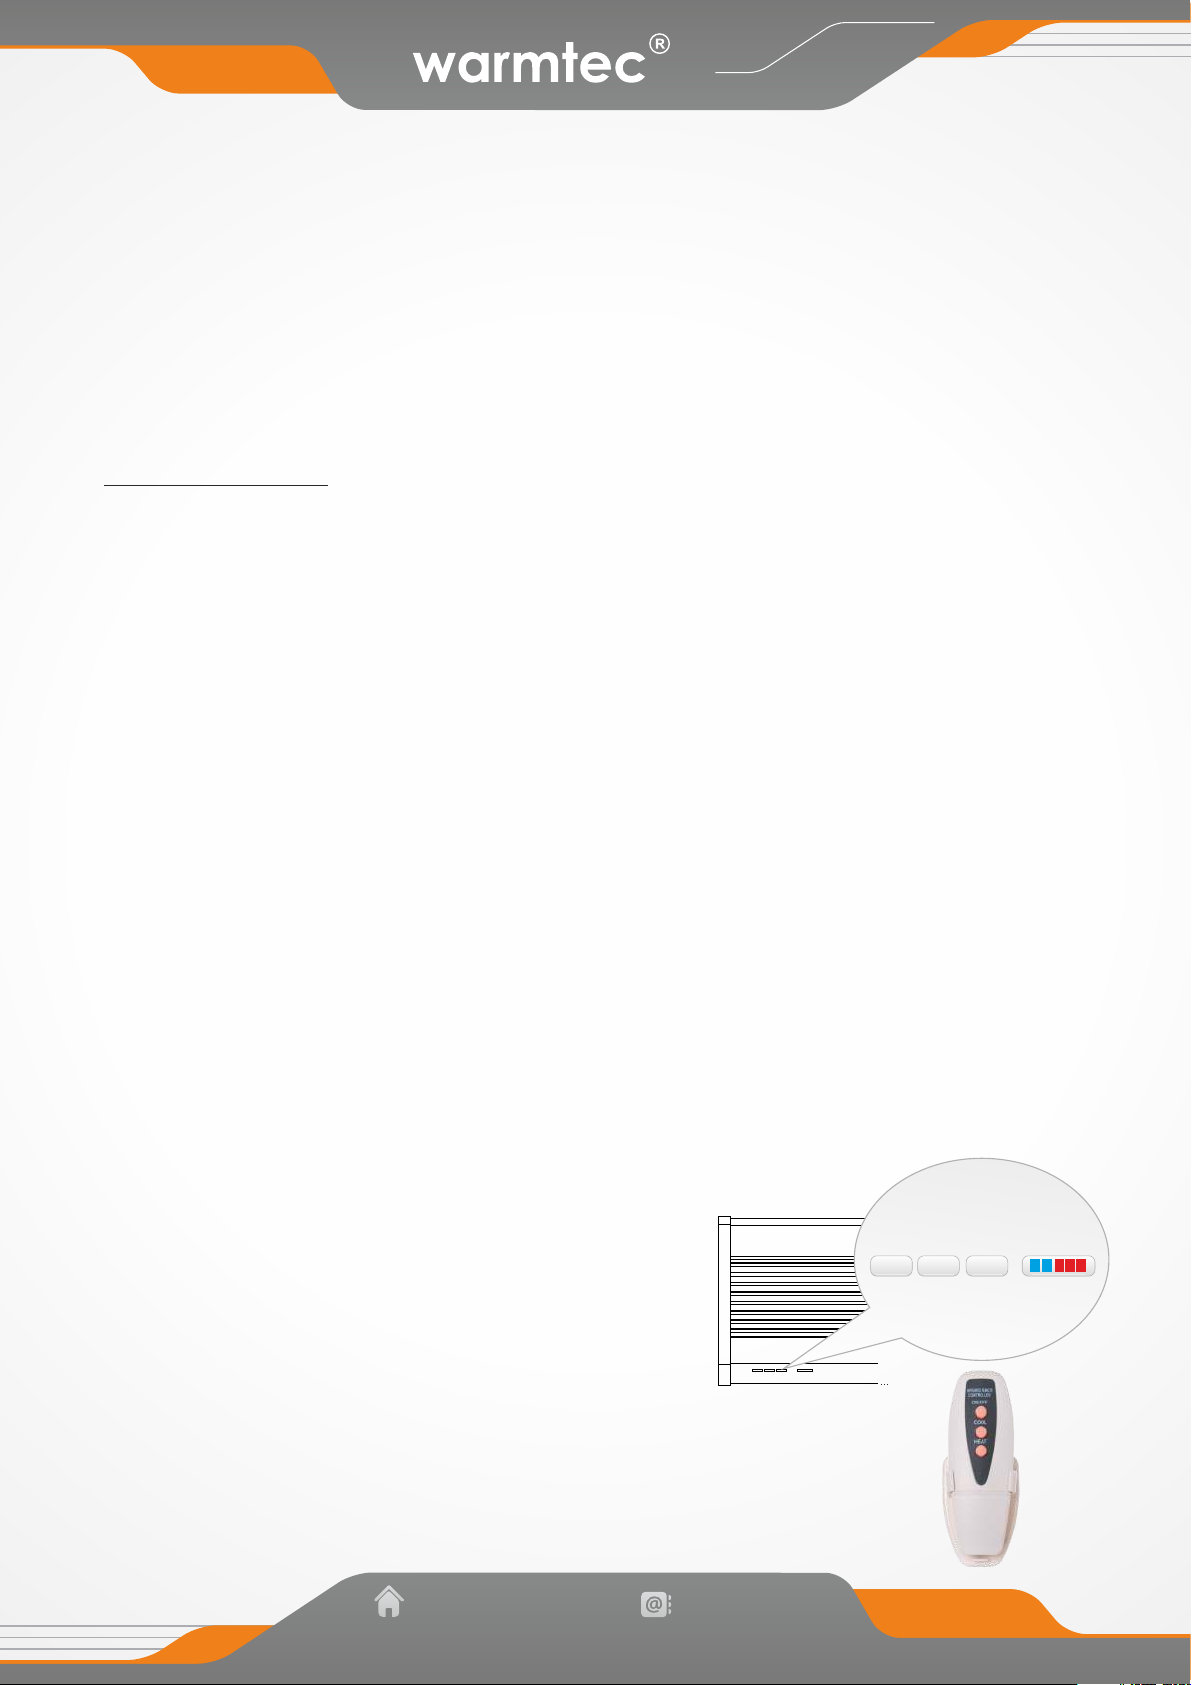
6.2. Control via the build-in control panel.
The same as the 6.1.
6.3. Protection against overheating.
The device has protection against overheating (above 135°C). When the heater temperature reaches
135°C, then the device can be switched again to the heating mode.
135°C or more, then
heating mode turns off automatically and the device starts working in cooling mode (without heating). The green LED diode
lights up. When the heater temperature drops under
On/Off COOL HEAT
CONTROL
PANEL
V. 1.06
This manual suits for next models
3
Table of contents
Other Warmtec Heater manuals
Popular Heater manuals by other brands

Airflow
Airflow EPO-V Series Manual for installation, use and maintenance

LUCHT LHZ
LUCHT LHZ TECHNOTHERM VPS Installation and operating instructions

Soleus Air
Soleus Air HGW-308 user manual

Schwank
Schwank Select12 Series manual

Frico
Frico Thermoplus EC450 Mounting and operating instructions

Alpina
Alpina SF-9353 Instructions for use