manuals.online logo
Brands
  1. Home
  2. •
  3. Brands
  4. •
  5. Warmup
  6. •
  7. Thermostat
  8. •
  9. Warmup 6iE User manual

Warmup 6iE User manual

Display Power Base Screwdriver Mounting Screws Floor Sensor
The 6iE mini must be installed by a qualied
electrician. It requires a permanent 230 V AC
supply from a 30mA RCD or RCBO protected
circuit in accordance with the current edition
of the BS7671 Wiring Regulations.
Isolate the 6iE mini from the mains supply
throughout the installation process.
Ensure that wires are fully inserted into the
terminals and secured, free strands should
be trimmed, as they could cause a short-
circuit.
Install the 6iE mini in an area with good
ventilation. It should not be beside a
window/door, in direct sunlight or above
another heat generating device (e.g. radiator
or TV).
Ensure the distance from your router to the
6iE mini is not excessive. This will ensure the
wireless connection is not subject to range or
interference issues once installed.
For bathroom installations the 6iE mini MUST
be mounted outside of Zones 0, 1 and 2. If
this is not possible then it must be installed
in an adjacent room, controlling the rooms
using the oor sensor only.
The 6iE mini and its packaging are not toys;
do not allow children to play with them. Small
components and packaging present a risk of
choking or suocation.
The 6iE mini is suitable for indoor use only. It
must not be exposed to moisture, vibrations,
mechanical loads or temperatures outside of
its rated values.
For safety and licensing reasons (CE/UKCA),
unauthorised change and/or modication of
the 6iE mini is not permitted.
Pack Contents
Safety Information
q
q
q
q
q
q
q
q
Step 1 - Getting Started
Isolate the thermostat and supply from
the mains supply.
Install a 50 mm deep electrical back box in
your preferred thermostat location. Pull wires
(heater, supply and oor sensor) through
back box and complete terminal wiring.
Unclip the display from the power base.
Release the display as shown.
2
1
1 2
34
230 V AC:
50Hz
Floor Sensor
Step 2 - Wiring Connections
Heaters. Max.
16A (3,680W)
This Quick Start Guide will guide you through
the installation and initial setup of your 6iE
mini thermostat. Always retain this manual
for future use. If you have any issues please
contact our technical helpline.
q
L1 & N4 Heater Live and Neutral
Max. 16A (3680W)
L2 & N3 Supply Live and Neutral
5 & 6 Floor Sensor (No Polarity)
ELECTRIC UNDERFLOOR HEATING
L1 Switched Live to Wiring Centre
L2 & N3 Supply Live and Neutral
N4 Not Used
N4 Not Used
5 & 6 Floor Sensor (No Polarity)
5 & 6 Not Used
HYDRONIC UNDERFLOOR HEATING
L1 Switched Live to Zone Valve/Boiler
L2 & N3 Supply Live and Neutral
CENTRAL HEATING
For extra low voltage or volt-free systems a contactor
must be used. Connecting the 6iE mini directly to
extra low voltage or volt-free boilers may cause
damage to the boiler circuit.
NOTE: When using the sensor connected to
terminals 5 & 6 for air (or oor) temperature
control, a limit probe for the oor (or air) can
be connected to terminals 6 & 7 (EXT).
WiFi Thermostat
TM
6iE
mini
The smartest, most efficient way to control
the world’s best selling floor heating.
Miniaturised.
WARNING!
The 6iE mini must be installed by a qualied electrician in accordance with the current edition of the
BS7671 Wiring Regulations. Wire the thermostat using the diagram above and heater type wiring
information below.
NOTE: For loads above 10 A, the conductor wire gage should be at least 2.5mm²
Step 4 - Initial Setup
Download the MyHeating App. Open the My Heating App and scan the QR
Code on the 6iE mini screen protector. Follow
the instructions in the App to complete setup.
1 2
‘MyHeating’
by Warmup
Step 3 - Thermostat Mounting
Insert xing screws through mounting holes
of the power base and tighten.
Re-attach the front housing until a “click” is
heard. You can now power up the 6iE mini.
Follow the on screen instructions to set up
your system.
1 2
Step 5 - Add Location and Room
Location
A location needs to be setup before a room can be congured and the 6iE mini
thermostat registered. Creating a location is user friendly and easy to follow, it is
advised to have details of your current energy tari and pricing to hand, as these
will be required if you wish to use the energy monitoring features.
The MyHeating App will guide you through the setup of your 6iE mini thermostat. You will have to
set up your house location and then the room your new thermostat is located.
Room Setup
With a location now setup, the next step is to register a room in which your
thermostat is located. This is the heating zone your 6iE mini will control. Please
have your device number to hand and ensure you correctly set the correct System
Type and Wattage of heaters connected.
Operating Guide
Please scan the QR Code for further information such as how to set a program, setting in manual
mode or using the energy monitor function.
NOTE: If an external relay or contacter relay has been installed please set System Type as Electric
+ Relay.
NOTE: Hereby, Warmup plc, declares that the radio equipment type
RSW-01-XX-YY is in compliance with the RED Directive 2014/53/EU and
Radio Equipment Regulations 2017. The declarations of conformity may
be consulted by scanning the QR Code or visiting www.literature.warmup.
co.uk/d-o-c/6iE-mini.
Technical Specications
Instructions for Disposal
Do not dispose of the device with regular domestic waste! Electronic equipment must be
disposed of at local collection points for waste electronic equipment in compliance with the
Waste Electrical and Electronic Equipment Directive.
Contact
Warmup - IM - 6iE mini - V1.3 2021-03-12_EN
21.5
09:00
Warranty
Contact
Warmup plc
www.warmup.co.uk
[email protected]
Tel: 0345 345 2288
Fax: 0345 345 2299
Warmup GmbH
www.warmupdeutschland.de
[email protected]
Tel: 008000 – 345 0000
Fax: 04431 - 948 70 18
Model RSW-01-XX-YY
Operating Voltage 230 V AC : 50 Hz
Protection Class Class II
Max. Load 16A (3680W)
Rated impulse voltage 4000V
Automatic action 100,000 cycles
Disconnection means Type 1B
Pollution degree 2
Max. Ambient Temperature 0 - 40°C
Relative Humidity 80%
IP Rating IP33
Dimensions 86 x 86 x 16 mm
Screen size 1.8”
Sensors Air & Floor (Ambient)
Sensor Type NTC10k 3m Long (Can Be Extended To 50m)
Operating Frequency 2401 - 2484MHz
Max. Radio-Frequency Power Transmitted 20dBm
Installation Depth 50 mm Back Box
Compatibility
Electric, Hydronic Underoor Heating. Max. 16A (3680W)
Central Heating Systems
(Combi & system boilers with switch live, 230V AC input)
Er-P Class IV
Warranty 12 Years
Approvals BEAB
Warmup plc warrants this product, to be free from defects in the workmanship or
materials, under normal use and service, for a period of twelve (12) years from the date
of purchase by the consumer when installed with a Warmup heater.
If at any time during the warranty period the product is determined to be defective,
Warmup shall repair or replace it, at Warmup’s option. If the product is defective, please
either;
Return it, with a bill of sale or other dated proof of purchase, to the place from which you purchased it,
or
Contact Warmup. Warmup will determine whether the product should be returned or replaced.
The twelve (12) year warranty only applies if the product is registered with Warmup within 30 days after
purchase. Registration can be completed online at www.warmup.co.uk
This warranty does not cover removal or re-installation costs and shall not apply if it is shown by
Warmup that the defect or malfunction was caused by failure to follow the instruction manuals,
incorrect installation or damage which occurred while the product was in the possession of a consumer.
Warmup’s sole responsibility shall be to repair or replace the product within the terms stated above. If
the product is installed with a non-Warmup heater a three (3) year warranty will apply. This warranty
does not extend to to any associated software such as apps or portals.
WARMUP SHALL NOT BE LIABLE FOR ANY LOSS OR DAMAGE OF ANY KIND, INCLUDING ANY INCIDENTAL
OR CONSEQUENTIAL DAMAGES RESULTING, DIRECTLY OR INDIRECTLY, FROM ANY BREACH OF ANY
WARRANTY, EXPRESS OR IMPLIED, OR ANY OTHER FAILURE OF THIS PRODUCT. THIS WARRANTY IS
THE ONLY EXPRESS WARRANTY WARMUP MAKES ON THIS PRODUCT. THE DURATION OF ANY IMPLIED
WARRANTIES, INCLUDING THE WARRANTIES OF MERCHANTABILITY AND FITNESS FOR A PARTICULAR
PURPOSE, IS HEREBY LIMITED TO THE TWELVE-YEAR DURATION OF THIS WARRANTY.
This Warranty does not aect your statutory rights.
12
W
A
R
M
U
P
1
2
Y
E
A
R
L
I
M
I
T
E
D
W
A
R
R
A
N
T
Y
W
A
R
M
U
P
1
2
Y
E
A
R
L
I
M
I
T
E
D
W
A
R
R
A
N
T
Y
Warmup plc n704 Tudor Estate nAbbey Road nLondon nNW10 7UW nUK
Warmup GmbH nOttostraße 3 n27793 Wildeshausen nDE
The WARMUP word and associated logos are trade marks. © Warmup Plc. 2021 – Regd. TM Nos. 1257724, 4409934, 4409926, 5265707. E & OE.
Other manuals for 6iE

3

Other Warmup Thermostat manuals

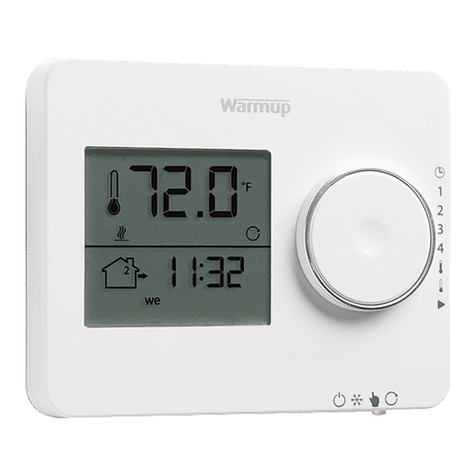
Warmup tempo User manual

Warmup

Warmup tempo User manual

Warmup MTC-1991-WU User manual

Warmup

Warmup MTC-1991-WU User manual

Warmup UCCG Installation manual

Warmup

Warmup UCCG Installation manual

Warmup MTC-1991-WU User manual

Warmup

Warmup MTC-1991-WU User manual

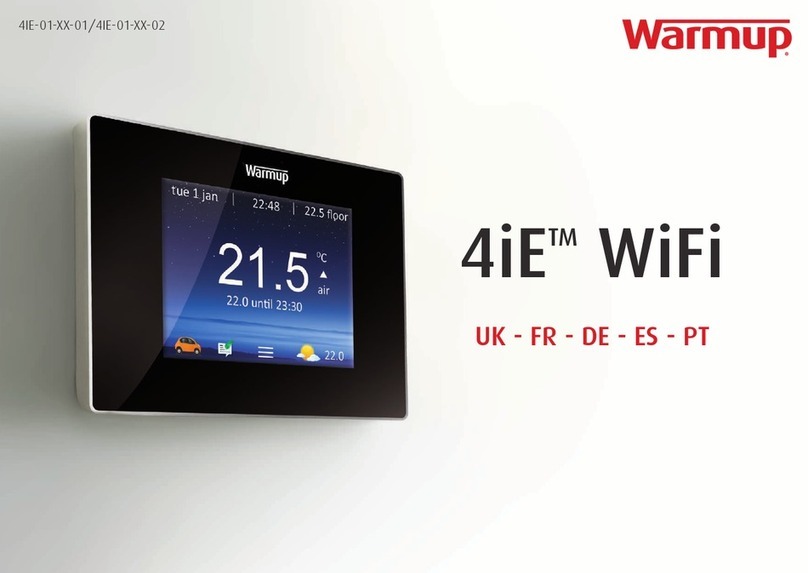
Warmup 4iE WiFi User manual

Warmup

Warmup 4iE WiFi User manual

Warmup 4iE WiFi Quick start guide

Warmup

Warmup 4iE WiFi Quick start guide

Warmup Tempo User manual

Warmup

Warmup Tempo User manual

Warmup 6iE User manual

Warmup

Warmup 6iE User manual

Warmup OTN-1991-WA User manual

Warmup

Warmup OTN-1991-WA User manual

Warmup 3IE User manual

Warmup

Warmup 3IE User manual

Warmup Element User manual

Warmup

Warmup Element User manual

Warmup konekt WIRELESS KW-UKETRV User manual

Warmup

Warmup konekt WIRELESS KW-UKETRV User manual

Warmup Terra User manual

Warmup

Warmup Terra User manual

Warmup 3IE User manual

Warmup

Warmup 3IE User manual

Warmup W3115 User manual

Warmup

Warmup W3115 User manual

Warmup UDG User manual

Warmup

Warmup UDG User manual

Warmup 5iE Quick start guide

Warmup

Warmup 5iE Quick start guide

Warmup 3IE User manual

Warmup

Warmup 3IE User manual

Warmup 3IE User manual

Warmup

Warmup 3IE User manual

Warmup 3IE User manual

Warmup

Warmup 3IE User manual

Warmup WA-TSTAT-V User manual

Warmup

Warmup WA-TSTAT-V User manual

Warmup 3IE User manual

Warmup

Warmup 3IE User manual

Warmup W3WT01 User manual

Warmup

Warmup W3WT01 User manual

Warmup One User manual

Warmup

Warmup One User manual

Popular Thermostat manuals by other brands

Hunter 42227 owner's manual

Hunter

Hunter 42227 owner's manual

Watts MILUX RF user guide

Watts

Watts MILUX RF user guide

Current WTS10 installation instructions

Current

Current WTS10 installation instructions

OJ Electronics MTD2 user manual

OJ Electronics

OJ Electronics MTD2 user manual

OJ Electronics ETN4-1999 manual

OJ Electronics

OJ Electronics ETN4-1999 manual

Potterton EP2 Customer's manual

Potterton

Potterton EP2 Customer's manual

Lux Products PUREPRO DP732T instruction manual

Lux Products

Lux Products PUREPRO DP732T instruction manual

England's Stove Works 55-SHP22 installation guide

England's Stove Works

England's Stove Works 55-SHP22 installation guide

Venstar ColorTouch T6900 Owner's manual and installation instructions

Venstar

Venstar ColorTouch T6900 Owner's manual and installation instructions

Honeywell FocusPRO TH6110D1005/U user guide

Honeywell

Honeywell FocusPRO TH6110D1005/U user guide

Siemens REV24 installation instructions

Siemens

Siemens REV24 installation instructions

ritetemp 6020 install guide

ritetemp

ritetemp 6020 install guide

Honeywell T8700B owner's guide

Honeywell

Honeywell T8700B owner's guide

AirPatrol Lite Nordic quick start guide

AirPatrol Lite

AirPatrol Lite Nordic quick start guide

Honeywell t8501A installation instructions

Honeywell

Honeywell t8501A installation instructions

Myson MPRT RF User instructions

Myson

Myson MPRT RF User instructions

resideo Honeywell Home T6RWP quick start guide

resideo

resideo Honeywell Home T6RWP quick start guide

Weishaupt WEM-RG1 Installation and operating instruction manual

Weishaupt

Weishaupt WEM-RG1 Installation and operating instruction manual

manuals.online logo
manuals.online logoBrands
  • About & Mission
  • Contact us
  • Privacy Policy
  • Terms and Conditions

Copyright 2025 Manuals.Online. All Rights Reserved.