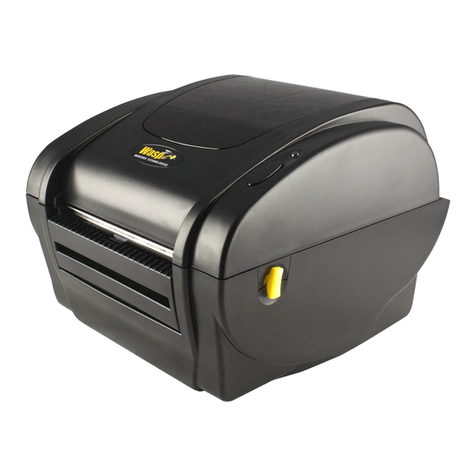
Wasp WPL25 User manual

WPL25/WHC25

© 2012 by Wasp Barcode Technologies. All rights reserved.
No part of this publication may be reproduced or used in any form, or by any electrical or mechanical means, without
permission in writing from Wasp Barcode Technologies. This includes electronic or mechanicalmeans,such as photocopying,
recording, or information storage and retrieval systems. The material in this manual is subject to change without notice.
The software is provided strictly on an “as is” basis. Allsoftware, including firmware, furnished to the user is on a licensed
basis. Wasp Barcode Technologies grants to the user a non-transferable and nonexclusive license to use each software or
firmware program delivered hereunder (licensed program). Except as noted below, such license may not be assigned,
sublicensed, or otherwise transferred by the user without prior written consent of Wasp Barcode Technologies. No right to
copy a licensed program in whole or in part is granted, except as permitted under copyright law. The usershall not modify,
merge, or incorporate any form or portion of a licensed program with other program material, create a derivative work from a
licensed program, or use a licensed program in a network without written permission from Wasp Barcode Technologies. The
user agrees to maintain Wasp Barcode Technologies’ copyright notice on the licensed programs delivered hereunder and to
include the same on any authorized copies it makes, in whole or in part. The useragrees notto decompile,disassemble, decode,
or reverse engineerany licensed program delivered to the user or any portion thereof.
Wasp Barcode Technologies reserves the right to make changes to any software orproduct to improve reliability, function, or
design.Wasp Barcode Technologies doesnot assume any product liability arising out of, or in connection with,theapplication
or use of any product, circuit, or application described herein. No license is granted, either expressly or by implication,
estoppel, or otherwise under any Wasp Barcode Technologies, intellectual property rights. An implied license only exists for
equipment, circuits, and subsystems contained in Wasp Barcode Technologies products.
Wasp Barcode Technologies is a registered trademark of Wasp Barcode Technologies. Otherproductnames mentioned in this
manual may be trademarks or registered trademarks of their respective companies and are hereby acknowledged.
Wasp Barcode Technologies
1400 10th St.
Plano TX 75074
http://www.waspbarcode.com
i
WPL25/WHC25 User Manual
Table of Contents
Chapter 1 - Introduction......................................................................................................1
1.1 Introducing the WPL25/WHC25 Printer.....................................................................1
1.2 Compliances............................................................................................................1
Chapter 2 – Operations Overview.......................................................................................2
2.1 Unpacking and Inspection ........................................................................................2
2.2.1 Front View....................................................................................................3
2.2.2 Interior View.................................................................................................4
2.2.3 Rear View....................................................................................................5
Chapter 3 - Setup.................................................................................................................6
3.1 Setting Up the Printer...............................................................................................6
3.2 Loading the Media....................................................................................................6
3.2.1 Loading........................................................................................................6
3.2.2 Loading External Media (WPL25 model only) .............................................10
3.2.3 Loading Media in Peel-off Mode (Option)....................................................12
3.2.4 Loading Media in Cutter Mode (Option)......................................................14
3.3 Diagnostic Tool.......................................................................................................15
3.3.1 Start Diagnostic Tool...................................................................................16
3.3.2 Printer Function (Calibrate sensor, Ethernet setup, RTC setup…..).............17
3.4 Setting Ethernet by Diagnostic Utility (WPL25).......................................................17
3.4.1 Using USB Interface to Setup Ethernet Interface........................................18
3.4.2 Using Ethernet Interface to Setup Ethernet Interface..................................19
3.5 Install MicroSD Memory Card.................................................................................20
3.6 Mount the Printer on the Wall .................................................................................22
3.7 Using the PC USB Keyboard with Printer USB Host Interface (WHC25) .................23

ii
WPL25/WHC25 User Manual
Chapter 4 – LED and Button Functions............................................................................24
4.1 LED Indicator.........................................................................................................24
4.2 Regular Button Functions.......................................................................................24
4.3 Power on Utilities ...................................................................................................24
4.3.1 Gap/BlackMark Sensor Calibration............................................................25
4.3.2 Gap/BlackMark Calibration, Self-Test and Dump Mode..............................26
4.3.3 Printer Initialization.....................................................................................28
4.3.4 Set Black Mark Sensor as Media Sensor and Calibrate the Black Mark Sensor 29
4.3.5 Set Gap Sensoras Media Sensor and Calibrate the Gap Sensor................30
4.3.6 Skip AUTO.BAS.........................................................................................30
Chapter 5 - Troubleshooting.............................................................................................31
5.1 LED Status.............................................................................................................31
5.2 Print Problem.........................................................................................................32
5.3 LCD Display (WPL25)............................................................................................33
Chapter 6 – Maintenance...................................................................................................35

1
WPL25/WHC25 User Manual
Chapter 1 - Introduction
1.1 Introducing the WPL25/WHC25 Printer
Thank you for purchasing the WPL25 or WHC25 Barcode Printer. Although the printer has a small
footprint, it delivers reliable, superior performance.
This printer provides direct thermal printing at user-selectable speeds of: 2.0, 3.0, 4.0 or 5.0 ips. It
accepts roll feed, die-cut, and fan-fold media with gap or black mark. All common barcode formats are
available. Fonts and barcodes can be printed in 4 directions with 8 different alphanumeric bitmap fonts
and built-in scalable font capability. You will enjoy trouble-free, high-throughput for printing labels with
this printer.
1.2 Compliances
CE Class B:
EN55022: 1998+A1: 2000+A2: 2003
EN55024: 1998+A1: 2001+A2: 2003 IEC 61000-4 Series
EN61000-3-2: 2006 & EN61000-3-3: 1995+A1: 2001
FCC Part 15, Class B
UL, CUL: UL60950-1
C-Tick:
CFR 47, Part 15/CISPR 22 3rd Edition: 1997, Class B
ANSI C63.4: 2003
Canadian ICES-003
TÜV/Safety: EN60950-1 / IEC 60950-1
CAUTION
1. HAZARDOUS MOVING PARTS IN CUTTER MODULE. KEEP FINGERS AND OTHER
BODY PARTS AWAY.
2. THE MAIN BOARD INCLUDES A REAL-TIME CLOCK FEATURE THAT HAS A LITHIUM
BATTERY CR2032 INSTALLED. THERE IS A RISK OF EXPLOSION IF THE BATTERY IS
REPLACED BYAN INCORRECTTYPE.
3. DISPOSE OF USED BATTERIES ACCORDING TO THE MANUFACTURER’S
INSTRUCTIONS.
Note: The maximum printing ratio per dot line is 15% for this printer. To print the full web black line, the
maximum black line height is limited to 40 dots, which is 5mm for 203 DPI resolution printer.

2
WPL25/WHC25 User Manual
Chapter 2 – Operations Overview
2.1 Unpacking and Inspection
This printer has been specially packaged to withstand damage during shipping. Please carefully
inspect the packaging and printer upon receiving the barcode printer. Please retain the packaging
materials in case you need to reship the printer.
Unpacking the printer, the following items are included in the carton.
One printer unit
One Windows labeling software/Windows driver CD disk
One power cord
One auto switching power supply
One USB interface cable
If any parts are missing, please contact Wasp Barcode Technologies.

3
WPL25/WHC25 User Manual
2.2.1 Front View
WPL25 model WHC25 model
1. Top cover open lever
2. MicroSD card socket
3. Media view window
4. LED indicator
5. Feed button
6. Paper exit chute
7. LCD display (Option for WPL25 model)
* Recommended MicroSD card specification.
SD card spec SD card capacity Approved SD card manufacturer
V1.0, V1.1 MicroSD 128 MB Transcend, Panasonic
V1.0, V1.1 MicroSD 256 MB Transcend, Panasonic
V1.0, V1.1 MicroSD 512 MB Transcend, Panasonic
V1.0, V1.1 MicroSD 1 GB Transcend, Panasonic
V2.0 SDHC CLASS 6 MicroSD 4 GB Transcend
- The DOS FAT file system is supported for the SD card.
- Folders/files stored in the SD card should be in the 8.3 filename format
1
3
4
5
2
6
1
3
4
5
2
6
7

4
WPL25/WHC25 User Manual
2.2.2 Interior View
1. Top cover
2. Media holder
3. Media guide
4. Printhead
5. Gap sensor (receiver)
6. Gap sensor (transmitter)
7. Platen roller
8. Black mark sensor
9. Media holder lock switch
7
6
5
4
1
8
3
2 (WPL25 model)
9
2 (WHC25 model)

5
WPL25/WHC25 User Manual
2.2.3 Rear View
WPL25 model WHC25 model
1. Power switch
2. Power jack socket
3. USB interface
4. RS-232C interface (Option for WPL25 mode)
5. Fan-fold paper entrance chute
6. Ethernet interface (Option for WPL25 model)
7. USB host (Factory option for WHC25 mode)
Note: The interface picture here is for reference only. Please refer to the product specification for the
interfaces availability.
1
4
3
2
5
6
1 3
2
7

6
WPL25/WHC25 User Manual
Chapter 3 - Setup
3.1 Setting Up the Printer
1. Place the printer on a flat, secure surface.
2. Make sure the power switch is set to “off”.
3. Connect the printer to the computer with the provided USB cable.
4. Plugthe power cord into theAC power cord socket at therear ofthe printer, and then plug the
power cord into a properly grounded power outlet.
Note: Please switch OFF printer power switch prior to plug in the power cord to printer power
jack.
3.2 Loading the Media
3.2.1 Loading
1. Open the printer top cover by pulling the tabs located on each side towards the front of the
printer, and then lift the top cover to the maximum open angle.

7
WPL25/WHC25 User Manual
2. The media holder can be used for 1” and 1.5” media core by rotating the upper part of label
holder180 degrees clockwise. (For WPL25 model only).
3. Separate the media holders to the label roll width.
WPL25 model WHC25 model
1”
1.5”

8
WPL25/WHC25 User Manual
4. Place the roll between the holders and close them onto the core.
WPL25 model WHC25 model
5. Place the paper, printing side face up, through the media guides, media sensor and place the
label leading edge onto the platen roller.
WPL25 model WHC25 model
Platen roller
Sensor
Media guides

9
WPL25/WHC25 User Manual
6. Close the top cover gently and make sure the cover latches securely.
WPL25 model WHC25 model
7. Use “Diagnostic Tool” to set the media sensor type and calibrate the selected sensor. (Start
the “Diagnostic tool” Select the “Printer Configuration” tab Click the “Calibrate Sensor”
button)
Note:Please calibrate the gap/black mark sensor when changing media.
1. Loading path for roll labels

10
WPL25/WHC25 User Manual
WPL25 model WHC25 model
3.2.2 Loading External Media (WPL25 model only)
1. Open the printer’s top cover and separate the media holders to fit the media width.
2. Press down the media holder lock switch to fix the media holder.

11
WPL25/WHC25 User Manual
3. Feeds the media through the rear external label entrance chute. And place the paper, printing
side face up, through the media guides, media sensor and place the label leading edge onto
the platen roller.
4. Close the top cover gently.
5. Use “Diagnostic Tool” to set the media sensor type and calibrate the selected sensor. (Start
the “Diagnostic tool” Select the “Printer Configuration” tab Click the “Calibrate Sensor”
button)
Note:Please calibrate the gap/black mark sensor when changing media.
Rear external
label entrance

12
WPL25/WHC25 User Manual
3.2.3 Loading Media in Peel-off Mode (Option)
1. Refer to section 3.2.1 to load the media.
2. Open the top cover and peel-off panel after calibrated the sensor.
3. Lead the media through the backing paper opening, beneath the peel-off roller.
Peel-off panel
Peel-off roller
Backing paper opening

13
WPL25/WHC25 User Manual
4. Push the peel-off panel back to the printer
5. Close the top cover gently.
6. Press the FEED button to test.
Note:Please calibrate the gap/black mark sensor when changing media.
Backing paper (Liner)

14
WPL25/WHC25 User Manual
3.2.4 Loading Media in Cutter Mode (Option)
1. Refer to section 3.2.1 to load the media.
2. Lead the media through the cutter paper opening.
3. Close the top cover gently.
4. Use “Diagnostic Tool” to set the media sensor type and calibrate the selected sensor. (Start
the “Diagnostic tool” Select the “Printer Configuration” tab Click the “Calibrate Sensor”
button)
Cutter paper opening

15
WPL25/WHC25 User Manual
Note:Please calibrate the gap/black mark sensor when changing media.
3.3 Diagnostic Tool
The Diagnostic Utility is enclosed in the CD disk \Utilities directory. Users can use this Utility to setup
the Ethernet by RS-232, USB and Ethernet interfaces. The following contents will instruct users how to
configure the Ethernet by these three interfaces.
Note: This utility works with printer firmware V6.00 and later versions.

16
WPL25/WHC25 User Manual
3.3.1 Start Diagnostic Tool
1. Double click on the Diagnostic tool icon to start the software.
2. There are four features (Printer Configuration, File Manager, Bitmap Font Manager,
Command Tool) included in the Diagnostic utility.
Features tab
Printer functions
Interface
Printer Status
Printer setup
Other manuals for WPL25
1
This manual suits for next models
1
Table of contents
Other Wasp Barcode Reader manuals

Wasp
Wasp WWS650 Administrator Guide

Wasp
Wasp WPL608 User manual

Wasp
Wasp WDI4500 User manual

Wasp
Wasp WDI4500 User manual

Wasp
Wasp WWS750 User manual

Wasp
Wasp WWS800 User manual

Wasp
Wasp WWS110i User manual

Wasp
Wasp WPL618 Series User manual

Wasp
Wasp Bar Code Laser Operating instructions

Wasp
Wasp WDI4500 User manual

Wasp
Wasp WWS110i User manual

Wasp
Wasp WWS800 User manual

Wasp
Wasp WLS9600 User manual

Wasp
Wasp WPL304 User manual

Wasp
Wasp 2D User manual

Wasp
Wasp WLS8600 User manual

Wasp
Wasp CCD Scanner Operating instructions

Wasp
Wasp WLR8900 Operating instructions

Wasp
Wasp WLS8600 User manual

Wasp
Wasp WLP 4170 Operating instructions