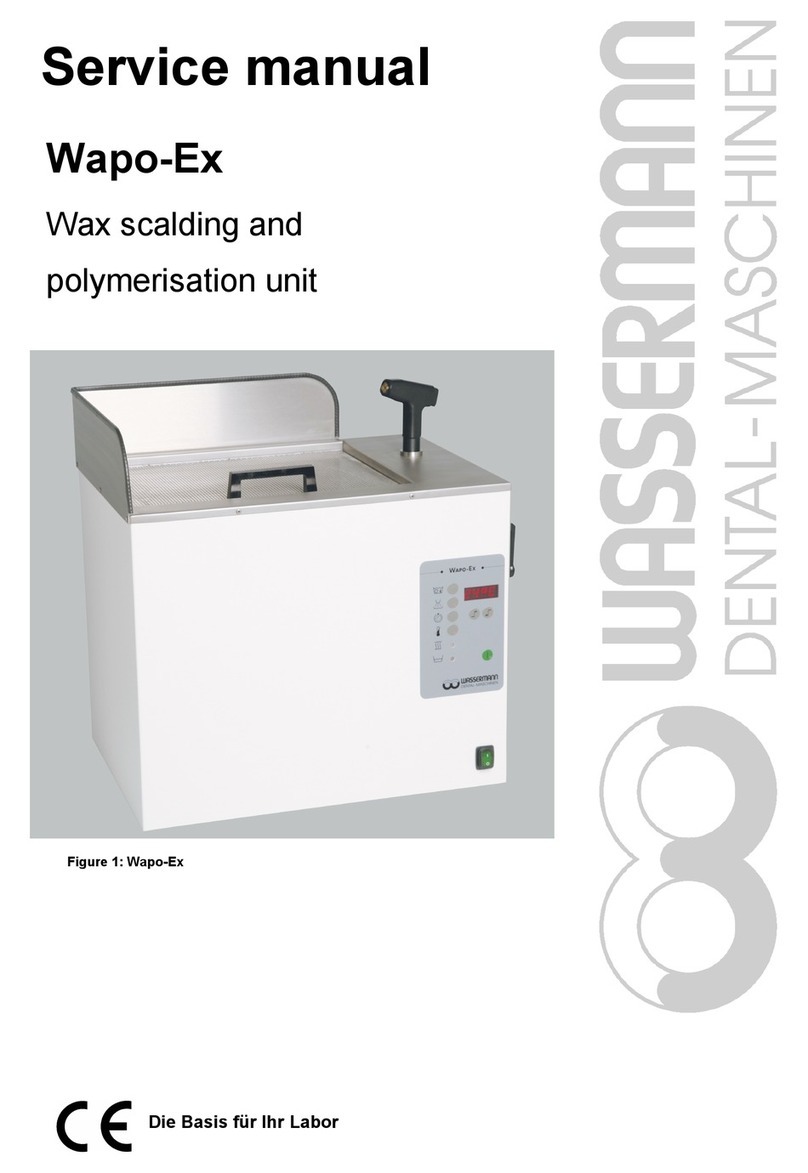
Wassermann Wapo-Ex 8 plus User manual

Boil Out and
Polymerisation Unit
Wapo-Ex 8 plus
MANUAL

Dear customer,
Thank you for choosing a product from the Wassermann range. Wassermann ental-
Maschinen incorporates the highest standards of quality and the latest technology.
In order to enjoy maximum performance and years of trouble-free operation, please read
this user manual carefully before you connect this device and start work, and operate the
device according to the recommended guidelines. The operation safety and the
functionality of this device can only be guaranteed if you follow both the general safety
guidelines and the applying laws to prevent accidents as well as the precautions given in
this user manual. We are not liable for any damages which occur due to inappropriate
usage or faulty operation of this device.
Make sure that anyone using this device has read and understood this user
manual.
Keep this user manual in a safe place where it can be referred to as required at
any time.
The unit complies with the relevant EU guidelines.
The unit is subject to the EU guidelines 2012/19/EU (WEEE irective).
Company address:
Wassermann ental-Maschinen GmbH
Rudorffweg 15-17
21031 Hamburg, Germany
Phone : +49 (0)40 730 926 -20/ -24 Fax.: +49 (0)40 730 37 24
www.wassermann.hamburg
www.facebook.com/Wassermann entalmaschinen
Erstellt: 02.10.20/ msc Version: 1 Wapo-Ex 8 plus: 170977

Contents
1 Features............................................................................................................................4
2 Application.........................................................................................................................4
3 Safety Symbols used in this Manual.................................................................................5
4 Safety Guidelines..............................................................................................................5
5 Responsibility for Operation or amage...........................................................................6
5.1 Warranty.....................................................................................................................6
6 Before Starting..................................................................................................................6
6.1 Transport....................................................................................................................6
6.2 Installation..................................................................................................................7
6.3 Storage.......................................................................................................................7
7 Installation/ Start-up/ Menu Functions..............................................................................8
8 Operation........................................................................................................................18
8.1 General Operating Instructions................................................................................18
8.2 Boiling Out Operation...............................................................................................20
8.3 Hand Shower............................................................................................................20
8.4 Polymerisation Operation.........................................................................................21
9 Troubleshooting..............................................................................................................22
10 Maintenance..................................................................................................................23
10.1 Cleaning.................................................................................................................23
10.2 Servicing.................................................................................................................24
10.3 Repairs...................................................................................................................24
10.4 Spare Parts.............................................................................................................24
10.5 Service Hotline 0049 (0)40 730 926 -20/ -24.........................................................24
10.6 Scope of elivery/ Accessories..............................................................................24
11 Technical ata..............................................................................................................25
12 isposing of the Unit.....................................................................................................26
12.1 Information on isposal for Countries within the EU.............................................26
13 EU eclaration of Conformity.......................................................................................27

1 Features
•Compact tabletop automat for boil out or polymerisation up to 8 flask halves
•Fully automatically
•Reliable polymerisation results
•Convenient boil out process, easy access to flask baskets
•Spray system in the middle, easy to mount/ dismount
•Quick exchange of both functions boil-out and polymerisation
•Touch screen for fast and easy operation
•Integrated timer
•Optical and acoustic lack of water warning
•Low water cut-out in order to protect the heating
•Thermostat protected, gasketless submersible pump, silent and maintenance-free
•For manual scalding: Integrated hand spray made of non-conductive plastic,
lowered lid and all-round splash protection made of stainless steel
•Easy to clean without tools
•esigned for long durability
•High quality construction, most parts made of stainless steel
•Energy saving thermal insulation
2 Application
The Wapo-Ex 8 plus is suitable for automatic boiling out or for the water bath
polymerisation of up to 8 flask halves, as well as for manual scalding of small parts in the
lowered lid with the hand spray. It can be used to fully automatically polymerise all
commercially available plastics through long-term polymerisation (up to 99 hours) as well
as through boiling polymerisation (up to 99 °C).
Only use the device for this type of application.
4

3 Sa ety Symbols used in this Manual
Warning!
This is a warning of risk situations and dangers.
Failure to observe this warning could be life-threatening.
These warnings has to be observed.
In ormation!
This symbol draws your attention to specific features that has to be observed.
4 Sa ety Guidelines
Configuring and operating this equipment requires precise knowledge and observance
of the instructions in this user manual. The equipment is designed only for its intended
application.
WARNING:
Servicing and repairs should be carried out only by authorised specialists.
isconnect the power plug before starting any maintenance work.
Make sure that the equipment is connected to the correct power source.
Attention! Danger o Scalding!
o not touch the hand shower at the nozzle or hose.
o not point the spraying jet towards humans or animals.
The water, which comes out of the nozzle can reach temperatures of 95°C;
therefore only use the hand shower in the area of the screen cover or the hand
basin.
5

5 Responsibility or Operation or Damage
The responsibility for operating the device lies exclusively with the owner or user if said
device is incorrectly serviced, maintained or altered by persons not employed by an
authorised dealer or if the device is used in a manner contrary to its specified purpose.
The unit has to be maintained and operated in accordance with this user manual.
Wassermann ental-Maschinen GmbH is not responsible for damage arising from the
nonobservance of these instructions.
Warranty and responsibility provisions contained in the sales and supply conditions of
Wassermann ental-Maschinen GmbH are not extended by these instructions.
5.1 Warranty
The warranty period for our equipment is 12 months. If faults occur within the
warranty period, contact your dental depot or get in touch directly with our service
department.
Your equipment should only be operated in perfect condition. If faults occur which
could harm operators or third parties, the unit should not be used until it has been
fixed.
This warranty does not cover damage caused by improper use, external mechanical
causes, transport damage or interference with the unit by unauthorized persons.
6 Be ore Starting
6.1 Transport
Before transporting the unit, ensure that it has been unplugged from the power socket.
Make sure that it is packed correctly in order to avoid accidental damage.
Be sure to check for any transport damage when unpacking the goods. Note down
any damage if found.
6

6.2 Installation
Open the box, remove the packing materials, and carefully lift out the device and
accessories. Check the included accessories.
The device has to stand horizontally on a steady and even surface.
Install the device in a place where it will not block the working area and the
functionality (take the dimensions into account).
o not install the unit outdoors or in places without proper ventilation.
Before start-up, be sure the device reaches room temperature.
We strongly recommend to install the unit irmly to the discharge system,
since it is equipped with an automatic water overflow discharge system, i.e. too
much filled very hot water runs out automatically, even when the discharge
cock is closed. Furthermore complete emptying for cleaning purposes etc. is
thus simplified.
Avoid overfilling and check the overflow system / drainage system. Strong
overfilling can damage the electronics in the medium term.
For damage caused by improper handling, no liability is assumed.
6.3 Storage
The unit location is very important when it comes to workplace safety, even if it is only to
be set up there for a short period. The room should be dry, well ventilated and vibration-
free. An even temperature and wooden supports also help. The unit should not be stored
or set up outdoors. If the unit is to be stored for an extended period, protect it from
moisture and dust.
7

7 Installation/ Start-up/ Menu Functions
The container lid is equipped with a sa ety switch.
I you open the lid, the program is interrupted.
Only applies to the automatic program - not to manual operation.
Be ore starting the unit, connect up the following:
Firmly clamp the supplied drainage hose to the device and ensure there is a
suitable drainage facility.
Insert the plug into the socket – make sure that the voltage information between the
device and the mains network is identical.
The filter mat is already placed with the white side facing down.
Fill the unit with water and Wachs-Ex up to the overflow limit (21 litres max.)
osage: approx. 45 ml / 21 litres water.
Switch on the mainswitch (green rocker switch).
Symbol (water deficit) must not appear.
•Also avoid an overflow!
Water deficit
Make sure you define the device's main parameters before switching it on. These settings
are performed in the set-up menu . Familiarise yourself with the many options which
the system offers before starting to boil out. This applies in particular to functions
start temperature and choice of work mode.
8
A
A
3
14
7

The Set-Up Menu
Title Actual temperature To the set-up menu
Heating On/Off Polymerisation menu Boil out menu
9
3
2
465
1

The Set-Up Menu Page 1
Make the following settings in the set-up menu:
Start temperature Timer Continue in the menu
Sleep Calibration method Back to start menu
The Set-Up Menu Page 2
C/°F ate and time Continue in the menu
Work mode Information Back to the start menu
10
89
11
13 9
15
7
10
12
14
16
16

6
55a
5b
Description o Functions 5 - 14
Manual Boil Out Menu (Ball cock position: „lever vertical“) Heating
The manual boil out process is initiated by touching the boil out symbol.
If the temperature falls below 63 °C the process is aborted and the heating
symbol appears. In order to continue working the process must be
manually started by touching the boil out symbol once again.
To relieve the hose and hand shower of pressure when not in use, the ball cock
should always be returned to the horizontal basic position.
Automatic Boil Out Menu (Ball cock basic position: „lever horizontal“)
Here you can set the temperature and the time for the boil out process. By tapping the
numbers increases and the values can then be changed.
Press the Start button to start the program. Interrupt or stop the program by using the
Stop/ Interrupt button.
Stop/ Interrupt Stop Interrupt Back Start
11
c
c

6a Program Parameters
efines the parameters for the program temperature and time. Touch the numbers to
change the values. It is possible to store up to three polymerization steps # 1-3.
Polymerization Step 1:
Delete To the next program Save
Examples of the Steps 2 and 3:
Start
Touch the arrow to start the polymerization.
Interrupt or cancel the program using Start/Stop.
12
6b

Polymerization
Stop / Pause Cancel Pause Back Start
Preheating Temperature
efines the target temperature once the main switch has been activated.
The preheat temperature also applies to waiting times and rest periods. efault: 65°C
If the programme temperature selected is higher, the temperature falls back to
this value when the programme ends.
After defining the desired mode it may make sense to adjust the preheat temperature
of the programme temperature. This avoids long heating up or cooling down phases.
The preheating temperature can be up to 8 ° C higher than the program temperature so
that the program can run. The controller will then adjust (reduce) the temperature to the
programmed value.
13
14
6b
7
14

Timer
This defines the weekday activation and deactivation times.
Programs running currently have a higher priority; they are not switched off until complete.
Sleep Button Display
Press the Sleep button to switch the system to sleep mode.
14
8
10

De inition o Calibration Method
EF: efault (calibrated for mains water)
CAL Calibration (only necessary for extreme deviations in water quality)
This measure defines the conductance of the water!
Drain water
Replenish water
15
11

Choose between °C Celsius and °F Fahrenheit
Calibrate the temperature with a relative o set
+0.0 %
The relative offset of the heating curve causes a correction of the temperature value in
percent to the measured value. As shown in the symbol, the angle of the heating curve is
adjusted when you change this value. The relative offset value can be set in the range of -
9.9% to + 9.9%.
Calibrate the temperature with an absolute o set
+0.0 °C
To correct the heater curve by a value in °C or °F, you can use the absolute offset of the
heater curve. As shown in the symbol, the zero crossing of the heating characteristic shifts
when this value is changed. The absolute offset value can be set in the range of -9.9°C to
+ 9.9°C.
16
12
12b
Change the value and the algebraic
sign by tapping on the
respective numeral.
12a
Change the value and the algebraic
sign by tapping on the
respective numeral.

Pictogram or the Sequence in Time and Date Function
Choice o Working Mode
efines whether the time should start immediately or once the heating value has been
reached.
(a) ( efault) Unit heats up to the temperature programmed via taking into account
any heat losses caused by the conveying pump. After reaching this value, the result
measured is validated by a control cycle. If the value is confirmed, the polymerzation will
start.
(b) The programmed polymerization starts immediately, but the earliest at 65 °C Celsius.
Please select a suitable preheating temperature (see page 13.)
17
14
13
a
b
5
7

8 Operation
8.1 General Operating Instructions
All instructions for using the unit, whether in verbal or written form, are based on our own
experience and experimentation and can only be regarded as guidelines.
The Wapo-Ex 8 plus is not ready to use until the temperatur exceeds 65 C, i.e.
the pump will not start operating until the desired temperature is reached.
The Wapo-Ex 8 plus is protected against dry running in order to prevent the
heating from burning out (flashing symbol). While the program is running, an
alarm sounds when there is insufficient water. Take care that the water level is
always above the white plastic ring (see in the housing), as the heating and the
program will otherwise shut down automatically!
An additional safeguard protects the heating against overheating; it is
automatically deactivated at above 97°C.
Avoid overfilling and check the overflow system / drainage system. Strong
overfilling can damage the electronics in the medium term. For damage caused
by improper handling, no liability is assumed.
Wear heat-retardant gloves when working with the Wapo-Ex 8 plus.
18

Attention! anger of Scalding!
o not touch the hand shower at the nozzle or hose.
o not point the spraying jet towards humans or animals.
The water, which comes out of the nozzle can reach temperatures of 95C;
therefore only use the hand shower in the area of the screen cover or the hand
basin.
uring boiling out with the hand shower you must shift the ball cock (situated at
the right side at the top of the housing) to the vertical position.
To relieve the hose and hand shower of pressure when not in use, the ball cock
should always be returned to the horizontal basic position.
Unplug the device if it is not in use for a longer period.
19

8.2 Boiling Out Operation
•Fill the unit with water and Wachs-Ex up to the overflow limit (21 litres max.)
osage: approx. 45 ml / 21 litres water.
•Also avoid an overflow !
•Activate main switch (green rocker switch).
•Check the water level – the low water alarm must not flash.
•Place prepared cuvettes in the device clamp.
•Automatic boil out (temperature/time) is started by the symbol. After the boil
out process has ended, the temperature falls/rises to the preset temperature
again (see page 13).
•For the manual boil out process the ball cock must be returned to the vertical
position. Than the manual boil out process is initiated by touching the boil out
symbol .
•To stop the process touch the boil out symbol once again.
8.3 Hand Shower
In its ready state (> 65 °C) you can activate the hand shower at any time by moving the
ball cock to the vertical position. The settings are as described in section 7 Installation/
Commissioning/ Menu Functions.
Always return the ball cock to its basic position after use, i.e. in a horizontal position facing
back.
Please take note of the warning indications.
20
56A
5
6
7
A
5
Table of contents
Other Wassermann Laboratory Equipment manuals