Wassermann WAPO-Ex User manual

Die Basis für Ihr Labor
Service manual
Wapo-Ex
Wax scalding and
polymerisation unit
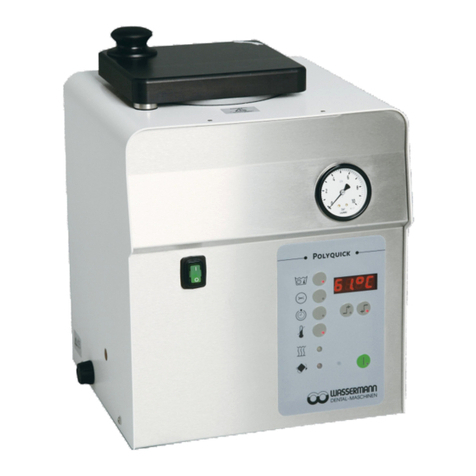
Figure 1: Wapo-Ex

Dear cus omer,
Thank you for choosing a product from the Wassermann range. Wassermann dental
equipment incorporates the highest standards of quality and the latest technology.
In order to enjoy maximum performance and years of trouble-free operation, please
read this service manual carefully before you connect this device and start ork, and
operate the device according to the recommended guidelines. The operation safety and
the functionality of this device can only be guaranteed if you follo both the general
safety guidelines and the applying la s to prevent accidents as ell as the precautions
given in this service manual. We are not liable for any damages hich occur due to
inappropriate usage or faulty operation of this device.
Make sure that anyone using this device has read and understood this service
manual.
Keep his service manual in a safe place where i can be referred o as required a
any ime.
Company address:
Wassermann Dental-Maschinen GmbH
Rudorff eg 15-17
D-21031 Hamburg, Germany
Tel. : +49 (0)40 / 730 926 – 0 Fax.: +49 (0)40 / 730 37 24
E-mail: info@ assermann-dental.com
URL: h p//www.wassermann-den al.com
- 1 -
Published: 03.05.13 / fl msc Version: 2 job: 170996/ab # 132640

Con en s
1 Features..........................................................................................................................3
2 For your safety................................................................................................................3
2.1 Your service manual....................................................................................................3
2.2 Safety guidelines.........................................................................................................4
2.3 Responsibility for operation and damage....................................................................4
3 Applications.....................................................................................................................5
4 Before you start..............................................................................................................5
4.1 Unpacking / Transport.................................................................................................5
4.2 Set-up and storage......................................................................................................5
5 Start-up...........................................................................................................................6
6 Operation.......................................................................................................................7
6.1 Operation.....................................................................................................................7
6.2 Setting time and temperature......................................................................................8
6.2.1 For scalding (button 2).......................................................................................................8
6.2.2 Conversion table °C - °F.....................................................................................................8
6.2.3 Polymerisation (choice of 3 times and 3 temperatures).......................................................9
6.2.4 Setting the time................................................................................................................... 9
6.2.5 Setting the temperature....................................................................................................10
6.3 Storing........................................................................................................................11
6.4 Special function: “Scalding during polymerisation”...................................................11
6.5 Manual operation.......................................................................................................12
7 Troubleshooting / Correcting errors..............................................................................12
8 Maintenance.................................................................................................................14
8.1 Cleaning.....................................................................................................................14
8.2 Maintenance..............................................................................................................15
8.3 Warranty....................................................................................................................15
8.4 Spare parts and accessories.....................................................................................16
8.5 Repairs.......................................................................................................................16
9 Technical data..............................................................................................................17
10 EC CONFORMITY CERTIFICATE.............................................................................18
11 Wiring diagram............................................................................................................19
12 Spare part diagram.....................................................................................................20
Tel.: + 49 (0)40 / 730 926 – 0.................................................................................................1
- 2 -

1 Fea ures
The proven Wassermann WAPO - Ex combination unit, no ith an easy-to-read
multifunction display, is an extremely compact piece of bench top equipment, hich is
used for scalding ax and for polymerisation. It can take 4 half-caps for scalding and/or
6 caps in a denture for polymerisation. A housing and chamber in stainless steel
contribute to its long service life.
The unit has a lo - ater monitor to protect the heater, and for scalding small items,
there is a recessed lid and a hand-held spray in non-heat-conducting plastic.
The special WAPO-Ex / IVOCAP model has an automatic ater-level regulator.
2 For your safe y
2.1 Your service manual
Configuring and operating this equipment requires precise kno ledge and observance
of the instructions in this service manual. The equipment is designed only for its
intended application.
Very impor an poin s in this service manual are signalled as follo s:
Warning!
This is a warning of risk si ua ions and dangers. Failure o observe his
warning could be life- hrea ening. These warnings mus be observed.
Informa ion!
This symbol draws your a en ion o specific fea ures, which mus be
observed.
- 3 -

2.2 Safety guidelines
This uni is designed for a mains vol age of 220-240 V / 50/60 Hz.
Make sure ha i is connec ed o he correc mains vol age.
Always disconnec he power cable before under aking cleaning or
main enance.
2.3 Responsibility for operation and damage
The responsibility for operating the unit lies exclusively ith the o ner or user if the said
unit is incorrectly serviced, maintained or altered by persons not employed by an
accredited dealer or if the unit is used in a manner contrary to its specified purpose.
The unit must be maintained and operated in accordance ith this service manual.
Wassermann Dental-Maschinen GmbH is not responsible for damage arising from the
non-observance of these instructions.
Guarantee and responsibility provisions contained in the sales and supply conditions of
Wassermann Dental-Maschinen GmbH are not extended by these instructions.
Ensure ha his service manual is accessible a all imes and has been
read and unders ood.
- 4 -

3 Applica ions
The WAPO - Ex is used for scalding up to 4 half-caps and up to 6 caps for
polymerisation. A divider in the trough creates t o separate chambers. You can also
scald small items using a hand spray.
Only use the device for this type of application.
4 Before you s ar
4.1 Unpacking Transport
- Open the cartons, remove the packing materials, and carefully lift out the instrument
and accessories. Check that the accessories are correct (see 8.4).
−When transporting the unit, make sure that it has been disconnected from the po er
supply. Use appropriate packing materials to avoid accidental damage.
4.2 Set-up and storage
−Set the unit up on a level surface.
−Use clamps to attach the drain hose supplied firmly to the unit and arrange a suitable
drainage system.
−Al ays set the unit up ith sufficient orkspace around it (check its dimensions). Do
no se i up ou of doors.
- If the unit is to be stored for an extended period, protect it from dust and moisture.
I is very impor an o have he uni connec ed rigidly o a drainage
sys em as very ho wa er (abou 95°C) is involved. I will also facili a e
emp ying he uni comple ely for cleaning, for example.
- 5 -

5 S ar -up
−Insert the po er plug into the mains socket (220-240 V / 50/60 Hz).
−Insert the filter hite side do n.
−Fill the unit ith ater (about 20 litres) at least up to the hite plastic ring in the
container.
−Turn on the main s itch (green rocker s itch).
−The unit immediately heats up to its default setting (65°C), or to the last stored
scalding temperature.
−When the desired temperature has been reached, the yello LED (9) goes out and
the unit is ready for operation.
Wear hea -resis an gloves when working wi h he WAPO-Ex.
The WAPO - Ex has a dry-run pro ec ion device o preven he hea er
burning ou due o a lack of wa er (red LED). A warning signal also
sounds while he program is running.
Make sure ha he wa er level is always above he whi e plas ic ring (in
he con ainer), o herwise he hea er will cu ou au oma ically and he
red LED will flash.
If he uni is no o be used for an ex ended period, pull ou he power plug.
- 6 -

6 Opera ion
6.1 Operation
1. Turn on main s itch (green rocker s itch).
2. The red ater-level LED (10) should not come on or flash. If it does, check the ater
level or the ater-level sensor.
3. Choose Polymerisation or Scalding.
4. Place prepared caps in unit.
5. Set desired time and temperature for scalding (see 6.2.1).
6. Set desired time and temperature for polymerisation (see 6.2.2).
7. Use Start/Stop (7) to start the program.
8. The yello LED (9) comes on during heating.
9. After the set time, the unit s itches off automatically and a tone sounds.
No e: Each bu on has a buil -in red LED. S ar he program once he
desired empera ure has been reached.
- 7 -
1
2
3
6
7
5
4
8
9
10
Start/ Stop
Time
Temperature
Heater
Lo ater level
Digital display
Set / Plus
Default / Minus
Polymerisation
Scalding

6.2 Setting time and temperature
6.2.1 For scalding (button 2)
Se ing he ime:
1. Press Time (3).
2. Press Set (4).
3. Keep Time (3) pressed and set the desired time using Set (4) or Default (5).
Se ing he empera ure:
1. Press Temperature (6).
2. Press Set (4).
3. Keep Temperature (6) pressed and set the desired temperature using Default (5)
and Set (4).
4.
6.2.2 Conversion table °C - °F
= (TF − 32) / 1,8
100 °C = 212 °F
95 °C = 203 °F
90 °C = 194 °F
85 °C = 185 °F
80 °C = 176 °F
75 °C = 167 °F
70 °C = 158 °F
65 °C = 149 °F
60 °C = 140 °F
- 8 -

6.2.3 Polymerisation (choice of 3 times and 3 temperatures)
The Polymerisation (1) and Set-Point (4) LEDs must be on, but not Start/Stop (7). Use
the buttons as described belo to set the function. This allo s you to check and/or
change stored values.
6.2.4 Setting the time
- 9 -
1. Press and hold Time (3), then press Start/Stop (7) once.
The first character on the display (8) flashes to indicate
that the value can be changed by pressing Set-Point (4)
or True Value (5) hile Time (3) is held on. Release all
three buttons to store the changed value.
2. Store the value by simultaneously pressing
Polymerisation (1) and Set-Point (4).
3. For the second value, press and hold Time (3) again,
then press Start/Stop (7) once. The second character
on the display flashes. Follo the same sequence as
above.
4. The procedure is the same for the third display
character. Each change needs to be stored.
5. If Time (3) is pressed and held, and Start/Stop (7)
pressed a fourth time, the total of the three individual
times is displayed.
Times assigned the value zero (0) are ignored.
5
3
1
7
4
8

6.2.5 Setting the temperature
All ins ruc ions for using he uni , whe her verbal, wri en or in he
form of prac ical guidance, are based on individual experience and
experimen a ion and can only be regarded as guidelines.
- 10 -
1. Press and hold Temperature (6), then press
Start/Stop (7) once. The first character on the
display (8) flashes to indicate that the value
can be changed by pressing Set-Point (4) or
True Value (5) hile Temperature (6) is held
on. Release all three buttons to store the
changed value.
2. The value is stored by simultaneously
pressing Polymerisation (1) and Set-Point
(4).
3. For the second value, press and hold
Temperature (6), then press Start/Stop (7)
once. The second character on the display
flashes. Follo the same sequence as
above.
4. The procedure is the same for the third
display character. Each change needs to be
stored.
5. If Temperature (6) is pressed and held, and
Start/Stop (7) pressed a fourth time, the first
of the three individual temperatures is
displayed.
5
4
6
7
18

6.3 Storing
Individual set values can be stored by simultaneously pressing Scalding (2) or
Polymerisation (1) and Set (4).
A “YES” on the display confirms that the values have been stored.
As each ne value is stored, the previous value is over ritten.
Warning: Pressing Scalding (2) or Polymerisation (1) and Default (5) resets the
Wassermann default values. Storing the value using Polymerisation (1) and Plus (4) is
confirmed by a “YES”.
Defaults: Polymerisation Scalding
Time Tempera ure Time Tempera ure
6:30 h 70º C 15 min. 65°C
0:00 h 0º C
1:30 h 95º C
6.4 Special function: “Scalding during polymerisation”
Scalding is possible hile the polymerisation process is under ay. The last stored
scalding time is used, not at the last stored scalding temperature, but at the default
temperature for the polymerisation process. Scalding is started by pressing Scalding
(2). The scalding process can be stopped by pressing Scalding (2) again.
Warning: All opera ions, including polymerisa ion, are s opped if you press S ar /
S op (7)!
- 11 -

6.5 Manual operation
Once the unit is ready for use, you can, at any time, activate the hand spray by turning
the ball valve (horizontal). Settings should be as described under 6.2. When you have
finished, al ays return the ball valve to its original position (vertical).
The WAPO - Ex is ready for use when he empera ure is above
55°C, ha is, he pump s ar s opera ion once he se empera ure
has been reached. On addi ion here is a safe y s ep: he hea ing
s ops au oma ically when he empera ure of he hea ing is higher
han 99 °C.
Warning: Risk of scalding!
Do no hold he hand spray by he nozzle or hose.
Do no poin he spray a living crea ures.
The wa er from he nozzle can be as ho as abou 95°C, so should
only be sprayed near he uni lid or he washbasin.
The ball valve ( op righ on housing) needs o be se horizon al
when scalding wi h he hand spray. To ake he pressure off he
hose and hand spray, always rese he valve o ver ical when hey
are no being used.
- 12 -

7 Troubleshoo ing / Correc ing errors
Fault Likely cause Likely solution
WAPO-Ex does not heat
up
Dirty level sensor Clean level sensor
Water level too lo Add ater
Water-level LED comes
on and arning tone
sounds
Dirty level sensor Clean level sensor
Water level too lo Add ater until red LED
goes out and tone stops
Water pump inoperative Operating or set
temperature not yet
reached
Heat to operating
temperature (min. 60°C) or
set temperature
Multi-function display not
orking correctly
Variations in mains
voltage (220-240 V / 50/60
Hz)
Turn of main s itch and
turn on again in about 1
minute.
Multifunction
display sho s A
Water-temperature above
100°C (A3 means 103 °C)
-faulty temperature sensor
-faulty control board
Turn off the ater supply,
s itch off the unit
completely, contact service
Multifunction
display sho s F 1
Short-circuit:
Faulty electrial component
Turn off the ater supply,
s itch off the unit
completely, contact service
Multifunction
display sho s F 2
Faulty temperature sensor Turn off the ater supply,
s itch off the unit
completely, contact service
If he above recommenda ions do no solve he problem, con ac your
den al depo or our Service depar men .
- 13 -

Warning: Do no use ma erials con aining solven s o dissolve wax, as
his will a ack he uni ’s rubber componen s.
Warning: Le KALK–EX work for a maximum 12 hours.
Drain solu ion and rinse horoughly.
8 Main enance
8.1 Cleaning
In order to guarantee trouble-free operation, the unit should receive the follo ing
attention:
A leas 1x per week
−Change ater, adding Wax–Ex.
Quantity: approx. 4 ccm/1 litre ater, corresponding to approx. 90 - 110g per 20
litres.
−Clean level sensor ( hite plastic ring) ith nailbrush or similar.
Every 2 weeks
−Change filter ( hite side do n).
Every 4 weeks
−Clean unit ith Kalk–Ex.
Quantity: approx. 5ccm/1 k litre ater, corresponding to approx. 170 - 220g of Kalk-
Ex per 20 litres. – If heavy lime deposi , increase quan i y appropria ely -
The outside of the unit and fittings are best cleaned ith a sponge or soft cloth and mild
detergent.
The model pla e must al ays be easy to read and should not be removed.
- 14 -

To change he fil er and clean he level sensor (whi e ring), firs remove
he cap con ainers. The perfora ed pla e can hen be aken ou and you
can remove he fla fil er. When inser ing a new one, make sure ha he
whi e side is face down and ha he fil er fi s under he raised edge of
he base pla e. The base pla e is easily removed, giving ready access o
he level sensor and he hea er coil. Re-inser he base pla e wi h i s
raised edges facing upwards.
8.2 Maintenance
The WAPO-Ex does not need any special maintenance. Just make sure it is clean and
free of lime build-up.
8.3 Warranty
The arranty period for our instruments is 12 months. If faults occur ithin the arranty
period, contact your dental depot or get in touch directly ith our Service department.
Your WAPO-EX combination unit should only be operated in perfect condition. If faults
occur hich could harm operators or third parties, the unit should not be used until it
has been fixed.
This arranty does not cover damage caused by improper use, external mechanical
causes, transport damage or interference ith the unit by unauthorized persons.
- 15 -

8.4 Spare parts and accessories
Spare par s
Item number Description
170074 Cap container
170009 Button cover
326002 Scalding nozzle
392008 Rubber foot 32 x 32 - H6, black
511091 Rocker s itch, green
Accessories
Item number Description
170020 Service packet for WAPO - Ex
170100 Wheeled chassis for Wapo - Ex (not standard item)
320030 PVC hose 19 x 4 (3/4“) - 1500mm long
322017 Hose clamp D20 - 32 x 12.2
8.5 Repairs
Servicing or repairs to the unit must only be carried out by trained technicians. Only
original spares are to be used. Responsibility for the product is voided if altered by
unauthorized persons or if inappropriate components are installed.
- 16 -

9 Technical da a
170996 WAPO – Ex / 170995 WAPO – Ex IVOCAP
Noise emission ≤ 70 dB(A)
We reserve he righ o make echnical changes.
Voltage: 220-240 V / 50/60 Hz
Po er consumption: 9 A
Output: 2000 W
Water capacity: approx. 20 litres
Overall dimensions: Width 550 mm
Height 470 mm
Depth 400 mm
Weight: 35.5 kg
- 17 -

10 EC CONFORMITY CERTIFICATE
In accordance with 2006/95/EG (low-voltage guidelines), 2004/ 08/EG (EMV guidelines) ,
2006/42/EG (Machinery guidelines) and 97/23/EG (Pressure Equipment Directive)
Manufacturer: W A S S E R M A N N
Dental-Ma chinen
GmbH
Rudorffweg 15 - 17
D-21031 Hamburg
Product de cription: Wax calding unit for
dental application
Model: WAPO-Ex
WAPO-Ex IVOCAP
(170996)
(170995)
Applicable tandard : DIN EN 61010-1
DIN EN 61000-6-3
DIN EN 61000-6-1
DIN 45635-1
DIN EN 60335-1
Hiermit wird be tätigt, daß die oben bezeichnete Ma chine den genannten EG-Richtlinien
ent pricht. Die e Erklärung wird ungültig, fall die Ma chine ohne un ere Zu timmung
verändert wird.
Thi i to confirm that the above mentioned machine complie with the de cribed EC rule .
Thi declaration become invalid if the machine i modified without our approval.
Cette machine e t conforme aux norme en vigueur de la Communité Européene. Cet avi
e t nul et non avenant i cette machine e t modifiée an notre accord.
E ta máquina, anteriormente mencionada, cumple con lo limite requerido por el
reglamento EC. Ahora bien, e ta declaración quedará invalidada en ca o de realizar
modificacione al aparato in nue tra aprobación.
Hiermee wordt beve tigd dat bovengenoemde machine voldoet aan de voorge chreven EU
normen. Deze verklaring verlie t geldigheid al er zonder onze uitdrukkelijke toe temming
wijzigen aan de machine worden aangebracht.
Place, date: Hamburg, 05.03.13
Company tamp:
Signed: ________________________
Wilfried Wa ermann
(Managing Director)
- 18 -

11 Wiring diagram
- 19 -
Other manuals for WAPO-Ex
1
This manual suits for next models
3
Table of contents
Other Wassermann Laboratory Equipment manuals
Popular Laboratory Equipment manuals by other brands

Agilent Technologies
Agilent Technologies 6890 Series Site preparation and installation manual

W&H
W&H Lyla Instructions for use

Klein Tools
Klein Tools TI250 instruction manual

Distek
Distek 3100 Series Quick start instructions

Thermo Scientific
Thermo Scientific Sorvall ST 16 instruction manual

METER
METER AQUALAB 3 manual