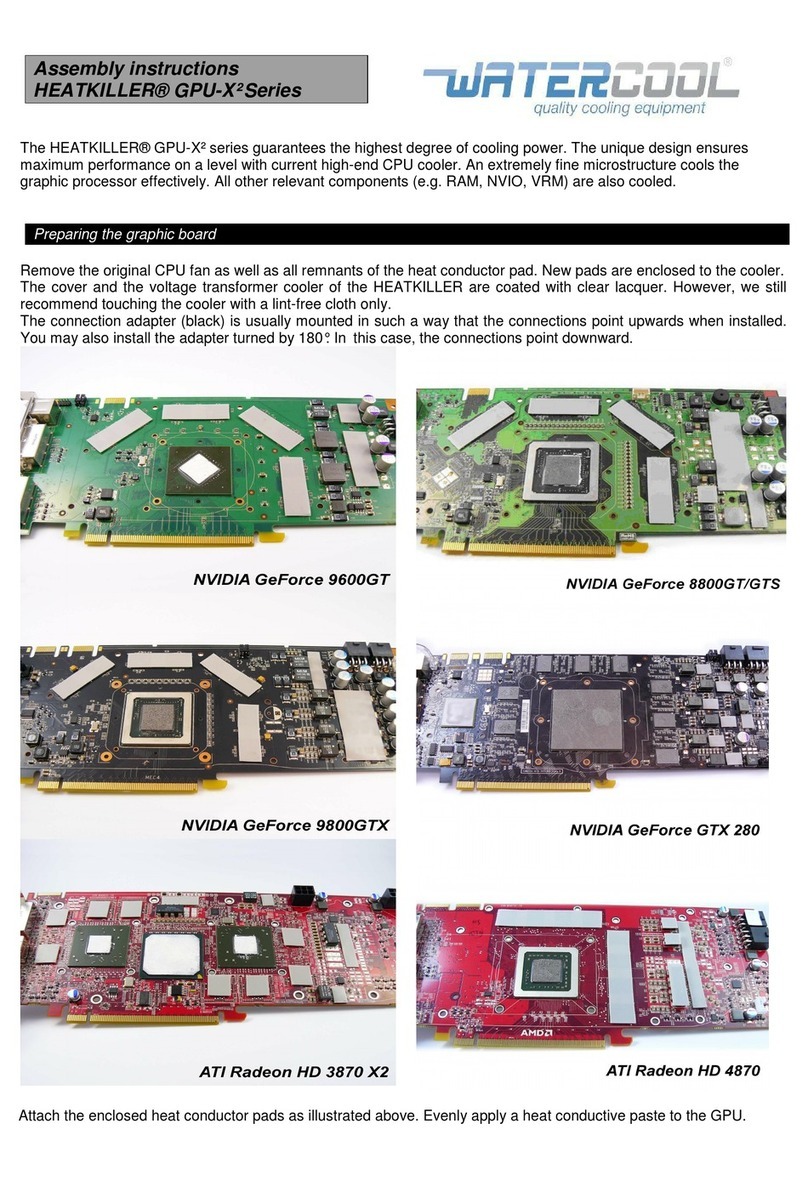
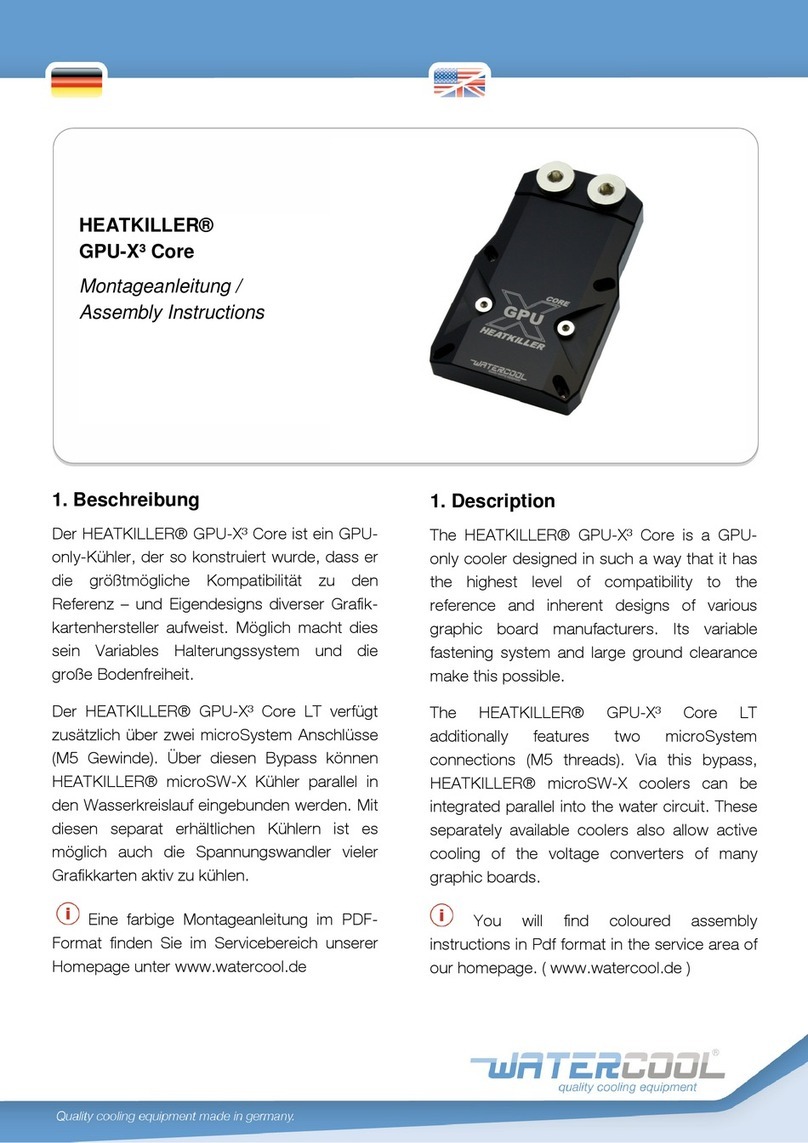
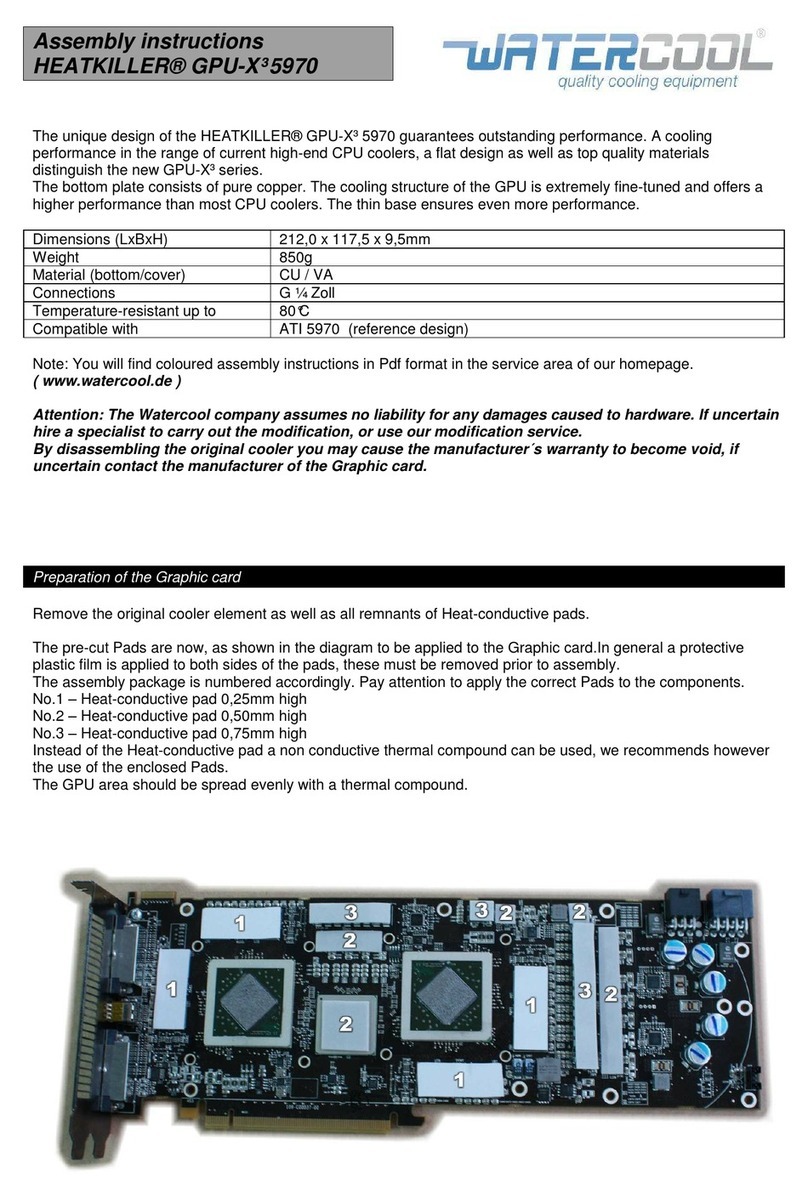
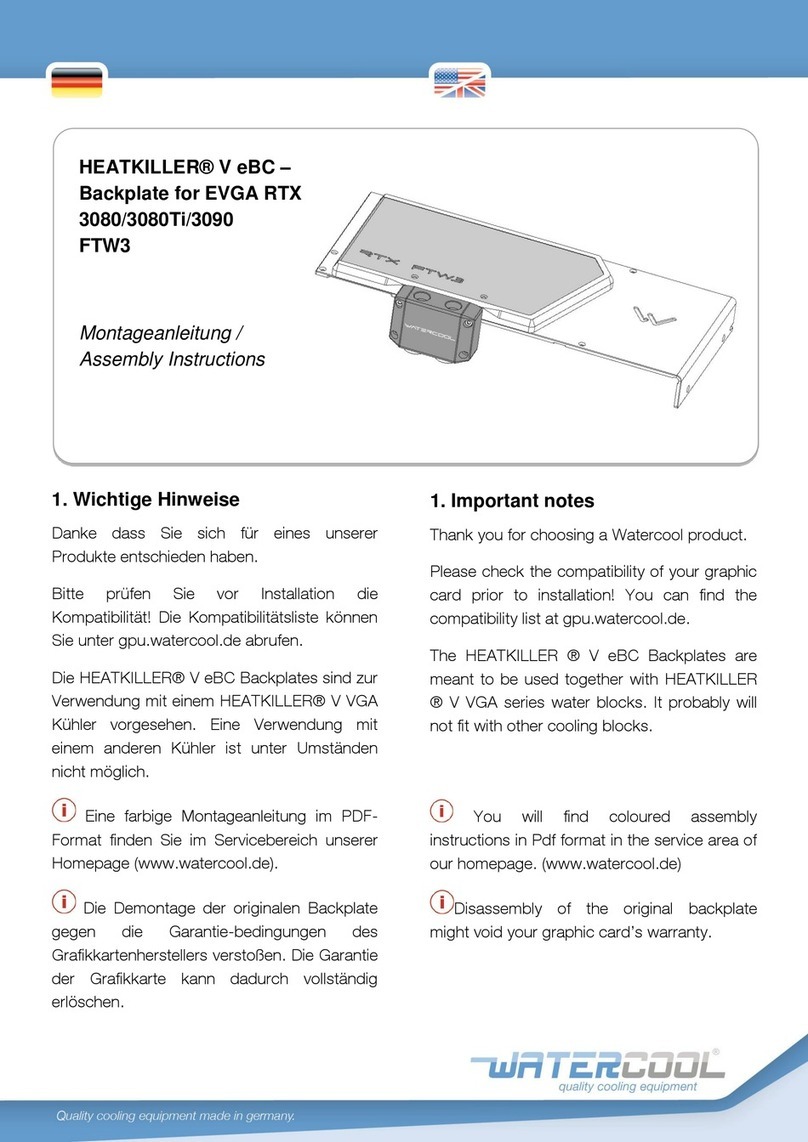
manuals.online logo
Brands
  1. Home
  2. •
  3. Brands
  4. •
  5. Watercool
  6. •
  7. Computer Hardware
  8. •
  9. Watercool HEATKILLER V VGA Series User manual

Watercool HEATKILLER V VGA Series User manual

HEATKILLER@V
for EVGA RTX 3080 & 3090 FTW3
and Ti Version
Montageanleitung
/
Assembly Instructions
1.Wichtige Hinweise
Danke dass Sie Sich fur eines unserer
Produkte entschieden haben.
Die Kühlerder HEATKILLERO V VGA serie
werdenspeziell für die Verwendung auf einem
bestimmten Platinenlayout entworfen. Bitte
prüfenSie vor Installation
die Kompatibilität
Ihrer Grafikkarte! Die Kompatibilitätsliste
können Sie unter gpu.watercool.de abrufen.
Eine farbige Montageanleitung
im PDF-
Formatfinden Sie im Servicebereich unserer
Homepage(www.watercool.de).
@ Die Demontage des originalen Kühlers
einer Grafikkarte kann gegen die Garantie-
bedingungen des Grafikkartenherstellers
verstoßen.
Die Garantie der Grafikkarte
kann
dadurch vollstandig erlöschen.
1. Description
Thank you for choosing a Watercoolproduct.
The HEATKILLER @ V VGA series water
blocks are designedto be used on a particular
PCB layout.Please check the compatibility
of
your graphic card priorto installation!
You can
find the compatibility list at gpu.watercool.de .
O) You will find coloured assembly
instructions in Pdf format in the service area of
our hoinepage. (www.watercool.de )
Disassembly of the original cooler might
void yourgraphic card's warranty.
O Bitte lesen Sie diese Montageanleitung
sorgfåltig durch. Die Installation erfolgt auf
eigene Gefahr. Ein Nichtbeachten der
Montageanleitung kann ihre Hardware
irreparabelbeschädigen. Die firma Watercool
übernimmt keinerlei Haftung bei
Beschadigungen der Hardware.
2. Vorbereitung der Grafikkarte
Entfernen Sie die werkseitig montierte
Backplate, den Kühler sowe verbhebende
Reste von Warmeleitmitteln.
Anschließend
konnen die Warmeleitpads aus dem
Lieferumfang des Kuhlers gemäß der
nachfolgenden Abbildung aufgebracht
werden. Der GPI-J-Bereich wird anschließend
gleichmåßig mit einer Wärmeleitpaste
versehen.
O Die Warmeleitpads Sind beidseitig mit
einerSchutzfolie versehen. Diese müssen vor
Verwendung entfernt werden!
all pads are Imm
O Please read theseassemblyinstructions
thoroughly. Installation takes place at your
own risk. Ignonng these assembly
instructions can damage your hardware
beyond repair. Watercoolshall not be liable
for damages to your hardware.
2. Preparation of the graphic card
Remove the stock backplate, the original
cooler and all remaining
residueof thermal
compound. Place the supplied thermalpads
on the graphic card as illustrated.
Applythe
thermal compound evenly to the GPIJ area.
O Both sides of the pads are covered with
a protective film which must be removed
before the installation!
90
3. Montage ohne Backplate
Für die Montage
benotigen
Sie anen TORX
Schlüssel mit der Größe TX8.
Legen Sie den Kühler auf die vorbereitete
Grafikkarte und drehen Sie anschließend
beides zusammen um. Nun konnen die
Schrauben —
mit Unterlegschelbe - angesetzt
werden. Drehen Sie diese nur etwa ein bis
zwei Umdrehungen in die Gewlnde des
Kuhlers, bevor Sie diese festziehen.
Das anschließende
Festziehen
der Schrauben
sollte Ober Kreuz durchgeführt werden.
Beginnen Sie dabei mit dem GPIJ Bereich.
Grundsåtzlich empfehlen Wir die Montage mit
3.Z
Mounting without backplate
Put the water block onto the prepared
graphics card and then turn the components
around. The block is delivered
Withstainless
steel screws and plastic washers. Screw the
screws —with washers — into the block
beginning
withthe GPIJ area. Do not tighten
the screws yet!
Once all screws are attached to the block,
screw them tight beginning with the GPU area.
Make sure to tightenthe screws crosswise.
Basically we recommend the assembly with
Backplate.
Passive-Backplates:
Aktive-Backplates: 16078, 16079
16080,16081
Backplate.
Passiv-backplates:
Active-backplates:
16078,16079
16080, 16081
21x Pan head screw M2.5x8 TORX
Ix Pan head screwM2,5x4
TORX
4x Washer M2,5
VA
17x Washer M2,5PA
www.watercool.de E-Mail info@watercool.de WATERCOOL GmbH Zum Mevenbruch 6 17192Waren Germany
4. Öffnendes Kühlers zu Wartungs-
zwecken
Der Kühler kann zu Wartungszwecken
geöffnet
werden.Dazu müssen die Schrauben
des Terminals entfernt und die Zierblende
angehoben werden. Der Deckel lässt Sich nun
durch entfernen
der Schrauben lösen.
(D Zur Befestigung
des Oberteilskönnen
unterschiedliche Schraubenlången verbaut
worden sein. Achten Sie bei der Montage
darauf, die richtigen Schraubenlången den
richtigen Gewinden zuzuordnen.
ODas Offnen des Kühlers geschieht auf
eigene Gefahr. Die Firma Watercool
übernimmt keinerlei Gewährleistung für die
Dichtheit nachdem der Kühler geöffnet wurde.
Web www.watercool.de E-Mail info@watercool.de
4. Opening for maintenance
The block can be opened for mantenance.
Unscrew the two terminalscrews and lift the
frontcover. Now, you can unscrew the screws
in the acrylic top.
(C) There can be screws in different
lengths
securingthe top. Please make sure thatyou
use the screws Withthe correct length in the
correct threads.
OOpening the waterblock is on yourown
risk! Watercool does not guarantee for
leakproofnesswhen the water block has been
opened.
5. Prüfung Montageund Dichtheit
Nach Abschluss der Montage ict eine
Überprüfung und ein Pcobelaui unetlässlich.
Es sind alle Bereiche decKarle auf eventuellei0
Kontakt zum Kühler zu überprüfen. Des
Weiteren ist insbesondere der Kontakt der
GPU zum Kühler zu prüfen, ebenso die
Durchbiegung der Karte. Eine geringe
Durchbiegung der Karte ist normal.
Ein Dichtheitstest sollte vorzugsweise
außerhalb des Computers erfolgen, insofern
dies nicht möglich ist, darf die Hardware zur
Zeit des Testlaufes nicht eingeschaltet sein!
Sind alle Bereiche des Kühlers überprüft, kann
der Computer in Betrieb genommen werden.
Hierbei sind sofort nach dern Start die
Temperaturender GPU zu kontrollieren.
WATERCOOL GmbH zum Mevenbruch
617192
Waren Germany
5. '»staiiationand leak test
Aiter the installation,a check and test run must
be performed!The block is constructed on the
reference design (Founders Edition); still, all
sectionsof the boardhave to be checked for
possible contact to the cooler. In addition, the
contact of the GPU to the block must be
checked along Withthe bending of the board.
A slight bending of the board is normal.
A leak test should preferably be performed
outside of the computer.If this is not possible,
the hardware may not be turned on during the
test run!
Once all of the block elements
were tested, the
computer can be put into operation. Check the
temperatureof the GPU immediatelyafter the
start
6. Allgemeine Hinweise
O HEATKILLER@
V VGA serie hat
definierte
Ein- und Ausgange. Das dem Slotblech
zugewandte Anschlussgewinde ist als
Eingang zu verwenden!
Wir empfehlen als Kühlmedium
demineralisiertes bzw. entionisiertes Wasser
(destilliertes Wasser) mit einem geeigneten
Korrosionsschutz. Wir haben gute
Erfahrungen mit Mayhem's XT-I, Innovatek
Protect oder Aquacomputer Double Protect
gemacht.
Der Kühler ist voll SLI/CF tauglich. Zum
Aufbau eines Dual- oder Triple SUI/CF
Systems bieten Wirspezielle Verbinder (Dual /
Triple-Links) an, welche das Verbinden der
Kühler äußerst einfach gestalten.
6. General Information
O The HEATKILLER@
V VGA serieshas a
defined input and output.The port closest to
the Slot bracket should be used as the inlet.
We recommend using demineralized or
deionized water (distilled water) With a
corrosion inhibitor
additive as fluid. We made
good experiences With Mayhem's x
rr-l ,
Innovatek Protect or Aquacomputer Double
The cooler is fullycompatibleWith
SUI/CF. To
build up a dual or triple
SLI/CF system we offer 8
a special bridge (dual / triple-link), which
simplifies the connecting of multiple gpu
coolers.
3
IIIJ
124,00mm
141.32 mm
163.32mm
Web www.watercool.de ,E-Mail info@watercool.de WATERCOOL GmbH zum Mevenbruch
617192 Waren Germany

Other Watercool Computer Hardware manuals
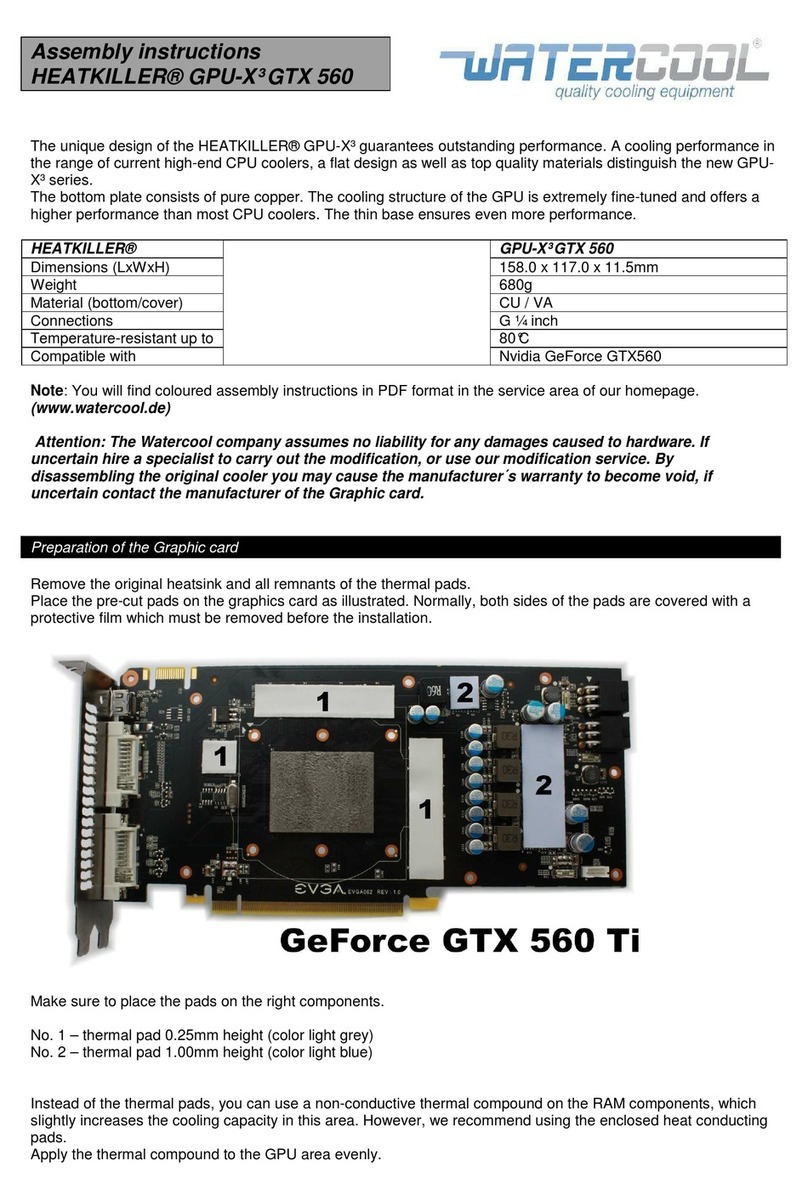
Watercool HEATKILLER GPU-X3 GTX 560 User manual

Watercool

Watercool HEATKILLER GPU-X3 GTX 560 User manual

Watercool HEATKILLER MB-X ASUS RAMPAGE IVBlack Edition User manual

Watercool

Watercool HEATKILLER MB-X ASUS RAMPAGE IVBlack Edition User manual

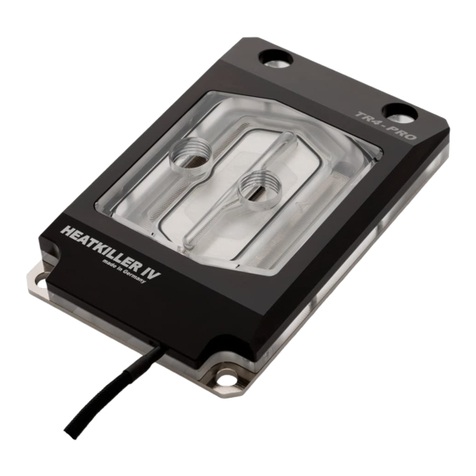
Watercool HEATKILLER IV Pro User manual

Watercool

Watercool HEATKILLER IV Pro User manual

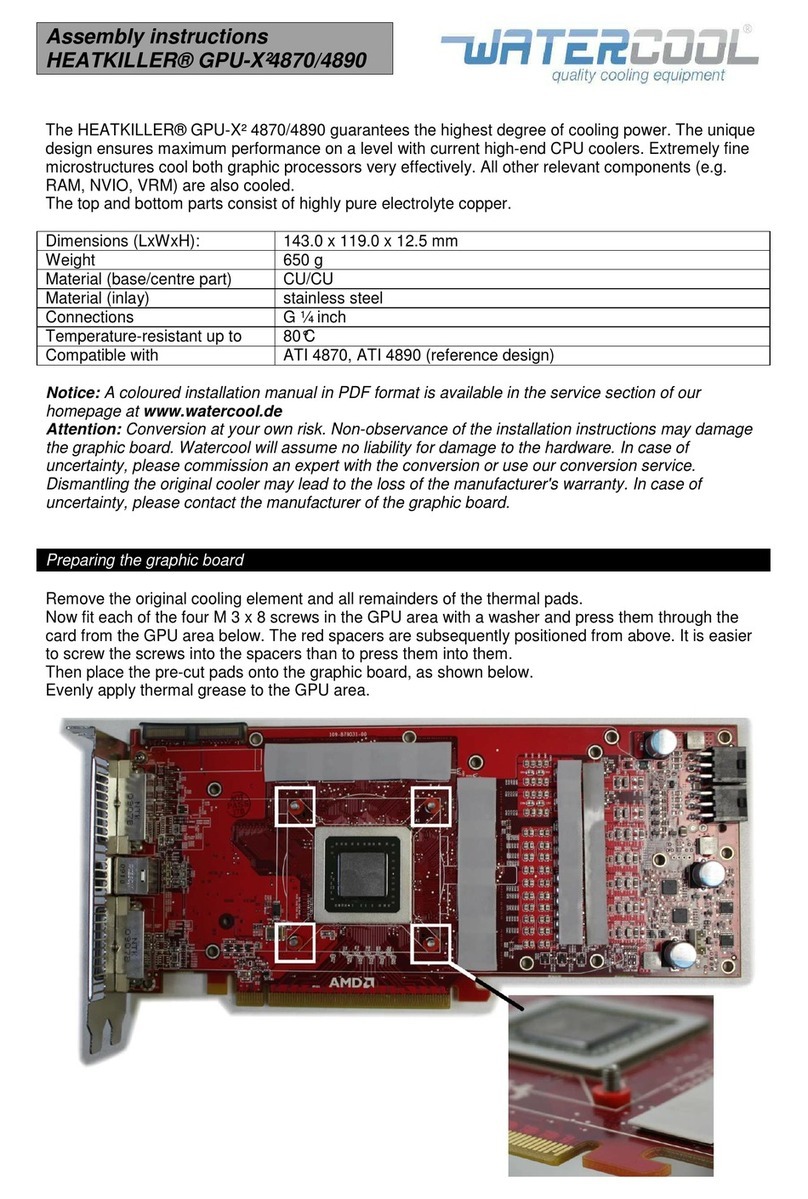
Watercool Heatkiller GPU-X2 Series User manual

Watercool

Watercool Heatkiller GPU-X2 Series User manual

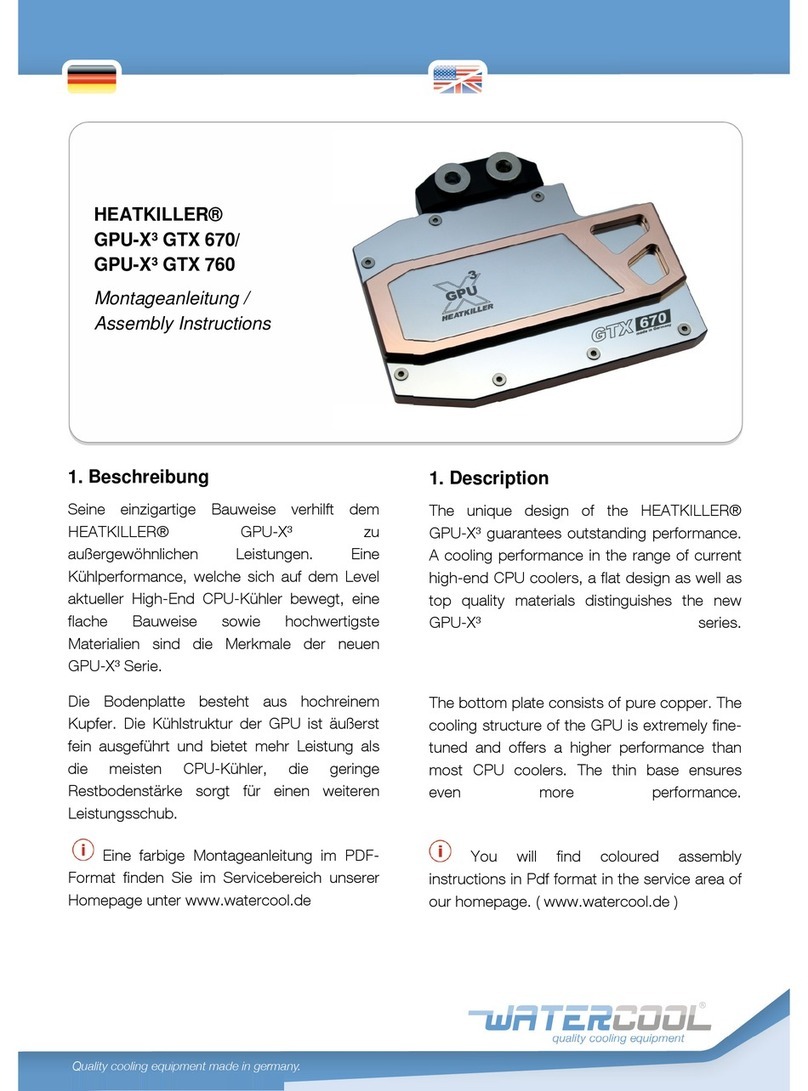
Watercool HEATKILLER GPU-X3 GTX 670 User manual

Watercool

Watercool HEATKILLER GPU-X3 GTX 670 User manual

Watercool HEATKILLER V eBC User manual

Watercool

Watercool HEATKILLER V eBC User manual

Watercool HEATKILLER IV User manual

Watercool

Watercool HEATKILLER IV User manual

Watercool HEATKILLER IV VGA Series User manual

Watercool

Watercool HEATKILLER IV VGA Series User manual

Watercool HEATKILLER V VGA Series User manual

Watercool

Watercool HEATKILLER V VGA Series User manual

Watercool HEATKILLER GPU-X3 Core Series User manual
Watercool

Watercool HEATKILLER GPU-X3 Core Series User manual

Watercool HEATKILLER IV VGA Series User manual

Watercool

Watercool HEATKILLER IV VGA Series User manual

Watercool HEATKILLER GPU-X3 5970 User manual
Watercool

Watercool HEATKILLER GPU-X3 5970 User manual

Watercool HEATKILLER GPU-X GTX570 V2 LT User manual
Watercool

Watercool HEATKILLER GPU-X GTX570 V2 LT User manual

Watercool HEATKILLER GPU-X2 4870 User manual

Watercool

Watercool HEATKILLER GPU-X2 4870 User manual

Popular Computer Hardware manuals by other brands

Lenovo IdeaPad S205 Notice

Lenovo

Lenovo IdeaPad S205 Notice

Quantum Fireball 1080 Configuration guide

Quantum

Quantum Fireball 1080 Configuration guide

Sabiana Carisma CRC-ECM Technical guide

Sabiana

Sabiana Carisma CRC-ECM Technical guide

Terasic PCA3 user manual

Terasic

Terasic PCA3 user manual

Acrosser Technology AR-B1540 user guide

Acrosser Technology

Acrosser Technology AR-B1540 user guide

Eurotech EmbeddedDNA An0031 manual

Eurotech

Eurotech EmbeddedDNA An0031 manual

Quatech QSSP-PCIE-100 user manual

Quatech

Quatech QSSP-PCIE-100 user manual

GeoBox M800 user guide

GeoBox

GeoBox M800 user guide

Keithley 7012-S instruction manual

Keithley

Keithley 7012-S instruction manual

Analog Devices MicroConverter ADuC832 Quick reference guide

Analog Devices

Analog Devices MicroConverter ADuC832 Quick reference guide

Algolith Mosquito Guide to installation and operation

Algolith

Algolith Mosquito Guide to installation and operation

Edimax EB-MDC2 user manual

Edimax

Edimax EB-MDC2 user manual

Huawei CR-MPUB Specifications

Huawei

Huawei CR-MPUB Specifications

Panasonic TY-FB11DD - Monitor Terminal Expansion Board Specifications

Panasonic

Panasonic TY-FB11DD - Monitor Terminal Expansion Board Specifications

Proxim B11FNF-USB user manual

Proxim

Proxim B11FNF-USB user manual

Motorola NXP SYMPHONY DSP56007 Technical data

Motorola

Motorola NXP SYMPHONY DSP56007 Technical data

Exsys EX-1224 user manual

Exsys

Exsys EX-1224 user manual

Macrovision Corporation VX5002 Service manual

Macrovision Corporation

Macrovision Corporation VX5002 Service manual

manuals.online logo
manuals.online logoBrands
  • About & Mission
  • Contact us
  • Privacy Policy
  • Terms and Conditions

Copyright 2025 Manuals.Online. All Rights Reserved.