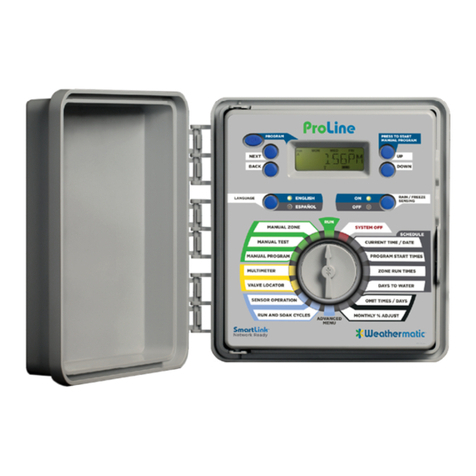
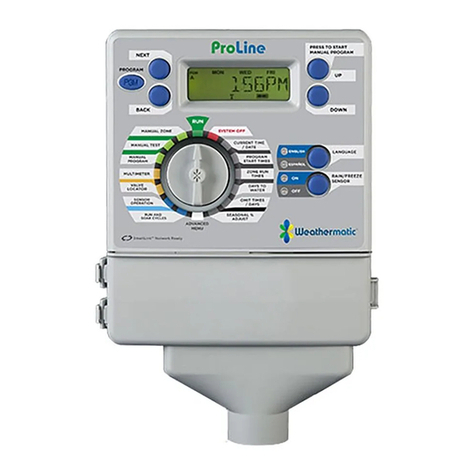
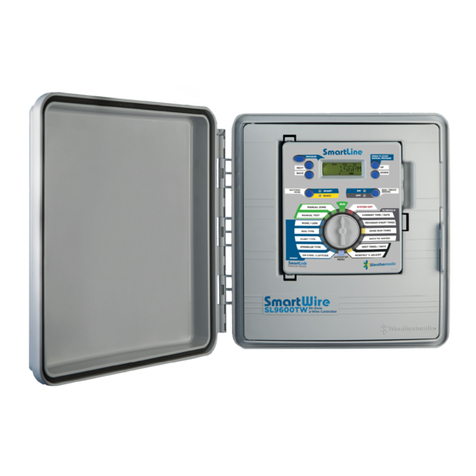
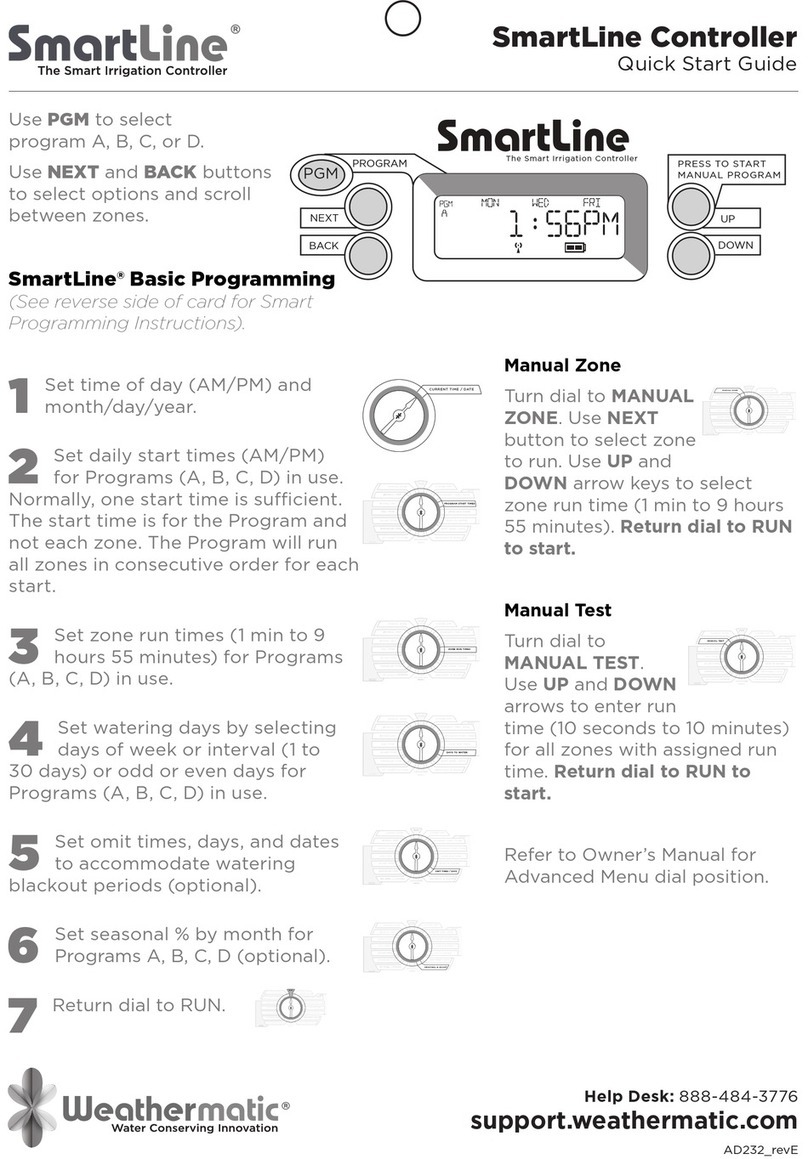
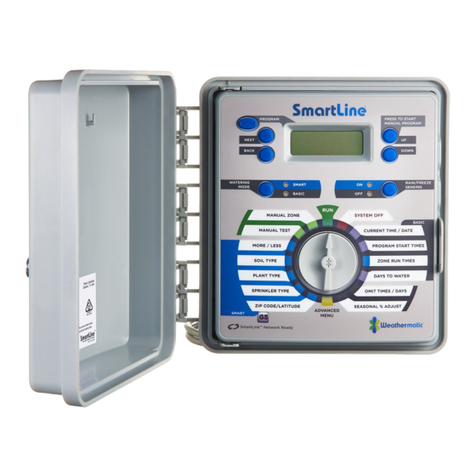
Weathermatic PROLINE PL800 Instruction Manual

Page 1
ProLine Controller Frequently Asked Questions
Q1: How many stations does the ProLine Controller have?
A1: The PL800 has a base of 4 stations but can expand to 8 stations using 2-station modules.
The PL1600 has a base of 4 stations but can expand to 16 stations using 4-station modules or
can expand to 24 stations using 12-station modules.
The PL1620 is a fixed station count with 24 stations.
The PL4800 has a base of 12 stations but can expand to 48 stations using 12-station modules.
Q2: How many stations will the ProLine controller run at the same time?
A2:
•Date Code: Pre-2018
oPL1600/PL1620 = 2 programs - Program A, B, or C AND Program D, 3 solenoids
including MV
oPL4800 = 4 programs (Program A, B, C, D), 5 solenoids including MV
•Date Code: 2018 - Current
oPL1600/PL1620 (G5) = 4 programs (Program A, B, C, D), 3 solenoids including MV
oPL4800 (G5) = 4 programs (Program A, B, C, D), 5 solenoids including MV
Q3: Can your controller operate both normally open and normally closed master valves?
A3:
•Date Code: Pre-2018
oPL1600/PL1620/PL4800 = NO
•Date Code: 2018 - Current
oPL1600/PL1620/PL4800 (G5) = YES. This option is set up under the ADVANCED
Menu.
Q4: Does the existing controller need to be upgraded to work with the aircard?
A4: SmartLink requires a compatible ProLine control panel. To find your ProLine control panel
version, go to the Advanced Functions > About menu and select the option to view your control
panel version.
•SmartLink is supported by ProLine control panel versions 5.10 and greater. If you have version
5.10 or greater, no changes are required.
•ProLine control panel versions older than 5.10 cannot be used and require a new control
panel. Control panels can be purchased through your Authorized Weathermatic Distributor. It
is not necessary to replace the entire controller. You can simply remove the panel from the
hinge and replace with a new compatible panel.
Q5: Can the controller panel in a PL1600 be swapped for a controller panel in a PL4800,
SL1600 or SL4800 or SL9600TW?
A5: Yes. All ProLine and SmartLine controller panels are interchangeable.

Page 2
Q6: Which RFS5 Rain/Freeze sensor works with the PL800? With the PL1600?
A6: The ProLine PL800 and PL1600 is designed for use with either the RFS1 or RFS5 rain/freeze
sensor.
Q7: Does the PL800 work on SmartLink-Commercial?
A7: No. The ProLine SL800 DOES NOT currently operate with a the SmartLink Aircard.
Q8: Does the PL800 work on SmartLink-Residential?
A8: No. The ProLine PL800 DOES NOT currently operate with a the SmartLink RESIDENTIAL
Aircard.
Q9: Does the ProLine PL1600 or PL4800 controller work on SmartLink?
A9: Yes. The ProLine PL1600 and PL4800 can be connected to the SmartLink network using a
SmartLink aircard with a subscription or a SmartLink Residential bundle.
Q10: What is the difference between the ProLine controller and the SmartLine controller?
A10: The ProLine controller has a Spanish language button on the panel. The ProLine controller
does not have an ET (Smart) programming options. Some ADVANCED Features are available as
options using the Panel Dial. All other features are the same as SmartLine.
Q11: Does the ProLine controller work with flow sensing?
A11: Yes. The ProLine PL1600 and PL4800 can be connected to a flow sensor via it’s SmartLink
aircard with a SmartLink flow subscription.
Q12: Does a SLW "weather station" work with ProLine?
A12: ONLY the rain/freeze functions will operate on a SLW weather station if used with a
ProLine controller. The local weather data does NOT function when an SLW weather station is
used on a ProLine controller.
Q13: Is there an extended warranty for ProLine/SmartLink equipment?
A13: Yes. An extended warranty is available for purchase which extends the warranty to cover
fire, theft, vandalism and product failure.
Q14: What is the 9-volt battery connection in the compartment behind the front panel used
for?
A14: Connect a 9V battery to view and program the control panel when it is "open" or removed
from the housing. All ProLine controllers use a Real Time Clock/Calendar instead of a backup
battery to maintain correct time/date during a power outage. ProLine non-volatile memory
also maintains programming during power outages.

Page 3
Q15: The ProLine panel is displaying the current time and date, yet I can’t I turn on a station.
A15: The panel is ajar (open) and the display is being powered by the 9V battery. The controller
will not run until the panel is completely closed.
Q16: My rain sensor shows ORANGE, but it isn’t raining, and the controller won’t run a
program.
A16: This is a feature of the ProLine controller called SLW Delay that extends the “dry out”
period for an additional number of hours. The SLW Delay under the SENSOR OPERATIONS
allows the user to adjust the factory set 48-hour watering delay that will occur after a rain
event shutdown if you are using a RFS Rain/Freeze sensor.
Note: The SLW DLY begins after the SLW rain sensor has reset (is dry) following a rain event.
Accumulation of new water deficits will not begin until after the SLW Delay has cleared.
Q17: What do the Watering Cycle Pause Functions (Mode LED, Sensor LED, Display Message)
mean?
A17:
Mode
LED
Sensor
LED
Color
Color
Display Message
Reason
Red
N/A
Controller dial is set to OFF
Green
Red
RAIN
Rain sensor disks are wet.
Controller WILL NOT water.
Green
Red
FREEZE
Temperature is 37 degrees F or
colder. Controller WILL NOT
water.
Green
Red
SENS
Sensor tripped at the SEN
terminals. Controller WILL NOT
water.
Green
Orange
RAIN DLY
Irrigation cancelled for additional
hours in SLW DLY. Controller
WILL NOT water.
Orange
Green
Omit-Time
Cycle paused for omit hours set
Orange
Green
SOAK
Zone waiting for soak time out
Orange
Green
ZONE DLY
Waiting for next zone
Orange
Green
PAUSE
Waiting for MVP to turn on or off

Page 4
Q18: What happens to the remaining run time if the program is interrupted by an omit time?
A18: The omit settings are used to set a watering blackout period. For example, if you live in a
municipality that restricts outdoor watering between 10:00 am and 6:00 pm, you can blackout
that time period. If a watering program in progress is paused for a blackout period, the
ORANGE LED will display on the front panel during the pause. The watering cycle will
automatically resume at the end of the blackout period.
Q19: How do I create a "Grow-In" program for newly seeded lawn or new sod?
A19: You can create a "grow-in" program that will allow for watering with multiple daily starts.
The number of days the Grow-In program runs is user defined. Once the controller has reached
the user defined days, the controller will automatically revert to the Default program.
First, set up your normal watering program for an established landscape and activate the RFS
rain/freeze sensor. The next step is to save this program for future retrieval. Turn the dial to
Advanced Functions, press the DOWN button to get the Default screen. Press the Next button
to view Store in the display. Press Next button one more time and wait until the screen shows
Complete. Then turn the dial back to Run. You have saved the Default program. Now, change
your program(s) to the desired grow-in settings.
When you have finished programming the Grow-in program, turn the dial to Advanced
Functions, press the DOWN button to get to the Grow-in program. Press the Next button to set
the number of days to use the Grow-in program. Then turn the dial back to Run. You have
saved the Grow-in program.
Q20: My ProLine controller runs the same program over and over. Is something wrong?
A20: Check the Set Daily Start Times settings. Turn all other seven start times to OFF if do not
need more than one start time. If you have more than one start time, they should not be the
same time. To turn a start time to OFF, hold down one of the arrow buttons until you see OFF
shown in the display.
Q21: What is the battery icon in the ProLine display used for?
A21: The battery icon in the display indicates to different setting based on the dial position.
When the dial is in the Manual Program, Multimeter, Valve Locator, Sensor Operations or Run
Soak Cycles position, the battery icon reflects the battery strength of the RFS Rain/Freeze
sensor. When the dial is in all other positions, the battery icon reflects the strength of the 9V
battery installed in the access compartment in the back of the panel. ProLine Controllers use a
Real Time Clock/Calendar instead of a backup battery to maintain correct time during a power
outage. For the PL1600 and PL4800, the display will show a blank battery icon in the display
until/unless a battery is installed in the controller. Battery usage is only necessary for
programming when the control panel is removed.

Page 5
Q22: Why do I not see a battery strength icon for the RFS rain/freeze sensor when I turn the
ProLine dial to determine RFS battery strength? (left side of controller)
A22: The icon will disappear if the daily communication does not occur. You might have a
communication problem with the RFS unit. If you have any blank screens, then go to the RFS
unit and perform the diagnostic test as described in the Troubleshooting section of your
manual. The icon will return by itself if the controller receives a rain or freeze message from
the RFS or if the battery(s) in the RFS have a reportable change in strength. You can restore the
icon by holding down on the rain tab on top of the RFS for about 10 seconds.
Q23: How do I keep the run times from violating a local watering regulation?
A23: You can use the OMIT feature on the dial to blackout any restricted watering hours, days,
or dates. The Set Watering Days position on the dial also allows you to select specified weekly
days or odd/even days to an interval of days.
Q24: Why is my system repeating a watering cycle?
A24: Possible causes:
1) More than one Daily Start Time has been set for each program. The program will start at the
designated start time and run all zones assigned to that program in consecutive order. To turn
off extra start times, turn the dial to the Daily Start Times position and use the Next button to
view all start times for each program (A, B, C and D). Use either arrow button to advance to the
OFF position for each start time.
2). Run/Soak feature has been set in the Advanced Functions position causing the controller to
cycle multiple times so that the proper amount of water can be applied without creating runoff.
If you are using Run/Soak, the controller will automatically divide run times to minimize water
run-off.
Q25: How do I start a manual watering program in my ProLine controller?
A25: There are three ways. If you want to run all programs for the scheduled run time
programmed in the controller, just push the RUN MANUAL PROGRAM button at the top of the
controller. It will run all programs and return to the Auto-Adjust mode by itself. If you want to
select a single zone, you can turn the dial to MANUAL ZONE, use the arrow buttons to enter a
run time for the zone and then return the dial to RUN to start the operation. You can also use
the MANUAL TEST position on the dial to quickly run through all zones with time assigned.
When you turn to MANUAL TEST, the screen will display a 10 second run time for all
stations. You can change this time using the arrow buttons if you like; then return the dial to
RUN to start the operation

Page 6
Q26: What if my system did not water at a scheduled time when operating with the ProLine
controller?
A26: Check the ACTIVE LED. If it is RED, a rain or freeze sensor has shut down operation. It will
resume watering at the next scheduled start time.
Q27: What does the PAUSE indication mean on my ProLine controller?
A27: It means that your controller has temporarily paused irrigation due to a setting in the
programming for Omit Time, Rain Delay or Run/Soak to prevent water runoff.
If you are using an RFS rain/freeze sensor, the controller will also pause for a period of time (48
hours is default) after a rain sensor shutdown. The controller will resume watering at the first
scheduled start time after the pause. If you want to delete the 48-hour pause, just press the
sensor button to put the unit into bypass and then press the button again to put the sensor
mode back to active. The LED will be green. The controller will also show PAUSE momentarily
when it switches from one zone to another zone.
Q28: Why does my ProLine show zero zones?
A28: Possible Causes
(1) Try a different module. You could have a defective module.
(2) Modules must be installed from left to right with no open module positions in between
modules.
(3) AC must be present before the controller will recognize newly added modules. Make sure
the panel is tightly closed and the 9V battery is not connected and try again.
(4) If none of the above works, try a Total Reset of the controller as explained in section 7.1 of
your manual.
Q29: Does the SL1600/1620 have a ribbon cable?
A29: No, there is not a ribbon cable connecting the faceplate to the controller. The controller
clicks in and makes connection directly to the housing.
Q30: What does "NO AC" indicate?
A30: If your display indicates NO AC indicates the control panel is not being powered by the
normal 24v AC power.
Common causes:
1) Panel door is open
2) Fuse if blown in controller
3) Transformer is not working
4) Power source (outlet or breaker) is not functioning
While the NO AC is displayed, the controller is on 9V battery power and will not operate zones
or run your system.

Page 7
Q31: What options are available in the ProLine Advanced Menu?
A31: The Advanced Menu provides additional information and allows more technical inputs
commonly used by professional installers.
ADVANCED FUNCTIONS ON PROLINE DIAL
RUN/SOAK
This feature allows the user to set a Maximum Run and a Minimum Soak for each program to
eliminate water run-off. To adjust turn the Dial to Run and Soak Settings. Use the PGM button
to select the Program. Use the UP button to adjust the Maximum Run for each program. This is
the maximum RUN time the controller can do before going to SOAK. Press the NEXT button to
adjust the Minimum Soak for each program. This is the minimum time the zone must SOAK
before it is ready to RUN again.
SENSOR OPERATIONS
Sensor is an ON/OFF toggle to override the SEN terminals rain/ freeze functions on selected
zones. Factory default is ON.
SLW
RAIN
The rain selection is on/off toggle to override the SLW sensor feature for selected zones.
Factory default is ON for all zones.
FREEZE
The freeze selection is on/off toggle to override the SLW freeze sensor feature for selected
zones. Factory default is ON for all zones.
DELAY
This feature allows the user to adjust the factory set 48-hour watering delay that will occur
after a rain event shutdown if you are using a RFS Rain/Freeze sensor. To eliminate the delay or
to reduce or increase the factory default hours, turn the dial to Advanced Menu and use an
arrow button to select SLW DLY. Press the NEXT button and 48 hours will show in the display.
Use the UP and DOWN buttons to eliminate the delay or to select a different number of hours
(0–99 hours). Note: The SLW DLY begins after the SLW rain sensor has reset following a rain
event. Accumulation of new water deficits will not begin until after the SLW DLY has cleared.
LOCATOR
This feature will create a “chatter” for a selected valve as a convenient method of locating
buried valves. Use NEXT and BACK buttons to scroll to the valve you want to “chatter.”

Page 8
MULTIMETER
Your ProLine controller can assist you with several diagnostic functions.
OUTPUTS
Use the UP to select OUTPUTS function. Then use NEXT and BACK buttons to scroll through MV
and Zone Valves to view AC Amp reading for each valve. Scroll BACK to OUTPUTS display to
move to next diagnostic function. Typical range is 150 to 350 mA per valve with a valve
connected. An OPEN or SHORT message indicates a problem with a zone. Note: If you have
more than one valve on a zone, the ProLine controller will measure total current for the
combined valves.
24V PWR
This function displays output voltage at the transformer. Normal reading is 24 to 30 volts AC.
ADVANCED FUNCTIONS UNDER THE ADVANCED MENU
RAIN DLY
The rain delay feature allows user to globally suspend watering operations for all programs for
a selected number of days.
Use UP or DOWN buttons to select 1 to 14 days for watering suspension. The watering blackout
will automatically be cleared from the ProLine controller after the assigned days have expired
and watering will resume at the next available start time.
DS TIME
Your ProLine controller can automatically adjust the time for daylight saving time (DST). The
factory default setting is OFF and has been preset for the current USA schedule. To turn DST
Adjust ON, press the next button at DS TIME, the NEXT button at ON/OFF then select ON.
The DS Time feature can be customized to match any international DST schedule. Press the
NEXT button at DS TIME in advanced functions. Select DS SETUP and press the NEXT button
again. You will be prompted to enter the START schedule (time of day is moved ahead 1 hour
per START schedule), and the STOP schedule (time of day is moved back 1 hour per STOP
schedule). DST start and stop are formatted with the Week (first, second, third, last), the Day
(Sun-Sat) and the Month (Jan-Dec). All DS Time adjustments are made at 2 am. To return the DS
Time schedule back to the USA factory default, use the US DEFLT option.
DST ON/OFF
If you would like for your controller to automatically set the time of day on the occurrence of
Daylight-Saving Time, make sure it is turned on in this menu

Page 9
DS SETUP
Your controller is programmed with the default of starting Daylight Saving Time starting on the
second Sunday in March and ending on the first Sunday in November. If you would like to
adjust these settings, you may do so in this menu.
FAULT
The Fault Indicator appears ONLY when a fault is detected. Turn dial to Advanced Functions and
press NEXT button to view faults. This feature is used to identify problems that may require
attention or repair to insure proper operation of the system. Use NEXT button to view the type
of fault. If more than one fault exists, you can use the UP and DOWN buttons to search for
additional faults. Use NEXT button one more time and it will flash KEEP. If you want to clear the
fault, use the UP and it will flash CLEAR. If you turn the dial out of the Advanced Menu positions
while CLEAR is flashing, the fault icon on the display will disappear. However, if the cause of the
fault is not corrected, the controller will continue to skip watering a zone with a fault and will
resume the flashing FAULT icon on the display each time that zone is operated.

Page 10
NUM START
This ProLine feature allows you to select the number of Watering Program Start Times that you
want to appear at Program Start Times on the dial. The default number of start times shown is
3. To select 4 to 8 start times, go to Advanced Functions, NUM STRT. Press Next to view the
default of 3 start times. Scroll the UP/DOWN buttons to select 4 to 8 start times to be visible on
the dial. Return the dial to Run.
MV2 ZONE
A second master valve circuit can be enabled in this menu by designating a zone valve to be
MV2
ZN/ZN DLY
This function allows user to set delay times between zone starts for use in systems with slow
closing valves or pump systems that are operating near maximum flow or have slow well
recovery. Use UP and DOWN buttons to change value. Adjustable in one-minute increments
from 0 (the ProLine controller default setting) to 30 minutes; adjustable in 10-minute
increments from 30 minutes to 3 hours.
MV/ZN DLY
(Master Valve Advance Open and Delayed Close):
This function allows the user to set a delay time between the opening of the master valve and
the opening of the first zone valve as well as a delay between the closing of the last zone valve
and the closing of the master valve.
Use the NEXT button to enter menu. Select setting for the ON Delay or OFF Delay by pressing
NEXT. Use UP and DOWN buttons to select delay time. Use arrow buttons to set ON Delay time
from 0 seconds to 1 minute in 1 second increments. OFF Delay can be set from 0 seconds to 3
minutes in 1 second increments.
MV/ZONE
This feature is used to indicate which zones will use the master valve/pump start output. Use
NEXT button to set each zone ON or SYSTEM OFF (ProLine controller default is master valve ON
for all zones). Use UP and DOWN buttons to select ON or OFF. Use NEXT button to select zone.
Caution: If an unused zone is turned on and activates a pump start relay, the pump may
overheat or cause a pipe to burst. To prevent operating a pump with no flow (dead heading),
make sure all unused zones are set to OFF.

Page 11
NC/NO MV
Enter this menu to select between normally open or normally closed master valves for master
valve 1 and master valve 2. 10.17 CON PGM
Select the ability to run 1, 2,3, or all 4 programs simultaneously. Default is two simultaneous
programs. Program D will run with high priority.
CLR PGM
This feature allows the user to clear all programmed values specific to a selected program. All
zone run times and daily start times will be set to OFF; watering days will default to Days of the
Week (all on); Season % will equal 100% for all months and Run/Soak will be OFF. Omit
times/days are not reset when clearing a program.
From the CLR PGM menu, press NEXT and the display will show KEEP. Use PGM button to select
program to be cleared. Then, press either the UP or DOWN button to display CLEAR. With
CLEAR showing in the display, either press NEXT or BACK or turn the dial to complete the
clearing of the selected program. Likewise, with KEEP showing in the display, either press NEXT
or BACK or turn the dial to keep the selected program.
CLR ALL
This feature is similar to CLR PGM except that it clears all user programmed data for all four
programs and returns most Advanced Menu changes to factory defaults. Turn the dial to
Advanced Menu and use an arrow button to select CLR ALL. Press the NEXT button and KEEP
will show in the display. Press the UP and DOWN button to select CLEAR. Press NEXT to clear all
programs. The display will show CLEARING to confirm that all programs have been cleared.
Note: This function is not the same as the Total Master Reset as described under 7.1 in your
Owner’s Manual.
SKIP CUR
You can increase the skip circuit threshold here. Some accessory, like pump start relays, In rush
currents exceed the factory setting of 1.0 Amp.
MODBUS
This displays a static address along with a user programmable address to integrate with third
party software
ABOUT
Provides information on software version in the ProLine controller.

Page 12
MODEL
Model Number
VERSION
Version of Firmware
BUILD
Build version
GROW IN
Grow In allows you to set up a new landscape grow-in watering program that will automatically
expire after a set number of days that you select. At the end of your selected grow-in period,
the controller will automatically retrieve your long-term watering program to avoid the
necessity of having to return to the controller.
Step 1: Set up your long-term watering program.
Step 2: Go to Advanced Menu and select DEFAULT. Press NEXT and STORE will appear on the
display. Press NEXT again and wait several seconds. The display will show COMPLETE to confirm
that you have successfully stored your program.
Step 3: Set up your temporary Grow-In program.
Step 4: Go to Advanced Menu and select GROW IN. Press NEXT once to view default days for
grow in. Use Adjust Value buttons to select 1 to 99 days for the grow in period. At the end of
your grow in, the controller will automatically retrieve the long-term program stored in Step 2.
Return dial to Run.
DEFAULT
This is an optional function that allows the user to store a program that can be retrieved later if
it is inadvertently deleted or changed. Once the controller has been programmed, go to
Advanced Menu and select DEFAULT. Press NEXT and STORE will appear on the display. Press
NEXT one more time and wait several seconds. The display will show COMPLETE to confirm that
you have successfully stored your program. If the controller has had the operating program
changed and you want to return to the stored program, go to DEFAULT, press NEXT and one of
the arrow buttons. The display will show RETRIEVE. Press NEXT and the display will show
COMPLETE to confirm that the DEFAULT program has been restored as the operating program.
To clear a stored DEFAULT program, you must use the Total Reset procedure, Section 7.1.

Page 13
RETRIEVE
Retrieve default program
STORE
Store default program
UNITS
Select either Metric or standard units of measure
LANGUAGE
English, Espanol, Italiano, Portuguese, or Francais may be selected
Other manuals for PROLINE PL800
4
This manual suits for next models
3
Table of contents
Other Weathermatic Controllers manuals

Weathermatic
Weathermatic SmartWire 9600TW User manual

Weathermatic
Weathermatic SoloRain 8014 Series User manual

Weathermatic
Weathermatic PROLINE PL800 User manual

Weathermatic
Weathermatic Smartlink Aircard User manual

Weathermatic
Weathermatic SmartLink SmartLine User manual

Weathermatic
Weathermatic SmartLine User manual

Weathermatic
Weathermatic SmartLine User manual

Weathermatic
Weathermatic ProLine 800 Series User manual

Weathermatic
Weathermatic PROLINE PL800 User manual

Weathermatic
Weathermatic PROLINE PL800 User manual