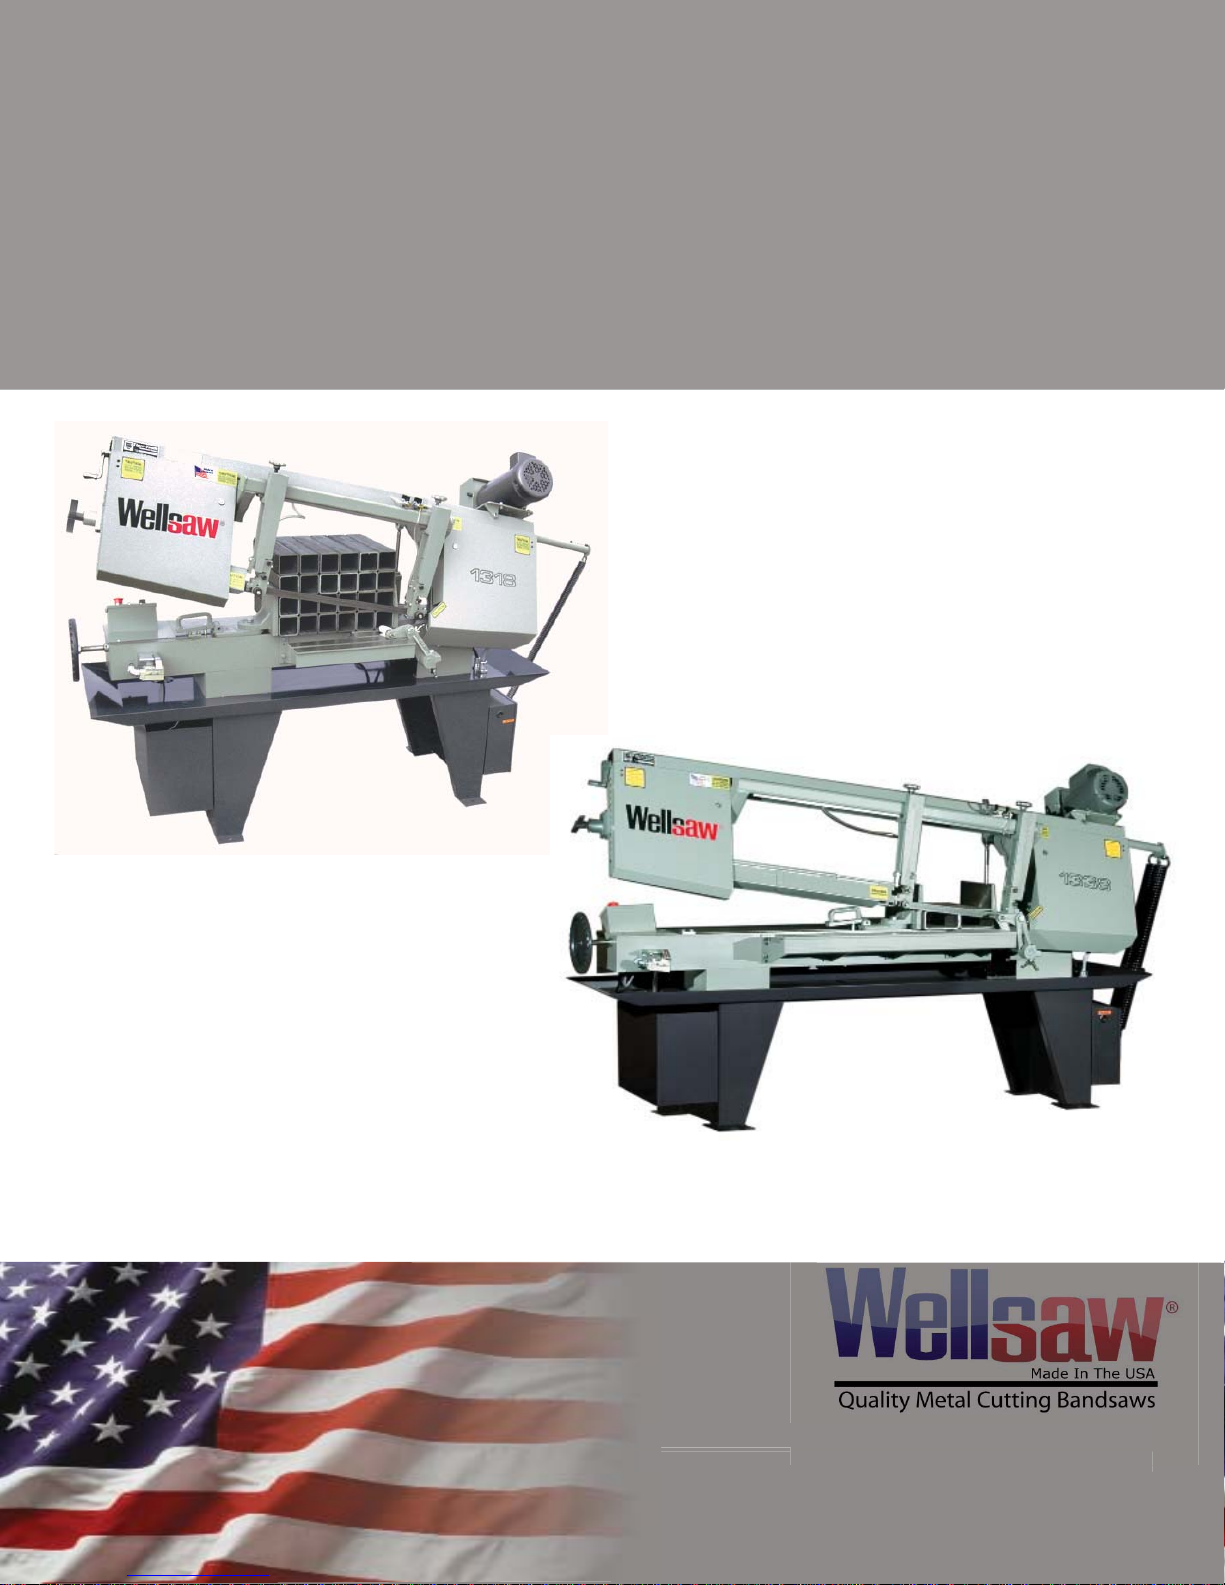
Wellsaw 1118 Installation and operation manual

Parts List
and
Operating & Maintenance Manual
1118, 1318, 1338 & 1348
MODELS
Manual Bandsaws
Built better to work stronger and last longer
2829 N. Burdick St. Kalamazoo, MI 49004
Phone: 269-345-1132 Fax: 269-345-0095
www.wellsaw.com
ick
S
t. Kalamazoo, MI 49004
345-1132 Fax: 269-345-0095
1318
(formerly model 1118)
1338, 1348
REV 161111

2
FORWARD
The Model 1118,1338 and 1348 Wellsaw bandsaws have been designed and manufactured to
conform to Wellsaw’s recognized high standards of quality and performance. Each saw must
pass a series of final inspection tests, including actual metal cutting operations, before it is
shipped. For this saw to provide satisfactory service, it is necessary that it be properly installed,
operated and maintained. This manual has been prepared to assist you in carrying out these
functions. We urge you to study this manual and follow its suggestions.
RECEIVING AND INSTALLATION
Carefully remove the wrap and skid so the saw and its parts are not marred or otherwise
damaged. In the event of damage in transit, notify the carrier and file a Proof of Loss Claim
immediately.
Shortages
Inspect the complete shipment carefully against the itemized packing list. Make sure that all
items are present and in good condition. In the event of any shortage, notify the distributor from
whom you purchased the saw and the carrier who made final delivery.
Utility Hook-Up
The use of a qualified electrician is always recommended when connecting the saw to the main
power supply. Electrical codes differ from area to area and it is the customer’s responsibility to
ensure that their saw complies with applicable codes. Your Wellsaw is pre-wired at the factory
for a specified voltage. Always check the motor and electrical panel to ensure that they are both
wired to correspond to your electrical power supply.
1

1
- Misuse of this machine can cause serious injury.
- For safety, machine must be set up, used and serviced
properly.
- Read, understand and follow instructions in the
operator’s and parts manual.
When setting up machine:
- Always avoid using machine in damp or poorly lighted
work areas.
- Always be sure machine is securely anchored to the
floor.
- Always keep machine guards in place.
- Always put start switch in “OFF” position before
plugging in machine.
When using machine:
- Never operate with machine guards missing.
- Always wear safety glasses with side shields (See
ANSI Z87.1)
- Never wear loose clothing or jewelry.
- Never overreach - you may slip and fall into the
machine.
- Never leave machine running while away from it.
1. Always wear protective eye wear when operating
machinery. Eye wear shall be impact resistant, protective
safety glasses with side shields which comply with ANSI
Z87.1 specifications. Use of eye wear which does not comply
with ANSI Z87.1 specifications could result in severe injury
from breakage of eye protection.
2. Wear proper apparel. No loose clothing or jewelry which
can get caught in moving parts. Rubber soled footwear is
recommended for best footing.
3. Do not overreach. Failure to maintain proper working
position can cause you to fall into the machine or cause your
clothing to get caught - pulling you into the machine.
4. Keep guards in place and in proper working order. Do not
operate the machine with guards removed.
5. Avoid dangerous working environments. Do not use
stationary machine tools in wet or damp locations. Keep work
areas clean and well lit. Special electrics should be used when
working on flammable materials.
6. Avoid accidental starts by being sure the start switch is
“OFF” before plugging in the machine.
7. Never leave the machine running while unattended.
Machine shall be shut off whenever it is not in operation.
8. Disconnect electrical power before servicing. Whenever
changing accessories or general maintenance is done on
the machine, electrical power to the machine must be
disconnected before work is done.
- Always shut off the machine when not in use.
When servicing the machine:
- Always unplug machine from electrical power while
servicing.
- Always follow instructions in operators and parts
manual when changing accessory tools or parts.
- Never modify the machine.
Read and follow these simple rules for best results and
full benefits from your machine. Used properly,
Wellsaw’s machinery is among the best in design and
safety. However, any machine used improperly can be
rendered inefficient and unsafe. It is absolutely
mandatory that those who use our products be properly
trained in how to use them correctly. They should read
and understand the Operators and Parts manual as well
as all labels affixed to the machine. Failure in
following all of these warnings can cause serious
injuries.
9. Maintain all machine tools with care. Follow all
maintenance instructions for lubricating and the changing of
accessories. No attempt shall be made to modify or have
makeshift repairs done to the machine. This not only voids
the warranty but also renders the machine unsafe.
10. Secure work. Use clamps or a vise to hold work when
practical. It is safer than using your hands and it frees both
hands to operate the machine.
11. Never brush away chips while the machine is in
operation.
12. Keep work area clean. Cluttered areas invite accidents.
13. Remove adjusting keys and wrenches before turning the
machine back on.
14. Use the right tool. Don’t force a tool or attachment to do
a job it was not designed for.
15. Use only recommended accessories and follow
manufacturers instructions pertaining to them.
16. Keep hands in sight and clear of all moving parts and
cutting surfaces.
17. All visitors should be kept at a safe distance from the
work area. Make workshop completely safe by using
padlocks, master switches, or by removing starter keys.
18. Know the tool you are using - its application, limitations,
and potential hazards.
WARNING
Machinery general safety warnings

2
19. Some dust created by power sanding, sawing, grinding,
drilling and other construction activities contains chemicals
known to cause cancer, birth defects or other reproductive
harm. Some examples of these chemicals are:
-Lead from lead based paint
-Crystalline silica from bricks and cement and other masonry
products, and
-Arsenic and chromium from chemically treated lumber
20. Your risk from those exposures varies, depending on how
often you do this type of work. To reduce your exposure to
these chemicals: work in a well ventilated area, and work with
approved safety equipment, such as those dust masks that are
specifically designed to filter out microscopic particles.
1. Always wear leather gloves when handling a saw blade.
The operator shall not wear gloves when operating the
machine.
2. All doors shall be closed, all panels replaced, and all other
safety guards in place prior to the machine being started or
operated.
3. Be sure that the blade is not in contact with the workpiece
when the motor is started. The motor shall be started and you
should allow the saw to come to full speed before bringing the
workpiece into the saw blade.
4. Keep hands away from the blade area. See figure A.
5. Remove any cut off piece carefully while keeping your
hands free from the blade area.
6. Saw must be stopped and electrical supply must be cut off
before any blade replacement or adjustment of blade support
mechanism is done, or before any attempt is made to change
the drive belts or before any periodic service or maintenance is
performed on the saw.
7. Remove all loose items and any unnecessary work pieces
from the area before starting machine.
8. Bring adjustable saw guides and guards as close as possible
to the work piece.
Figure A Figure B
General Electrical Cautions
This saw should be grounded in accordance with the National
Electrical Code and local codes and ordinances. This work
should be done by a qualified electrician. The saw should be
grounded to protect the user from electrical shock.
Wire sizes:
Caution: for circuits which are far away from the electrical
service box, the wire size must be increased in order to deliver
ample voltage to the motor. To minimize power losses and to
prevent motor overheating and burnout, the use of wire sizes
for branch circuits or electrical extension cords according to
the following table is recommended:
Conductor Length AWG (American wire gauge) number
240 volt lines 120 volt lines
0-50 feet No. 14 No. 14
50-100 feet No. 14 No. 12
Over 100 feet No. 12 No. 8
9. Always wear protective eye wear when operating, servicing
or adjusting machinery. Eye wear shall be impact resistant,
protective safety glasses with side shields complying with
ANSI Z87.1 specifications. Use of eye wear which does not
comply with ANSI Z87.1 specifications could result in severe
injury from breakage of eye protection. See figure B.
10. Non-slip footwear and safety shoes are recommended. See
figure C.
11. Wear ear protectors (plugs or muffs) during extended
periods of operation. See figure D.
12. The workpiece, or part being sawed, must be securely
clamped before the saw blade enters it.
13. Remove cut off pieces carefully, keeping hands away
from saw blade.
14. Saw must be stopped and electrical supply cut off or
machine unplugged before reaching into cutting area.
15. Avoid contact with coolant, especially guarding your
eyes.
Figure C Figure D
Safety instructions on sawing systems

3
Table of Contents
GENERAL
Receiving and Installation.................................................1
Safety Warnings and Instructions...................................2
Specications and Features..............................................3
Notes on Sawing...................................................................4
Trouble Shooting..................................................................4
Placing the Blade on Saw ..............................................6
Wheel Pitch Adjustment................................................6
Drive Wheel Adjustment................................................6
Variable Speed Drive....................................................... 6
Gear Box Repair.................................................................6
Fixed Vise Jaw ....................................................................7
Sliding Vise Jaw .................................................................7
Hydraulic Feed Control...................................................7
Blade Brush.........................................................................7
Motor Switch......................................................................7
Servicing the Blade Guides............................................7
Blade Guide Alignment...................................................8
Recommended Service Kit.................................................8
Maintenance............................................................................9
Machine Operation..............................................................10
Limited Warranty..................................................................10
Backlash Adjustment Proceedure..................................11
DRAWINGS & PARTS LISTS
Frame Assembly...................................................................12
Bed Assembly .......................................................................14
Rite Tensioning Device ......................................................16
Leg & Chip Pan .....................................................................18
Blade Guide Assembly.......................................................20
Blade Brush Assembly .......................................................20
Blade Guides for 1”Blades................................................22
Blade Guides for 1-1/4”Blades........................................24
Hydraulic System.................................................................26
Coolant System ....................................................................28
Motor & Gear Box ................................................................30
Electrical Controls ...............................................................32
Electrical Schematic............................................................34
Speed & Feed Selection.....................................................36
Specications
Capacity:
Rectangular
1318
1338
1348
Round
1318
1338
1348
Flat
1318
1338
1348
45° Angle
1318
1338
1348
Blade Size:
1318
1338
1348
Blade Speeds
Blade Guides
Blade Tension
Electrical Options
Coolant System
Vise Control
Swivel Vise
Feed Control
Band Wheels
Bed Height
Floor Area:
1318
1338
1348
Shipping Weight:
1318
1338
1348
13” high x 18” wide
13” high x 38” wide
13” high x 48” wide
13” diameter
13” diameter
13” diameter
20” wide
38” wide
48” wide
11” high x 10” wide
12” high x 21” wide
12” high x 31” wide
1" x .035" x 12'6" (150")
1” x .035” x 15’6” (186”)
1-1/4” x .042” x 17’6” (210”)
Innitely Variable, 70-375 SFPM
Carbide Guides with Rollers
Manual Rite-Tension®
3 hp - 208-230-460/60/3
2hp - 115-208-230/60/1
Tank Capacity 8 Gallons
Submersible Pump/3 GPM
Quick Acting/Manual Screw
To 45°
Variable Hydraulic/Counterbalance Spring
15" Diameter Cast Iron
29"
40"W x 84"L
40”W x 102”L
40”W x 112”L
1000 Lbs.
1230 Lbs.
1300 Lbs.
Standard Features
• Spring-Loaded Carbide Guides with Rollers
• Combination Reduction Gearbox and Ring & Pinion
Blade Drive
• Baldor® Motor
3hp motor 3 phase TEFC
2hp single phase ODP
• Innitely Variable Blade Speeds
• Rite-Tension® Blade Tensioning Device
• Wet Cutting System
• Powered Blade Brush
• 110 Volts at Controls
• Overload and Undervoltage Protection
• Precision Ground Bed and Vise Jaws
• Quick Acting Vise
• Adjustable Stock Stop
• Auto Shut-O at End of Cut
• OSHA Blade Guarding
• Tiger-Tooth® Bi-Metal Blade
• Coolant for Initial Start-Up
Available Factory Options
Flush Hose with 8.5 GPM Pump | Powered Frame Raise
and/or Powered Vise | Laser Line Pointer | Casters (Set of 4,
2 Locking) | NFPA Electrics (with Disconnect) | Work Light
with Transformer | Stock Stand, 18" | 5' Non-Powered Roller
Conveyor | 10' Non-Powered Conveyors
Please Contact Factory for Additional Options
Other Models in the 1318 Family
Model 1338 with 38" Width Capacity
Model 1316S Swivel Head Miter Saw to 60°
All Models Available with PLC Controlled
Semi-Automatic Operation
Wellsaw® |2829 N. Burdick Street |Kalamazoo, MI 49004 |Phone: 269-345-1132 |Fax: 269-345-0095 |Web: www.wellsaw.com

4
Notes on Sawing
It is widely recognized that a proficient operator is a
key to optimum bandsawing. He makes certain the
machine is properly maintained and adjusted for
dependable operation. He carefully sets up each
cutting job to prevent damage to the machine and
obtain the best performance from the equipment.
Experienced blade dealers can be very help-ful in
selecting the grade and proper tooth blade for each
sawing job. All blades should be straight, have sharp
teeth with uniform set, and be “broken in” at a
reduced feed rate to obtain good cutting performance
and blade life.
Every cutting situation has special characteristics
requiring some experimentation to determine which
blade, speed and feed rate will achieve the most
satisfactory result. Cutting charts indicate a good
starting point, but must be modified by direct
experience if optimum performance is desired.
Here are some helpful pointers for adjusting speed
and feed for good cutting performance.
1. Make sure the saw is cutting a good chip from
the workpiece.
2. Watch for blue chips or excessive “smoke”
indicating heat in the cut which could damage the
blade or work harden the material being cut
3. Watch for excessive vibration or chatter marks
on the cut-off piece indicating possible damage to the
saw teeth by “hammering”.
4. Check the cut-off piece for flatness. A dull blade
or excessive feed will produce a “belly” in the cut.
5. Inspect the blade for worn, rounded or shiny
cutting edges. Avoid force cutting which will allow
chips to “weld” to saw teeth and eventually cause the
teeth to be stripped off the blade.
6. When experimenting, start with a slow speed and
feed rate. Gradually increase blade speed and then
feed pressure by small amounts until adverse effects
are noted. You can then set the speed and feed at a
reasonable level for continuous cutting. Remember
that blade speed and feed pressure must be balanced to
keep cutting a good chip.
Trouble Shooting
Premature Dulling of Blade Teeth
1. Feed rate too high or low. Check recommendation.
2. Blade speed too slow or too fast.
3. Faulty material; heavy scale, hard spots, etc.
4. Verify material analysis.
5. If coolant flow is not covering saw teeth,
increase coolant flow rate.
6. If saw is vibrating in cut, reduce blade speed or
increase feed rate.
7. Chipped or broken tooth may be lodged in cut.
8. “Chip welding” caused by improper feed and
speed.
9. Incorrect coolant mixture.
10. Incorrect blade selection
11. Improper break-in of new blade. New blades
should be run initially with reduced feed pressure for
approximately 50 to100 square inches.
12. Saw blade teeth may be hitting blade guides.
Check for proper blade size.
Saw Blade Vibration
1. Incorrect blade speed for material.
2. Blade tension insufficient.
3. Back-up bearing may be worn.
4. Incorrect choice of saw tooth pitch.
5. Incorrect coolant mixture.
6. Incorrect feed setting. Increase feed.
7. Workpiece not firmly clamped in vice.
8. Worn or improperly adjusted saw guides. Check
and make necessary adjustments.
Blade Teeth Chipping or Ripping Out
1. Blade pitch too coarse. Use a fine pitch saw blade
on thin work sections.
2. Improper break-in of new blade. Do not start a
new blade in an old cut.
3. Work piece not held firmly enough. Clamp work
securely.
4. Introduce cooling if it is not being used.
5. Faulty material; scale or hard spots.
6. Blade gullets may be loaded. Use higher viscosity
lubricant or coolant.
7. Blade speed and feed may need adjustment.

5
Notes on Sawing
It is widely recognized that a proficient operator is a
key to optimum bandsawing. He makes certain the
machine is properly maintained and adjusted for
dependable operation. He carefully sets up each
cutting job to prevent damage to the machine and
obtain the best performance from the equipment.
Experienced blade dealers can be very help-ful in
selecting the grade and proper tooth blade for each
sawing job. All blades should be straight, have sharp
teeth with uniform set, and be “broken in” at a
reduced feed rate to obtain good cutting performance
and blade life.
Every cutting situation has special characteristics
requiring some experimentation to determine which
blade, speed and feed rate will achieve the most
satisfactory result. Cutting charts indicate a good
starting point, but must be modified by direct
experience if optimum performance is desired.
Here are some helpful pointers for adjusting speed
and feed for good cutting performance.
1. Make sure the saw is cutting a good chip from
the workpiece.
2. Watch for blue chips or excessive “smoke”
indicating heat in the cut which could damage the
blade or work harden the material being cut
3. Watch for excessive vibration or chatter marks
on the cut-off piece indicating possible damage to the
saw teeth by “hammering”.
4. Check the cut-off piece for flatness. A dull blade
or excessive feed will produce a “belly” in the cut.
5. Inspect the blade for worn, rounded or shiny
cutting edges. Avoid force cutting which will allow
chips to “weld” to saw teeth and eventually cause the
teeth to be stripped off the blade.
6. When experimenting, start with a slow speed and
feed rate. Gradually increase blade speed and then
feed pressure by small amounts until adverse effects
are noted. You can then set the speed and feed at a
reasonable level for continuous cutting. Remember
that blade speed and feed pressure must be balanced to
keep cutting a good chip.
Trouble Shooting
Premature Dulling of Blade Teeth
1. Feed rate too high or low. Check pages 35-36.
2. Blade speed too slow or too fast.
3. Faulty material; heavy scale, hard spots, etc.
4. Verify type of material.
5. If coolant flow is not covering saw teeth,
increase coolant flow rate.
6. If saw is vibrating in cut, reduce blade speed or
increase feed rate.
7. Chipped or broken tooth may be lodged in cut.
8. “Chip welding” caused by improper feed and
speed.
9. Incorrect coolant mixture.
10. Incorrect blade selection
11. Improper break-in of new blade. New blades
should be run initially with reduced feed pressure for
approximately 50 to100 square inches.
12. Saw blade teeth may be hitting blade guides.
Check for proper blade size.
Saw Blade Vibration
1. Incorrect blade speed for material.
2. Blade tension insufficient.
3. Back-up bearing may be worn.
4. Incorrect choice of saw tooth pitch.
5. Incorrect coolant mixture.
6. Incorrect feed setting. Increase feed.
7. Workpiece not firmly clamped in vice.
8. Worn or improperly adjusted saw guides. Check
and make necessary adjustments.
Blade Teeth Chipping or Ripping Out
1. Blade pitch too coarse. Use a fine pitch saw blade
on thin work sections.
2. Improper break-in of new blade. Do not start a
new blade in an old cut.
3. Work piece not held firmly enough. Clamp work
securely.
4. Introduce cooling if it is not being used.
5. Faulty material; scale or hard spots.
6. Blade gullets may be loaded. Use higher viscosity
lubricant or coolant.
7. Blade speed and feed may need adjustment.

6
Premature Blade Breakage
1. Poor weld in the blade.
2. Feed rate set too high. Reduce it.
3. Excessive blade speed. Adjust it.
4. Blade guides set too tight or misaligned.
5. Blade tension set too high.
6. Blade running against flange on wheels. Adjust
wheel pitch.
Blade Squeal
1. Feed rate too light for blade speed. Increase
feed rate and/or reduce blade speed.
Blade Slips Off Band Wheels
1. Blade not tensioned correctly.
2. Wheel pitch not set properly.
3. Guides set too tight.
Gullets of Blade Teeth Loading
1. Blade pitch too fine. Review blade selection.
2. Incorrect blade speed. Consult cutting chart.
3. If not using coolant, apply it.
Chips Welding to Blade Teeth
1. Cutting rate too high.
2. Chip brush may be out of adjustment.
3. Check coolant and application.
Blade Becoming Scored
1. Saw guides may be worn. Check and replace if
necessary.
2. Too much pressure on saw guides. Adjust.
3. Guides may be out of alignment.
Blade Making Belly-Shaped Cut
1. Blade tension too light. Increase it.
2. Saw guides too far from work piece.
3. Blade pitch too fine. Use larger pitch and
positive rake tooth form.
4. Excessive feed. Decrease it.
5. Dull blade.
Inaccurate Cut-Off
1. Is conveyor or stock stand level with saw bed?
2. Insufficient blade tension.
3. Blade guides too far apart. Always set blade
guides as close to the piece as possible.
4. Blade may be dull. Check and replace if
necessary.
5. Feed pressure too high. Reduce it.
6. Blade guides loose, worn or out of alignment.
7. Too many teeth-per-inch. Blade not cutting
freely.
8. Chip brush not cleaning teeth properly.
9. Dirty coolant.
10. Check for loose fasteners.
Rough Cut / Poor Finish
1. Excessive feed rate. See recommendations.
2. Blade too coarse. Use finer blade pitch.
3. Inadequate cutting fluid. Replace.
Blade Stalls in Work
1. Insufficient blade tension.
2. Excessive feed pressure.
3. Blade tooth spacing too coarse.
4. Motor worn or defective.
5. Guides too tight against blade.
Blade Does Not Track Properly
1. Set wheel pitch so that blade runs to wheel
flange but not against it.
2. Is blade tension correct?
3. Is back of blade riding against backup
bearing? If not, adjust it.
Motor Overheating
1. Check for correct voltage supply. Check
voltage at motor. Check magnetic starter heaters.
2. Check for loose electrical connections.
3. Does motor amp reading correspond to rating
on motor specifications tag?
4. Is internal motor wiring correct?
5. Is drive belt over tightened?
Automatic Stop
When the blade has completed a cut through the
material, the saw frame drops onto a limit switch
actuator which shuts the motor off.
When changing a blade or doing any other
maintenance or repair, be sure the automatic stop
is engaged and disconnect the main power supply.
It is necessary to raise the saw frame to clear the
limit switch actuator before the saw can be started.

7
PLACING THE BLADE ON SAW
S/N’s up to 1999
1. Raise saw frame.
2. Open idle and drive wheel guards.
3. Remove blade brush drive belt by loosening
thumb screw.
4. Loosen Rite Tension® take up screw and
remove old blade. In the event of a broken blade,
be sure Rite tension® is open by turning take up
screw counter-clockwise at least six (6) times.
5. WARNING: Uncoil new blade, wearing
gloves to protect your hands and Eye protection.
Make certain blade teeth point in the direction of
blade travel which is toward the motor.
6. Place new blade on the guides and on band
wheels.
7. Grasp blade on frame side and push it
toward guide bracket beam to hold it in position
while turning Rite Tension® take up screw.
8. Tighten blade to proper tension. Blade is
properly tensioned when the take up screw is
tightened until mechanism bottoms.
After S/N 1999
To insert a new blade, turn the Adjusting Knob
(item 17 in the parts diagram) on the blade guide
Counter Clockwise (CCW) until it stops. Insert
the new blade and turn the Adjusting Knob
Clockwise (CW) until it stops. The spring loaded
carbide guides will then be in proper contact with
the sides of the blade. The back of the blade
should just touch the carbide back up guide (15
in the parts drawing). The side bearings should
have a gap of .038 for the .035 thickness blade.
Wheel Pitch Adjustment
If the saw blade runs too low, runs off the wheels,
or runs too high and rubs the wheel flange, a
wheel adjustment must be made.
Loosen the blade before making the following
adjust-ments.
Idler Wheel:
Blade running too low or off the wheel- adjust the
idler wheel block. Loosen the two cap screws in
the block, opposite the take up screw end, one-half
turn. Tighten the opposite two cap screws one-half
turn. Repeat if necessary.
Blade running too high and against the idler
wheel flange- The blade can become distorted, its
top edge rolled over and wheel flange will wear
excessively.
To correct this, loosen the two cap screws closest to
the take up screw one-half turn. Tighten the
opposite cap screws one-half turn. Repeat if
necessary.
Drive Wheel:
Blade running too low or off the drive wheel-Loosen
the two cap screws opposite the outside end of the
wheel plate one-half turn. Tighten the two set
screws on the same end one-half turn. Repeat if
necessary.
Blade running too high, and against the drive wheel
flange- Loosen the cap screws closest to the outside
end of the wheel plate and loosen the two set screws
at the same time by the same amount. Repeat if
necessary.
Make certain all screws are tight after adjustments
have been made.
Variable Speed Drive
Models 1118, 1338, 1348 and 1316S are equipped
with variable speed pulleys providing infinite speed
selection between 70 and 375 feet-per-minute. See
Cutting Speed Chart for settings.
To vary blade speed, rotate handwheel clockwise to
increase speed or counter-clockwise to decrease
speed. Do not adjust the speed unless the pulley
system is in operation (spinning). The handwheel
drag is set at the factory during assembly. This drag
prevents handwheel “creep” during operation but
still permits easy adjustment. Due to normal wear
and environment, the drag setting may change. To
readjust, tighten set screw in thrust nut.
Gear Box Repair
1. Remove gear box from saw.
2. Remove four machine screws holding gear box
together.
3. Separate gear box by carefully prying castings
apart at a location near pulley shaft. Caution: Do
not use excessive force.
4. Once the gear box is open, the internal parts
may be inspected for wear.
5. Liquid plastic gasket is used to seal the gear
case, Loctite No. 51580 or equivalent.
6. Grease, Mobilgrease XHP 220 or
equivalent is recommended. The grease must
have excellent clinging characteristics. (See
Lubrication).

8
Blade Guide Alignment
Up to S/N 1999
To properly align the saw blade for a straight and
accurate cut, do the following:
1. Check the stationary vise jaw. Make sure it is
square. To do this, place a combination square
against the vise jaw slot in the saw bed. Slide the
square toward the stationary vise jaw. Make the
necessary adjustment. If you then find the saw
blade is not square with the stationary vise jaw,
the blade must be adjusted.
2. This adjustment is made with the top two
socket headed screws on the roller adjusting
block of the guide arm. Looking at the drawing
(figure 2) you will see these adjusting screws
labeled “A” and “B”.
3. To make a vertical adjustment of the saw
blade, so that the cut is square from top to bottom,
the blade must be set so that it is perpendicular to
the bed. In making this adjustment, clean the saw
bed first.
4. Set the rule of the combination square on the
saw bed with the end of the rule butted against
the blade above the set of the saw teeth. Use a 1-
1/2 thousandths (.0015”) shim and slide it along
the top and the bottom edge of the rule where it
meets the saw blade. If the shim slides between
the blade and the rule at, either the top or
bottom, the roller supports must be adjusted by
using the bottom socket head screws marked “C”
and “D” to obtain the correct 90 degree angle.
The top ball bearing should be in contact with the
top of the blade at all times. When running the
saw at idle, this contact pressure should be light.
Blade Guide Adjustment
After S/N 1999
To properly align the saw blade for a straight
and accurate cut, do the following:
1. Square the stationary vise jaw. Make sure it is
square to the front of the vise slot. Check by
placing a combination square against the front of
the vise slot in the saw bed. Slide the square
toward the stationary vise. Make any necessary
adjustment to the vise jaw to bring it into square.
Set the combination square so that one leg is
along the face of the stationary vise and check to
see that the blade is square to the vise jaw. If it is
not square, follow the instructions for horizontal
adjustment.
2. Vertical Adjustment. The back of the saw blade
should just touch the carbide back up guide (item
15 in the parts drawing) when the saw is running
but not cutting. To adjust, loosen the two cap
screws 8 [A] and move the block up or down as
required. (Before making this adjustment, be sure
the back of the blade is properly contacting the
flange on both the drive and idle wheels).
3. Horizontal Adjustment. Loosen the two cap
screws 8 [B] securing the horizontal adjusting
block (items 11 & 12 of the parts drawing). Turn
the top adjusting bolt (item 13 of the parts
drawing) to move the blade either in, toward the
saw bed, or out, away from the saw bed.
Normally, the blade comes off the Drive Wheel
with a minimum amount of adjustment needed in
the Horizontal Adjusting Block. The Idle End
adjusting block is more likely to require
adjustment.
4. Blade Tilt. To ensure the blade is perpendicular to
the bed of the saw, loosen the two cap screw 8 [C]
holding the Guide Support (28 & 29 of the parts
drawing) and turn the bottom adjusting bolt (13 of
the parts drawing).
Set the combination square on the saw bed with the
end of the rule butted against the blade above the set
of the teeth. Use a 1-1/2 thousandths (.0015”) shim
and slide it along the top and bottom edge of the rule
where it meets the saw blade. If the shim slides
between the blade and the rule at either the top or
bottom, the blade guides must be adjusted.
5. Safety. Ensure that all bolts are properly
tightened and that all guards are in place before
using the saw.
9
Recommended Service
Kits for Insurance Against Downtime
(before S/N 2000)
1 year
100133-004 Rotary Blade Brush 1 reqd.
2 years
100416-003 Bearing 4 reqd.
100406-002 Bearing 2 reqd.
105454-005 VS Belt 1 reqd.
100133-004 Rotary Blade Brush 1 reqd.
100166-450 Blade Brush V Belt 1 reqd.
106317 Fixed Carbide Guide 2 reqd.
106319 Spring Back Carbide 2 reqd.
After s/n 2000
1 year
100133-004 Rotary Blade Brush 1 reqd.
2 years
100416-001 Bearing 4 reqd.
152153 Top Carbide Guide 2 reqd.
106317 Fixed Carbide Guide 4 reqd.
105454-005 VS Belt 1 reqd.
100133-004 Rotary Blade Brush 1 reqd.
100166-450 Blade Brush V Belt 2 reqd.

9
Maintenance
Caution: Disconnect the electrical supply and press
emergency STOP button before performing any
maintenance. DO NOT service the Frame Hydraulic
Cylinder or Down Feed Valve unless the frame is in
the DOWN position or resting on a mechanical stop,
such as a block of wood.
Daily
1. Keep the saw clean and free of chips.
2. Maintain the coolant level and keep the coolant
tank and filter clean of chip accumulation or sludge.
Monthly
1. Check, adjust and replace blade brush as needed.
2. Lubricate drive gears
3. Inspect carbide guides and bearings.
4. Inspect drive belt.
5. Clean coolant tank and filter as needed.
Annually
1. Check hydraulic oil level.
2. Replace guide rollers and carbide inserts.
3. Inspect gear box. Lubricate as needed.
thoroughly removed before lubricating the saw. The
following lubrication recommendations cover usual saw
applications. Heavy use and hostile environments may
indicate more frequent lubrication for best saw
performance.
Vise Screw, Ring Gear, Drive Pinion
1. Inspect Monthly.
2. Use Anti-Seize on Vise Screw.
3. Use Extreme Pressure Open Gear Lube sparingly on
Ring Gear and Drive Pinion
Gear Case
1. Inspect after 3 years (6,000 hours).
2. Use Mobilgrease XHP 220 or equivalent.
3. Viscosity: Heavy Grease, drop point 550EF
4. Military Specification: None
Hydraulic Cylinder
1. Inspect annually. Fill to top of plug. Drain and
replace every 5 years (10,000 hours).
2. Fill with Mobil Velocite Oil #6 or equivalent.
3. Viscosity at 100EF: SUS 57-61.
4. Military Specification: None.
Motor
Lubrication
Correct and adequate lubrication is a very important
factor in determining the life and service of your
Wellsaw. It is essential that all dust, dirt, chips, etc. be
1. Inspect annually. Re-lubricate every 2 years (4,000
hours) 1 to 2 full strokes.
2. Use Shell Dolium R or equivalent.
3. Viscosity: Heavy Grease, drop point 219EC.
4. Military Specification: None.
Parts Ordering
For your convenience:
When contacting your Wellsaw supplier or the Company for parts or service, it is essential that you
have your saw Model, Serial Number and Purchase Date available.
Jot them down here for handy reference.
Model:
Serial Number:
Purchase Date:

10
MACHINE OPERATION
1. Raise the frame and lock it into place by turning the manual flow control valve clockwise
(CW) until it stops.
2. Adjust material you plan to saw to the desired cut off length. Turn vise screw handle
clockwise (CW) to tighten. Always be sure the material is properly secure before cutting.
3. Push the blade START button to start the machine.
NOTE: If the coolant selector switch is in the ON position, the coolant pump will turn
on with the motor. Check to ensure there is adequate coolant in the coolant tank.
4. Adjust feed pressure for the material to be cut. Refer to pages 35 & 36 for the
recommended settings.
5. Open the manual flow control valve. Turn it counterclockwise (CCW) to the desired feed
rate. NOTE: When breaking in a new blade, always reduce the frame feed rate to one half
(1/2) the normal rate of descent.
6. The saw will automatically shut off at the end of the cut. Raise the frame and lock it in to
place. Repeat the above operation for additional operations.
NOTE: The saw may be turned off at any time during the cutting operation by
pressing the STOP button on the operator control panel or by pressing the KILL
SWITCH (frame down limit switch) on the front of the machine.
One Year Limited Warranty
This Wellsaw is warranted against defects in material and workmanship installed or
performed at our factory. Within one year from the date of purchase, we will, free of
charge, at our option, either repair or replace any part of the Wellsaw which our
examination discloses to be defective because of workmanship or a defect in material, and to
make any necessary service adjustments as required. This warranty does not apply if the
Wellsaw has been subject to accident, alteration, abuse, misuse or which fails due to lack of
care or as the result of inadequate power supply and specifically does not apply to normal
wear of moving parts such as bearings, gears, pinion or blade. There is no warranties beyond
the description on the face hereof. Wellsaw shall not be liable for consequential or incidental
damage suffered or incurred with respect to defective material or workmanship.
All transportation costs or parts submitted to Wellsaw under this warranty must be paid by
the saw’s owner. No products or parts are to be returned to our factory without first
obtaining written permission.
NOTE: Be sure to fill out and return the Warranty Card provided with this Wellsaw.

11
Procedure to check gear backlash onWellsaw bandsaws.
The applies to saw models with spur type ring & pinion final drive.
- Find the six bolts that hold the Ring Gear to the Bandwheel.
- Using a dial indicator with a magnetic mount, position the indicator so that the
point will contact one of the bolt heads. The indicator must be 90° to the gear (see
illustration).
- The Pinion Gear must be held stationary.This can be done by holding a screwdriver
in the teeth and prying against the saw frame.
- Rock the bandwheel slightly by hand and note the travel on the indicator. See
specifications.
- To adjust the backlash the gearbox must be repositioned.The gearbox mounting
holes are oversized for this purpose. Slightly loosen the bolts that hold the gearbox
to the wheel plate and push the gearbox in the desired direction.Tighten the bolts
and recheck the backlash.
- If you chose to use another method to check the recommended clearance please
note that too much or too little clearance will cause damage to the ring and pinion
gears.
Backlash Specification:
9.5" and 11.5" Ring Gears = .010" to .015"
13.5" Ring Gear = .015" to .020"

12
Frame Assembly
Frame Assembly
1
74
8
9
10
11
7
70 22 19
20
21
28
2
31
32
72
41
49 50
14
58
59
60
61
65
57
60
59
62
71
740
70
7
76
68
69
14
77
67
29 33
38
39
34
30
75
23
13
14
15 12
17
16
18 35 36
37
39
38
23
23
75
44
48
73
46
45
40
51 43
41 42
30
75
23
24
47
25
27
52
53
78
58
55
54
59
60
61
63 79
66
56
60
59
64
62
26
6
3
4
5
6
74
2
8
9
10
11
Frame Assembly
82

13
Frame
A
Fram
e
Frame Assembly
1 150146SER
V
Idle Wheel Guard
2 150147SER
V
Drive Wheel Guard 44 100165-011 Shoulder Bolt, 3/8-16 x 1-1/2
3 100139-003 Knob 45 Blade Brush Ass'y (page 20
)
4 100034-045 Set Screw, 1/4-20 x 1-1/4 46 150369 Blade Brush Arm
5 150150 Retainer Nut 47 100008-018 Cap Screw, Soc Hd 5/16-18 x 3/4
6 100135-002 1/4 Turn Fastener w/cam 48 100042-003 Thumb Screw, 1/4-20 x 2
(model 1118 after S/N 2583) 49 100004-055 Cap Screw, HH 3/8-16 x 2-1/
4
(model 1338 after S/N 1723) 50 100004-013 Cap Screw, HH 5/16-18 x 5/
8
(model 1348 after S/N 4807) 51 150022 Wheel Plate, Drive End
7 100013-010 Cap Screw, BH 1/4-20 x 1/4 52 100166-450 V- Belt
8 150095 Door Catch Mtg Block 53 150144 Pulley, Large
9 150096 Door Catch 54 100004-068 Cap Screw, HH 1/4-20 x 1-1/
4
10 150182 Door Catch Sleeve 55 100025-001 Lock Washer, 1/4
11 100013-009 Machine Screw, BH 10-32 x 1/2 56 150087 Drive Wheel Ass'y for 1" Blade
s
12 Motor & Gear Box Assy. (page 30
)
(includes 41,54,55,58-64, & 66)
13 100017-002 Hex Nut, 5/16-18 150087-002 Drive Wheel Ass'y for 1-1/4" Blade
s
14 100025-002 Lock Washer, 5/16 (includes 41,54,55,58-64,66,78 &79)
15 100029-003 Flat Washer, 5/16 57 150088 Idle Wheel Ass'y for 1" Blade
s
16 150248 Motor Mount Bracke
t
(includes 41,58-62 & 65)
17 100004-116 Cap Screw, HH 1/2-13 x 4-1/
2
150088-002 Idle Wheel Ass'y for 1-1/4" Blade
s
18 100004-016 Cap Screw, HH 5/16-18 x 7/
8
(includes 41,58-62,65,78 & 79)
19 150010 Guide Beam Ass'y (model 1118 to S/N 1300) 58 100019-016 Hex Jam Nut, 5/8-18
150280 Guide Beam Ass'y (model 1118 after S/N 1300) 59 100068-002 Snap Ring (2 req'd/ wheel
)
150318 Guide Beam Ass'y (model 1338) 60 100414-003 Ball Bearing (2 req'd/ wheel
)
150389 Guide Beam Ass'y (model 1348) 61 105415 Spacer (1 req'd/ axle
)
20 150124 Guide Arm Track (model 1118) 62 105420 Wheel Axle
150320 Guide Arm Track (model 1338) 63 150059-001 Drive Wheel for 1" Blade
150387 Guide Arm Track (model 1348) (includes items 59 thru 61)
21 100009-013 Cap Screw, FH 5/16-18 x 1/2 150059-002 Drive Wheel for 1-1/4" Blade
22 100218-010 Clamp (includes items 59-61, 78 & 79)
23 100004-076 Cap Screw, HH 3/8-16 x 1 64 B-086 Internal Ring Gear
24 150104 Counter Balance Arm & Sleeve 65 150060-001 Idle Wheel for 1" Blade
25 150411 Counter Balance Spring Attach. (model 1118) (includes items 59 - 61)
150336 Counter Balance Spring Attach. (model 1338) 150060-002 Idle Wheel for 1-1/4" Blade
150471 Counter Balance Spring Attach. (model 1348) (includes items 59-61, 78 & 79)
26 150114 Counter Balance Screw (model 1118) 66 150405 Shield
150315 Counter Balance Screw (model 1338) 67 150157 Blade Guard Lower (Model 1118
)
150386 Counter Balance Screw (model 1348) 150321 Blade Guard Lower (Models 1338 & 1348
)
27 100053-021 Roll Pin, 3/16 x 7/8 68 150414 Clamp
28 150476 Cran
k
69 150154 Blade Guard Suppor
t
29 100049-001 Drive Screw #4 70 100013-005 Machine Screw, BH 10-32 x 3/
8
30 155152 Door Catch Support (after S/N 2583) 71 150130 Blade Guard, upper (Model 1118 before S/N 1300
)
31 100053-015 Roll Pin, 1/8 x 1" 150273 Blade Guard, upper (Model 1118 after S/N 1300
)
32 100030-007 Flat Washer, 1/2 SAE 150314 Blade Guard, upper (Model 1338
)
33 150231 Cutting Pressure Label 150399-001 Blade Guard, I.E. ( Model 1348, 1 req'd w/ 150339-002
)
34 150031 Saw Frame (model 1118 to S/N 1300) 150399-002 Blade Guard, D.E. (Model 1348, 1 req'd w/ 150339-001
)
150281 Saw Frame (model 1118) 72 Rite Tension
£
Blade Tension & Slide Block
150316 Saw Frame (model 1338) Ass'y (see page 16
)
150391 Saw Frame (model 1348) 73 100024-002 Wing Nut, 1/4-20
35 100004-030 Cap Screw, HH 3/8-16 x 1-1/
2
74 100013-005 Machine Screw, Button Head 10-32 x 3/
8
36 100019-004 Hex Nut, 3/8-16 75 100025-003 Lock Washer, 3/8
37 100023-004 Nylon Lock Nut, 1/2-13 76 105537 Spacer (2)
38 150160-001 Door Latch Stud (1118 to S/N 2582) 77 150158 Blade Guard Mounting Bloc
k
150160-002 Door Latch Stud (only 1 req'd if used w
/
tem #6) after s/n 2583; 1338 s/n 1724; 78 150467 Flange Ring (used w/ 1-1/4" blades
)
1348 s/n 4808 79 100009-001 Cap Screw, Soc. FH, 1/4-20 x 5/8 (6 req'd per wheel
)
39 100004-015 Cap Screw, HH 5/16-18 x 3/
4
80 100004-076 Cap Screw, HH 3/8-16 x 3/4
40 100004-020 Cap Screw, HH 5/16-18 x 1-1/
4
81 100004-054 Cap Screw, HH 5/16-18 x 1-3/4
"
41 100065-007 Hex Nut, 5/8-18 82 100013-006 Cap Screw, BH 1/4-20 x 1/2
42 100034-005 Set Screw, 5/16-18 x 3/4
43 100004-015 Cap Screw, HH 5/16-18 x 3/
4
Frame Assembly
Frame Assembly

14
Bed Assembly
Bed Assembly
14
3
6
5
7
2
13
12
10
11
22 17 19
23
24
25
22 21
40 41 42
40 41 43
42 35
44 45
34 36
35
33
33
30
31
32
26
28
29
48 49
46
47 50
57
51 52 55 54 53
62
62
61
27
60
49
37
39
59 35 38
37
3935 38
35 20
16
15
14
19
20
28
18
58
64
63
98
57
51 52 55 54 53
56
35
32
49

15
Bed Assembly
1 100004-044 Cap Screw, HH 5/8 x 3
2 B-003 Movable Vise Jaw
3 155107 Washer
4 100004-070 Cap Screw, HH 1/2-13 x 1-3/4
5 100004-043 Cap Screw, HH 5/8 x 2-1/2 35 100025-002 Lock Washer, 5/16
6 M-065 Locating Pin 36 100017-002 Hex Nut, 5/16-18
7 B-215 Stationary Vise Jaw 37 150383 Tip Off Table (model 1118)
8 150091 Lift Plate 150382 Tip Off Table (model 1338)
9 100053-008 Roll Pin, 1/8 x 1-3/8 150394 Tip Off Table (model 1348)
10 150094 Vise Drive Pin before s/n 4279* 38 100004-018 Cap Screw, HH 5/16-18 x 1
150094-001 Vise Drive pin after s/n 4279 39 100029-002 Flat Washer, 1/4
11 100053-009 Roll Pin, 1/8 x 5/8 40 100402 Thrust Collar
12 100053-002 Roll Pin, 3/8 x 2-1/2 41 150199 Vise Screw (before S/N 1300)
13 B-077 Vise Slide Block before s/n 4279* 150286 Vise Screw (after S/N 1300)
B-077-001 Vise Slide Block after s/n 4279 42 M-061B Vise Screw Nut
14 150109 Pivot Arm (before S/N 1300) 43 150197 Vise Actuator (before S/N 1300)
150275 Pivot Arm (After S/N 1300) (Not Used after S/N 1300)
15 100029-008 Flat Washer, 5/8 44 M-041 Vise Ratchet Spacer
16 100017-007 Hex Nut, 5/8-11 45 100004-015 Cap Screw, HH 5/16-18 x 3/4
17 100000-018 Machine Screw, Rd Hd, 10-32 x 3/8 46 B-082 Stop Bar Bracket
18 150021-001 Pivot Bar Collar 47 100033-015 Set Screw, Sq Hd 5/8-11 x 1
19 100004-024 Cap Screw, HH 5/16-18 x 2-1/2 48 100025-007 Lock Washer, 5/8
20 150097 Clamp Plate 49 100004-041 Cap Screw, HH 5/8-11 x 1-1/2
21 100004-015 Cap Screw, HH 5/16-18 x 3/4 50 B-460 Stock Stop Bar
22 Control Switch Ass'y (see page 32) 51 100033-016 Sq. Hd. Set Screw, 5/8-11 x 4
23 B-093 Hand Wheel 52 100019-007 Hex Jam Nut, 5/8-11 (2 req'd)
24 100019-008 Hex Jam Nut, 3/4-10 53 100042-003 Thumb Screw, 1/4-20 x 2
25 102886 Set Collar 54 100024-002 Wing Nut, 1/4-20
26 150242 Saw Bed (1118, 1318 before 4279) 55 M-452 Stock Stop Arm (hinged)
150242-001 Saw Bed (1318 after s/n 4279) 56 M-451SERV Stock Stop Arm (fixed)
150305 Saw Bed (model 1338) 57 B-344 Stock Stop Ass'y
150398 Saw Bed (model 1348) (includes items 27,49, 51-56, & 60 - 62)
27 100030-005 Washer, 3/8 58 150274 Upper Cylinder Mount
28 100419-041 Bushing (2 req'd) 59 100039-004 Set Screw, Half Dog 3/8-16 x 1
29 150017 Pivot Bar (before S/N 1300) (3 req'd- use w/tip-off table)
150276 Pivot Bar (after S/N 1300) 60 155205-002 Wing Nut
30 B-151 Clamp Nut 61 155204 Carriage Bolt, Ribbed Neck
31 150099 Slide Block Plate 62 155190 Wedge
32 100004-018 Cap Screw, HH 5/16-18 x 1 155203 Wedge and Bolt Assembly
33 150098 Slide Block before s/n 4279* (includes items 61 & 62)
150098-001 Slide Block after s/n 4279 63 100008-006 Cap Screw, SH, 3/8-16 x 1
34 150093 Vise Push Channel 64 100008-016 Cap Screw, SH, 3/8-16 x 1-3/4 (4 req'd)
(model 1118 before S/N 1300)
150285 Vise Push Channel
(model 1118 after S/N 1300) *items are used on model 1338
150311 Vise Push Channel (model 1338)
150392 Vise Push Channel (model 1348)

16
1
2345678
9
10 11 12 13 14 16 17
18
27 19
20
21
22
24 25
26
23
15
M1316RiteTensionDev
Rite Tensioning Device®
Calibrating the WELLSAW RITE-TENSION ® Blade Tensioning Device
The Rite-Tension® device is a simple turn counter that is activated by blade tension and can be easily adjusted in the field.
Please review the operation instructions before making any adjustment:
1. LOOSENING
When replacing a worn or broken blade always turn the "T" handle out at least six (6) turns (counter-clockwise).
This will reset the device. Always push-in on the handle when loosening, this will insure that the internal counter is engaged.
2. TIGHTENING
Always pull out on the "T" handle when tightening the device (clockwise). After a number of turns the "T" handle will come
to a hard stop.
At this point the blade will be properly tensioned. Do not force the unit beyond this point.
Note: If the mechanism does not seem to come to a hard stop but continues to tighten, stop and repeat steps one and two.
Check to make sure the blade is properly positioned on the band wheels and is not binding in the guides during the
tightening process.
Calibration
The final tension is determined by the Adjusting Nut, pn 150070 (see "A" in drawing). The "rough" position can be
checked by measuring the clearance between the nut and the Tensioning Housing, pn 150067, (see "C").
A clearance of 1/4" will be within a safe range of the correct tension. When a tension guage becomes available the device
should be calibrated as follows: Loosen the set screw (B) one turn.
-If the band tension needs to be increased the adjusting nut should be turned out, one flat at a time, then the set
screw tightened and the device rechecked.
-If the tension needs to be decreased the adjusting nut should be turned in, one flat at a time and rechecked.
The device must be in the "loosened" or "open" position to make this adjustment.
RITE-TENSION®
ADJUSTMENT
1/4 in. 1/8 in.
"C"
ADJUSTING NUT (A)
LOCKING SET SCREW (B)

17
Rite Tensioning Device®
Caution:
The Rite Tension ® blade tensiong device has
been factory calibrated for your saw.
When re-tightening or replacing a blade, the 'T'
handle must be turned counter-clockwise at least
six turns to reset the Rite Tension ® mechenism.
1150075 Blade Tensioning Ass'y
(includes items 2 thru 18)
2 101184 Take Up Screw Handle
3 100053-005 Roll Pin, 3/16 x 1
4 100030-007 Flat Washer, 1/2
5 100410-001 Thrust Bearing
6 150068 Bearing Housing
7 100116-007 Belleville Washer (2 req'd)
8150074 Take Up Screw (includes items 2 & 9)
9 100052-026 Dowel Pin, 3/16 x 11/16
10 150069 Turn Counter
11 100136-006 Spring, Large Diameter
12 100136-001 Spring, Small Diameter
13 100000-010 Machine Screw, 8-32 x 5/16 (2 req'd)
14 150067 Blade Tension Housing
15 100034-008 Set Screw, 1/4-20 x 1/4
16 150070 Tension Adjuster
17 155068 Swivel Nut
18 098030-004 Collar, w/set screw
19 100008-072 Cap Screw, HH 5/16-18 x 3/8 (2 req'd)
20 100004-013 Cap Screw, HH 5/16-18 x 5/8 (4 req'd)
21 100025-002 Lock Washer, 5/16 (4 req'd)
22 B-046 Slide Block Guide, (2 req'd)
23 101164 Slide Block
24 B-010 Wheel Adjusting Block
25 100004-019 Cap Screw, HH 5/16-18 x 1-1/8 (4 req'd)
26 102360 Spacer (4 req'd)
27 150190 Tensioner Support

18
Leg & Chip Pan
Leg & Chip Pan
Leg & Chip Pan
This manual suits for next models
3
Table of contents
Other Wellsaw Saw manuals

Wellsaw
Wellsaw 1316S Installation and operation manual

Wellsaw
Wellsaw 58BD Installation and operation manual

Wellsaw
Wellsaw 8 Installation and operation manual

Wellsaw
Wellsaw 1316S-SA Installation and operation manual

Wellsaw
Wellsaw 613 Installation and operation manual

Wellsaw
Wellsaw 1270 User manual

Wellsaw
Wellsaw V-20F Installation and operation manual

Wellsaw
Wellsaw 1318 User manual

Wellsaw
Wellsaw 1318 -SA Operating instructions

Wellsaw
Wellsaw 1016 Installation and operation manual