Crafted For Life
Delémont, Switzerland 1893
Over a century ago, Wenger built a factory in this tiny Swiss village and trans-
formed it into production headquarters for the Genuine Swiss Army Knife™still
used by the Swiss Army today. As it was 100 years ago, each tool, implement
and knife manufactured by Wenger is crafted by hand in solid stainless steel
and each individually inspected for quality and craftsmanship. This same atten-
tion to detail has been applied to genuine Wenger watches. Wenger watches
are Swiss-designed, -engineered and -crafted with only the most accurate Swiss
movement available. Each watch is constructed with form and function that last
a lifetime. As with the genuine Swiss Army knife, Wenger watches are durable,
high quality, and versatile enough for use on any occasion. Wenger chronograph
watches are engineered to provide the same resourcefulness as the genuine
Swiss Army knife, supplying functionality beyond the everyday.
2
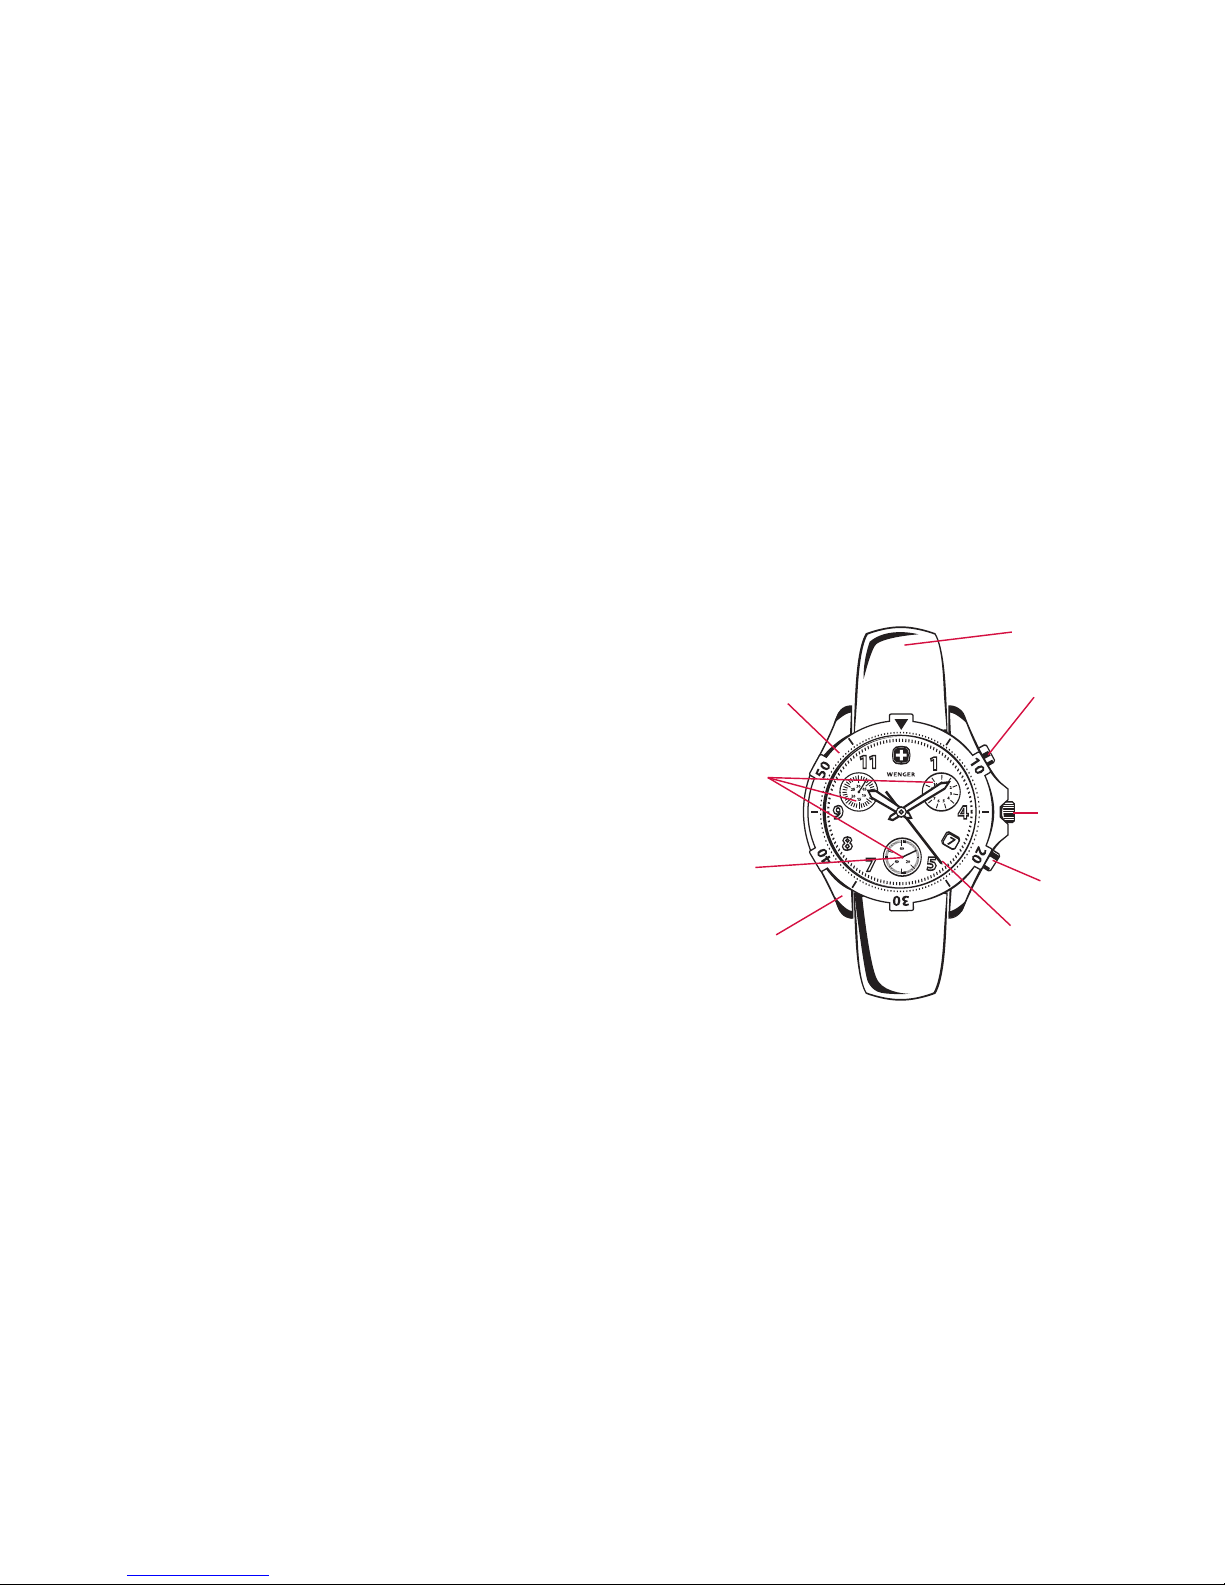
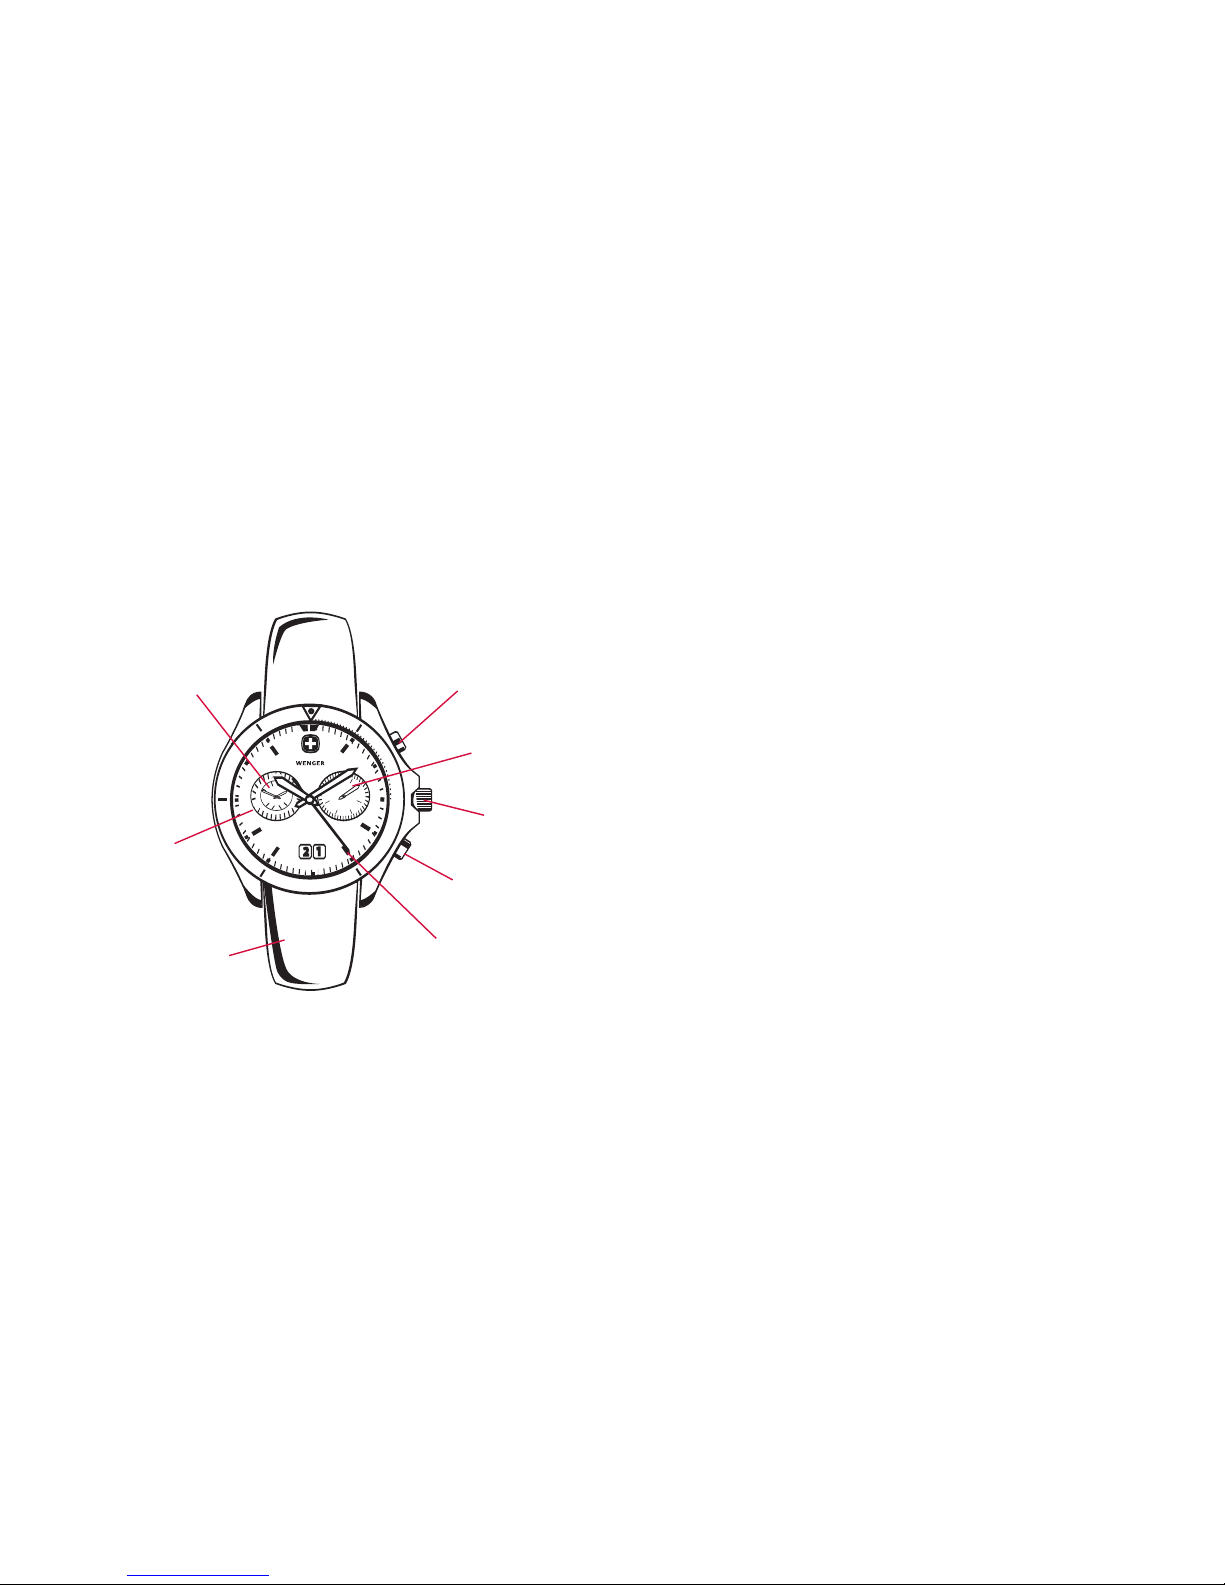
Wenger Chronograph Watch Components
Movements – Swiss quartz movements featuring a 12 hour or 30-minute timer,
60-second timer, seconds hand timer, and 1/10-second timer. All Wenger Swiss
quartz movements are accurate to 1/10 of a second per day.
Case Body – All stainless steel or titanium for quality and durability.
Water-Resistant – To 50m (165'), 100m (330') or 200m (660') for dive watches.
Straps/Bracelets – Only stainless steel or titanium bracelets featuring dive
buckles or deployant jewelry buckles are featured. Straps are offered in genuine
calfskin leather, specially treated rubberized leather, durable, water-resistant
rubber or nylon, or other high-quality materials.
Luminous Markers – Hands, markers, and numerals may be overlaid with Super
Luminova,
®aluminous material which recharges in seconds when exposed to
direct sunlight for improved, extended nighttime visibility.
Crystals – The crystal is the clear surface which covers the watch dial. Wenger
uses only scratch-resistant mineral crystals or sapphire crystals for durability.
3