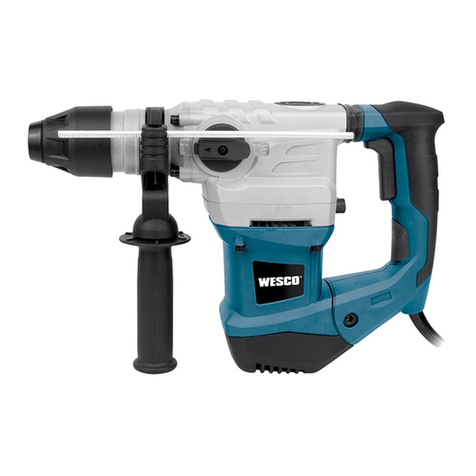
Wesco WS2940K2 User manual

Martelete SDS-plus a bateria PT P05
Cordless Rotary Hammer EN P13
Martillo SDS - Plus a batería ES P20
WS2940K2


1 2
3
4
5

Fig.C2
Fig.E2
Fig.A Fig.B1 Fig.B2
Fig.C1 Fig.D
Fig.E1 Fig.F

5
PT
LISTA DE COMPONENTES
1. Tampa de proteção contra pó
2. Acoplamento (luva) de trava do mandril SDS-plus
3. Rotação para direita e esquerda
4. Interruptor Liga/Desliga (On/Off) com velocidade variável
5. Baterias
6. Trava de baterias
7. Comutador para seleção da função
8. Luz LED
Nem todos os acessórios ilustrados ou descritos são fornecidos em todas as versões (consulte conteúdo informado na
embalagem do produto).
DADOS TÉCNICOS
WS2940K2
Voltagem 18V
Velocidade sem carga 0-900 /min
Impactos 0-5000 bpm
Energia de impacto 1.2 J
Capacidade máxima de perfuração em
Aço 10 mm
Madeira 16 mm
Concreto 13 mm
Peso da máquina 1.22 kg
Carregador WS9890
Classe de proteção - carregador /II
Tensão de entrada do carregador 100-240V~50/60Hz, 37W
Tensão de saída do carregador 20V 1500mA
Capacidade da bateria 2.0 Ah (WS9894) Li-Ion
Tempo para carregar (aproximado) 90 min
ACCESSORIES:
WS2940K2
Carregador 1
Conjunto de baterias 2
Recomendamos-lhe que compre todos os acessórios no fornecedor onde tenha adquirido a ferramenta. Escolha os
acessórios de acordo com o trabalho que tenciona executar. Para mais detalhes, consulte a embalagem dentes. Os
comerciais também pode ajudar e aconselhar.

6PT
SEGURANÇA DO
PRODUTO
AVISOS GERAIS
DE SEGURANÇA
DE FERRAMENTAS
ELÉTRICAS
ATENÇÃO! Leia atentamente as
seguintes instruções. A não observância
destas instruções pode causar choque elétrico, incêndio e/
ou lesões graves.
Guarde estas instruções para referência
futura.
Os termos “ferramenta elétrica” utilizados em todos os
avisos constantes destas instruções referem-se à sua
ferramenta elétrica acionada por corrente elétrica (com
cabo de alimentação) ou ferramenta elétrica acionada por
bateria (sem cabo de alimentação).
1. LOCAL DE TRABALHO
a) Mantenha o local de trabalho limpo e
bem arrumado. Áreas com pouca iluminação e
desordenadas podem provocar acidentes.
b) Não utilize o aparelho em locais onde
existam líquidos, gases ou poeiras
inflamáveis e onde exista o risco de
explosão. As ferramentas elétricas produzem
faíscas que podem inflamar poeiras ou gases.
c) Mantenha as pessoas e particularmente
as crianças afastadas da ferramenta
elétrica durante o seu funcionamento.
Qualquer distração pode fazê-lo perder o controle da
ferramenta.
2. SEGURANÇA ELÉTRICA
a) O Plugue da ferramenta deve encaixar
bem na tomada de alimentação. Nunca
modifique plugues elétricos, seja de que
maneira for. Não utilize nenhum plugue
de adaptação com ferramentas elétricas
que tenham ligação à terra. Plugues não
modificadas e tomadas de corrente adequadas
reduzem o risco de choque elétrico
b) Evite o contato do corpo com superfícies
ligadas à terra como tubos, aquecedores,
fogões, geladeiras e tubulações. Existe um
aumento do risco de choque elétrico se o seu corpo
estiver em contato com a terra ou a massa.
c) Não exponha este equipamento à chuva
ou humidade. A infiltração de água num aparelho
elétrico aumenta o risco de choque elétrico.
d) Utilize corretamente o cabo de
alimentação. Nunca utilize o cabo para
transportar, puxar ou desligar o aparelho
da tomada de corrente. Mantenha o
cabo afastado de fontes de calor, óleos,
arestas afiadas ou peças em movimento.
Cabos danificados ou modificados aumentam o risco
de choque elétrico.
e) Quando trabalhar com uma ferramenta
elétrica ao ar livre, use um cabo de
extensão adequado para utilização no
exterior. A utilização de um cabo adequado para uso
exterior reduz o risco de choque elétrico.
f) Se não puder evitar a utilização de uma
ferramenta elétrica num local húmido,
utilize uma fonte de alimentação
protegida contra corrente residual. A
utilização de um dispositivo com proteção contra
corrente residual reduz o risco de choque elétrico.
3. SEGURANÇA DE PESSOAS
a) Esteja atento, observe o que está
fazendo e seja prudente sempre que
trabalhar com uma ferramenta elétrica.
Não utilize nunca uma ferramenta
elétrica quando estiver cansado ou
sob a influência de drogas, álcool ou
medicamentos. Um momento de desatenção
quando se utiliza uma ferramenta elétrica pode causar
lesões graves.
b) Utilize equipamentos de segurança. Use
sempre óculos de proteção. Equipamentos
de segurança, tais como máscaras protetoras, sapatos
de sola antiderrapante, capacetes ou proteções
auriculares devidamente utilizados reduzem o risco de
lesões.
c) Evite o arranque acidental da ferramenta.
Certifique-se de que o interruptor está
desligado antes de ligar a ferramenta
à fonte de alimentação e/ou à bateria,
antes de pega-la ou antes de a
transportar.Se mantiver o dedo no interruptor ou
acionar o aparelho enquanto este estiver ligado podem
ocorrer acidentes.
d) Remova quaisquer chaves de ajuste ou
de porcas antes de ligar a ferramenta
elétrica. Chaves de porcas ou de ajuste fixadas a
peças móveis da ferramenta podem causar lesões.
e) Não exceda as suas próprias
capacidades. Mantenha sempre o corpo
em posição firme e de equilíbrio, o que lhe

7
PT
permite controlar melhor a ferramenta elétrica em
situações imprevistas.
f) Use roupa apropriada. Não use vestuário
solto ou artigos de joalharia. Mantenha
o cabelo, vestuário e luvas afastados de
peças em movimento. Roupas soltas, artigos de
joalharia ou cabelos compridos podem ser agarrados
por peças em movimento.
g) Se forem fornecidos dispositivos para
a montagem de unidades de extração
ou recolha de resíduos, Assegure-
se de que são montados e utilizados
adequadamente. A utilização destes dispositivos
pode reduzir os perigos relacionados com a presença
de resíduos.
4. UTILIZAÇÃO E MANUTENÇÃO DA
FERRAMENTA ELÉTRICA
a) Não force a ferramenta. Utilize a
ferramenta elétrica apropriada para cada
aplicação. A utilização da ferramenta elétrica
apropriada executa o trabalho de forma melhor e mais
segura, à velocidade para a qual foi concebida.
b) Não utilize esta ferramenta se o
interruptor não estiver em perfeitas
condições de uso, não ligando ou
desligando. Qualquer ferramenta elétrica que não
possa ser controlada pelo interruptor é perigosa e deve
ser reparada.
c) Desligue o plugue da fonte de
alimentação e/ou remova a bateria
da ferramenta antes de proceder a
quaisquer ajuste, antes de trocar
os acessórios ou antes de guardar
a ferramenta. Estas medidas de segurança
preventivas reduzem o risco de acidentes com a
ferramenta.
d) Quando não estiver usando a ferramenta
elétrica, guarde-a fora do alcance
das crianças e não deixe que esta
seja utilizada por pessoas que não
a conheçam, nem tenham lido as
instruções.
As ferramentas elétricas são perigosas nas mãos de
pessoas inexperientes.
e) Faça a manutenção de ferramentas
elétricas. Verifique quaisquer
desalinhamentos, encaixes de peças
móveis, quebras e outras condições que
possam afetar o funcionamento. Se esta
ferramenta estiver avariada, mande-a
reparar antes a utilizar. Muitos acidentes são
causados pela manutenção deficiente de ferramentas
elétricas.
f) Mantenha as ferramentas de corte
limpas e afiadas. As ferramentas de corte,
discos de serra e outros acessórios com manutenção
adequada e arestas de corte (ou destes) afiadas têm
menos probabilidades de bloquear e são mais fáceis
de controlar.
g) Utilize a ferramenta elétrica, acessórios,
brocas, etc. em conformidade com estas
instruções e da forma prevista para este
tipo específico de ferramenta, tendo
em conta as condições presentes e o
trabalho a executar. A utilização de ferramentas
elétricas para aplicações diferentes daquelas a que se
destinam pode levar a situações de perigo.
5. UTILIZAÇÃO E MANUTENÇÃO DE
FERRAMENTA ALIMENTADA POR
CONJUNTO DE BATERIAS
a) Recarregue o conjunto de baterias
apenas com o carregador especificado
pelo fabricante. Um carregador para determinado
tipo de conjunto de bateria pode levar ao risco de
incêndio se utilizado com outro tipo de baterias.
b) Utilize ferramentas elétricas apenas
com os tipos de conjuntos de baterias
especificamente designados. A utilização de
quaisquer outros tipos de conjuntos de baterias pode
levar a riscos de lesão ou incêndio.
c) Quando não estiver utilizando o conjunto
de baterias, mantenha-o afastado de
objetos metálicos como clipes, moedas,
chaves, pregos, parafusos ou outros
objetos metálicos de pequena dimensão,
que possam fechar o contato entre os
terminais. O curto-circuito de terminais de bateria
pode provocar incêndios ou queimaduras.
d) Em condições inadequadas, o eletrólito
das baterias pode verter. Evite o contato.
Se ocorrer algum contato acidental, lave
com água. Se o líquido entrar em contato
com os olhos, procure imediatamente
aconselhamento médico. O líquido das
baterias pode provocar irritações na pele ou
queimaduras.
6. ASSISTÊNCIA TÉCNICA
a) A sua ferramenta elétrica só deve ser
reparada por um técnico de assistência
qualificada e autorizada Wesco e devem
ser apenas utilizadas peças de reposição

8PT
genuínas, mantendo assim a segurança da
ferramenta. Procure um centro de serviço autorizado.
PONTOS DE
SEGURANÇA
ADICIONAIS PARA A
SUA FERRAMENTA
1. Usar proteção para os ouvidos. A
exposição ao barulho pode causar perda
de audição.
2. Use as pegas auxiliares fornecidas com
a ferramenta. A perda de controlo pode
causar danos pessoais.
3. Segure a ferramenta pelas superfícies
de controle isoladas ao executar uma
operação onde a ferramenta cortante
pode contato com uma instalação
elétrica escondida. O contato com um
fio com corrente fará com que as peças
de metal expostas da ferramenta fiquem
com corrente e provoque choque ao
operador.
4. Usar máscara contra o pó.
INSTRUÇÕES DE
SEGURANÇA PARA O
CARREGADOR
ATENÇÃO! Leia atentamente as
seguintes instruções. A não observância
destas instruções pode causar choque elétrico, incêndio e/
ou lesões graves.
Guarde estas instruções para referência
futura.
- Este aparelho não se destina a ser
utilizado por pessoas (incluindo crianças)
com capacidades físicas, sensoriais ou
mentais limitadas, falta de experiência
ou conhecimento, a não ser que sejam
supervisionadas ou tenham sido
instruídas sobre o uso do aparelho
por uma pessoa responsável pela sua
segurança.
- As crianças devem ser vigiadas para
garantir que não brincam com o
aparelho.
Se o cabo de alimentação estiver
danificado, este deve ser substituído
pelo fabricante, seu agente autorizado ou
pessoal técnico qualificado para evitar
qualquer situação de perigo.
INSTRUÇÕES
DE SEGURANÇA
ADICIONAIS PARA O
CARREGADOR
1. Leia estas instruções antes de proceder o
carregamento.
2. Não carregue uma bateria com fuga de líquido (com
vazamento).
3. Não utilize o carregador para qualquer outro fim para
além daquele para o qual o mesmo foi concebido.
4. Ligue o carregador apenas a uma fonte de alimentação
a.c.
5. Apenas para utilização no interior, não expor as
baterias à chuva ou água.
6. O carregador deve ser protegido contra qualquer
contato com a humidade.
7. Não use o carregador em ambiente externo.
8. Não provoque curto-circuito os contatos da bateria ou
do carregador.
9. Ao carregar a bateria tenha atenção aos símbolos de
polaridade “+/-“.
10. Não abra a unidade de bateria e mantenha-a fora do
alcance das crianças.
11. Não utilize este carregador para carregar baterias de
outros fabricantes.
12. Certifique-se de que a ligação entre o carregador
e a bateria foi feita de forma correta não existindo
qualquer obstrução por parte de objetos estranhos.
13. Certifique-se de que as ranhuras do carregador
estão livres de objetos estranhos e proteja-as contra
qualquer contato com sujeira ou humidade. Guarde
num local seco e sem gelo.
14. Ao carregar a bateria certifique-se de que o
carregador está num local bem ventilado e longe
de materiais inflamáveis. A bateria pode aquecer
durante o carregamento. Não sobrecarregue a bateria.
Certifique-se de que durante o carregamento a bateria
e o carregador são devidamente supervisionados.
15. Não tente carregar baterias que não são recarregáveis
uma vez que estas podem sobreaquecer e avariar.
16. A vida útil da bateria e o desempenho desta podem
ser optimizados se a bateria for carregada em
temperaturas entre os 18℃e os 24℃. Não carregue
a bateria em temperaturas abaixo dos 4,5℃, ou acima
dos 40,5℃. Isto é importante pois evita danos graves
a bateria.

9
PT
INSTRUÇÕES DE
SEGURANÇA PARA A
BATERIA
a) Não desmonte nem abra as pilhas ou a
baterias.
b) Não provoque curto-circuito na bateria.
Não guarde indiscriminadamente as
baterias numa caixa ou numa gaveta
onde possam entrar em contato entre si
ou com objetos metálicos, provocando
curto-circuito. Quando a bateria não estiver sendo
utilizada, mantenha-a afastada de outros objetos
de metal, como os clips, moedas, chaves, pregos,
parafusos ou outros pequenos objetos que podem
promover uma ligação de um terminal ao outro. Se
ocorrer a ligação dos dois terminais, pode provocar
queimaduras ou incêndio.
c) Não exponha a bateria ao calor ou ao
fogo. Evite o seu armazenamento em
locais expostos à luz solar direta.
d) Não submeta a bateria a choques ou
pancadas.
e) No caso de fuga de líquidos, não
permita que os líquidos entrem em
contato com a pele ou com os olhos.
Em caso de contato, lave a área
afetada com bastante água e procure
aconselhamento médico.
f)
Em caso de ingestão de uma pilha ou bateria,
procure imediatamente ajuda médica.
g) Mantenha a bateria limpa e seca.
h) Se os terminais da bateria estiverem sujos,
limpe-os com um pano limpo e seco.
i) A bateria precisa de ser carregada antes
de ser utilizada. Consulte sempre as
instruções e utilize a forma correta de
carregamento.
j) Não deixe a bateria carregando quando
não precisar de utilizar.
k) Após períodos prolongados de
armazenamento, poderá ser necessário
carregar e descarregar a bateria várias
vezes para obter o desempenho máximo.
l) A bateria oferece o melhor desempenho
quando é utilizada à temperatura
ambiente normal (20ºC ± 5°C).
m) Quando eliminar baterias, mantenha
as baterias de diferentes sistemas
eletromecânicos separadas entre si.
n) Recarregar a bateria apenas com o
carregador de bateria fornecido e
especificado pelo fabricante. Não
utilize qualquer outro carregador além
do especificamente fornecido para
utilização com o equipamento. Um
carregador que seja adequado para um tipo de bateria
pode criar um risco de incêndio quando utilizado com
outro tipo de bateria.
o) Não utilize qualquer bateria não
concebida para ser utilizada com o
equipamento.
p) Mantenha a bateria fora do alcance de
crianças.
q) Guarde a documentação original do
produto para referência futura.
r) Retire a bateria do equipamento quando
o mesmo não estiver a ser utilizado.
s) Elimine o equipamento de forma correta.
SÍMBOLOS
Para reduzir o risco de ferimentos o utilizador
deve ler o manual de instruções
Aviso
Usar proteção para os ouvidos
Usar proteção ocular
Usar máscara contra o pó
Apenas para utilização no interior
Não expor as baterias à chuva ou água
Não queimar
Fusível
Duplo isolamento
Terminal positivo

10 PT
Terminal negativo
Não jogar fora as baterias, Eliminar baterias
gastas em local adequado ou entregue-as
num ponto de reciclagem.
INSTRUÇÕES DE
FUNCIONAMIENTO
NOTA: Antes de utilizar a ferramenta, leia
atentamente o manual de instruções.
UTILIZAÇÃO DO PRODUTO
O Martelo Perfurador Wesco WS2940K2 foi desenvolvido
e fabricado para perfura alvenaria, concreto. Ela também é
apropriada para furar sem percussão em madeira, metal,
cerâmica e plástico.
ANTES DE UTILIZAR A FERRAMENTA
CARREGANDO A BATERIA (VER FIG. A)
ATENÇÃO:
a) Não utilize nenhum carregador de bateria que não seja
o carregador fornecido com essa ferramenta ou outro
original com o mesmo código.
b) Se a bateria estiver muito quente, é preciso retirar a
bateria do carregador e esperar que a mesma esfrie
antes de carregar novamente
c) A bateria da sua nova ferramenta não está carregada,
portanto é preciso carregar a bateria totalmente
quando for utilizar pela primeira vez.
d) Carregue a bateria totalmente ou pelo menos mais de
50% da carga antes de guardá-la. Caso a ferramenta
não for utilizada por um longo período de tempo,
carregue a bateria a cada período de 3-6 meses.
PROCEDIMENTO DE CARREGAMENTO
1). Conecte o carregador em uma tomada elétrica
apropriada. A luz ficará verde.
2). Instale (deslizando) a bateria no carregador. A luz
vermelha ascendera’, indicando que a bateria esta’
sendo carregada.
3). Quando a bateria estiver carregada, a luz verde
se ascendera’. A bateria agora esta’ totalmente
carregada. Retire o carregador da tomada e retire a
bateria do carregador.
AVISO: Quando a bateria ficar sem
carga após uma utilização contínua ou
devido à exposição à luz solar direta ou a
uma qualquer fonte de calor, deixe a
ferramenta esfriar antes de proceder ao
carregamento da bateria.
INDICADOR DE CARGA
Luz Indicação
Vermelho continuo
Em carga
Verde continuo
Carregamento concluído
B) COMO RETIRAR OU INSTALAR O
CONJUNTO DE BATERIAS
Aperte o fecho de fixação da bateria e remova-a da
furadeira. (Ver Fig. B1)
Após o carregamento, faça deslizar a bateria para o interior
do compartimento da mesma existente na furadeira. Uma
pequena pressão é suficiente para instalar a bateria. (Ver
Fig. B2)
INSTRUÇÕES DE FUNCIONAMENTO
1. COLOCANDO E REMOVENDO UMA
BROCA
Tome cuidado para que a tampa de proteção
contra pó não seja danificada na troca de
brocas.
— AJUSTAR ACESSÓRIOS (Ver Fig. C1)
Limpar e lubrificar levemente os acessórios (brocas) antes
de introduzi-las. Introduzir o acessório livre de pó no
mandril com movimentos rotativos até travar. O acessório
(broca) trava-se automaticamente. Após instalar, sempre se
certifique de que a ferramenta esteja presa de forma segura
no mandril, tentando puxá-la para fora.
—REMOVENDO UMA BROCA (Ver Fig. C2)
Puxe para trás a luva do mandril e em seguida puxe o
acessório para fora do mandril.
AVISO! O seu novo martelete é uma ferramenta
potente que lhe permite executar todos os trabalhos
de forma rápida e eficaz. Esta potência pode fazer com que
as brocas SDS de qualidade inferior se partam ou Fiquem
presas no mandril. Por isso, recomendamos-lhe que utilize
apenas brocas SDS de alta qualidade juntamente com esta
ferramenta.
2. INTERRUPTOR LIGA/DESLIGA (ON/OFF)
COM VELOCIDADE VARIÁVEL (Ver Fig. D)
Pressione o interruptor para iniciar a ferramenta e
libere-o para parar a ferramenta. Esta ferramenta tem um

11
PT
interruptor de velocidade variável que permite velocidades
mais altas com pressão crescente no interruptor – a
velocidade é controlada Pela pressão que se aplica no
gatilho do intrruptor.
3. INTERRUPTOR DE BLOQUEIO (TRAVA DO
INTERRUPTOR) (Ver Fig. D)
O interruptor pode ser bloqueado na posição OFF, o que
ajuda a reduzir a possibilidade de arranque acidental,
quando a furadeira não estiver sendo utilizada. Para
bloquear o interruptor de gatilho, coloque o seletor de
rotação na posição central.
4. ROTAÇÃO PARA DIREITA E ESQUERDA
(Ver Fig. E1, E2 )
Para alterar o sentido de rotação, pressione o botão
“Seletor de sentido de rotação”, ao pressionar para a
esquerda,funcionará no sentido normal (com a seta
apontada para o material a ser furado ou aparafusado).
Quando pressionado para a direita, essa estará funcionando
no sentido reverso.
Atenção: Nunca inverta o sentido de
rotação quando o mandril estiver em
movimento. Aguarde até que a ferramenta
tenha parado!
5. COMUTADOR PARA SELEÇÃO DA
FUNÇÃO (Ver Fig. F)
O modo de funcionamento da ferramenta em cada aplicação
é definido através do comutador de seleção da função. Para
mudar de uma função para outra, pressione o botão de
liberação (a) e rode o seletor para o modo de funcionamento
pretendido.
Para utilizar em simultâneo a função de perfuração e de
martelo quando estiver Perfurando concreto ou alvenaria,
escolha a posição de martelo.
Para perfurar aço, madeira ou plástico escolha a posição de
furadeira.
Aviso: O comutador de tipos de
funcionamento só deve ser acionado
quando o aparelho estiver parado.
6. LUZ LED
Para ativar a luz de trabalho basta apertar o botão de ligar
a ferramenta e assegurar que o controle de rotação de
avanço/reversa esteja na posição direita/esquerda. Ao
libertar o botão, a luz desliga-se.
A Iluminação por LEDs permite uma maior visibilidade em
áreas escuras ou fechadas.
7. DISPOSAL OF AN EXHAUSTED BATTERY
PACK
To preserve natural resources, please recycle or
dispose of the battery pack properly. This battery
pack contains Li-ion batteries. Consult your local
waste authority for information regarding available recycling
and/or disposal options. Discharge your battery pack by
operating your drill, then remove the battery pack from the
drill housing and cover the battery pack connections with
heavy-duty adhesive tape to prevent short circuit and energy
discharge. Do not attempt to open or remove any of the
components.
SUGESTÕES DE
TRABALHO PARA O SEU
FURADEIRA
Se a sua ferramenta elétrica ficar muito quente, acerte a
velocidade para o máximo e deixe a furadeira trabalhar sem
carga (apenas girando o motor sem perfurar) durante 2-3
minutos para esfriar o motor.
As brocas com ponta de metal duro devem ser sempre
utilizadas para concreto e alvenaria.
Quando perfurar metal, utilize só brocas de aço rapido (HSS)
em boas condições. Para fazer um furo de grande diâmetro
em material duro, recomendamos que comece fazendo
um pequeno furo de guia antes de passar para uma broca
maior.
SOLUÇÃO DE
PROBLEMAS
1. POR QUE SUA FURADEIRA PARA
REPENTINAMENTE QUANDO EM
FUNCIONAMENTO.
a) Ela funciona em plena potência até precisar ser
recarregada. Portanto, se sua ferramenta parar
repentinamente, primeiro, verifique a bateria. A bateria
de íons de lítio está protegida por “Discharging Protection
System” (Sistema de Proteção de Descarga). Quando a
bateria fica sem carga, a ferramenta elétrica é desligada
através de um circuito de proteção: a ferramenta de trabalho
não volta a funcionar.
b) PROTEÇÃO CONTRA SOBRECARGA. Quando
sobrecarregado, o motor para. Alivie imediatamente
a carga na máquina e deixe-a funcionando durante
aproximadamente 30 segundos à maior velocidade sem
carga.
c) Alta temperatura da ferramenta ou bateria. Se a carga
for excessiva ou se a temperatura da bateria ultrapassar

12 PT
os admissíveis 75°C, o comutador eletrônico desliga a
ferramenta elétrica até esta voltar à faixa de temperatura de
funcionamento normal.
2. RAZÕES PARA TEMPOS DE SERVIÇO
DIFERENTES DO CONJUNTO DE BATERIAS
Pelos tempos de recarga acima referidos, e se o conjunto
de baterias não tiver sido utilizado durante um período
prolongado, o tempo de funcionamento do conjunto de
baterias será reduzido. Isto pode ser corrigido por várias
operações de carga e descarga, ao carregar e trabalhar com
a furadeira. Condições de serviço mais pesadas tais como a
aplicação de parafusos de grandes dimensões em madeira
dura, consumirão mais depressa a energia do conjunto
de baterias do que condições de serviço mais leves. Não
recarregue o conjunto de baterias com temperaturas
inferiores a 0°C e superiores e 45°C porque isso afetará o
seu rendimento.
MANUTENÇÃO
Remova a bateria da furadeira/parafusadeira
antes de fazer qualquer ajuste, regulagem,
instalação ou manutenção.
A sua ferramenta não requer qualquer lubrificação ou
manutenção adicional. A ferramenta não têm peças
susceptíveis de ser substituídas pelo usuário. Nunca utilize
água ou produtos químicos para limpar a sua ferramenta.
Limpe-a com um pano macio. Guarde sempre a sua
ferramenta num local seco. Mantenha as ranhuras de
ventilação do motor devidamente limpas. Se observar a
ocorrência de faíscas nas ranhuras de ventilação, isso é
normal e não danificará a sua ferramenta.

13
EN
COMPONENT LIST
1. Dust Protection Cap
2. Tool Holder Locking Sleeve
3. Forward And Reverse Rotation Control
4. On/Off Switch (with variable speed control)
5. Battery Pack
6. Battery Pack Release Button
7. Function Mode Selection Switch
8. LED light
Not all the accessories illustrated or described are included in standard delivery.
TECHNICAL DATA
WS2940K2
Voltage 18V
No load speed 0-900 /min
Impact rate 0-5000 bpm
Impact energy 1.2 J
Max. drilling capacity
Steel 10 mm
Wood 16 mm
Concrete 13 mm
Machine weight 1.22 kg
Charger WS9890
Charger Protection class /II
Charger Input 100-240V~50/60Hz, 37W
Charger Output 20V 1500mA
Battery capacity 2.0 Ah (WS9894) Li-Ion
Charging time (approx.) 90 min
ACCESSORIES
WS2940K2
Charger 1
Battery pack 2
We recommend that you purchase your accessories from the same store that sold you the tool. Choose the type according
to the work you intend to undertake. Refer to the accessory packaging for further details. Store personnel can assist you and
offer advice.

14 EN
PRODUCT SAFETY
GENERAL POWER TOOL
SAFETY WARNINGS
WARNING: Read all safety warnings
and all instructions. Failure to follow the
warnings and instructions may result in electric shock, fire
and/or serious injury.
Save all warnings and instructions for future
reference.
The term “power tool” in the warnings refers to your mains-
operated (corded) power tool or battery-operated (cordless)
power tool.
1. WORK AREA SAFETY
a) Keep work area clean and well lit. Cluttered
or dark areas invite accidents.
b) Do not operate power tools in explosive
atmospheres, such as in the presence of
flammable liquids, gases or dust. Power
tools create sparks which may ignite the dust or
fumes.
c) Keep children and bystanders away while
operating a power tool. Distractions can cause
you to lose control.
2. ELECTRICAL SAFETY
a) Power tool plugs must match the outlet.
Never modify the plug in any way. Do
not use any adapter plugs with earthed
(grounded) power tools. Unmodified plugs and
matching outlets will reduce risk of electric shock.
b) Avoid body contact with earthed or
grounded surfaces, such as pipes,
radiators, ranges and refrigerators. There
is an increased risk of electric shock if your body is
earthed or grounded.
c) Do not expose power tools to rain or
wet conditions. Water entering a power tool will
increase the risk of electric shock.
d) Do not abuse the cord. Never use the
cord for carrying, pulling or unplugging
the power tool. Keep cord away from
heat, oil, sharp edges or moving parts.
Damaged or entangled cords increase the risk of
electric shock.
e) When operating a power tool outdoors,
use an extension cord suitable for
outdoor use. Use of a cord suitable for outdoor use
reduces the risk of electric shock.
f) If operating a power tool in a damp
location is unavoidable, use a residual
current device (RCD) protected supply.
Use of an RCD reduces the risk of electric shock.
3. PERSONAL SAFETY
a) Stay alert, watch what you are doing and
use common sense when operating a
power tool. Do not use a power tool while
you are tired or under the influence of
drugs, alcohol or medication. A moment of
inattention while operating power tools may result in
serious personal injury.
b) Use personal protective equipment.
Always wear eye protection. Protective
equipment such as dust mask, non-skid safety shoes,
hard hat, or hearing protection used for appropriate
conditions will reduce personal injuries.
c) Prevent unintentional starting. Ensure
the switch is in the off-position before
connecting to power source and/or
battery pack, picking up or carrying the
tool. Carrying power tools with your finger on the
switch or energising power tools that have the switch
on invites accidents.
d) Remove any adjusting key or wrench
before turning the power tool on. A wrench
or a key left attached to a rotating part of the power
tool may result in personal injury.
e) Do not overreach. Keep proper footing
and balance at all times. This enables better
control of the power tool in unexpected situations.
f) Dress properly. Do not wear loose
clothing or jewellery. Keep your hair,
clothing and gloves away from moving
parts. Loose clothes, jewellery or long hair can be
caught in moving parts.
g) If devices are provided for the connection
of dust extraction and collection
facilities, ensure these are connected
and properly used. Use of dust collection can
reduce dust-related hazards.
4. POWER TOOL USE AND CARE
a) Do not force the power tool. Use the
correct power tool for your application.
The correct power tool will do the job better and safer
at the rate for which it was designed.
b) Do not use the power tool if the switch
does not turn it on and off. Any power tool that
cannot be controlled with the switch is dangerous and
must be repaired.
c) Disconnect the plug from the power

15
EN
source and/or the battery pack from
the power tool before making any
adjustments, changing accessories, or
storing power tools. Such preventive safety
measures reduce the risk of starting the power tool
accidentally.
d) Store idle power tools out of the reach
of children and do not allow persons
unfamiliar with the power tool or these
instructions to operate the power tool.
Power tools are dangerous in the hands of untrained
users.
e) Maintain power tools. Check for
misalignment or binding of moving
parts, breakage of parts and any other
condition that may affect the power tool’s
operation. If damaged, have the power
tool repaired before use. Many accidents are
caused by poorly maintained power tools.
f) Keep cutting tools sharp and clean.
Properly maintained cutting tools with sharp cutting
edges are less likely to bind and are easier to control.
g) Use the power tool, accessories and
tool bits etc. in accordance with these
instructions, taking into account the
working conditions and the work to be
performed. Use of the power tool for operations
different from those intended could result in a
hazardous situation.
5. BATTERY TOOL USE AND CARE
a) Recharge only with the charger specified
by the manufacturer. A charger that is suitable
for one type of battery pack may create a risk of fire
when used with another battery pack.
b) Use power tools only with specifically
designated battery packs. Use of any other
battery packs may create a risk of injury and fire.
c) When battery pack is not in use, keep it
away from other metal objects, like paper
clips, coins, keys, nails, screws or other
small metal objects, that can make a
connection from one terminal to another.
Shorting the battery terminals together may cause
burns or a fire.
d) Under abusive conditions, liquid may be
ejected from the battery; avoid contact.
If contact accidentally occurs, flush with
water. If liquid contacts eyes, additionally
seek medical help. Liquid ejected from the
battery may cause irritation or burns.
6. SERVICE
a) Have your power tool serviced by a
qualified repair person using only
identical replacement parts. This will ensure
that the safety of the power tool is maintained.
HAMMER SAFETY
WARNINGS
1. Wear ear protectors. Exposure to noise can
cause hearing loss.
2. Use auxiliary handles, If supplied with the
tool. Loss of control can cause personal injury.
3. Hold power tools by insulated gripping
surfaces, when performing an operation
where the cutting accessory may contact
hidden wiring. Cutting accessory contacting a
‘live’ wire may make exposed metal parts of the power
tool ‘live’ and could give the operator an electric shock.
4. Always wear a dust mask.
GENERAL SAFETY
WARNINGS
WARNING Read all safety warnings and
all instructions. Failure to follow the warnings
and instructions may result in electric shock, fire and/or
serious injury.
Save all warnings and instructions for future
reference.
- This appliance is not intended for use by
persons (including children) with reduced
physical, sensory or mental capabilities,
or lack of experience and knowledge,
unless they have been given supervision
or instruction concerning use of the
appliance by a person responsible for
their safety.
- Children should be supervised to ensure
that they do not play with the appliance.
If the supply cord is damaged, it must be
replaced by the manufacturer, its service
agent or similarly qualified persons in order
to avoid a hazard.

16 EN
ADDITIONAL SAFETY
INSTRUCTIONS FOR
YOUR BATTERY
CHARGER
1. Before charging, read the instructions.
2. Do not charge a leaking battery.
3. Do not use chargers for works other than
those for which they are designed.
4. Before charging, ensure your charger is
matching the local AC supply.
5. For indoor use, or do not expose to rain.
6. The charging device must be protected
from moisture.
7. Do not use the charging device in the
open.
8. Do not short out the contacts of battery
or charger.
9. Respect the polarity “+/-“ when charging.
10. Do not open the unit and keep out of the
reach of children.
11. Do not charge the batteries of other
manufactures or ill-suited models.
12. Ensure that the connection between the
battery charger and battery is correctly
positioned and is not obstructed by
foreign bodies.
13. Keep battery charger’s slots are free of
foreign objects and protect against dirt
and humidity. Store in a dry and frost-free
place.
14. When charging batteries, ensure that
the battery charger is in a well-ventilated
area and away from inflammable
materials. Batteries can get hot during
charging. Do not overcharge any
batteries. Ensure that batteries and
chargers are not left unsupervised during
charging.
15. Do not recharge non-rechargeable
batteries, as they can overheat and
break.
16. Longer life and better performance can
be obtained if the battery pack is charged
when the air temperature is between 18℃
and 24℃. Do not charge the battery pack
in air temperatures below 4.5℃, or above
40.5℃. This is important as it can prevent
serious damage to the battery pack.
SAFETY INSTRUCTIONS
FOR BATTERY PACK
a) Do not dismantle, open or shred cells or
battery pack.
b) Do not short-circuit a battery pack. Do
not store battery packs haphazardly in
a box or drawer where they may short-
circuit each other or be short-circuited
by conductive materials. When battery pack is
not in use, keep it away from other metal objects, like
paper clips, coins, keys, nails, screws or other small
metal objects, that can make a connection from one
terminal to another. Shorting the battery terminals
together may cause burns or a fire.
c) Do not expose battery pack to heat or
fire. Avoid storage in direct sunlight.
d) Do not subject battery pack to
mechanical shock.
e) In the event of battery leaking, do not
allow the liquid to come into contact
with the skin or eyes. If contact has
been made, wash the affected area with
copious amounts of water and seek
medical advice.
f) Seek medical advice immediately if a cell
or battery pack has been swallowed.
g) Keep battery pack clean and dry.
h) Wipe the battery pack terminals with a
clean dry cloth if they become dirty.
i) Battery pack needs to be charged before
use. Always refer to this instruction and
use the correct charging procedure.
j) Do not maintain battery pack on charge
when not in use.
k) After extended periods of storage, it may
be necessary to charge and discharge
the battery pack several times to obtain
maximum performance.
l) Battery pack gives its best performance
when it is operated at normal room
temperature (20 °C ± 5 °C).
m) When disposing of battery packs,
keep battery packs of different
electrochemical systems separate from
each other.
n) Recharge only with the charger specified
by POSITEC. Do not use any charger
other than that specifically provided for
use with the equipment. A charger that is
suitable for one type of battery pack may create a risk

17
EN
of fire when used with another battery pack.
o) Do not use any battery pack which is not
designed for use with the equipment.
p) Keep battery pack out of the reach of
children.
q) Retain the original product literature for
future reference.
r) Remove the battery from the equipment
when not in use.
s) Dispose of properly.
SYMBOLS
To reduce the risk of injury, user must read
instruction manual
Warning
Wear ear protection
Wear ear protection
Wear dust mask
For indoor use only
Do not expose to rain or water
Do not burn
Fuse
Double insulation
Positive terminal
Negative terminal
Li-Ion battery.
Do not dispose of batteries, Return exhausted
batteries to your local collection or recycling
point.
OPERATING
INSTRUCTIONS
NOTE: Before using the tool, read the
instruction book carefully.
INTENDED USE
The machine is intended for driving in and loosening screws
as well as for drilling in wood, metal and plastic.
BEFORE PUTTING INTO OPERATION
CHARGING THE BATTERY PACK (See Fig. A)
NOTE:
a) Do not use any charger other than that specifically
provided for use with the equipment.
b) If the battery pack is very hot you must remove your
battery pack from the charger and allow time for the
battery to cool down before recharging.
c) The battery in your new tool is not charged when it
leaves the plant. Therefore it must be full charged
before using the first time
d) Please charge the battery to reach full or no less than
half charge before storage. If the tool will not be used
for long periods of time, charge the battery every 3-6
months
CHARGING PROCEDURE
1). Plug the charger into an appropriate outlet. The light
will be green.
2). Slide the battery pack into the charger, the light
will turn to red to indicate the charging process has
started.
3). When charging is completed, the light will turn to
green. The pack is now fully charged, unplug the
charger and remove the battery pack.
WARNING: When battery charge runs out after
continuous use or exposure to direct sunlight or heat,
allow time for the battery to cool down before re-charging to
achieve the full charge.

18 EN
CHARGING INDICATOR
Light Status
Red on Charging
Green on Fully Charged
B) TO INSTALL OR REMOVE THE BATTERY
PACK
Depress the battery pack release button firmly first and
then slide the battery pack out from your tool. (See Fig. B1)
After recharge, slide it into the tool. A simple push and slight
pressure will be sufficient. (See Fig. B2)
OPERATION
1. INSERTING AND REMOVING DRILL BIT
TAKE CARE THAT THE DUST PROTECTION
CAP IS NOT DAMAGED WHEN CHANGING
BITS.
— INSERTING (See Fig. C1)
Clean and lightly oil the bit before inserting. Insert the
dust-free bit into the bit holder with a twisting motion until
it latches.
The bit locks itself. Check the locking by pulling on the tool.
— REMOVING (See Fig. C2)
Retract back the bit holder locking sleeve and pull out the
bit.
WARNING!Your new Rotary Hammer generates
powerful forces to get your job done quickly and
effectively. These forces may cause inferior quality SDS bits
to break and jam in the chuck,We therefore recommend
that only high quality SDS bits be used with this tool.
2. ON/OFF SWITCH WITH VARIABLE SPEED
CONTROL (See Fig. D)
Depress on/off switch to start and release it to stop your
tool. The on/off switch is also a variable speed switch that
delivers higher speeds with increased trigger pressure.
Speed is controlled by varying the pressure applied to the
switch.
3. SWITCH LOCK (See Fig. D)
The switch trigger can be locked in the OFF position. This
helps to reduce the possibility of accidental starting when
not in use. To lock the switch trigger, place the direction of
rotation control in the center position.
4. FORWARD AND REVERSE ROTATION
CONTROL (See Fig. E1, E2 )
With the drill pointing away from you, push the forward/
reverse-lever to the left for forward rotation. Push the
forward/reverse-lever to the right for reverse rotation.
WARNING: Never change the direction of rotation
while the tool is rotating, wait until it has stopped.
5. FUNCTION MODE SELECTION (See Fig. F)
The operation of the gearbox for each application is set with
the function mode selection switch. To change between
functions, depress the unlocking button (a) and rotate the
selector to the desired operating mode.
For simultaneous drilling and impacting of concrete or
masonry, choose the Hammer drilling position.
For drilling into steel, wood and plastics choose the Rotary
drilling position.
WARNING: The operating mode selector switch
may be actuated only at a standstill.
6. LED LIGHT
To turn on the light, press the on/off switch and make sure
the forward/reverse rotation control is on right/left position.
When you release the on/off switch, the light will be off.
LED lighting increases visibility-great for dark or enclosed
area.
7. DISPOSAL OF AN EXHAUSTED BATTERY
PACK
To preserve natural resources, please recycle or
dispose of the battery pack properly. This battery
pack contains Li-ion batteries. Consult your local
waste authority for information regarding available recycling
and/or disposal options. Discharge your battery pack by
operating your drill, then remove the battery pack from
the drill housing and cover the battery pack connections
with heavy-duty adhesive tape to prevent short circuit and
energy discharge. Do not attempt to open or remove any of
the components.
WORKING HINTS FOR
YOUR TOOL
If your power tool becomes over heated, set the speed
to maximum and run no load for 2-3 minutes to cool the
motor. SDS-plus tungsten carbide drill bits should always be
used for concrete and masonry.
When drilling in metal, only use HSS drill bits in good
condition. Where possible use a pilot hole before drilling a
large diameter hole.

19
EN
PROBLEM SOLUTION
1. WHY YOUR DRILL SUDDENLY STOPS
WHEN WORKING.
a) They run at full power until they need charging. So if
your tool suddenly stops check your battery first. The
Li-ion battery is protected against deep discharging by
the “Discharging Protection System”. When the battery
is empty, the machine is switched off by means of a
protective circuit, and the drill bit will be stop working.
b) Overload protection. When overloaded, the motor
comes to a stop. Relieve the load on the machine
immediately and allow cooling for approx. 30 seconds
at the highest no-load speed.
c) High temperature of the tool or battery. When the load
is too high or the allowable battery temperature of 75
°C is exceeded, the electronic control switches off
the power tool until the temperature is in the optimum
temperature range again.
2. REASONS FOR DIFFERENT BATTERY
PACK WORKING TIMES
Charging time problems, having not used a battery pack for
a prolonged time will reduce the battery pack working time.
This can be corrected after several charge and discharge
operations by charging & working with your drill. Heavy
working conditions such as large screws into hard wood will
use up the battery pack energy faster than lighter working
conditions. Do not re-charge your battery pack below 0oC
and above 30oC as this will affect performance.
MAINTENANCE
Remove the battery pack from the tool
before carrying out any adjustment,
servicing or maintenance.
Your power tool requires no additional lubrication or
maintenance. There are no user serviceable parts in your
power tool. Never use water or chemical cleaners to clean
your power tool. Wipe clean with a dry cloth. Always store
your power tool in a dry place. Keep the motor ventilation
slots clean. Keep all working controls free of dust.
Occasionally you may see sparks through the ventilation
slots. This is normal and will not damage your power tool.

20 ES
LISTA DE PARTES
1. Protector Antipolvo
2. Manguito De Fijación
3. Botón de Adelante/Atrás/Traba
4. Interruptor de encendido / apagado
5. Paquete De Baterías
6. Lengüetas De Liberación De Las Baterías
7. Selector de modo o función
8. Luz LED indicadora
No todos los accesorios ilustrados o descritos se incluyen junto con el producto estándar.
DATOS TÉCNICOS
WS2940K2
Voltios 18V
Velocidad sin Carga 0-900 /min
Tarifa del impacto 0-5000 bpm
Energía de impacto 1.2 J
Máx capacidad de perforación
Acero 10 mm
Madera 16 mm
Concreto 13 mm
Peso de la máquina 1.22 kg
Cargador WS9890
Clase de protección del cargador /II
Entrada del cargador 100-240V~50/60Hz, 37W
Salida del Cargador 20V 1500mA
Capacidad de batería 2.0 Ah (WS9894) Li-Ion
Tiempo de carga (aprox.) 90 min
ACCESORIOS
WS2940K2
Cargador 1
Batería 2
Le recomendamos que compre todos los accesorios en la tienda donde adquirió la herramienta. Consulte el empaque de los
accesorios para obtener más detalles. El personal de la tienda también puede ayudarle y aconsejarle.
Table of contents
Languages:
Other Wesco Rotary Hammer manuals