WeTek Play2 User manual

user manual
v1.2 | 2016

TABLE OF CONTENTS
1. Introduction
1.1 Important safety information
1.2. Precautions
2. Product Overview
3. Get Started
3.1. Gift-box Contents
3.2. Installation Requirements
3.3. Connections
3.4. Power Adaptor
3.5. RCU
3.5.1 How to use
4. Specications
5. Connecting
6. Further assistance
7. Warranty

INTRODUCTION
Before using your WeTek Play2, please read carefully all the useful information
provided in this manual. It will help you and will alert you to the necessary safety
precautions preceding its rst usage.
1. IMPORTANT INFORMATION FOR THE USERS
1.1 Important safety information
Read, follow and keep these instructions.
• Do not use this device near water.
• Clean only with a dry cloth.
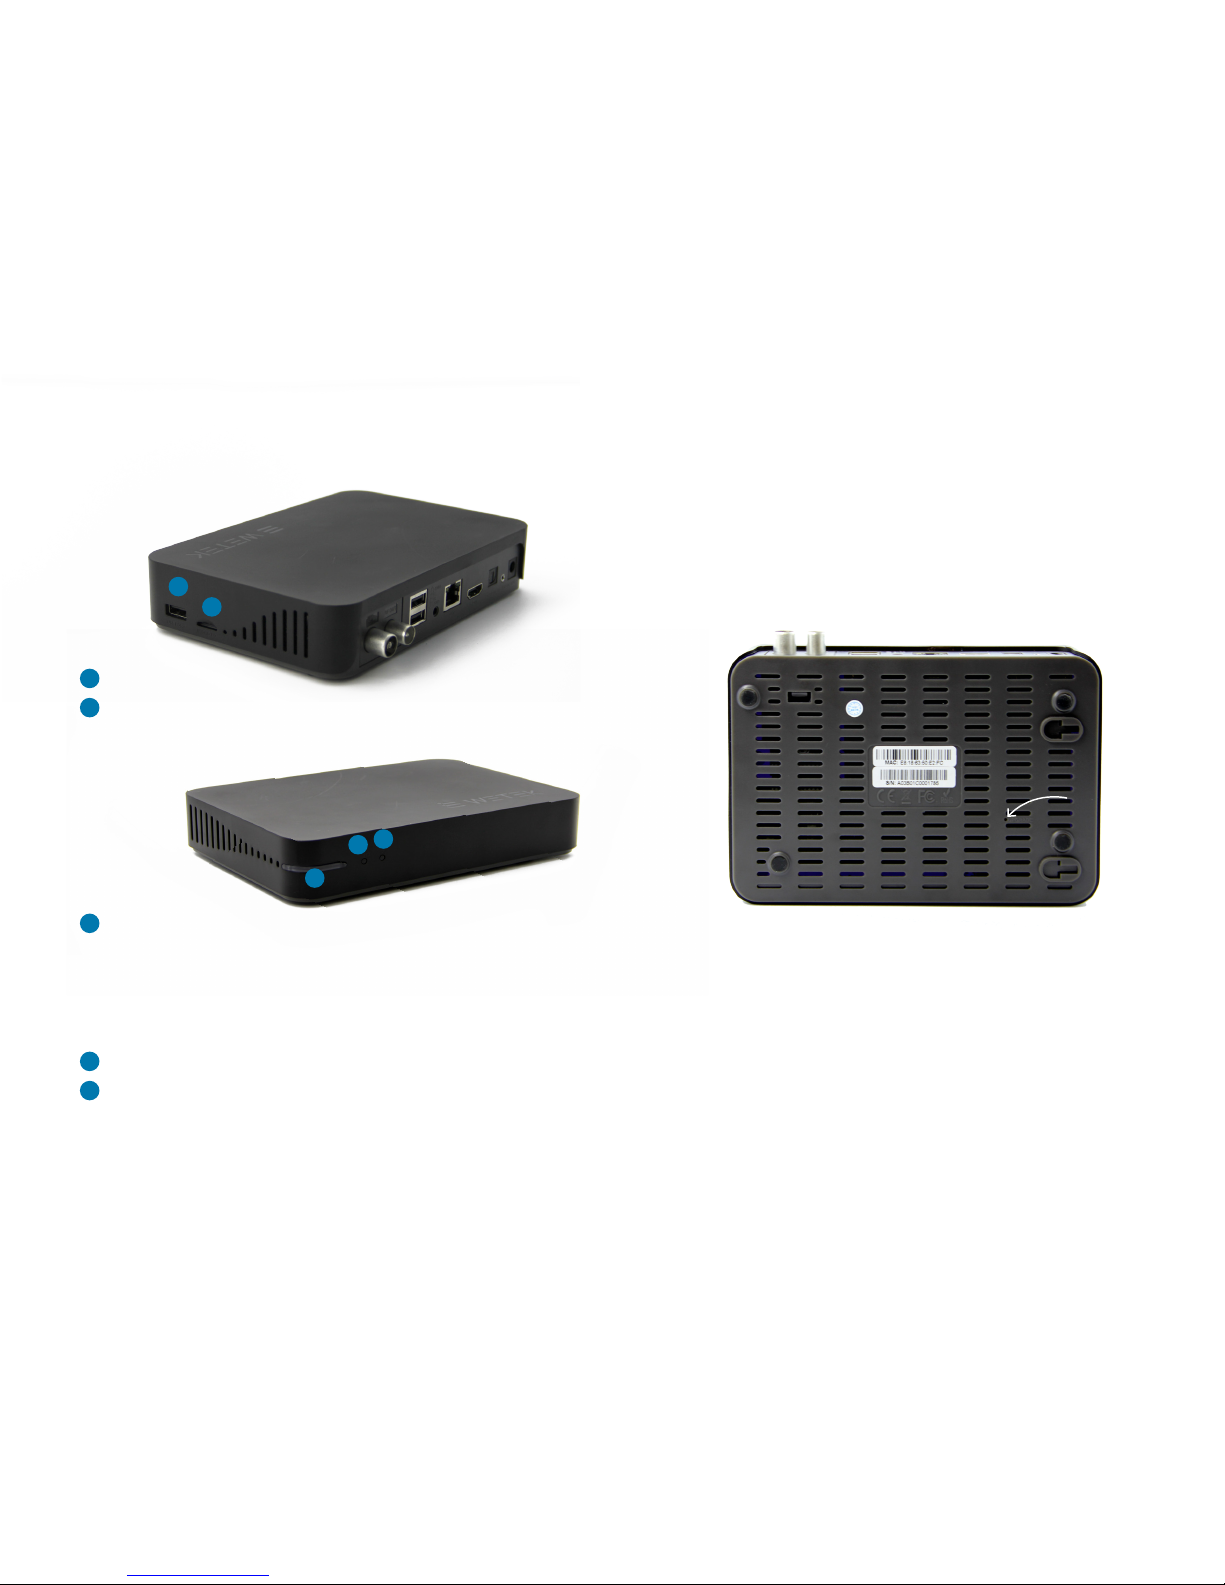
• Do not block any of the ventilation openings.
• Install in accordance with the manufacturer’s instructions.
• Do not install near any heat sources such as radiators, heat registers, stoves
or other apparatus (including ampliers) that produce heat.
• Protect the power cord from being walked on or pinched particularly at the
plug, receptacles and the point where they exit from the device. .
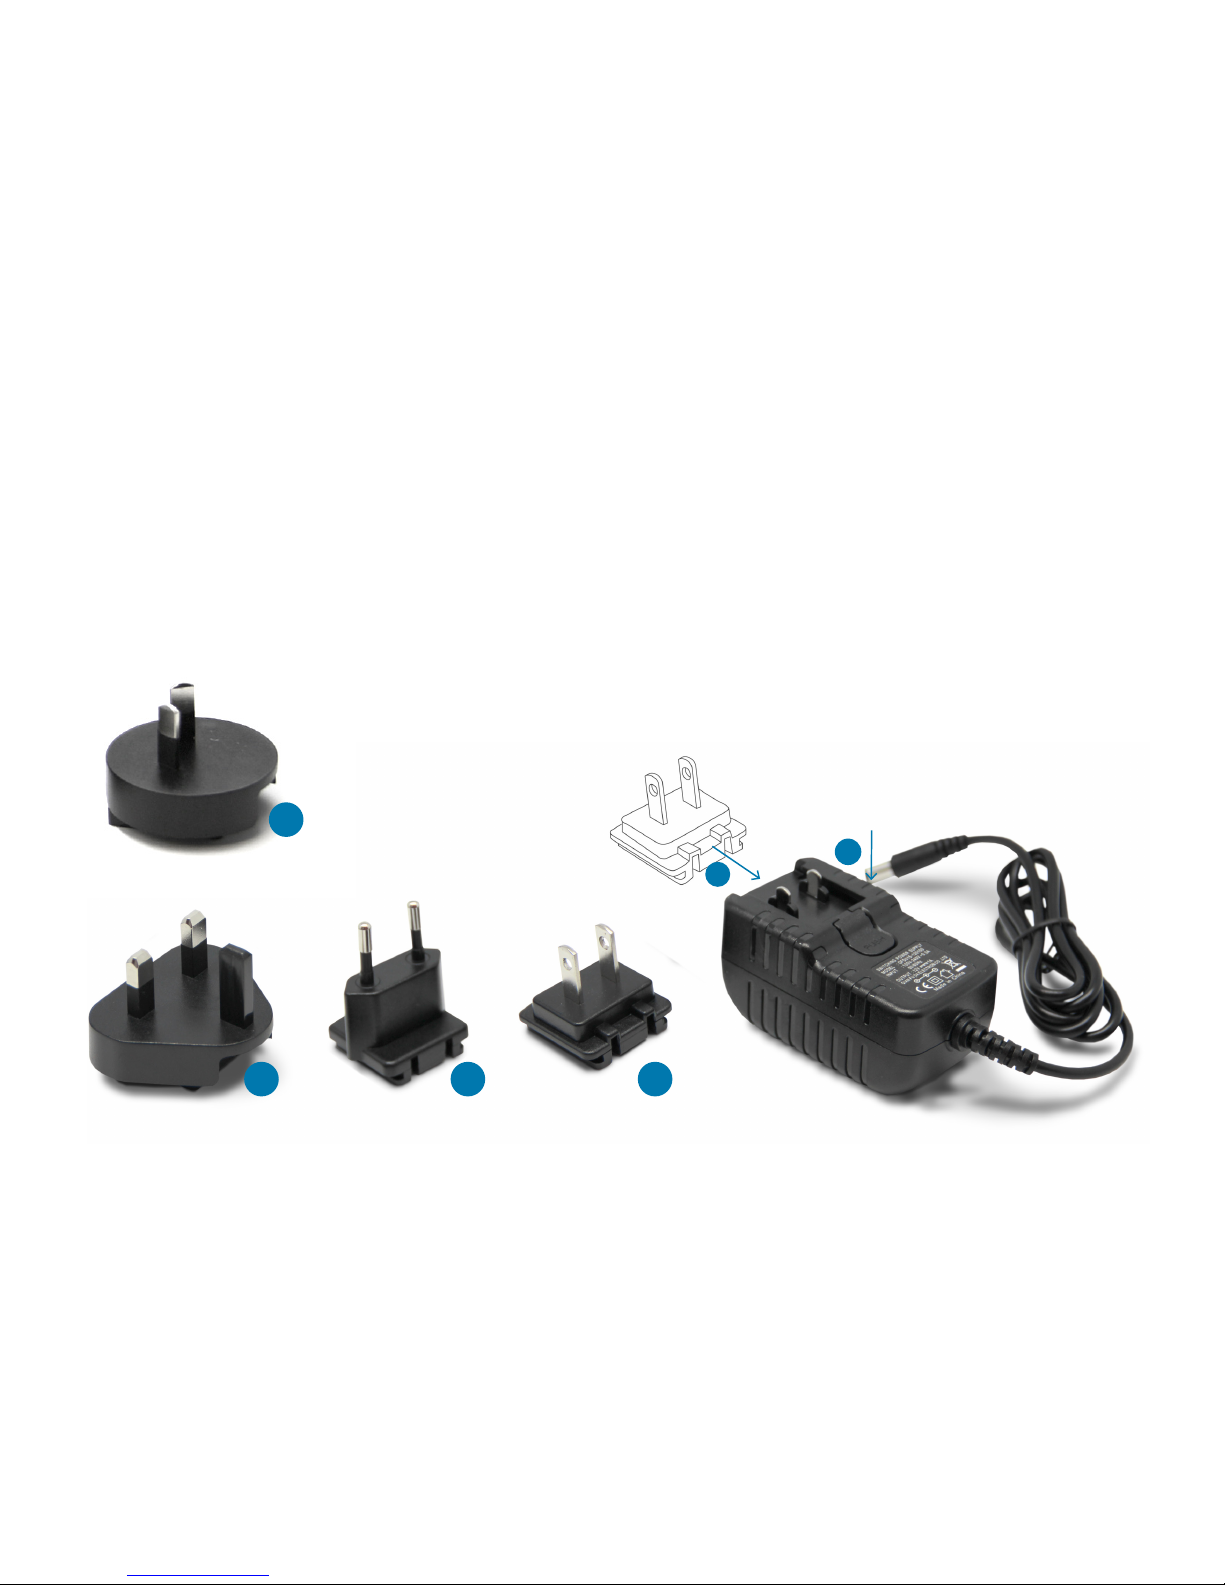
• Only use accessories included within this package or recommended by the
manufacturer.
• Unplug this device during lightning storms or when unused for long periods of
time.
WARNING: To reduce the risk of re or electric shock, do not expose this device to
rain or moisture.
This symbol indicates “dangerous voltage” inside the product which
presents a risk of electric shock or personal injury.
This symbol indicates important instructions accompanying the
product.
1.2. Precautions
Please read these precautions before operating this unit.
a) Power cord protection
To avoid any malfunctions of the unit, please observe the following:
• Hold the plug rmly when connecting or disconnecting the power cord.
• Keep the power cord away from heating appliances.
• Never put any heavy object on the power cord.
• Do not attempt to repair the power cord in any way.
• Never make or change connections with the power switched on.
b) Location
Avoid placing the unit in areas of:
• Direct sunlight or heating radiators.
• High temperature (over 50ºC) or high humidity (over 90%).
• Dust, as the internal parts may be seriously damaged.
c) Non-use periods
When the unit is not being used, turn it o. If it is unused for a long period of time,
the unit should be unplugged from the power source.

d) No ngers or other objects inside
• Touching internal parts of this unit is dangerous and may cause serious dam-
age to the unit.
• Do not attempt to disassemble the unit. Do not put any foreign object in this
unit.
e) Keep away from water
Keep the unit away from ower vases, tubs, sinks, etc. If liquids are spilled into the
unit, serious damage could occur.
2. PRODUCT OVERVIEW
WeTek Play 2 brings endless entertainment to your living room. Enjoy the latest
movies and series in 4K UHD, play games, browse the internet, keep up with the
news or use the DVB modular tuner to watch thousands of TV channels via satel-
lite, terrestrial or cable connections.
Your WeTek device gives you access, among others, to the following possibilities:
• Modular DVB tuner for satellite, cable or terrestrial connections.
• HDMI interface for digital audio and high-denition video
• Composite interface (RCA, yellow / white / red) for analog AV connection
• S / PDIF (optical) digital audio hi-
• Video output resolutions up to 4K
• Surround Digital audio output multi channel or stereo (digital surround sound
is only available when using the S / PDIF interface)
• Wired (Ethernet cable not included) or wireless Internet connection.
• Use microSD cards.
• 3 USB external ports where you can connect several USB storage devices and
access them simultaneously. You can also connect keyboards, webcams and
other devices with USB connection.
• Bluetooth to connect your speakers, keyboard, mouse, tness watches, mo-
bile phone and other devices with Bluetooth 4.0.

3. GET STARTED
3.1. Gift-box Contents
Before you install your WeTek Play 2, check that all the accessories you need have
been supplied.
1. WeTek Play 2 device
2. RCU
3. Power adapter
4. HDMI and RS232 cables
5. Update Nail
3.2. Installation Requirements
Your WeTek Play 2 can be installed correctly when accompanied by:
• TV, monitor or projector with HDMI port or alternatively with composite input
ports (standard A/V).
• Two AAA batteries for the RCU
• Internet network connection (required for updates and streaming)
• Ethernet cable (optional)
• Optical cable (S / PDIF) (optional)
• AV Composite Cable (alternative to HDMI connection)* (optional)
• Coaxial cable (optional)
• MicroSD card for external storage (optional)
*Please note that not all AV cable may be compatible with WeTek. To get the best
performance you should use an ocial cable. The cable is not included with Wetek
models, but can be purchased at the WeTek online shop.
3.3. Connections
Back view
1
1
3
3
5
5
2
2
4
4
6
7
8
1
3
5
2
4
• Modular DVB Tuner (optional) • HMDI output
• 2x USB • Optical output
• AV output • RS-232
• Ethernet port • DC in
1
3
5
2
4
6
7
8

Side view
1. USB port
2. Micro SD port
Front view
3. Power Button / Status LED
Turn on and o your WeTek directly by pressing this button. Alternatively you can
do it with the Remote Control Unit.
O - The power cord is disconnected.
Red - WeTek is in o
Blue - WeTek is on and the boot image should appears on the screen
2. Ethernet Status LED
3. WiFi Status LED
Bottom view
Upgrade button
WeTek Play 2 allows to access the upgrade button if an hard factory reset is
required.
1
2
1
1
2
2
3
1
23

3.4. Power Adapter
WeTek Play 2 is available with a set of interchangeable plugs to accommodate
standard wall sockets in multiple countries. Before using the AC adapter, you need
to install the correct plug according to your country socket. To install and remove
see the illustration below.
1
2
EUUK US
AUS

CAUTION: Do not expose the batteries or the remote control with batteries in places too hot (direct
sunlight, re, etc.).
NOTE: Key functions may vary according to operating system and running program.
3.5. RCU
GENERAL FUNCTIONS
1. Power button
2. TV app
3. Mute
4. Alphanumeric pad
5. Backspace
6. Shift
7. Home
8. Menu
9. Back
10. Recent Apps
11. On/O Directional Mouse
12. Apps
13. Directional keys
14. OK button
15. Volume up/down
16. Channel up/down
17. Add to Favorites
18. Teletext
19. WeTV special controls
20. Playback controls
1 3
5
8
10
2
4
7
6
97
6
1
3
5
8
10
2
4
9
3.5.1 How to use
The WeTek Play 2 remote control unit allows you to browse all the operating system’s
features.
To control the mouse cursor with the directional keys, press key 11. To disbale this
function, press the key 11 again.
Press the button 7 Home whenever you wish to return to WeTek main page,
The alphanumeric keypad allows you to enter in the search elds letters or numbers.
Alternatively you can use the virtual keyboard.
11
11
12
12
16
18 13
15
13
17
19 14
14
18
19
20
20
15
17
16

4. SPECIFICATIONS
GENERAL Device Name WeTek Play 2
Processor (CPU) AMLogic S905-H Rev C Quad
Core
GPU Octa-core ARM Mali-450MP
RAM Memory 2 GB DDR III
ROM Memory 8 GB eMMC
Modular Tuner*
(*optional)
DVB-S2, DVB-C/T/T2 and ATSC
SOFTWARE Operating System Android 5.1.1
CONNECTIONS Ethernet 1000 Mbit/s(Gigabit
Ethernet)
Wireless LAN 802.11 2.4/5 GHz B/G/N
Bluetooth 4.0 yes
USB 2.0 3
Memory Card Reader 1 (micro SD)
IR yes
Serial Debug RS-232
AUDIO & VIDEO SPDIF 1
A/V Output 1
(compatible with 17mm
TRRS jack only)
HDMI 1x 2.0
OTHERS Power Supply Unit DC In
Interchangeable plugs
(EU, UK, USA, AUS)
LED Power, Standby,
Ethernet, WiFi
Remote Control Unit IR Remote Control
Housing dimensions 42x125x180mm

5. CONNECTING
Before connecting your WeTek device to your TV/monitor or projector, please
ensure that it is placed on a at and stable surface.
Now that your WeTek Play 2 is in position, please refer to the following diagram.
1. Connect WeTek Play to a TV using the HDMI digital output (1a) or the AV output
(1b) as an analog alternative.
2. Connect the Ethernet cable to the router or use a wireless access.
3. If you have an external sound system, connect the optical output.
4. Connect the antenna cable.*
5. Connect the power supply to your WeTek.
6. Connect the remote inserting two AAA batteries (not included).
7. Connect the device using the power button, wait for the boot
animation and follow the Wizard to congure your WeTek Play 2.
*the modular tuner is an optional feature
7
6
1
a
b
1
3
3
5
2
2
45
7
4
6

6. FURTHER ASSISTANCE
This manual does not end here. To help you improve your user experience, you can
access additional information, tutorials, quick guides assistance, screens, forums
and more, visiting wetek.com/support.
If you nd any problem, please give us the opportunity to address it before
returning this product. Most technical support questions can be answered through
our knowledge base or the online support service.
Note: Some support operations may require that you have access to a PC with Windows 7 or higher,
an available serial port (or a serial-USB converter), as well as a Telnet / SSH client software such as
Putty.
7. WARRANTY
To nd all Warranty & Return Terms regarding WeTek Play 2, please access wetek.
com/terms.
NOTE: The warranty will be voided if installed any non-ocial ROM or recovery.
To proceed with any refund process, your WeTek Play 2 needs to have the original
software installed.
All product names, logos, and brands are property of their respective owners.
Manufactured under license from Dolby Laboratories. Dolby and the double-D symbol are registered trademarks of Dolby Laboratories.

www.wetek.com
Table of contents
Other WeTek Set-top Box manuals