manuals.online logo
Brands
  1. Home
  2. •
  3. Brands
  4. •
  5. Whirlpool
  6. •
  7. Air Conditioner
  8. •
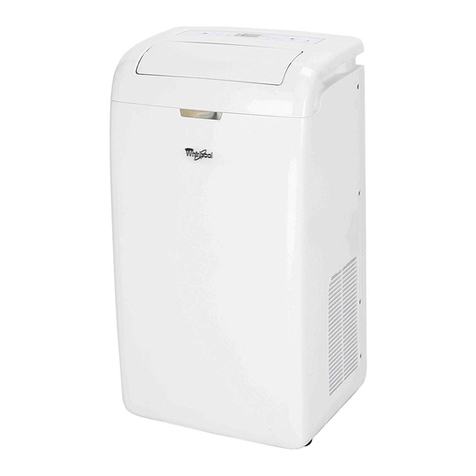
  9. Whirlpool PORTABLE AIR CONDITIONER User manual

Whirlpool PORTABLE AIR CONDITIONER User manual

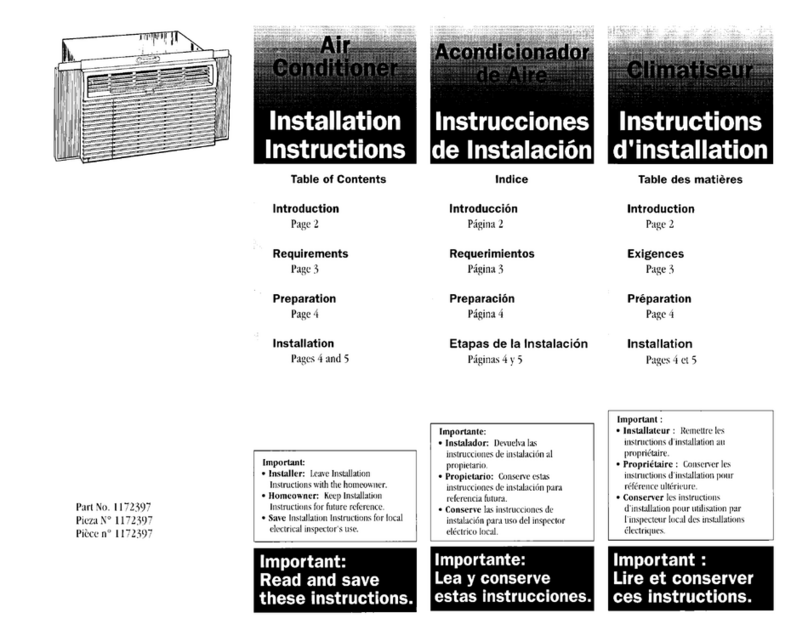
Part No. 1161390 Rev. A
9-sa.
IMPORTANT:
Read and save
these instructions.
lMPOt?TANl:
Installer: Leave Installation Instructions
with the homeowner,
Homeowner: Keep Installation Instructions
for future reference.
Save Installation Instructions for local
electrical inspector’s use.
Air Conditioner
-.
Before
you
start
Grounded electrical outlet
within
l a* reach of the Dower supolv cord is
Proper installat& is your required. See’ Electric& ’ ’
responsibility. Make sure you have requirements.
everything necessary for correct
installation. It is the customer’s
responsibility to comply with the
Important: Observe all
installation specifications provided.
governing codes and
ordinances.
Do Not use an
extension cord.
the reach of the
power
supply
cord.
Check location where air
conditioner will be installed:
9 Correct opening size,
l Adequate wall support for
weight of air conditioner,
l An electrical outlet within reach
h
l Free movement of air to rooms
to be cooled.
The opening dimensions must
have a 26-3/8” width and 19-3/4”
height.
of power supply cord,
Electrical Shock Hazard
It is the customer’s responsibility: Electrical Code, ANSI/NFPA 70-
* To contact a qualified electrical latest edition*, and all local
installer. codes and ordinances.
l
To assure that the electrical
installation is adequate and in
conformance with National Failure to do so could result in
fire, electrical shock or other
personal injury.
collects inside the air
conditioner. It is not sanitary.
BMaintain a firm hold on the air Failure to follow these instructions
could result in personal injury or
damage to air conditioner.
C’
opies of the standards listed may be obtained from:
‘Nallonal Fire ProtectIon Assoclallon
Batterymarch Park
Quincey, Massachusetts 02269
Page 2
Personal Injury/Product Damage Hazard
. Because of the weight and size conditioner to prevent it from
of the air conditioner, more falling out of opening during
than one person is needed to installation.
move, lift and safely install it.
l
Db Not locate air conditioner
l
Handle air conditioner with where cabinet front is exposed
care. Metal fins on front and to a heat source that raises the
rear coils are sharp. surface temperature above
. Do Not drink the water that 120°F.
Tools and
matehfs needed
for installation:
Order Window Mounting Kit,
Part No. 1162147 from authorized
parts distributor.
Electrical
requirements
Electrical Shock Hazard
l
Electrical ground is required
on this appliance.
l
If cold water pipe is
interrupted by plastic, non-
metallic gaskets or other
insulating materials. Do Not
use for grounding.
. Do Not ground to a gas pipe.
l
Do Not modify the power 1
supply cord plug. If it does not
fit the outlet, have a proper
outlet installed by a qualified
electrician.
l
Do Not have a fuse in the
neutral or grounding circuit.
A fuse in the neutral or
grounding circuit could result
in an electrical shock.
bDo Not use an extension cord
with this appliance.
bCheck with a qualified
electrician if you are in doubt
as to whether the appliance is
properly grounded.
bGrounding wire must be
connected to grounding screw
located in lower right corner of
air conditioner when air
conditioner is in cabinet.
:ailure to follow these
nstructions could result in
‘erious injury or death.
If codes permit and a separate
grounding wire is used, it is
recommended that a qualified
electrician determine that the
grounding path is adequate.
A single-phase, 60-Hz, AC-only,
electrical supply is required on a
separate circuit. A time-delay
fuse or circuit breaker is required:
15-amp for models without
electrical heater and 30-amp for
models with electric heater. The
fuse size must not exceed the
circuit rating specified on the
model and serial label. The model
and serial label is located behind
the front panel on the base
flange.
Specific electrical requirements
are listed in the chart. Follow the
requirements for the type of plug
on the power supply cord.
Recommended grounding
method
For your personal safety, this
appliance must be grounded. This
appliance is equipped with a
power supply cord having a
3-prong grounding plug. To
minimize possible shock hazard,
the cord must be plugged into a
mating, S-prong grounding-type
wall receptacle, grounded in
accordance with the National
Electrical Code, ANSI/NFPA
70-latest edition’, and all local
codes and ordinances, If a
mating wall receptacle is not
available, it is the personal
responsibility and obligation of the
customer to have a properly
grounded, 3-prong wall
receptacle installed by a qualified
electrician.
Now start...
With air conditioner in room where
it will be installed.
r
It is the customer’s responsibility
and obligation to have this
product installed by a qualified
technician familiar with
through-the-wall room air
conditioner installations,
approprlale
header If required_ casing
I
L
caulk
Alternate ’
conslruclldn
for plaster
Provlde l-3/1
Approprlale
header If required
lrlm \ /
Ilntel
lor plaster
Provlde l-
for power / r - lo frame.
supply cord I
entry on lefl l-J/l 6’ cRarance for
slde. power supply cord.
Brick veneer construction
1
When using a wood,
n
metal or plastic molding,
the finish frame should line up with
inside wall. If the plastered wall is
to be flush with the cabinet and
no molding is used, the finish frame
must be set l/2 inch into the wall.
allowance for l/2’
flange on bottom y Dimension
clearance ior \
power supply l-3/16’ clearance
cord entry on for power supply
IeR slde. cord
Frame
construction
of cabinet)
2.
deoends on
wail
thickness
and type of
molding.
Cut opening through the wall.
-
Remove insulation.
3
Use l-inch or heavier
n
lumber for wood frame.
Measure depth of wall opening
and frame.
Apply wood preservative to the
outside exposed surface.
4
Insert the frame in the
n
wall opening. Square
and level frame. Nail frame
securely to the wall studs.
Page 3
Floor Damage
Remove air conditioner from
carton and place on
cardboard.
Failure to do so may cause
damage to floor covering.
5
Remove air conditioner
from carton and place on
H cardboard.
rounding
ire screw
6
Loosen but do Not
remove the grounding
n
screw. Disconnect
grounding wire.
7
Pull on handles; slide air
H conditioner out of cabinet
and place on cardboard.
8
Inset-t cabinet into wall
I openina. The top of the
cabinet should extend 1)2 inch
into room. If there is trim, the
cabinet should extend l/2 inch in
front of trim.
Floor Damage
Check that air conditioner
cabinet is tilted to the outside so
that water will run to the outside.
Failure to do so may cause
damage to floor covering.
Part No. 1161390 Rev. A
0 1992 Whirlpool Corporation
-.
9
Place level inside cabinet
n
on the riaht side. There
should be a tilt t6 the outside of
approximately one bubble. Place
the level on the left side and
check.
IO
Use the insulation
n
removed in Step 2 to
seal opening between cabinet
and frame.
11
Drill four holes on
H each side and two
through the top of the cabinet into
the frame. Use ten, #lO x 1” wood
screws to attach cabinet to frame.
Do Not overtighten screws or
cabinet will distort and provide a
poor air seal between cabinet and
air conditioner.
Electrical Shock Hazard
Grounding wire from the air
conditioner must be connected
to the cabinet.
Failure to do so could result in
electrical shock.
..
,..:.:.:,.
.
......:‘.‘:..,..’
w :..
..:..,
..:;.::
.::
::.
..,:,..,.‘..
,..‘.
......
.
.;:
.....:.
..... .
....‘.
2- l/2” seal strip
_.
12
Place the 2- l/2” seal
n
strip inside the cabinet
as shown. Make seal flush with
cabinet front edge: (This seal strip
fits between the air conditioner
base and the cabinet.)
13
Insert air conditioner
I into cabinet.
Reattach grounding wire to
grounding screw. Put excess
grounded wire between coil and
grey beaded foam.
14
Attach front by first
n
removing the two,
Prepared by Whirlpool Corporation
Benton Harbor. Michigan 49022
#8 x 3/8” screws from base; then
insert front tabs into top of
cabinet and swing front in place.
Attach bottom of front by
reinserting the two, #8 x 3/8”
screws.
15
Caulk all outside wall
H openings around
cabinet.
16
If needed, install
H molding around room
side of cabinet.
If your air conditioner is not
operating properly...
Check that the circuit breaker is
not tripped or house fuse blown.
Check that power supply cord is
securely plugged into the
electrical outlet.
If you need assistance...
The Whirlpool Consumer
Assistance Center will answer any
questions about operating or
maintaining your air conditioner
not covered in the Installation
Instructions. The Whirlpool
Consumer Assistance Center is
open 24 hours a day, 7 days a
week. Just dial (800) 253- 1301 -
the call is free.
When you call, you will need the
air conditioner model number
and serial number. Both numbers
can be found on the model and
serial label located behind the 1
front panel on the base flange.
If you need service...
In the event that your Whirlpool
appliance should need service,
call the dealer from whom you
purchased the appliance or a
Whirlpool-authorized service
company. A Whirlpool-authorized
service compqny is listed in the
Yellow Pages of your telephone
directory under “Appliances -
Household - Major - Service or
Repair.” You can also obtain the
service company’s name and
telephone number by dialing,
free, within the continental United
States, the Whirlpool Consumer
Assistance Center telephone
number, (800) 253-1301. A special
operator
will tell you the name
and number of your nearest
Whirlpool-authorized service
company.
Maintain the quality built into your
Whirlpool appliance - call a
Whirlpool-authorized service
company.
Printed in U.S.A.
Other manuals for PORTABLE AIR CONDITIONER

6

Other Whirlpool Air Conditioner manuals

Whirlpool ACM052 User manual

Whirlpool

Whirlpool ACM052 User manual

Whirlpool Room Air Conditioners for Slider & Casement... User manual

Whirlpool

Whirlpool Room Air Conditioners for Slider & Casement... User manual

Whirlpool COOL IMPRESSION SERIES User manual

Whirlpool

Whirlpool COOL IMPRESSION SERIES User manual

Whirlpool W5WCE065XW0 User manual

Whirlpool

Whirlpool W5WCE065XW0 User manual

Whirlpool ACC108PS User manual

Whirlpool

Whirlpool ACC108PS User manual

Whirlpool FM07IDUWA2 User manual

Whirlpool

Whirlpool FM07IDUWA2 User manual

Whirlpool 1188177-W Parts list manual

Whirlpool

Whirlpool 1188177-W Parts list manual

Whirlpool AMAP050BW User manual

Whirlpool

Whirlpool AMAP050BW User manual

Whirlpool AMD 064 User manual

Whirlpool

Whirlpool AMD 064 User manual

Whirlpool ACQ082 User manual

Whirlpool

Whirlpool ACQ082 User manual

Whirlpool 4380701 User manual

Whirlpool

Whirlpool 4380701 User manual

Whirlpool ACQ058PP0 User manual

Whirlpool

Whirlpool ACQ058PP0 User manual

Whirlpool 1187680 User manual

Whirlpool

Whirlpool 1187680 User manual

Whirlpool 819052203 Assembly instructions

Whirlpool

Whirlpool 819052203 Assembly instructions

Whirlpool ACSIOZ ACS520 User manual

Whirlpool

Whirlpool ACSIOZ ACS520 User manual

Whirlpool ACC602 User manual

Whirlpool

Whirlpool ACC602 User manual

Whirlpool AC1052XS User manual

Whirlpool

Whirlpool AC1052XS User manual

Whirlpool ACS082PK Instruction Manual

Whirlpool

Whirlpool ACS082PK Instruction Manual

Whirlpool AR0500XA User manual

Whirlpool

Whirlpool AR0500XA User manual

Whirlpool AMAP151BW User manual

Whirlpool

Whirlpool AMAP151BW User manual

Whirlpool Cool Impression room air conditioners User manual

Whirlpool

Whirlpool Cool Impression room air conditioners User manual

Whirlpool ACU124PK0 Product information sheet

Whirlpool

Whirlpool ACU124PK0 Product information sheet

Whirlpool ACQ052 User manual

Whirlpool

Whirlpool ACQ052 User manual

Whirlpool SPIW309A3WF.1 User manual

Whirlpool

Whirlpool SPIW309A3WF.1 User manual

Popular Air Conditioner manuals by other brands

Panasonic CS-SC12BKP operating instructions

Panasonic

Panasonic CS-SC12BKP operating instructions

Toshiba RAS-B22PKVSG-E installation manual

Toshiba

Toshiba RAS-B22PKVSG-E installation manual

Honeywell MM14CHCS owner's manual

Honeywell

Honeywell MM14CHCS owner's manual

LG HSN18APX owner's manual

LG

LG HSN18APX owner's manual

Mitsubishi Electric MCFZ-A12WV installation manual

Mitsubishi Electric

Mitsubishi Electric MCFZ-A12WV installation manual

Mitsubishi Electric NTXUKS06A112A Series operating instructions

Mitsubishi Electric

Mitsubishi Electric NTXUKS06A112A Series operating instructions

Dettson COND-ELD-09 Installation instructions and owner's manual

Dettson

Dettson COND-ELD-09 Installation instructions and owner's manual

Samsung GH052EAM Owner's instructions

Samsung

Samsung GH052EAM Owner's instructions

Fujitsu AOYA72LALT Service manual

Fujitsu

Fujitsu AOYA72LALT Service manual

Hisense KG25YR1A Use and installation instruction

Hisense

Hisense KG25YR1A Use and installation instruction

Kenmore 25371123011 installation instructions

Kenmore

Kenmore 25371123011 installation instructions

nvent SPECTRACOOL NHZ28 instruction manual

nvent

nvent SPECTRACOOL NHZ28 instruction manual

Fujitsu ARYA36LATU Service manual

Fujitsu

Fujitsu ARYA36LATU Service manual

Mitsubishi Electric MUZ-D30NA-1 Service manual

Mitsubishi Electric

Mitsubishi Electric MUZ-D30NA-1 Service manual

GE APCA10 Series Owner's manual and installation instructions

GE

GE APCA10 Series Owner's manual and installation instructions

Ingersoll-Rand EBC180-300 Installation, operation and maintenance

Ingersoll-Rand

Ingersoll-Rand EBC180-300 Installation, operation and maintenance

LG Multi V PRHR041 installation manual

LG

LG Multi V PRHR041 installation manual

Bosch PAM21011 Instructions for use

Bosch

Bosch PAM21011 Instructions for use

manuals.online logo
manuals.online logoBrands
  • About & Mission
  • Contact us
  • Privacy Policy
  • Terms and Conditions

Copyright 2025 Manuals.Online. All Rights Reserved.