Whirlpool HB10813 Installation manual

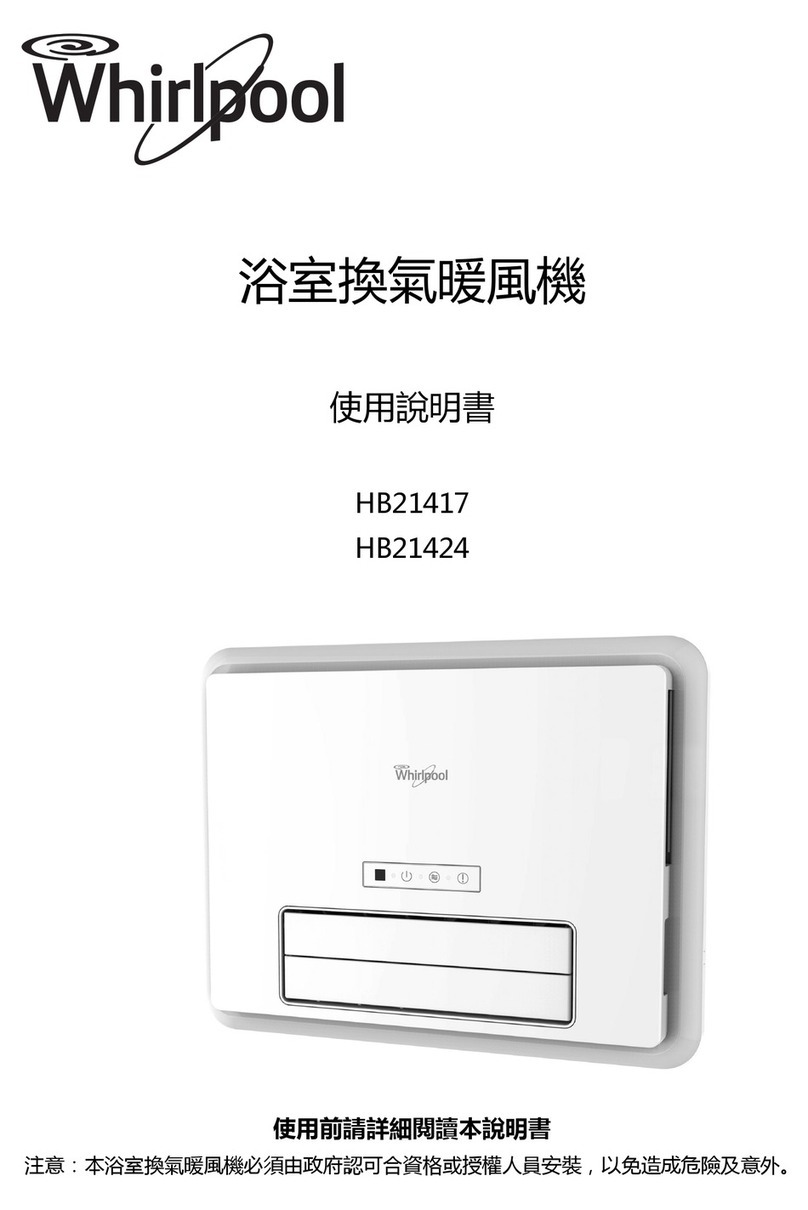
BATHROOM VENTILATOR
OPERATION MANUAL
HB10813
Please read this Operation Manual carefully before using this machine.
Warning: In order to prevent damage or accident, this machine must be installed by those
qualified technicians recognized by the government.

- 1 -
1. /ŵƉŽƌƚĂŶƚ^ĂĨĞƚLJ/ŶĨŽƌŵĂƚŝŽŶ
zMust use the appropriate power (220V-240V ~/50Hz).
zThis product is not suitable for the disabled, mental
retarded or mental disorder, or those who are lack of
experience and common sense (including children)
unless they are under guidance.
zTake care of your children and do not allow them to play
with this machine.
zIn order to use this machine more properly, and reduce
any danger caused by the incorrect operation, please
pay attention to the following items.
If the power wire is broken, please ask for the supplier
and manufacturer’s replacement. Make sure the
power wire places on suitable location and will not
block the road.
WARNING: In order to avoid overheating, do not cover
the heater.
The heater must not be located immediately below a
socket outlet.
Do not use this heater in the surroundings of a bath, a
shower or a swimming pool.
Product do not control room temperature, when there
is no responsible person close by, please do not let
those disabled stay alone in the narrow room and use
the machine.
When children and disabled people do cleaning and
maintenance work, please make sure responsible
person do take care of them.
Do not let the kids under the age of 3 to come close to
this machine, unless responsible person do pay strictly
attention to them.

- 2 -
When the machine was installed and placed at the
correct working location, there should be a person
responsible for safety guidance and assistance, and to
ensure the safety of the users to understand the
potential risk of this machine. Children who aged from
3 to 8 only can turn on/off this machine. Please do not
let the children aged from 3 to 8 to do regulation,
cleaning, maintenance work on this machine, and do
not let them to connect the plug to power supply.
CAUTION - some parts of this product can become
very hot and may cause burns. Particular attention has
to be given where children and vulnerable people are
present.
This product must be connected to the ground wire.
Incorrect connection to the ground wire may cause
danger.
Please check the reliability of the ground wire
connection and do not use your own power wire. If
your plug does not match this machine, please ask
qualified electrician for the acceptable outlet.
zFollow all the safety precautions listed below for safety
and to reduce the risk of injury or electrical shock.
Read all the instructions carefully before using this
appliance and keep them for future reference.
Retain the manual. If you pass the product to a third
party, make sure to include this manual.
Make sure no water inside the product before using.
WARNING: Do not use this heater in small rooms
when it is occupied by persons not capable of leaving
the room on their own, unless constant supervision is
provided.

- 3 -
Turn off the product and remove plug until the
product stops working and cool down completely
before clean the unit.
Please do not pull out the power plug by pulling the
power cord. It may cause the power cord damage or
electric shock.
If there is abnormal smell or noise when uses the
product, please stop using and pull out the power cord
immediately.
Please don't put heavy unit onto the power cord or
fold the power cord. It may lead to electric shock.
Please don't have the wind blow to the children
directly for a long time. It may influence the children's
health.
Please don't touch the plug by wet hands.
Please don't put the wood or metal stick into the air
inlet or outlet. It may lead to electric shock, or product
damage.
Do not use it on outdoor areas.
This appliance is for household use only.
Do not immerse the appliance or the electrical cord or
plug in liquids.
Do not use the appliance for any purpose not
expressly specified in this manual.
This appliance must be attended at all times when it is
switched on.
Do not insert any objects into the heater.
When using the heater, keep combustible materials or
explosive objective, away from the heater.
Do not place the appliance close to children or pets.
Never let children operate this appliance. Close

- 4 -
supervision is necessary when this is used near
children.
Do not touch hot surface when in use.
Do not share the same circuit receptacle with others
appliances, otherwise may have burn hazard.
Do not use extension cord or exchangeable plug.
Unplug heater if it fails to operate properly and inform
customer service center.
Dispose of packaging properly.
The heater only for personal use, not for heating any
liquids or other danger things.
Persons (including children) with reduced physical,
sensory or mental capabilities, or any individual lacking
experience and knowledge should be supervised or
given instruction by a person responsible for their
safety when they using this appliance. Unless being
supervised, the above persons (included children)
can't use this appliance.

- 5 -
2. Installation Precautions
zThis product should be installed in the place where can bear the weight of this goods.
zIncorrect installation may cause noise, empathy. Please assembly properly.
zIn order not to cause the dew flowing back from exhaust pipe to the bathroom, the
exhaust pipe should always be set in downward sloping to the outdoor.
zWhen installing the machine, the Front Panel shall be not less than 1.8 meters off the
ground.
zNot allow being installed in the hot furnace directly above and a place for more than 40
degrees.
zPlease set airflow intake to promote convection.
zDo not change the product's rated features.
zProhibiting using any installation method beyond the specified in the user manual.
zBefore installing this product, please ensure that the power has been cut off.
zWhen the flammable gas leaks, stop using it and turn off the machine and all its
function.
zDo not install this product near curtains and other flammable materials to prevent any
danger.
zProduct installation and maintenance should be done by professional designated by
the manufacturer.
zPlease install a complete power cutoff switcher (refer to below diagram) which the
contact separation is more than 3mm and the capacity is more than 250V~16A to
control the power of the machine, and install the switcher outside the bathroom where
it is easily controlled.
zDo not install the machine in steam sauna bathroom.
zDo not install the machine where it is exposed to oil mist.
zDo not install the machine in public bathroom.
zDo not install the machine in a wardrobe.
zDo not cover heater outlet, otherwise it may cause a fire due to overheating.
zDo not install too close to the electrical outlet in order to prevent damage of the
machine, for it may cause damage of other electrical appliances.
zProhibit using any programmes or timer automatically connected to the power or any
other devices to use this product. Otherwise it will cause damage to the product, or
fire.
zDo not let people in the bathroom or shower zones touch the remote control.
zDo not expose this product directly under the shower.
zWhen installing and using, do not remove the main circuit cover plate, otherwise it will
cause electric shock or fire.
- 6 -
澬Names of the device and functions澭
1. Machine Unit: mm
Front Side
Bottom Remote Control
1. Pre-Filter, Carbon Filter
3. Display
Panel
5. Stainless Steel Housing
2. Front Panel
4. Air Outlet
ʓ
ʔʖ
ʕ
ʒ

- 7 -
2. Remote LCD Display
LCD Function Display
Dry (
◿䓓ԅ)
Heat (
㾎ԅ)
Vent (
㠹㾎/㠹㾎ڍҠԅ)
Fan (
ڲ䝬梏ԅ)
Quick Heat (
ବԅ)
24
H Vent (24 ش㩌㠹㾎ԅ
)
Time Display
Swing
Battery Replacement
6th Sense
Air Volume
Hi
/ Lo (/Ѻ)
Ionizer

- 8 -
澬Installation Method澭
Window Type
Size
Front Panel (HxW): 254x254 mm
Machine Body* (HxW): 209x207 mm
* Exclude the front panel
Window Cut Out (HxW): 214x212 mm
1. Install at the place of the aluminum framed window or replace the exhaust fan in the
bathroom.
2. Fix the stainless steel housing to the frame of the aluminum window (must use the
waterproof glue for the waterproof).
3. This product can be installed on a window with a frame width of 294mm or above. In the
left side, it is suggested to reserve a distance of minimum 10mm between the product and
the wall. In the right side, please reserve a distance of minimum 30mm between the
product and the wall for the ease of filter installation.
9ZGOTRKYY9ZKKR
.U[YOTM
=GRR
Stainless Steel
housing
Front panel
Fixed screw of
the main body
Outlet holes of power cord
Nails fixed hole
,XUTZ6GTKR
=OTJU]
=OTJU]

- 9 -
澬Installation of the Remote Control澭
1. Take out the remote control from the holder.
2. Install the remote control to suitable place. Check the main body can receive signal from
the remote control installation location or take out the remote control to check the
receiver sensitivity. The installation location cannot be toward the direct spraying area
of the shower.
3. Fix the remote control holder to the designed place and make marks according to the
arrows.
4. Dig holes according to the mark, fill the holes with 2 plastic plugs, and fix the holder with
screws.
5. Install two R03 (AAA) batteries to the remote control:
A) Rotate the knob clockwise to the position ͺ
B) Open the battery coverͺ
C) Install two R03 (AAA) batteries to the remote controlͺ
(pay attention to the directions of positive and negative electrode)
D) Replace the battery coverͺ
E) Rotate the knob anti-clockwise to the position ͺ
6. Place the remote control back to the holder.

- 10 -
澬Instructions澭
FUNCTION APPLICATION
Operation Mode
Default
Time
S
etting
(Max.)
FAN
PTC
1. Quick Heat
Warm Air
High Speed
On
2 hrs
12 hrs
Heat (Hi)
High Speed
On
2 hrs
12 hrs
Heat (Lo)
Low Speed
On
2 hrs
12 hrs
2. Vent (Hi)
Air Exhaust
High Speed
Off
2 hrs
24 hrs
Vent (Lo)
Low Speed
Off
2 hrs
24 hrs
3. Dry (Hi)
Drying
High Speed
On
4 hrs
12 hrs
Dry (Lo)
Low Speed
On
4 hrs
12 hrs
4. Fan (Hi)
Bathroom Cooling
High Speed
Off
4 hrs
24 hrs
Fan (Lo)
Low Speed
Off
4 hrs
24 hrs
5.
6th Sense
De-odor
Intelligence A
uto
D
eodorization
Determine
thefaŶspeed
by the
odor
sensor
O
ff
2
hrs
24
hrs
6.
Others -
24H Vent
Air Exhaust
Low Speed
O
ff
24
hrs
/
Delay Vent
Low Speed
Off
15 mins
/
Swing
Blade Swing
-
Up/down auto
swing
45°-120°
-
Left/right m
anual
louver
120°
/
/
/
/
Ionizer
Ionizer Output
On
Off
/
/

- 11 -
澬Function Descriptions澭
1Display
Power Indicator – Blue indicator light on when connected to power supply
Air Quality Indicator – Red indicator light means “Poor”, Orange indicator light
means “Fair”, Green indicator light means “Good”
Malfunction Indicator – Red indicator light on when the machine is failure
2HEAT Function – Quick Heat
zPress the “Quick Heat” button, the LCD displays the “Quick Heat” icon, air volume will
run at “High “mode.
zTimer: the default time is 2 hrs. By pressing “Timer “up or down button to select time
duration. The time can be set from 5 mins to 12 hrs. The time counter will be displayed
at the LCD. The time selected will be recorded in memory when it is off, and will
resume in your next usage.
zStop: when press the “Stop “button or pre-set time runs over, the LCD “Quick Heat
“and time display would disappear, and the machine will stop automatically.
zWhen the heater stops running, the fan will continue run 25 seconds to cool down the
heater.
HEAT Function – Hi / Lo
zPress the “Heat” button, the LCD displays “Heat” icon, air volume will run at “High
“mode. Press the button again to select “Hi” or “Lo” mode.
zTimer: the default time is 2 hrs. By pressing “Timer” up or down button to select time
duration. The time can be set from 5 mins to 12 hrs. The time counter will be displayed
on the LCD. The time selected will be recorded in memory when it is off, and will
resume in your next usage.
zUnder the mode, the inter-change of the air volume between “Hi” or “Lo” will not
affect the time counting.
zStop: when press the “Stop” button or pre-set time runs over, the LCD “Heat” and time
display would disappear, and the machine will stop automatically.
zWhen the heater stops running, the fan will continue run 25 seconds to cool down the
heater.

- 12 -
3VENT Function - Hi / Lo
zPress the “Vent” button, the LCD displays “Vent” icon, air volume will run at “Hi” mode.
Press the button again to select “Hi” or “Lo” mode.
zTimer: the default time is 2 hrs. By pressing “Timer” up or down button to select time
duration. The time can be set from 5 mins to 24 hrs. The time counter will be displayed
on the LCD. The time selected will be recorded in memory when it is off, and will
resume in your next usage.
zUnder the mode, the inter-change of the air volume between “Hi” or “Lo” will not
affect the time counting.
zStop: when press the “Stop” button or the pre-set time runs over, the LCD “Vent” and
the time display would disappear, and the machine will stop automatically.
4DRY Function - Hi / Lo
zPress the “Dry” button, the LCD displays “Dry” icon, the air volume will run at “Hi”
mode. Press the button again to select “Hi” or “Lo” mode.
zTimer: the default time is 4 hrs. By pressing “Timer” up or down button to select time
duration. The time can be set from 5 mins to 12 hrs. The time counter will be displayed
on the LCD. The time selected will be recorded in memory when it is off, and will
resume in your next usage.
zUnder the mode, the inter-change of the air volume between “Hi” or “Lo” will not
affect the time counting.
zStop: when press the “Stop” button or the pre-set time runs over, the LCD “Dry” and
the time display would disappear, and the machine will stop automatically.
zWhen the heater stops running, the fan will continue run 25 seconds to cool down the
heater.
5FAN Function - Hi / Lo
zPress the “Fan” button, the LCD displays “Fan” icon, the air volume will run at “Hi”
mode. Press the button again to select “Hi” or “Lo” mode.
zTimer: the default time is 4 hrs. By pressing “Timer” up or down button to select time
duration. The time can be set from 5 mins to 24 hrs. The time counter will be displayed
on the LCD. The time selected will be recorded in memory when it is off, and will
resume in your next usage.
zUnder the mode, the inter-change of the air volume between “Hi” or “Lo” will not
affect the time counting.
zStop: when press the “Stop” button or the pre-set time runs over, the LCD “Fan” and
the time display would disappear, and the machine will stop automatically.

- 13 -
66th Sense De-odor Function
zPress “6th Sense” button, the LCD displays “ ” icon.
zIn 6th Sense mode, the machine will automatically detect the odor of the bathroom
and run the de-odor function. The air quality light will indicate the odor level, Red
indicator light means “Poor”, the machine will run at “Hi” mode; Orange indicator light
means “Fair”, and the machine will run at “Hi” mode; Green indicator light means
“Good”, and the machine will run at “Lo” mode.
zTimer: the default time is 2 hrs. By pressing “Timer” up or down button to select time
duration. The time can be set from 5 mins to 24 hrs. The time counter will be displayed
on the LCD. The time selected will be recorded in memory when it is off, and will
resume in your next usage.
zStop: when press the “Stop” button or the pre-set time runs over, the LCD “ ” and
the time display would disappear, and the machine will stop automatically.Every time
when connecting to the power, it takes 5 mins for the sensor to get ready before 6th
sense function can be activated.
7Other
24H Vent Function
zPress the “24H Vent” buttonthe LCD displays “24H Vent” icon, the air volume will run
at “Lo" mode. The default running time is 24 hrs.
zStop: when press the “Stop” button or the default time runs over, the LCD “24H Vent”
and the time display would disappear, and the machine will stop automatically.
Delay Vent Function
zStart: press the “Delay Vent” buttonthe LCD displays “Vent” icon, the air volume will
run at “Lo” mode. The default running time is 15 mins.
zStop: when press the “Stop” button or the default time runs over, the LCD “Vent” and
the time display would disappear, and the machine will stop automatically.
Swing Function – Auto (Up / down)
zWhen the fan motor is running, the default louver position is 90 degree. Press the
“Swing” button to adjust the louver angle. The LCD will display “ ” icon. Swing
function is not valid under the modes of “Vent”, 24H Vent”, “Delay Vent” and “6th
Sense”.
zSwing: when the fan motor is running, press the “Swing” button, the louver will turn
from 90 degree position to swing ranging from 45 degree to 120 degree. Press the
“Swing” button again, auto louver will stop at the desired angle.
zStop: when press the “Stop” button or the pre-set time runs over, the louver will
return to 0 degree position (auto louver will stop operate).
Every time when connecting to the power, it takes 5 mins for the sensor to get ready
before 6th sense function can be activated.
z

- 14 -
Swing Function – Manual (Left / Right)
zLeft and right louver function to provide selection of wide airflow distribution of up to
120 degree, or concentrated airflow.
Diffused Airflow Concentrated Airflow
Ionizer Function
zWhen the fan motor is running, press the “Ionizer” button, the LCD will display “ ”
icon. Ionizer function is not valid under the modes of “Vent”, 24H Vent”, “Delay Vent”
and “6th Sense”.
zStop: when Ionizer is running, press the “Ionizer” button, Ionizer will stop, and the LCD
“ ” icon would disappear. Press the “Ionizer” button again, Ionizer will turn on again
and the LCD will display “ ” icon as well.

- 15 -
澬Maintenance and Safety Items澭
Maintenance and cleaning:
භPlease do turn off the power before maintenance work.
1. Front panel cleaning:
ӑPlease use the soft rag to clean the dirty place of the front panel.
ӑPut a clean rag in the warm water dissolved with neutral detergent, and then use
the rag to wipe the front panel. Use another rag to wipe the cover. The surface
shall have no detergent residues.
2. Filter Cleaning:
A. Pre-Filter
ӑUse a rechargeable handheld vacuum cleaner to remove dust from the filter or
wash it in the water. Please make sure the filter is completely dried out before
putting back to the machine. It is recommended to clean the filter regularly to
ensure its efficiency.
B. Carbon Filter
ӑNeed to replace the carbon filter after usage for some time. In general, it is
recommended to replace the filter for every 3 months’ usage but the actual
replacement is subject to the frequency of usage and air quality of living
environment.
(Remark: The carbon filter is not washable.)
Installation of Carbon Filter:
1.
Pull out the Pre-
filter from the
right side of front panel.
2.
Unpack the filter packaging.
Place the carbon filter on the
pre
-filter and by attaching it onto
the various hooks.
3
. Put the Pre-
filter back to the
machine.
Front Panel
Filter

- 16 -
If it is difficult to pull out the filter, please open the front cover to take out the filter:
1.
Open the front cover by
holding the two
sides of front
cover.
2.
Pull out the Pre-filter.
3. Close the front cover and also
press the upper left & right
corners to close it completely.
Safety Items:
zDo not put your hands into the machine when running, to avoid from injury or
burn by the heater.
zDo not spray water into the main body, which may damage the motor, or cause
electric shock by the electricity leakage.
zIn order to avoid from any accident or injury, if any of the following symptoms and
abnormal situation occur, please switch off the electricity and ask qualified
electrical engineering contractor for repair or check. (Self repair by user is strictly
prohibited to avoid danger).
ӑTurn on the power, the fan does not start.
ӑThe power on and off.
ӑAbnormal sound and vibration during operation.
ӑPlastic smell or other abnormal smell occurs.
General Failure Treatment:
Phenomenon
Check
Solution
No operate when the power
turning on
No power supply
Switch
on the power
The
light of the Power
does not light on
Ask the qualified engineer
for repair
The display light does not display
conforming to the function
The machine does not
receive remote control
signal
Align the remote to the
machine or control the
remote in the
receiving
range
Abnormal
noise
Filter blocking
Clean the filter or replace
with a new filter
The remote control does not
work
Low battery
Change the battery

- 17 -
澬Nut list澭
Hardware packs Usage Name
Specification
Amount
1.
Standard setting
Fixed Remote
Plastic plug
Ɍ8X27
2
Screw
Ɍ4*25
2
2. Windows
type setting
Fix the body
Plastic plug
Ɍ8X27
4
Screw
Ɍ4*25
4
澬Product Specification澭
Model No. HB10813
Voltage (V) 220-240V~
Frequency (Hz) 50Hz
Power (W) 1350W
Product Size
H x W x D
mm
254 x 254 x 197
Product Size (excl. panel)
(H x W) mm 209 x 207
Net Weight (kg) 3.5
zBe aware that any change of the specification and design will not be informed.
zIf any item in the English Version is different from the Chinese Version, please refer to
the Chinese Version.
zThe latest operation manual will be based on the url: www.whirlpool.com.hk.
Table of contents
Other Whirlpool Fan manuals

Whirlpool
Whirlpool UXD8636DYS User manual

Whirlpool
Whirlpool FT9901 User manual

Whirlpool
Whirlpool WF4235ER1 User manual

Whirlpool
Whirlpool HB21417 User manual

Whirlpool
Whirlpool UXD8636DYS Installation guide

Whirlpool
Whirlpool FT3904 Installation guide

Whirlpool
Whirlpool FC0806 Installation guide

Whirlpool
Whirlpool FT3905 User manual

Whirlpool
Whirlpool WF143CM1 User manual