Wibre 4.0314 User manual

INSTALLATION MANUAL
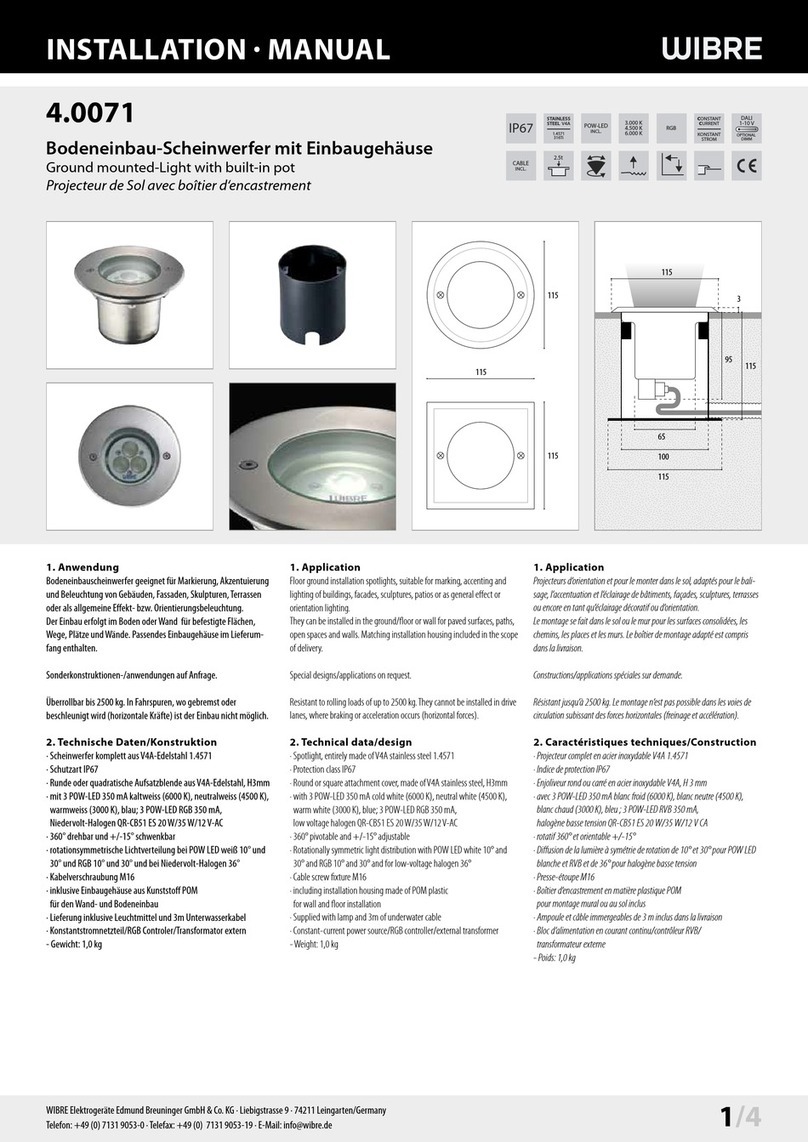
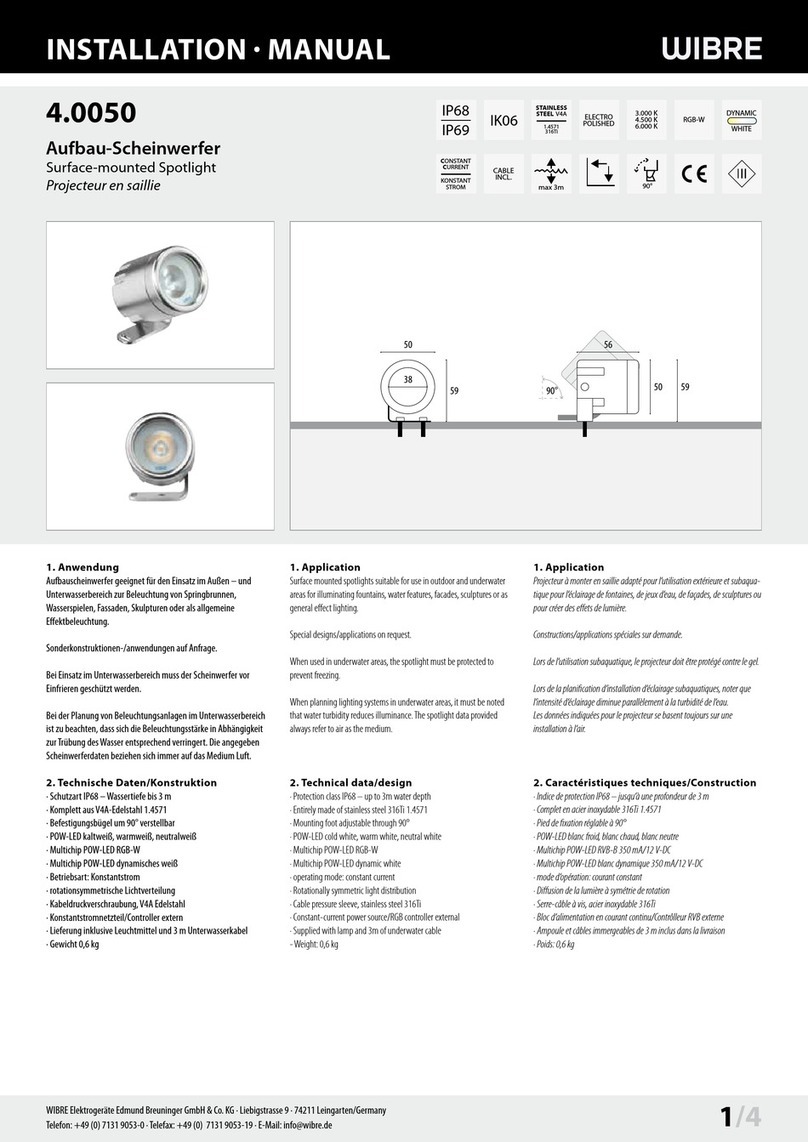
4.0314
Bodenaufbau-Scheinwerfer aus V4A-Edelstahl
Surface mounted-Light out of 316L stainless steel
Projecteur en saillie en INOX 316L
1. Anwendung
Bodenaufbauscheinwerfer geeignet für die Beleuchtung und
Akzentuierung von Gebäuden, Fassaden, Skulpturen, in Garten-
anlagen oder als allgemeine Eekt- bzw. Orientierungsbeleuchtung.
Einsetzbar als Pollerleuchte und in Situationen, wo ein Bodeneinbau
nicht möglich ist.
Die Installation erfolgt am Boden für befestigte Flächen, Wege,
Plätze und Wände.
Sonderkonstruktionen-/anwendungen auf Anfrage,
z.B. für temporäre Installationen (ortsveränderlich, seitlicher
Kabelauslass).
2. Technische Daten/Konstruktion
· Schutzart IP67
· komplett aus V4A-Edelstahl
· Scheinwerfer in kegelförmiger Aufbau-Hülse,
am Boden verschraubbar
· Reektor aus Reinstaluminium, symmetrisch, asymmetrisch
· temperaturbeständige Silikondichtung
· gehärtetes Sicherheitsglas (ESG)
· POW-LED-Platine temperaturüberwacht (NTC)
· Vorschaltgerät eingebaut bei HIT-CRI
· Vorschaltgerät separat bestellen bei POW-LED und QR-CBC51
· HIT-CRI ohne Leuchtmittel und ohne Kabel
· QR-CB51 mit Leuchtmittel, ohne Kabel
· POW-LED mit Leuchtmittel und Kabel
1. Application
Surface mounted spotlights, suitable for lighting and accentuating
buildings, façades, sculptures, gardens or for use as general effect lighting
or for orientation.
Can be used as a bollard light and in situations where a ground installation
is not possible.
They can be installed on the ground/floor for paved surfaces, paths, open
spaces and walls.
Special designs/applications on request, for example temporary installa-
tions (non-stationary, lateral cable exit).
2. Technical data/design
· Protection system IP67
· Made entirely of marine grade 316L stainless steel
· conical light, locking on the bottom
· Reflector made of high-purity aluminium, symmetrical/asymmetrical
· Temperature-resistant silicon seal
· Toughened safety glass (ESG)
· POW-LED-Platine temperatur control (NTC)
· fitted ballast device at HIT-CRI
· ballast device not included at POW-LED and QR-CBC51 (order separately)
· HIT-CRI without light source and without cable
· QR-CB51 with light source, without cable
· POW-LED with light source and cable
1. Application
Projecteurs en saille, adaptés pour l’éclairage et la mise en scène de
bâtiments, façades, sculptures, et jardins paysagés ou encore pour l’éclairage
d’effet ou d’orientation.
Peut être utilisé comme une lumière borne et dans les situations où une
installation au sol n‘est pas possible.
Le montage se fait sur le sol pour les surfaces consolidées, les chemins, les
places et les murs. Le boîtier de montage adapté est compris dans la livraison.
Constructions/applications spéciales sur demande, par exemple pour les
installations temporaires (non stationnaire, sortie de câble latérale).
2. Caractéristiques techniques/Construction
· Indice de protection IP67
· Complet, en acier inoxydable V4A, 316L
· Projecteurs conique, serrage au fond
· Réflecteur en aluminium extra-pur, symétrique, asymétrique
· Joint en silicone résistant aux températures élevées
· Verre trempé de sécurité (monocouche)
· platine POW-LED à température contrôlée (NTC)
· ballast intégré à HIT-CRI
· ballast pas inclus à POW-LED et QR-CBC51 (commander séparément)
· HIT-CRI sans ampoule et sans câble
· QR-CB51 avec ampoule, sans câble
· POW-LED avec ampoule et câble
WIBRE Elektrogeräte Edmund Breuninger GmbH & Co. KG · Liebigstrasse 9 · 74211 Leingarten/Germany
IP67
V4A
EDELSTAHL
KABEL
INKL
INKL
320
320
230
225
230
177
320
320
230
225
230
177

INSTALLATION MANUAL
3. Installation/Montage
Zur Installation sind die nationalen Sicherheitsvorschriften zu
beachten. Es wird keine Haftung für unsachgemäßen Einsatz oder
Montage übernommen. Bei nachträglichen Änderungen an den
Leuchten wird keine Haftung übernommen.
Montage des Scheinwerfers auf Beton, Paster, Platten, Holzdielen,
Erdreich, Kies, Rasenächen oder Beete möglich. Da bei Projekten
die Bodenverhältnisse und Einbausituation variieren ist keine
allgemein gültige Montageanleitung möglich. Die Piktogramme
verdeutlichen typische Montagebeispiele. 3.1/3.2
Montage
Bei der Installation sollte für eine sichere Standfestigkeit der Aufbau-
hülse gesorgt werden (gege benenfalls ein Fundament).
Die Aufbauhülse am Boden ausrichten und mittels Befestigungs-
material (nicht im Lieferumfang) am Boden befestigen. Bei losem
Untergrund kann die Hülse mit Haken oder ähnlichen Material xiert
werden. 3.2
Hinweis: Ausschließlich Befestigungsmaterial aus V4A-Edelstahl
verwenden!
Für gewünschte horizontale bzw. vertikale Ausrichtung der Leuchte
ist unbedingt auf eine korrekte Fixierung der Aufbauhülse und
Ausrichtung der Schraublöcher für den späteren Scheinwerfereinbau
zu achten. 3.3
3. Installation/mounting
When installing, observe the national safety regulations. We are not liable
for any improper use or installation. No liability will be accepted in case of
subsequent modification to the lights.
Installation of the spotlight is possible on concrete, pavement, slabs,
wooden floor boards, soil, gravel, lawn or garden beds. Since ground
conditions and installation circumstances vary, no general installation
instructions can be provided. The icons symbolise typical installation
examples. 3.1/3.2
Mounting
For the installation there should be a safe stability for the sleeve (a
basement if applicable).
Adjust the sleeve at the ground and fix it with the mounting material at the
ground. The mounting material is not included in the shipment!
In case of a loose underground you can fix the sleeve with a clamp or
something similar. 3.2
Note: Use only mounting material of V4A-stainless steel.
To be able to align the light horizontally or vertically, as desired, attention
must always be paid to correct fixing of the installation sleeve and align-
ment of the screw holes for later spotlight installation. 3.5./3.6.
3. Installation/Montage
Respecter les prescriptions nationales applicables en matière de sécurité.
Nous déclinons toute responsabilité pour l’utilisation ou le montage non
conforme. De même, nous réfutons toute responsabilité pour les modifi-
cations réalisées sur les luminaires.
Montage du projecteur sur le béton, les pavés, les plaques, les lames de
bois, la terre, le gravier, les espaces verts ou les plates-bandes. Étant donné
que dans les différents projets, les conditions du sol ainsi que la situation
d’installation varient, nous ne pouvons établir une notice de montage
générale. Les pictogrammes expliquent les exemples de montage type.
3.1/3.2
Montage
Le boîtier doit être stabilisé pendant l‘installation (en cas echéant sur un
fondement).
Après avoir ajusté le boîtier au sol il faut être fixé au sol avec le materiel de
fixage. La livraison ne contient pas le materiel de fixage!
En cas d‘un sous-sol instabile on peut fixer le boîtier avec un crochet ou
quelque chose similiaire. 3.2
Remarque: Il faut seulement utiliser du matériel de fixage en acier
inoxydable V4A.
Afin d‘assurer l‘alignement horizontal et vertical souhaité du projecteur,
veiller impérativement à une bonne fixation de la tube de montage et à
un alignement approprié des trous de vis pour le montage ultérieur du
projecteur. 3.5/3.6
2/4 WIBRE Elektrogeräte Edmund Breuninger GmbH & Co. KG · Liebigstrasse 9 · 74211 Leingarten/Germany
Telefon: +49 (0) 7131 9053-0 · Telefax: +49 (0) 7131 9053-19 · E-Mail: [email protected]
4x
2x
Dichtung
Gasket
Joint
3.1
3.4
3.2
3.3
Achtung: Anschluss der Netzteile muss stromlos erfolgen,
da sonst Entladungen im Netzteil zur Schädigung der LED führen
können. Es darf keine Primärspannung anliegen.
Hinweis: Die Installation eines bauseitigen Überspannungs-
schutzes nach DIN VDE 0100-443, DIN VDE 0100-534 und
EN 62305 wird empfohlen.
Hinweis: Nur Edelstahlwerkzeug verwenden!
Zur Vermeidung von Fremdrost!
Attention: The power supply must be connected without power,
since otherwise discharges in the power supply unit may damage
the LED. Primary voltage must not be present.
Note: Installation of customised surge protection in accordance
with DIN VDE 0100-443, DIN VDE 0100-534 and
EN 62305 is recommended.
Note: Only use tools made of stainless steel!
To avoid extraneous rust!
Attention: Les blocs d‘alimentation doivent être raccordés hors
tension, sinon des décharges dans le bloc d‘alimentation peuvent
détériorer les LED. Aucune tension primaire ne doit être présente.
Remarque: L‘installation d‘un système anti-surtension local
conforme aux normes DIN VDE 0100-443, DIN VDE 0100-534 et
EN 62305 est recommandée.
Remarque: L‘utilisation d‘outils en acier inoxydable est obliga-
toire! Pour éviter que la corrosion se forme!

INSTALLATION MANUAL
4. Connect the silicone cable
(if not already connected)
Open light (1), remove cover (2), glass pane (4), seals (5) and reflector
insert or light insert. (3.5)
Open cable screw fixture on the side or on the bottom; remove clamping
screw (9) and silicone seal insert (8), then slide over silicone cable (10),
push into cable screw fixture and securely tighten the clamping screw (9).
Caution: Use only temperature-resistant silicone cable with an external
diameter of 9 to 13 mm, which is resistant to mechanical notching; use of
different cable diameters is possible by replacing the silicone seal insert.
The silicone cable may also need to be routed in a protective tube. The sili-
cone cable should be connected to the mains supply under dry conditions
or specific connection boxes including sealing compounds are to be used if
directly connected in the ground. (e.g. WIBRE Article no. 9.9011 )
Closing the light
Staged silicone seal (5), glass pane (4) with grading facing up, paper
seal (3), cover (2) and screws (1) in the installation housing according
to the drawing and fix screws crosswise (3.7) (recommended fastening
torque: 3.0 Nm). Do not use a cordless screwdriver unless the torque can be
set. Screws must be evenly and securely tightened. Carry out a functional
test.
Note
In order to reduce condensation on the glass pane from penetrating
humidity after opening the light to replace or install the light source, we
recommend that the light be operated for approx. 10 minutes in an open
state. This must only be carried out under supervision and by qualified
technical staff. Afterwards, close the light as described above.
Caution: Only properly inserted seals, glass panes, covers and
properly tightened screws, as well as the recommended cable and securely
tightened cable screw fixtures ensure proper light operation.
Attention: Use only cable connected at the factory. Specify desired
cable length when ordering. Because of mechanical load, the cable should
also be laid in a protective tube.
The silicone cable should be connected to the mains supply under dry
conditions, or special connection units with sealing compound are to be
used if connected in the soil. (e.g. WIBRE article no. 9.9011)
4. raccordement du câble en silicone
comme suit, s’il n’est pas livré raccordé. Ouvrir le projecteur (1), l’enjoliveur
(2), le verre (4), les joints (5,6), retirer le réflecteur ou la lampe. (3.5).
Ouvrir les presse-étoupes sur le côté ou au sol ; retirer la vis de pression (9)
et la garniture d’étanchéité en silicone (8), le passer dans le câble en silicone
(10) et l’enfoncer dans le presse-étoupe et serrer la vis de pression (9).
Attention: Utiliser uniquement un câble en silicone résistant aux tempé-
ratures et aux entailles d’un diamètre de 9 à 13 mm ; d‘autres diamètres
sont possibles après remplacement de la garniture d’étanchéité en silicone.
Le cas échéant, il convient de poser le câble en silicone dans une gaine de
protection. Le raccordement du câble en silicone au secteur doit être réalisé
en milieu sec et lors du raccordement direct dans le sol, il convient d’utiliser
des unités de raccordement spéciales à masse de scellement. (p. ex. WIBRE
N° art. 9.9011)
Fermeture du projecteur
Le joint étagé en silicone (5), la vitre (4) étagée vers le haut, le joint en
papier (3), l’enjoliveur (2), les vis (1) dans le boîtier du projecteur en
respectant le schéma et serrer les vis en croix (3.7) (couple de serrage
recommandé 3,0 Nm). Ne pas utiliser de visseuse sans fil sans réglage
du couple. Veiller au siège uniforme et fixe des vis. Effectuer un test de
fonctionnement.
Remarque
afin de réduire la formation de condensation sur la vitre en raison de
l’humidité de l’air susceptible de pénétrer lors de la mise en place de
l’ampoule ou de son remplacement, il est recommandé de faire fonctionner
le projecteur pendant env. 10 minutes en le laissant ouvert. Cette opération
doit impérativement être effectuée par un personnel spécialisé ou sous sa
surveillance. Ensuite, fermer le projecteur comme décrit ci-dessus.
Attention: seul les joints, vitres, enjoliveurs correctement mis en place
et les vis correctement serrées ainsi que l’utilisation du câble recommandé et
des presse-étoupes serrée garantissent le fonctionnement du projecteur.
Attention: utiliser uniquement les câbles raccordés en usine. Indiquer
la longueur de câble souhaitée lors de la commande. En cas de sollicitation
mécanique, le câble doit être posé dans une gaine de protection.
Le raccordement du câble en silicone au secteur doit être réalisé en milieu
sec et, dans le cas d‘un raccordement direct dans le sol, il convient d’utiliser
des unités de raccordement spéciales à masse de scellement. (par ex. WIBRE
Réf. 9.9011)
WIBRE Elektrogeräte Edmund Breuninger GmbH & Co. KG · Liebigstrasse 9 · 74211 Leingarten/Germany
4. Anschluss des Silikonkabels
(falls nicht bereits angeschlossen)
Scheinwerfer önen (1), Blende (2), Glas (4), Dichtungen (5),
Reektor- bzw. Leuchteneinsatz entfernen. (3.11)
Kabelverschraubung seitlich bzw. am Boden önen; Druck-
schraube (9) und Silikondichteinsatz (8) entfernen , danach über
Silikonkabel führen (10) in Kabelverschraubung eindrücken und
Druckschraube (9) fest anziehen. Achtung: Nur temperaturbe-
ständiges und mechanisch kerbfestes Silikonkabel mit Außendurch-
messer von 9–13 mm verwenden, andere Kabeldurchmesser durch
Austausch des Silikondichteinsatzes möglich. Gegebenenfalls muss
das Silikonkabel zusätzlich in einem Schutzrohr verlegt werden.
Der Anschluss des Silikonkabels an das Hauptnetz sollte im Tro-
ckenen erfolgen bzw. bei Anschluss direkt im Erdreich sind spezielle
Anschlusseinheiten mit Vergussmasse zu verwenden. (z.B. WIBRE
Art.Nr. 9.9011)
Verschließen des Scheinwerfers
Silikonstufendichtung (5), Glassch eibe (4) mit Abstufung
nach oben, Papierdichtung (3), Blende (2), Schrauben (1) laut
Zeichnung (3.5) im Scheinwerfergehäuse einlegen und über
Kreuz (3.7) verschrauben (empfohlenes Anzugsdrehmoment 3,0
Nm). Akkuschrauber ohne Drehmomenteinstellmöglichkeit nicht
verwenden. Es ist auf gleichmäßigen, festen Sitz der Schrauben zu
achten. Funktionsprobe durchführen.
Hinweis
Um die Kondensbildung an der Glasscheibe durch eingetretene
Luftfeuchtigkeit nach dem Önen bei einem Leuchtmitteleinbau
bzw. –wechsel zu reduzieren, ist es empfehlenswert die Leuchte ca.
10 Minuten im geöneten Zustand zu betreiben. Dies darf nur unter
Aufsicht und von Fachpersonal ausgeführt werden. Danach kann die
Leuchte wie oben beschrieben geschlossen werden.
Achtung: Nur richtig eingelegte Dichtungen, Gläser, Abschlussblen-
den und richtig angezogene Schrauben sowie empfohlenes Kabel
und fest angezogene Kabelverschraubungen gewährleisten den
einwandfreien Scheinwerferbetrieb.
Achtung: Nur werkseitig angeschlossenes Kabel verwenden.
Gewünschte Kabellänge bei Bestellung angeben. Wegen
mechanischer Beanspruchung sollte das Kabel zusätzlich in einem
Schutzrohr verlegt werden.
Der Anschluss des Kabels an das Hauptnetz sollte im
Trockenen erfolgen bzw. bei Anschluss direkt im Erdreich sind
spezielle Anschlusseinheiten mit Vergussmasse zu verwenden.
(z.B. WIBRE Art.Nr. 9.9011)
A
B
C
D
E
F
G
H
6
5
4
3
2
1
N L
D
8 9
10
3.5
3.6
3.7

INSTALLATION MANUAL
4/4 WIBRE Elektrogeräte Edmund Breuninger GmbH & Co. KG · Liebigstrasse 9 · 74211 Leingarten/Germany
Telefon: +49 (0) 7131 9053-0 · Telefax: +49 (0) 7131 9053-19 · E-Mail: [email protected]
5. Montage des Scheinwerfers
Die mitgelieferte Dichtung auf die obere Fläche der Hülse einlegen.
(Verhindert Kontaktkorrosion an den Edelstahlteilen zwischen
Scheinwerfergehäuse und Hülse.) Die Leuchte in die Aufbauhülse
einsetzen und ca. 0,5 m Kabel in das Gehäuse einlegen und bis auf
Oberkante der Abschlussäche einschrauben. 3.4
6. Anschluß an Betriebsgeräte
Scheinwerfer mit POW-LED Einheiten sind nur in Reihe anzu-
schließen. Einzelanschlussader entsprechend den Vorschriften an
den Netz teilen elektrisch anschließen und Schutzleiterverbindung
vornehmen. Reektor-/ Leuchteneinsatz montieren und Leuchtmit-
tel einsetzen, sofern nicht im Lieferumfang bereits eingebaut.
Die maximale Anzahl der Leuchten sind dem Manual des Netzteiles
zu entnehmen. Gegebenenfalls Reihenanschluß in separater Vertei-
lerbox vornehmen, die im Außenbereich zusätzlich mit Vergußmasse
gegen Feuchtigkeit schützen.
7. Wartung und Leuchtmittelwechsel
Scheinwerfer spannungsfrei schalten und Gehäuse wie oben
beschrieben önen (3.5.) Leuchtmittel durch identisches aus-
tauschen und Gehäuse laut Vorschrift wieder verschließen (3.5.)
Hierbei Dichtungen zwischen Glas und Gehäuse und in der Kabel-
verschraubung auf Abnutzung oder Beschädigung überprüfen und
gegebenenfalls wechseln. Verunreinigungen und Ablagerungen auf
Glas oder Edelstahlteilen sind mit handelsüblichen Reinigungsmit-
teln zu entfernen.
8. Allgemeine Wartungshinweise
- Beim Reinigen darf die Leuchte nicht mit Metall angreifenden
Reinigungsmitteln in Berührung kommen. Der Einsatz salzsäure-
haltiger Reinigungsmittel an und in der Nähe von Scheinwerfer-
teilen aus Edelstahl ist in jedem Fall zu unterlassen.
- Scheinwerfer und Einbaugehäuse regelmäßig reinigen,
um Fremdrostablagerungen zu vermeiden.
- Achtung: Keine Hochdruckreiniger verwenden.
- Achtung: Strahler vor Einfrieren schützen, gegebenenfalls
müssen diese demontiert oder speziell geschützt werden.
- Verloren gegangene Schrauben dürfen nur durch Schrauben aus
V4A ersetzt werden.
- Je nach Beanspruchung (Höhe der Watttage, äußere Umstände) ist
alle 5–8 Jahre ein Wechsel der Dichtungen (Glasscheibe, Verschrau-
bung, O-Ring) und der Kabel zu empfehlen.
9. Garantiebestimmungen
Folgende Garantiezeiten und Bestimmungen gelten vom Tage der
Lieferung an:
- 24 Monate auf WIBRE-Scheinwerfer.
- Von den Garantieansprüchen ausgenommen sind Leuchtmittel
- Unter die Garantie fallen nachweisbare Material-, Konstruktions-
und Verarbeitungsfehler vonseiten des Herstellers.
- Für Schäden, welche durch Nichtbeachtung dieser Betriebs-
anleitung, oder durch unsachgemäße Reparatur entstehen,
können wir keine Garantie übernehmen.
- Keine Garantie besteht, wenn die Installation nicht korrekt nach
den Bestimmungen vorgenommen wurde oder bei Verwendung
nicht geeigneter Leuchtmittel bzw. Anschlusskabel.
- Änderungen, die dem technischen Fortschritt dienen, behalten
wir uns vor.
5. Fixing of the Spotlight
Place the supplied gasket on the upper surface of the sleeve. (Prevents
contact corrosion on the stainless steel parts between the light housing
and housing.) Place the light into the installation sleeve, insert approx. 0.5
m of cable into the housing, and tighten the screws until the housing is
flush with the top edge of the final surface. 3.4
6. Connection to power units
Spotlights with POW-LED units may only be connected in series.
Electrically connect individual wires to the power supply according to
regulations and establish the protective earth connection according to the
regulations. Install the reflector insert or lighting insert and insert the light
source if it was not already installed on delivery.
The maximum number of lights can be taken from the power supply
manual. bIf necessary. make the serial connection in a separate distribution
box, which outside must also be protected against moisture with sealing
compound.
7. Relamping and Maintenance
Always dismantle and assemble the floodlight and open it as described
above (3.5).Change the lamp with an identical one and close as
described above (3.5)
Make sure that the gaskets in between glass and housing and the ones in
the cable gland are in a good condition, make sure that there is no dirt on
the gaskets, if damaged change them immediately.
Soiling on the floodlight should be removed frequently by using commer-
cial stainless steel cleansers.
8. General service information
- When cleaning, make sure that the lights do not come into contact with
metal-corroding cleaning agents. The use of cleaning agents containing
hydrochloric acid on and near spotlight parts made of stainless steel must
always be avoided.
- Clean spotlights and installation housing regularly to avoid extraneous
rust deposits.
- Attention: Do not use high-pressure cleaners.
- Attention: Protect lightbulbs from freezing; they must be removed,
if necessary, or specially protected.
- Lost screws may only be replaced by screws made of V4A.
- Depending on load (wattage, external conditions), we recommend
changing the seals (on the glass pane, screws, O-ring) and cable every
5–8 years.
9. Warranty conditions
The following warranty periods and conditions apply from the day of
delivery:
- 24 months on WIBRE spotlights.
- Lamps are excluded from warranty claims.
- The warranty covers verifiable material, design and work errors by the
manufacturer.
- We cannot accept liability for damages caused by failure to comply with
this operating manual or through improper repair.
- The warranty is void if the installation was not performed properly
according to the instructions or unsuitable lamps or connecting cables
are used.
- We reserve the right to make changes for the purpose of technical
progress.
5. Fixation du Projecteur
Insérer le joint fourni sur la surface supérieure de la tube. (Empêche la
corrosion de contact sur les pièces en acier inoxydable entre le boîtier du
projecteur et le boîtier d’encastrement.) Mettre le projecteur en place dans
le tube de montage, placer env. 0,5 m de câble dans le boîtier et le visser
jusqu‘à affleurement avec la surface de finition. 3.4
6. Raccordement aux blocs d‘alimentation
Les projecteurs à POW-LED doivent uniquement être raccordés en série.
Raccorder les différents conducteurs aux blocs d‘alimentation conformément
aux prescriptions et effectuer le raccordement du conducteur de terre. Monter
le réflecteur/la lampe et mettre en place l’ampoule si elle n’est pas montée
livrée. Le nombre maximal de projecteurs pouvant être reliés est indiqué dans
le manuel du bloc d‘alimentation. Le cas échéant, procéder au raccordement
en série dans des boîtiers répartiteurs séparés dont l‘extérieur doit en outre
être protégé contre l‘humidité à l‘aide d‘une masse de scellement.
7. Maintenance et changement de lampe
Mettre le projecteur hors circuit et ouvrir le boîtier comme expliqué ci-dessus
(voir dessin 3.5) Changer l‘ampoule avec une ampoule identique et serrer le
projecteur comme indiqué.(voir dessin 3.5)
Observer soigneusement les joints entre le verre et le boîtier et ceux au
presse-étoupe, changer les s‘ils sont abîmés ou pourris.
Il est nécessaire de nettoyer régulièrement les parties en Inox et de les
débarrasser des dépôts et souillures avec un produit courant d‘entretien
de l‘Inox.
8. Instructions d‘entretien générales
- Lors du nettoyage, le projecteur ne doit pas entrer en contact avec des
détergents agressifs contre les métaux. L‘utilisation de détergent à base
d‘acide chlorhydrique sur et à proximité des pièces du projecteur en acier
inoxydable est totalement interdite.
- Nettoyer régulièrement le projecteur et le boîtier de montage afin d‘éviter
tout dépôt d‘oxydation.
- Attention: ne pas utiliser de nettoyeur haute pression.
- Attention: Protéger les projecteurs contre le gel ; le cas échéant, les
démonter ou assurer une protection spéciale.
- Les vis perdues ne doivent être remplacées que par des vis en acier
inoxydable V4A.
- Selon la sollicitation (puissance, circonstances environnementales), il est
recommandé de procéder au changement des joints (sur les vitres, les
raccords vissés et les joints toriques) et du câble tous les 5 à 8 ans.
9. Conditions de garantie
Les délais et dispositions de garantie suivantes s‘appliquent à compter de la
date de livraison :
- 24 mois sur le projecteur WIBRE.
- Sont exclus des conditions de garantie les ampoules.
• La garantie couvre les défauts de matériaux, les vices de construction et de
traitement dont la preuve est apportée qu‘ils sont imputables au fabricant.
• Les dommages, résultant du non-respect de la présente notice d‘utilisation
ou d‘une réparation non conforme, sont exclus de la garantie.
• Nous déclinons toute garantie dans les cas où l‘installation n‘a pas été
effectuée dans les règles de l‘art selon les instructions ou lors de l‘utilisation
d‘ampoules ou de câbles de raccordement non appropriés.
• Nous nous réservons le droit de réaliser toute modification répondant au
progrès technique.
W547i01 Stand 12.13 - Technische Änderungen vorbehalten - Für Druckfehler übernehmen wir keine Haftung
Other Wibre Outdoor Light manuals
Popular Outdoor Light manuals by other brands

Inspire
Inspire ROVAI 3276000700913 instruction manual

WE-EF
WE-EF SLS400 LED Series Installation and maintenance instructions

BSi
BSi iAXIS installation guide

Nemo
Nemo PROJECTOR 365 PRJ EDW 32 Assembly instructions

Roger Pradier
Roger Pradier Dallas manual

SONNEMAN
SONNEMAN REALS Series Assembly instructions

Patriot Lighting
Patriot Lighting lvy-24PT-SLPB installation manual

VELAMP
VELAMP SL410 quick start guide

BRIGHTECH
BRIGHTECH Litespan instructions

LF
LF Portfolio 7404280383 quick start guide

Solera
Solera RP-SAL-8W SF-GY-G2 Series instructions

Access Lighting
Access Lighting SQUARE 20399LEDMG installation instructions