manuals.online logo
Brands
  1. Home
  2. •
  3. Brands
  4. •
  5. Wildgame
  6. •
  7. Scouting Camera
  8. •
  9. Wildgame I6 User manual

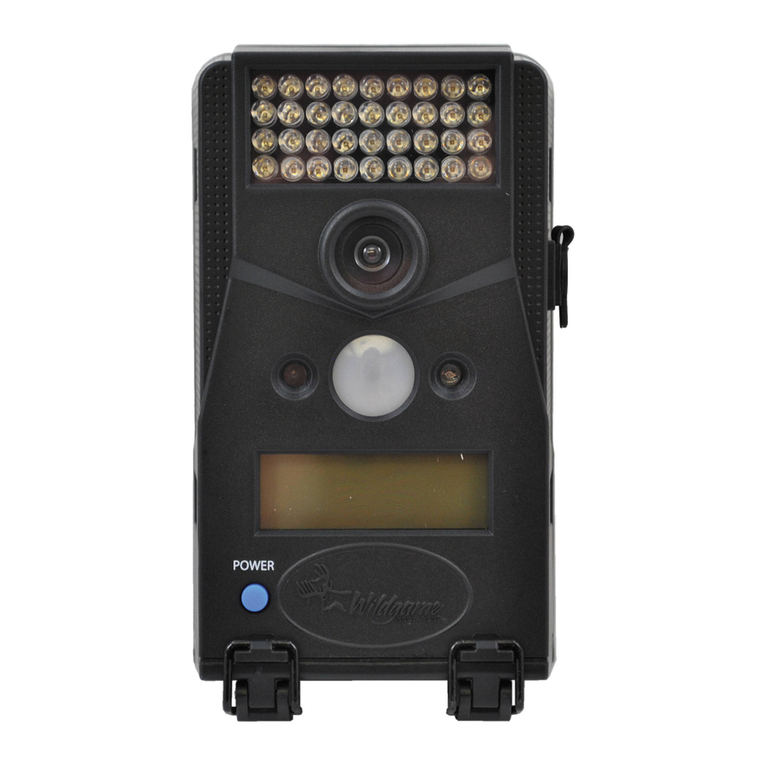
Wildgame I6 User manual

Other Wildgame Scouting Camera manuals

Wildgame FZ12 User manual

Wildgame

Wildgame FZ12 User manual

Wildgame TITAN User manual

Wildgame

Wildgame TITAN User manual

Wildgame Scrapeline User manual

Wildgame

Wildgame Scrapeline User manual

Wildgame N6E User manual

Wildgame

Wildgame N6E User manual

Wildgame R12B20-7 User manual

Wildgame

Wildgame R12B20-7 User manual

Wildgame IR2 Installation and operation manual

Wildgame

Wildgame IR2 Installation and operation manual

Wildgame Prizm User manual

Wildgame

Wildgame Prizm User manual

Wildgame Edge User manual

Wildgame

Wildgame Edge User manual

Wildgame N2E User manual

Wildgame

Wildgame N2E User manual

Wildgame r12i20 User manual

Wildgame

Wildgame r12i20 User manual

Wildgame DRT Extreme User manual

Wildgame

Wildgame DRT Extreme User manual

Wildgame W4E User manual

Wildgame

Wildgame W4E User manual

Wildgame L10b5 User manual

Wildgame

Wildgame L10b5 User manual

Wildgame WRAITH User manual

Wildgame

Wildgame WRAITH User manual

Wildgame Cloak Pro User manual

Wildgame

Wildgame Cloak Pro User manual

Wildgame t5i20 User manual

Wildgame

Wildgame t5i20 User manual

Wildgame SC20i20-7 User manual

Wildgame

Wildgame SC20i20-7 User manual

Wildgame Innovations Terra Extreme User manual

Wildgame

Wildgame Innovations Terra Extreme User manual

Wildgame W3EA User manual

Wildgame

Wildgame W3EA User manual

Wildgame W6EF User manual

Wildgame

Wildgame W6EF User manual

Wildgame Innovations Mirage User manual

Wildgame

Wildgame Innovations Mirage User manual

Wildgame Titan Extreme User manual

Wildgame

Wildgame Titan Extreme User manual

Wildgame Innovations Terra 8 User manual

Wildgame

Wildgame Innovations Terra 8 User manual

Wildgame SPARK User manual

Wildgame

Wildgame SPARK User manual

Popular Scouting Camera manuals by other brands

Stealth Cam CORE STC-Z3IRTL instruction manual

Stealth Cam

Stealth Cam CORE STC-Z3IRTL instruction manual

Suntek HC-800M user manual

Suntek

Suntek HC-800M user manual

Spypoint G4 user manual

Spypoint

Spypoint G4 user manual

Nestbox C13 user guide

Nestbox

Nestbox C13 user guide

Duramaxx 10029765 user manual

Duramaxx

Duramaxx 10029765 user manual

Wildview STC-TGL1 user manual

Wildview

Wildview STC-TGL1 user manual

Bestok 5210GM user manual

Bestok

Bestok 5210GM user manual

BlazeVideo A280W instruction manual

BlazeVideo

BlazeVideo A280W instruction manual

Primos Bullet Proof 2 instruction manual

Primos

Primos Bullet Proof 2 instruction manual

Brecom C2400 user manual

Brecom

Brecom C2400 user manual

Outdooree R6 user manual

Outdooree

Outdooree R6 user manual

Spypoint LINK-CT user manual

Spypoint

Spypoint LINK-CT user manual

Suntek HC-550A user manual

Suntek

Suntek HC-550A user manual

BolyGuard MG882K-8M user manual

BolyGuard

BolyGuard MG882K-8M user manual

ION Camocam Wi-Fi quick start guide

ION

ION Camocam Wi-Fi quick start guide

Minox DTC 400 SLIM instructions

Minox

Minox DTC 400 SLIM instructions

ElectrIQ Pro Outback MINI user manual

ElectrIQ

ElectrIQ Pro Outback MINI user manual

Boly BG710 Series user manual

Boly

Boly BG710 Series user manual

manuals.online logo
manuals.online logoBrands
  • About & Mission
  • Contact us
  • Privacy Policy
  • Terms and Conditions

Copyright 2025 Manuals.Online. All Rights Reserved.

Model # I6
602 Fountain Parkway
Grand Prairie, TX 75050
800.847.8269
“Wildgame Innovations”and the “Button Logo”are TM trademarks of Wildgame Innovations, LLC.
“Sport Responsible” , “Redux” and “Flextime”are TM trademarks of WGI Innovations, LTD. User’s Manual
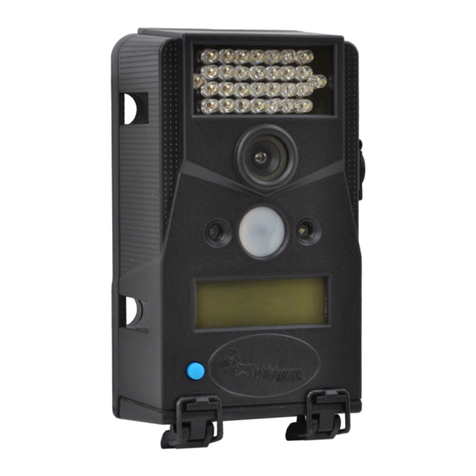
Infrared Digital Scouting Camera
Includes
Features
USB Cable 2 - Bungee Cords User Manual
Camera UnitFlextime Player
Software
RESOLUTION
FLASH
FLASH RANGE
SENSOR
SENSOR RANGE
IMAGE FORMAT
MEMORY
USB
IMAGE RESOLUTION
POWER SUPPLY
AUXILIARY POWER
BATTERY LIFE
ONBOARD POWER
HOUSING
MOUNTING
REDUX
MAX: 6 MP Still
18 High Intensity Infrared LED’s
up to 55 feet
Passive Infrared Sensor (PIR) Motion and Heat
up to 60 feet
JPEG - Digital Stills/ AVI-Digital Video
up to 32GB SD Card (not included and required)
Class 4 and above recommended
5-PIN Mini USB style - included
6 MP
4 C-Cell batteries (not included and required)
Alkaline recommended
External power port
Estimated up to 1 year or 40,000 photos
Built in battery to retain Date and Time
Weather resistant with rubber gaskets
2 Bungee cords - included
Technology to reduce motion blur during
transition time
page 1
page 2
NOTE: Flextime Player Software is optional.
Flextime files can be played by using most
media players.
Note: Battery life will vary depending on camera settings as well as environ-
mental conditions. Camera settings such as shorter delay periods or even using
Flextime mode are examples of settings that can reduce overall battery life.
Environmental conditions such as extreme cold can also inuence battery life.
Installing Batteries
Open the door at the bottom of
the camera by unlatching the
locking tab.
1.
With the camera facing up, open
the battery compartment cover
by sliding the latch to the left.
2.
With the bottom of the camera
towards you, load two C-cell batteries
with the positive ends towards you in
the left battery chamber and load two
C-cell batteries with the negative
ends towards you in the right battery
chamber.
3.
Close battery compartment cover. To
latch the cover simply pull the latch
slightly to the left as you close the
battery compartment cover.
4. Load SD memory card (up to 32GB not
included) into the SD card slot with
the connectors facing up.
5.
+
-
NOTE:
Do not mix old and new batteries. Do not mix
alkaline, standard (carbon-zinc) or rechargable
(ni-cad, ni-mh, etc) batteries.
TIPS:
Make sure the SD Card is unlocked
(small switch on the side of the SD Card)
or the camera LCD will read “LOCK”.
IMPORTANT:
Make sure the camera is powered off
before removing or installing an SD card.
If you are using an SD card from other
cameras, please make sure to format the
SD card in your computer prior to use in
your camera. New cards are ok to use
straight from the package.
page 3
page 4
Ready
Time/Date
Location
Trigger
Flextime
PIR Mode
PIR Active
Delay
PIR Mode Flextime Both
P1 P2 Interval
Still Video
24Hr Day Night
30sec 1min 2min 5min
Ready
Time/Date
Location
Trigger
Flextime
PIR Mode
PIR Active
Delay
PIR Mode Flextime Both
P1 P2 Interval
Still Video
24Hr Day Night
30sec 1min 2min 5min
Power Save
Power On
Setting Time
Test Mode
1.
Check the battery level icon to
ensure the batteries just
installed contain the proper
charge level. If so, you are ok to
proceed with camera use.
2.
To turn the unit ON, press and
release the power button.
1. To change date and time, start by
pressing and release the center
navigation button to set the hour.
2. Press the left or right navigation
button to go up or down in
sequence.
3. When the hour is set, repeat steps
1 and 2 to set the minutes.
page 5
page 6
NOTE: LCD cycle through camera
information. PIR picture number >
Flextime number > Remaining
pictures > Time
After 30 seconds without any
buttons being pushed, the LCD
will turn off and camera enters
into Power Save or Ready Mode.
1.
The LCD screen can be awak-
ened by pressing the Power
button briefly.
Note: The LCD will not “wake up” when
camera is writing to memory.
2.
PIR LED Status Light: During the
first 2 minutes of Ready Mode,
the red light will illuminate when
a PIR event is triggered. The red
light will blink for 2-3 seconds
when photo is taken during this
first 2 minutes. After 2 minutes
all indicator lights will turn off
until a button is pressed.
1. LCD Ready Mode: The camera
will automatically enter Ready
Mode if a button is not pressed
for greater than 30 seconds. The
status lights will illuminate for a
total of 2 minutes.
2.
Ready
Time/Date
Location
Trigger
Flextime
PIR Mode
PIR Active
Delay
PIR Mode Flextime Both
P1 P2 Interval
Still Video
24Hr Day Night
30sec 1min 2min 5min
POWER
POWER
Ready
Time/Date
Location
Trigger
Flextime
PIR Mode
PIR Active
Delay
PIR Mode Flextime Both
P1 P2 Interval
Still Video
24Hr Day Night
30sec 1min 2min 5min
Ready
Time/Date
Location
Trigger
Flextime
PIR Mode
PIR Active
Delay
PIR Mode Flextime Both
P1 P2 Interval
Still Video
24Hr Day Night
30sec 1min 2min 5min
Ready
Time/Date
Location
Trigger
Flextime
PIR Mode
PIR Active
Delay
PIR Mode Flextime Both
P1 P2 Interval
Still Video
24Hr Day Night
30sec 1min 2min 5min
Ready
Time/Date
Location
Trigger
Flextime
PIR Mode
PIR Active
Delay
PIR Mode Flextime Both
P1 P2 Interval
Still Video
24Hr Day Night
30sec 1min 2min 5min
Ready
Time/Date
Location
Trigger
Flextime
PIR Mode
PIR Active
Delay
PIR Mode Flextime Both
P1 P2 Interval
Still Video
24Hr Day Night
30sec 1min 2min 5min
Ready
Time/Date
Location
Trigger
Flextime
PIR Mode
PIR Active
Delay
PIR Mode Flextime Both
P1 P2 Interval
Still Video
24Hr Day Night
30sec 1min 2min 5min
Ready
Time/Date
Location
Trigger
Flextime
PIR Mode
PIR Active
Delay
PIR Mode Flextime Both
P1 P2 Interval
Still Video
24Hr Day Night
30sec 1min 2min 5min
Ready
Time/Date
Location
Trigger
Flextime
PIR Mode
PIR Active
Delay
PIR Mode Flextime Both
P1 P2 Interval
Still Video
24Hr Day Night
30sec 1min 2min 5min
Setting Date
Trigger Flextime
Location
1. Press the center navigation
button after setting the minute to
change the Day.
2. Press the left or right navigation
button to go up or down in
sequence.
3. When the DAY is set, repeat
steps 1 and 2 to set the Month
and Year.
1. Press the center navigation button
while Location is selected. The
first character will be blinking.
1. Press the center navigation button
while Trigger is selected. The
highlighted option will be blinking.
TRIGGER:
PIR MODE: Takes a photo only when the PIR
sensor is triggered.
FLEXTIME(Time Lapse): Takes time lapse images at
set intervals during the key movement periods
of the day, depending on your Flextime settings.
BOTH: Both PIR and Flextime are active.
The Interval setting is set by the Delay Setting on
the camera with a 1 minute minimum Flextime
delay. See chart on the next page for Flextime
options.
NOTE: Camera needs at least 48 hours in the
field to acclimate to the environment for
Flextime to function properly.
Reminder: Only use “Flextime” and “Both”
modes if you are wanting to use time lapse
technology. These modes can reduce battery life
versus the standard “PIR” mode.
2. Press the left or right navigation
button to move to different
options. Press the center naviga-
tion button to save the setting.
2. Press the left or right navigation
button to go up or down in
sequence. Press the center
navigation button when the
character shown is what you want
and move to the next character.
3. Repeat steps 1 and 2 to set the rest
of the characters. Press the center
navigation button to skip spaces
and save the location name.
1. Press the center navigation button
while Flextime is selected. The
highlighted option will be blinking.
2. Press the left or right navigation
button to move to different options.
Press the center navigation button
to save the setting.
page 7
page 8
Ready
Time/Date
Location
Trigger
Flextime
PIR Mode
PIR Active
Delay
PIR Mode Flextime Both
P1 P2 Interval
Still Video
24Hr Day Night
30sec 1min 2min 5min
POWER
This setting allows you to choose the mode in
which the camera will be capturing images.
POWER
Save the location of the area the camera was
installed. This is for your reference and is
optional. If you do not wish to name your location
skip to the next step.
Ready
Time/Date
Location
Trigger
Flextime
PIR Mode
PIR Active
Delay
PIR Mode Flextime Both
P1 P2 Interval
Still Video
24Hr Day Night
30sec 1min 2min 5min
Ready
Time/Date
Location
Trigger
Flextime
PIR Mode
PIR Active
Delay
PIR Mode Flextime Both
P1 P2 Interval
Still Video
24Hr Day Night
30sec 1min 2min 5min
Ready
Time/Date
Location
Trigger
Flextime
PIR Mode
PIR Active
Delay
PIR Mode Flextime Both
P1 P2 Interval
Still Video
24Hr Day Night
30sec 1min 2min 5min
Ready
Time/Date
Location
Trigger
Flextime
PIR Mode
PIR Active
Delay
PIR Mode Flextime Both
P1 P2 Interval
Still Video
24Hr Day Night
30sec 1min 2min 5min
Ready
Time/Date
Location
Trigger
Flextime
PIR Mode
PIR Active
Delay
PIR Mode Flextime Both
P1 P2 Interval
Still Video
24Hr Day Night
30sec 1min 2min 5min
Ready
Time/Date
Location
Trigger
Flextime
PIR Mode
PIR Active
Delay
PIR Mode Flextime Both
P1 P2 Interval
Still Video
24Hr Day Night
30sec 1min 2min 5min
Ready
Time/Date
Location
Trigger
Flextime
PIR Mode
PIR Active
Delay
PIR Mode Flextime Both
P1 P2 Interval
Still Video
24Hr Day Night
30sec 1min 2min 5min
Setting Date
Trigger Flextime
Location
1. Press the center navigation
button after setting the minute to
change the Day.
2. Press the left or right navigation
button to go up or down in
sequence.
3. When the DAY is set, repeat
steps 1 and 2 to set the Month
and Year.
1. Press the center navigation button
while Location is selected. The
first character will be blinking.
1. Press the center navigation button
while Trigger is selected. The
highlighted option will be blinking.
TRIGGER:
PIR MODE: Takes a photo only when the PIR
sensor is triggered.
FLEXTIME(Time Lapse): Takes time lapse images at
set intervals during the key movement periods
of the day, depending on your Flextime settings.
BOTH: Both PIR and Flextime are active.
The Interval setting is set by the Delay Setting on
the camera with a 1 minute minimum Flextime
delay. See chart on the next page for Flextime
options.
NOTE: Camera needs at least 48 hours in the
field to acclimate to the environment for
Flextime to function properly.
Reminder: Only use “Flextime” and “Both”
modes if you are wanting to use time lapse
technology. These modes can reduce battery life
versus the standard “PIR” mode.
2. Press the left or right navigation
button to move to different
options. Press the center naviga-
tion button to save the setting.
2. Press the left or right navigation
button to go up or down in
sequence. Press the center
navigation button when the
character shown is what you want
and move to the next character.
3. Repeat steps 1 and 2 to set the rest
of the characters. Press the center
navigation button to skip spaces
and save the location name.
1. Press the center navigation button
while Flextime is selected. The
highlighted option will be blinking.
2. Press the left or right navigation
button to move to different options.
Press the center navigation button
to save the setting.
page 7
page 8
Ready
Time/Date
Location
Trigger
Flextime
PIR Mode
PIR Active
Delay
PIR Mode Flextime Both
P1 P2 Interval
Still Video
24Hr Day Night
30sec 1min 2min 5min
POWER
This setting allows you to choose the mode in
which the camera will be capturing images.
POWER
Save the location of the area the camera was
installed. This is for your reference and is
optional. If you do not wish to name your location
skip to the next step.
Ready
Time/Date
Location
Trigger
Flextime
PIR Mode
PIR Active
Delay
PIR Mode Flextime Both
P1 P2 Interval
Still Video
24Hr Day Night
30sec 1min 2min 5min
Ready
Time/Date
Location
Trigger
Flextime
PIR Mode
PIR Active
Delay
PIR Mode Flextime Both
P1 P2 Interval
Still Video
24Hr Day Night
30sec 1min 2min 5min
Ready
Time/Date
Location
Trigger
Flextime
PIR Mode
PIR Active
Delay
PIR Mode Flextime Both
P1 P2 Interval
Still Video
24Hr Day Night
30sec 1min 2min 5min
Ready
Time/Date
Location
Trigger
Flextime
PIR Mode
PIR Active
Delay
PIR Mode Flextime Both
P1 P2 Interval
Still Video
24Hr Day Night
30sec 1min 2min 5min
PIR Mode
1. Press the center navigation
button while PIR Mode is
selected. The highlighted option
will be blinking.
PIR MODE:
STILL: The camera takes still photographs.
VIDEO: The camera takes 30 second videos.
2. Press the left or right navigation
button to move to different
options. Press the center naviga-
tion button to save the setting.
PIR Active
1. Press the center navigation
button while PIR Active is
selected. The highlighted option
will be blinking.
PIR ACTIVE:
24 HR: The PIR can be active at all times.
DAY: The PIR can be active in daylight hours
only.
NIGHT: The PIR can be active in nighttime
hours only.
2. Press the left or right navigation
button to move to different
options. Press the center naviga-
tion button to save the setting.
page 9
page 10
Flextime period:
1. 15 min before Sunrise
to 1 hour after Sunrise.
2. 1 hour before Sunset
to 15 min after Sunset
Flextime period:
1. 15 min before Sunrise
to 1 hour after Sunrise.
2. 1 hour before Sunset
to 15 min after Sunset
Flextime period:
1. 15 min before Sunrise
to 15 min after Sunset
1 HOUR
AFTER
SUNRISE
1 HOUR
BEFORE
SUNSET
15 MINUTES
BEFORE
SUNRISE
15 MINUTES
AFTER
SUNSET
FLEX
TIME FLEX
TIME
FLEX
TIME FLEX
TIME
PIR
INACTIVE
Camera is inactive before and after Flextime periods. Flextime is active twice a day.
Flextime is active twice a day.
Flextime is active during daytime.
Camera is in PIR mode before and after Flextime periods.
INACTIVE
INACTIVE
INACTIVE
INACTIVE
INACTIVE
PIR
PIR
FLEXTIME
PIR PIR
P1
FLEXTIME selected
BOTH selected
P2
INTERVAL
Flextime + PIR period:
1. 15 min before Sunrise
to 1 hour after Sunrise.
2. 1 hour before Sunset
to 15 min after Sunset
Flextime + PIR period:
1. 15 min before Sunrise
to 1 hour after Sunrise.
2. 1 hour before Sunset
to 15 min after Sunset
Flextime + PIR period:
1. 15 min before Sunrise
to 15 min after Sunset
P1
P2
INTERVAL
1 HOUR
AFTER
SUNRISE
1 HOUR
BEFORE
SUNSET
15 MINUTES
BEFORE
SUNRISE
15 MINUTES
AFTER
SUNSET
FLEX
TIME FLEX
TIME
FLEX
TIME FLEX
TIME
PIR
PIR PIR
PIR PIRPIR
PIR
FLEXTIME & PIR
PIR PIR
Camera is inactive before and after Flextime + PIR periods. Flextime + PIR is active twice a day.
Camera is in PIR mode before and after Flextime + PIR periods. Flextime + PIR is active twice a day.
Camera is in PIR mode before and after Flextime + PIR periods. Flextime + PIR is active during daytime.