WilTec 61029 User manual

Operation Manual
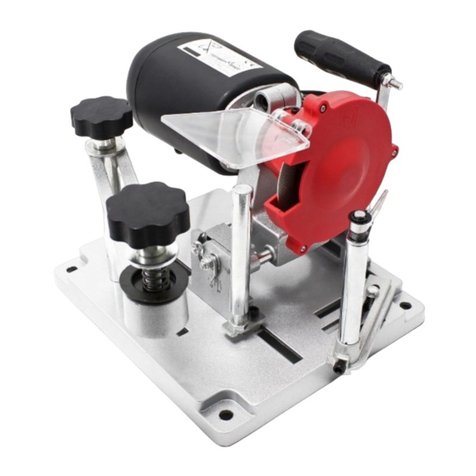
Electric Chainsaw Sharpener
61029
Illustration similar, may vary depending on model
Read and follow the operating instructions and safety information before using for the first time.
Technical changes reserved!
Due to further developments, illustrations, functioning steps and technical data can differ insignificantly.
Updating the documentation
If you have suggestions for improvement or have found any irregularities, please contact us.

© by WilTec Wildanger Technik GmbH Item 61029 Page 2
http://www.WilTec.de
http://www.aoyue.eu 10 2021-1
http://www.teichtip.de
The information contained in this document may alter at any time without previous notice. It is prohibited
to copy or spread any parts of this document in any way without prior written allowance. All rights re-
served.
The WilTec Wildanger Technik GmbH cannot be held accountable for any possible mistakes in this
operating manual, nor in the diagrams and figures shown.
Even though, the WilTec Wildanger Technik GmbH has undergone biggest possible efforts to ensure
that the operating manual is complete, faultless and up to date, mistakes cannot be entirely avoided.
If you should find a mistake or wish to make a suggestion for improvement, we look forward to hearing
from you.
Send an e-mail to:
or use our contact form:
https://www.wiltec.de/contacts/
The most recent version of this manual in various languages can be found in our online shop via:
https://www.wiltec.de/docsearch
Our postal address is:
WilTec Wildanger Technik GmbH
Königsbenden 12
52249 Eschweiler
Germany
Do you wish to pick goods up? Our pick-up address is:
WilTec Wildanger Technik GmbH
Königsbenden 28
52249 Eschweiler
Germany
To shorten the waiting time and allow for a rapid on-site transaction, we ask you to call us previously or
placing your order via the webshop.
E-mail: service@wiltec.info
Tel:+49 2403 55592-0
Fax: +49 2403 55592-15
To return orders for exchange, repair or for other purposes, please use the following address. Attention!
To allow for a smooth execution of your complaint or return, it is important to contact our customer
service team before returning the goods.
Returns Department
WilTec Wildanger Technik GmbH
Königsbenden 28
52249 Eschweiler
E-mail: [email protected]o
Tel:+49 2403 55592-0
Fax: +49 2403 55592-15

© by WilTec Wildanger Technik GmbH Item 61029 Page 3
http://www.WilTec.de
http://www.aoyue.eu 10 2021-1
http://www.teichtip.de
Introduction
Thank you for purchasing this quality product. To minimize the risk of injury we urge that our clients
take some basic safety precautions when using this device. Please read the operation instruc-
tions carefully and make sure you have understood its content.
Keep these operation instructions safe.
Technical data
Motor
Tension (V)
230
Frequency (㎐)
50
Power (W)
220
Speed (rpm)
7500
Table/vice angles (°)
35 (right to left)
Arbor diameter (㎜)
approx. 10
Wheel size (㎜)
100⌀×3.2 (thickness)
Overall size (㎜)
175×320×210
Weight (㎏)
1.84
Keep this manual. You will need the manual for safety warnings and precautions, assembly instruc-
tions, operating and maintenance procedures, parts list and diagram. Keep the manual in a safe and
dry place for future reference.
Safety warnings and precautions
Warning: When using tools, basic safety precautions
should always be followed to reduce the risk of personal
injury and damage to equipment.
Read all instructions
before using this tool!
•Keep the work area clean. Cluttered areas can lead to occurrence of injuries.
•Be aware of the working area conditions. Do not use machines or power tools in damp or wet
locations. Do not expose them to rain either. Keep the work area well lit. Do not use electrically
powered tools in the presence of flammable gasses or liquids.
•Keep children away. Children must never be allowed in the work area. Do not let them handle
machines, tools or extension cords.
•Store idle equipment. When not in use, tools must be stored in a dry location to avoid rust.
Always lock up tools and keep them out of reach of children.
•Use the right tool for the required work. Do not attempt to force a small tool or attachment to do
the work of a larger industrial tool. There are certain applications for which this tool was de-
signed. It will do its job better and more safely for the work, which it was intended. Do not modify
this tool and do not use this tool for a purpose for which it was not intended.
•Dress adequately. Do not wear loose clothing or jewellery as they can be caught in moving
parts. Protective, electrically non-conductive clothes and non-slip footwear are recommended
when working. Tie long hair together.

© by WilTec Wildanger Technik GmbH Item 61029 Page 4
http://www.WilTec.de
http://www.aoyue.eu 10 2021-1
http://www.teichtip.de
•Use eye and ear protection. Always wear approved impact safety glasses. Wear a full-face
shield if you are producing metal shavings or wood splinters.
•Do not overreach. Keep proper footing and balance at all times. Do not reach over or across
running machines.
•Take care of the tools. Keep the tools sharp and clean for a better and safer performance. Follow
the instructions for lubricating and changing equipment. Inspect tool cords frequently. If they
appear damaged, they need to be repaired by an authorized technician. The handles must be
kept clean, dry and free from oil and grease at all times.
•Avoid unintentional starting. Be sure the switch is in the OFF position when not in use and before
plugging it in.
•Stay alert. Watch what you are doing, use common sense. Do not operate any tool when you
are tired.
•Check for damaged parts. Before using the tool, any part that appears damaged should be
examined carefully to determine whether the part will be safe to be operated properly and per-
form its intended function. Check the alignment of connecting or moving parts, any broken parts
or mounting fixtures and any other condition that may affect the proper operation. Any part that
is damaged needs to be repaired or replaced properly by a qualified technician. Do not use the
tool if any switch does not turn on and off properly.
•Protect against electric shock. Prevent body contact with grounded surfaces such as pipes,
radiators, cooker plates and refrigeration units.
•Replacement parts and equipment. When maintenance work needs to be carried out, only iden-
tical and original replacement parts may be used. Use of any other parts will void the warranty.
Only use equipment intended for the use of the tool.
•Do not operate the tool if you are under the influence of alcohol or drugs. Read the package
insert and labels on the medicaments to determine if your judgment or reflexes are affected by
them. If there is any doubt, do not operate the tool!
•Use a proper size and type of extension cord. If an extension cord is required, it must be the
proper size and type to supply the correct current to the tool without heating up. Otherwise, the
extension cord could melt and catch fire or cause electrical damage to the tool. This tool requires
use of an extension cord of 0 to 10 A capability (up to 15 m/50 ft), with a wire size of 18 AWG
gauge. Longer extension cords require bigger sized wire gauges. If you are using the tool out-
doors, use an extension cord rated for outdoor use.
•Maintenance. For your safety, maintenance should be performed frequently by a qualified tech-
nician only.
•Never use the electric chainsaw sharpener around flammable materials.
Note: Performance of this tool (if powered by line voltage) may vary
depending on variations in local line voltage. Extension cord usage
may also affect the performance of the tool.
Warning: The warnings, cautions, and instructions discussed in this operating manual
cannot cover all possible conditions and situations that may occur. The operator
needs to understand that common sense and caution are factors which
cannot be built into this product, but must be applied by the
operator of the tool.
Additional safety warnings
Grinding wheel warnings
•Do not use a grinding wheel if it is chipped, cracked or worn. You can check if the wheel has
cracks that are non-visible to the human eye by hanging it from the central hole and tapping it
with a non-metallic object (i.e., screwdriver handle). If it is in a good condition, it will produce a
metallic sound. A dull sound indicates a crack or break.

© by WilTec Wildanger Technik GmbH Item 61029 Page 5
http://www.WilTec.de
http://www.aoyue.eu 10 2021-1
http://www.teichtip.de
•Only use grinding wheels that fit the mandrel (⅞″). Do not try to change or modify the mounting
hole on a grinding wheel to make it fit.
•Do not over-tighten the nut (3). Hand-tighten it only. Over-tightening may cause the wheel to
get damaged or crack.
•Never use the chain saw sharpener without the grinding wheel cover (2) in its designated
place.
•Always test the grinding wheel (5) by running it for a minute prior to contact with a chain.
•Stay away from the wheel when it is turning and make sure no one is standing close or in the
line of the wheel trajectory.
•If the grinding wheel vibrates, turn the machine off immediately and check that it is mounted
securely and not damaged.
•Never try to stop the grinding wheel with your hands, even if you are wearing safety gloves. The
wheel will cut through gloves and your hand causing serious injury.
•Never operate tool without the grinding wheel cover in place.
•The listed speed of the replacement grinding wheel must be the same as or exceed the rpm
rating of this tool.
Warning! This machine is designed to sharpen chain saw chains.
Do not attempt to sharpen or grind any other
tools or objects.
Unpacking
When unpacking, check that no parts listed on the parts list are missing.
Assembly
1. When installing the sharpener on a workbench, make sure that the lock wheel (46) is accessi-
ble as shown in the mounting picture in fig. 1.
2. Bolt (bolts not included) the unit directly down to the workbench through the two ¼″holes in the
base (40). The workbench must have a solid surface capable of supporting the weight of the
sharpener, the work-piece and various tools (see fig. 2).
Figure 1: ¼″hole with bolt
Figure 2: Base (40)
Warning! Always unplug the unit before changing
grinding wheels or when making any
adjustments to the sharpener.
Mounting a grinding wheel
Refer to the assembly drawing and fig. 3 and 4 below.
1. Raise the engine casing (12, 24) and lock it in the up position by tightening the screw (45).

© by WilTec Wildanger Technik GmbH Item 61029 Page 6
http://www.WilTec.de
http://www.aoyue.eu 10 2021-1
http://www.teichtip.de
2. Remove the two screws holding the grinding wheel cover (2) and set the cover aside.
3. Unscrew the nut (3) that holds the grinding wheel (5) in place.
4. Install the new wheel on the pressure plate (4) making sure it fits properly.
Note: Do not use a grinding wheel if it chipped, cracked, or worn. You can check if the wheel has cracks
not visible to the human eye by hanging it up by the central hole and tapping it with a nonmetal object
(i.e., screwdriver handle). If it is in good condition, it will produce a metallic sound. A dull sound indicates
a crack or break.
5. Replace the nut (3).
6. Replace the grinding wheel cover (2).
7. Release the screw (45) and lower the top housing.
8. Never operate tool without the grinding wheel cover in place.
Figure 3: Engine housing (12, 24) and screw (45)
Figure 4: Grinding wheel (5) and pressure
plate (4)
Operation
Warning! Always unplug the unit while adjusting chain to be sharpened.
Refer to the assembly drawing on and the various photographs.
Note: Raise the top casing while adjusting the chain.
1. Clean the chain before sharpening it. Wash it with a non-flammable solvent. Do not use gasoline
to dry the chain.
2. Lift up the chain stop (53) and secure the chain in the fixed disk (50) (see fig. 6).
3. Lower the chain stop (53) so that it is positioned on the tooth (blade) you want to start with (see
fig. 5). The tip of chain stop needs to be positioned against the tooth.
Figure 5: Chain stop (53) and screw (58)
Figure 6: Chain stop (53)

© by WilTec Wildanger Technik GmbH Item 61029 Page 7
http://www.WilTec.de
http://www.aoyue.eu 10 2021-1
http://www.teichtip.de
4. Loosen the lock wheel (46) to allow the entire housing to turn. Rotate the casing to match the
degree of angle you need on the angle gauge. Chains come in various sizes with varying de-
grees of sharpening angles. Check with your chain manufacturer’s manual to determine what
degree you need to sharpen at. Once the degree is set, tighten the lock wheel (46).
5. Lower the engine casing (12, 24) so that the grinding wheel (5) slightly touches the chain
tooth.
6. Hold it in position while you tighten the screw (45) so that the wheel will only go down to that
point (see fig. 7).
7. Depending on the amount of material you wish to remove, tighten or loosen the screw (58) and
set the lock nut accordingly (see fig. 5). The lock nut of the screw (58) will determine how much
material is removed. Once you set the lock nut, fully tighten the screw (58).
Figure 7: Screw (45)
Figure 8: Screw (45)
8. Lock the chain in the fixing disk (50) by turning the screw (52) (see fig. 8). The screw (52)
should be installed so that it can easily be released and tightened. You will need to release it
each time you move to the next link, and tighten it to sharpen the link.
9. If the chain has been repeatedly sharpened, the chain depth limiting gauges may need to be
taken down with a flat file (not included) (see fig. 9, 10). File down each gauge so that they are
at a lower level than the cutting teeth.
Figure 9
Figure 10
Figure 11
10. Put on your protective gear and make sure the immediate area is clear of bystanders.
11. Plug in the power cord (23) and press the green button on the switch (25) to turn on the ma-
chine.

© by WilTec Wildanger Technik GmbH Item 61029 Page 8
http://www.WilTec.de
http://www.aoyue.eu 10 2021-1
http://www.teichtip.de
12. Slowly lower the grinding wheel as shown in fig. 10. If you notice slight errors in your settings,
turn off the unit and unplug it before you make your adjustments.
Note: A good grind can be achieved when the contact between the wheel and the teeth
are gradual and smooth. Do not process each tooth too long.
13. After sharpening one tooth, turn off the machine. Lift the engine casing (12, 24), release the
screw (52), and move the chain to the next link, then position the chain stop (53). Tighten the
screw (52). Turn the machine back on and continue sharpening the next tooth. Repeat this
process until you have sharpened all of the links set up for this angle.
14. After you finish sharpening all of the teeth on the chain, turn off the machine by pushing the red
button on the switch (25) and unplugging the unit.
15. Loosen the lock wheel (46) and reset the angle so that the first tooth that has not been sharp-
ened is positioned against the screw (52) and locked it as explained (see fig. 11).
16. As you did with the first half of the chain, be sure to lower the engine casing (12, 24) so that
the grinding wheel (5) slightly touches the chain tooth, and lock it in place. Follow all of the
steps from 2 to 7 double checking everything before you plug in the machine and turn it on
again.
Attention: Remember to turn the machine off and unplug it if you need to make any ad-
justments!
17. After you have repeated all of the steps regarding the sharpening, your chain is ready to be
mounted onto the saw.
Maintenance
•Keep the sharpener clean and free of dust, metal debris and dirt.
•Check the grinding wheel before each use to make sure it is not damaged. Do not use a grinding
wheel if it is chipped, cracked, or worn. You can check if the wheel has non-visible cracks to the
human eye by hanging it up by its central hole and tapping it with a non-metallic object (i.e.,
screwdriver handle). If it is in good condition, it will produce a metallic sound. A dull sound
indicates a crack or break.
•Replace the grinding wheel after it has reached a diameter of 3″.
Please read the following carefully:
The manufacture and/or distributor has provided the parts diagram in this manual as a reference tool
only. Neither the manufacturer nor the distributor makes any representation or warranty of any kind to
the buyer that he or she is qualified to make any repairs to the product or that he or she is qualified to
replace any parts of the product. In fact, the manufacturer and/or distributor expressly states that all
repairs and parts replacements should be undertaken by certified and licensed technicians and not by
the buyer. The buyer assumes all risk and liability arising out of his or her repairs to the original product
or replacement parts there to or arising out of his or her installation of replacement parts thereto.
Note: Some parts are listed and shown for illustration purposes only and are not available individually
as replacement parts.

© by WilTec Wildanger Technik GmbH Item 61029 Page 9
http://www.WilTec.de
http://www.aoyue.eu 10 2021-1
http://www.teichtip.de
Parts list
№
Name
№
Name
1
Safety guard
30
Bolt
2
Grinding wheel cover
31
Clip
3
Nut
32
Screw
4
Pressure plate
33
Left cover
5
Grinding wheel
34
Flat pad
6
Output shaft
35
Screw
7
Bearing
36
Screw
8
Shaft circlip
37
Handspike
9
Synchronous belt
38
Spring
10
Nut
39
Screw
11
Big belt wheel
40
Base
12
Left engine casing
41
Nut
13
Bolt
42
Flat pad
14
Nut
43
Spring
15
Bearing
44
Flat pad
16
Small belt wheel
45
Screw
17
Carbon brush
46
Lock wheel
18
Carbon brush holder
47
Spring pad
19
Rotor
48
Nut
20
Stator
49
Flat pad
21
Bolt
50
Fixing disc
22
Pressing line plate
51
Nut
23
Power cord
52
Screw
24
Right engine casing
53
Chain stop
25
Switch
54
Nut
26
Nut
55
Nut
27
Capacitor
56
Right cover
28
Chain
57
Nut
29
Bolt
58
Screw

© by WilTec Wildanger Technik GmbH Item 61029 Page 11
http://www.WilTec.de
http://www.aoyue.eu 10 2021-1
http://www.teichtip.de
Disposal regulations
EU guidelines regarding the disposal of scrap electric appliances (WEEE, 2012/19/EU) were imple-
mented in the law related to electrical and electronic equipment and appliances.
All WilTec electric devices that fall under the WEEE regulations are labelled with the crossed-out
wheeled waste bin logo. This logo indicates that this electric equipment must not be disposed with the
domestic waste.
The company WilTec Technik GmbH has been registered in the German registry EAR under the WEEE-
registration number DE45283704.
Disposal of used electrical and electronic appliances
(intended for use in the countries of the European Un-
ion and other European countries with a separate col-
lection system for these appliances).
The logo on the article or on its packaging points out
that this article must not be treated as normal house-
hold waste but must be disposed to a recycling collec-
tion point for electronic and electrical waste equipment.
By contributing to the correct disposal of this article you
protect the environment and the health of your fellow
men. Environment and health are threatened by inap-
propriate disposal.
Material recycling helps reduce the consumption of raw materials.
Additional information on recycling this article can be provided by your local community, municipal waste
disposal facilities or the store where you purchased the article.
Address:
WilTec Wildanger Technik GmbH
Königsbenden 12 / 28
D-52249 Eschweiler
Important notice:
The reprint or reproduction, even of excerpts, and any commercial use, even in part, of this instruction
manual require the written permission of WilTec Wildanger Technik GmbH.
Other manuals for 61029
1
Table of contents
Other WilTec Power Tools manuals

WilTec
WilTec 61937 User manual

WilTec
WilTec 51278 User manual

WilTec
WilTec 64210 User manual

WilTec
WilTec 61000 User manual

WilTec
WilTec 62297 User manual

WilTec
WilTec 51278 User manual

WilTec
WilTec 30167 User manual

WilTec
WilTec HS-178 User manual

WilTec
WilTec 61029 User manual

WilTec
WilTec AOYUE INT853A User manual

WilTec
WilTec 61870 User manual

WilTec
WilTec 51278 User manual

WilTec
WilTec 61562 User manual

WilTec
WilTec 30162 User manual

WilTec
WilTec 61904 User manual

WilTec
WilTec 62283 User manual

WilTec
WilTec 51740 User manual

WilTec
WilTec 61106 User manual

WilTec
WilTec 51275 User manual

WilTec
WilTec 61033 User manual