WISEUP SHOP IDC100 User manual

IDC100
User Guide
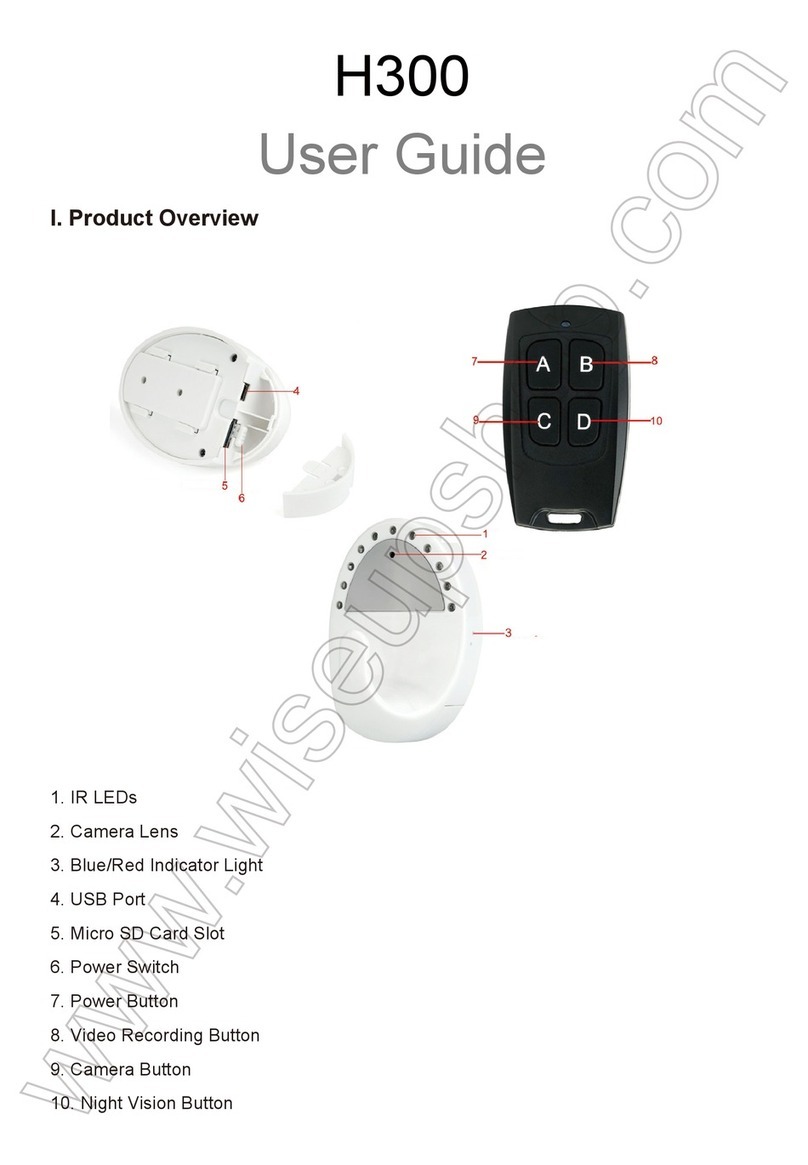
I. Product Overview
1.Camera Lens
2.Microphone
3.USB Port
4.Red Indicator Light
5.Blue Indicator Light
6.Power/Video Recording Button
7.Reset Button
8.Camera/Audio Recording Button
II. What’s in the Box
-1× Spy Camera ID Card
-1× USB Cable
-1× Lanyard
-1× Clip
III. Operation
>> Please make sure your camera battery is fully recharged before using.
>> Please format the built-in memory card on your PC computer before using.
3.1. POWER ON/OFF
3.1.1. Power on the camera by pressing the Power Button for 2 seconds. Both
the red and blue indicator lights will be illuminated, then the red one will be off
while the blue one will stay illuminated, indicating the camera has entered into
standby mode automatically.
3.1.2. Power off the camera by pressing the Power Button for 2 seconds again.
The blue indicator light will be off, then the red indicator light will flash twice and
turn off.
[Note]: The camera will shut down automatically if it is in standby mode without any
operation more than 1 minute.
3.2. VIDEO RECORDING
3.2.1. Power on the camera by pressing the Power Button for 2 seconds. Both
the red and blue indicator lights will be illuminated, then the red one will be off
while the blue one will stay illuminated, indicating the camera has entered into
standby mode automatically.
3.2.2. Press the Video Recording Button once to record video. The blue indicator
light will flash 3 times and then turn off.
3.2.3. Press the Video Recording Button once to stop recording video. The blue
indicator light will stay illuminated, indicating the camera is back to standby
mode.
[Note]:
1). A video file will be generated and saved every 30 minutes automatically.
2). The camera can record video for 3 hours continuously on a full charge.
3). Video Resolution: 1280x960 Video Format: AVI
4). If the camera is in low battery, the red indicator lights will flash 4 times and the camera
will shut down automatically, and the camera will save all the video files.
3.3. CAMERA/STILL PHOTOGRAPHY
3.3.1. Power on the camera by pressing the Power Button for 2 seconds. Both
the red and blue indicator lights will be illuminated, then the red one will be off
while the blue one will stay illuminated, indicating the camera has entered into
standby mode automatically.
3.3.2. Press the Camera Button once to take a photo. The red indicator light will
flash once and turn off every time you take a photo.
3.4. AUDIO RECORDING
3.4.1. Power on the camera by pressing the Power Button for 2 seconds. Both
the red and blue indicator lights will be illuminated, then the red one will be off
while the blue one will stay illuminated, indicating the camera has entered into
standby mode automatically.
3.4.2. Press the Audio Recording Button for 2 seconds to record audio. The blue
indicator light will be off, the red one will flash 4 times and then turn off.
3.4.3. Press the Audio Recording Button once to stop recording audio. The blue
indicator light will stay illuminated, indicating the camera is back to standby
mode.
[Note]:
1). An audio file will be generated and saved every 30 minutes automatically.
2). Audio Format: WAV
IV. Video/Image Files Uploads
4.1. Power off the camera and connect the camera to a proper PC computer
USB port by using the USB cable provided.
4.2. Removable disk drive folder appears.
4.3. All the files can be accessed in the drive.
V. Setting Time/Date Stamp
5.1. Power off the camera and connect the camera to a proper PC computer
USB port by using the USB cable provided.
5.2. Removable disk drive folder appears.
5.3. Click on the drive in the root directory and inside the root directory, create a
file named “time.txt”.
5.4. Write the current date and time in the “time.txt” file with the correct format:
YYYY-MM-DD HH:MM:SS (For example: 2016-04-12 14:24:32). Save this file.
5.5. Restart the camera and the system will upgrade the program automatically.
VI. Charging
6.1. Power off the camera and connect the camera to a proper PC computer
USB port by using the USB cable provided.
6.2. The red indicator light will keep flashing while the blue indicator light will be
illuminated during the charging process.
6.3. It will take 3 hours to obtain a full charge.
6.4. When the camera is fully recharged, the red indicator light will be off and the
blue one will stay illuminated.
Tips: you can also use a DC5V phone charger to charge this camera.
VII. Resetting
If, for any reason, the camera stops responding or isn’t working properly, a quick
reset will restore it back to normal operation.
Operation: When the camera is powered on, use a pin to press the Reset Button
once and the camera will shut down automatically. Then you can restart the
camera to the factory default settings.

IDC100
Benutzerhandbuch
I. Produktübersicht
1.Kamera-Objektiv
2.MikrofonHafen
3.USBAnzeigelampe
4.RedAnzeigelampe
5.Blue
6.Power / Video-Aufnahmetaste
7.Reset-Taste
8.Camera/Audio Aufnahme-Taste
II. Was ist in der Box
-1 × Spion Kamera-ID-Karte
-1 × USB-Kabel
-1 × Lanyard
-1 × Clip
III. Betrieb
>> Stellen Sie bitte sicher, dass Ihr Kamerabatterie vollständig aufgeladen wird,
bevor Sie verwenden.
>> Bitte formatieren Sie die integrierte Speicherkarte auf Ihrem PC-Computer
vor der Verwendung.
3.1. EINSCHALTEN / AUSSCHALTEN
3.1.1. Schalten Sie die Kamera ein, indem Sie den Netzschalter 2 Sekunden
lang drücken. Sowohl die rote als auch die blaue Kontrollleuchte leuchten auf,
und die rote leuchtet dann aus, während die blaue Lampe leuchtet, was
bedeutet, dass die Kamera automatisch in den Bereitschaftsmodus geschaltet
wurde.
3.1.2. Schalten Sie die Kamera aus, indem Sie den Netzschalter 2 Sekunden
lang erneut drücken. Die blaue Kontrolllampe erlischt, dann leuchtet die rote
Kontrollleuchte zweimal und erlischt.
[Hinweis]: Die Kamera schaltet sich automatisch ab, wenn sie sich im Standby-Modus
befindet, ohne dass der Betrieb länger als 1 Minute ist.
3.2. VIDEOAUFNAHME
3.2.1. Schalten Sie die Kamera ein, indem Sie den Netzschalter 2 Sekunden
lang drücken. Sowohl die rote als auch die blaue Kontrollleuchte leuchten auf,
und die rote leuchtet dann aus, während die blaue Lampe leuchtet, was
bedeutet, dass die Kamera automatisch in den Bereitschaftsmodus geschaltet
wurde.
3.2.2. Drücken Sie die Videoaufnahme-Taste einmal, um Video aufzuzeichnen.
Die blaue Kontrollleuchte blinkt dreimal und schaltet sich dann aus.
3.2.3. Drücken Sie die Video-Aufnahmetaste einmal, um die Aufnahme zu
beenden. Die blaue Kontrolllampe leuchtet auf und zeigt an, dass die Kamera
wieder in den Standby-Modus zurückkehrt.
[Hinweis]:
1). Eine Videodatei wird alle 30 Minuten automatisch generiert und gespeichert.
2). Die Kamera kann Video für 3 Stunden kontinuierlich auf eine volle Aufladung
aufzeichnen.
3). Videoentschließung: 1280x960 Videoformat: AVI
4). Wenn die Kamera schwach ist, leuchten die roten Kontrollleuchten vier Mal auf, und
die Kamera schaltet sich automatisch aus, und die Kamera speichert alle Videodateien.
3.3. KAMERA / STILL FOTOGRAFIE
3.3.1. Schalten Sie die Kamera ein, indem Sie den Netzschalter 2 Sekunden
lang drücken. Sowohl die rote als auch die blaue Kontrollleuchte leuchten auf,
und die rote leuchtet dann aus, während die blaue Lampe leuchtet, was
bedeutet, dass die Kamera automatisch in den Bereitschaftsmodus geschaltet
wurde.
3.3.2. Drücken Sie die Kamera-Taste einmal, um ein Foto aufzunehmen. Die
rote Anzeigelampe blinkt einmal und schaltet sich jedes Mal ab, wenn Sie ein
Foto machen.
3.4. AUDIO AUFNAHME
3.4.1. Schalten Sie die Kamera ein, indem Sie den Netzschalter 2 Sekunden
lang drücken. Sowohl die rote als auch die blaue Kontrollleuchte leuchten auf,
und die rote leuchtet dann aus, während die blaue Lampe leuchtet, was
bedeutet, dass die Kamera automatisch in den Bereitschaftsmodus geschaltet
wurde.
3.4.2. Drücken Sie die Audio Recording-Taste für 2 Sekunden, um Audio
aufzuzeichnen. Die blaue Kontrolllampe leuchtet nicht, die rote blitzt 4 mal und
schaltet sich dann aus.
3.4.3. Drücken Sie einmal die Audio Recording-Taste, um die Aufnahme zu
beenden. Die blaue Kontrolllampe leuchtet auf und zeigt an, dass die Kamera
wieder in den Standby-Modus zurückkehrt.
[Hinweis]:
1). Eine Audiodatei wird automatisch alle 30 Minuten erstellt und gespeichert.
2). Audio-Format: WAV
IV. Video / Bilddateien Uploads
4.1. Schalten Sie die Kamera aus und schließen Sie die Kamera mithilfe des
mitgelieferten USB-Kabels an einen geeigneten USB-Anschluss des Computers
an.
4.2. Wechseldatenträgerordner wird angezeigt.
4.3. Auf alle Dateien kann im Laufwerk zugegriffen werden.
V. Einstellzeit / Datumsstempel
5.1. Schalten Sie die Kamera aus und schließen Sie die Kamera mithilfe des
mitgelieferten USB-Kabels an einen geeigneten USB-Anschluss des Computers
an.
5.2. Wechseldatenträgerordner wird angezeigt.
5.3. Klicken Sie auf das Laufwerk im Stammverzeichnis und im
Stammverzeichnis, erstellen Sie eine Datei mit dem Namen "time.txt".
5.4. Schreiben Sie das aktuelle Datum und die Uhrzeit in der Datei "time.txt" mit
dem richtigen Format:
JJJJ-MM-TT HH: MM: SS (Beispiel: 2016-04-12 14:24:32). Speichern Sie diese
Datei.
5.5. Starten Sie die Kamera neu und das System aktualisiert das Programm
automatisch.
VI. Aufladen
6.1. Schalten Sie die Kamera aus und schließen Sie die Kamera mithilfe des
mitgelieferten USB-Kabels an einen geeigneten USB-Anschluss des Computers
an.
6.2. Die rote Leuchtanzeige blinkt, während die blaue Leuchtanzeige während
des Ladevorgangs aufleuchtet.
6.3.Es dauert 3 Stunden, um eine volle Ladung zu erhalten.
6.4.Wenn die Kamera vollständig aufgeladen ist, leuchtet die rote Anzeigelampe
und die blaue LED leuchtet nicht.
Spitzen: Sie können ein DC5V Telefonaufladeeinheit auch verwenden, um diese
Kamera aufzuladen.
VII. Rücksetzen
Wenn die Kamera aus irgendeinem Grund nicht mehr reagiert oder nicht
ordnungsgemäß arbeitet, wird sie durch einen schnellen Reset wieder in den
Normalbetrieb zurückversetzt.
Betrieb: Wenn die Kamera eingeschaltet ist, verwenden Sie einen Stift, um die
Reset-Taste einmal zu drücken, und die Kamera wird automatisch
heruntergefahren. Anschließend können Sie die Kamera auf die werkseitigen
Standardeinstellungen zurücksetzen.
IDC100
Mode d'emploi
I. Aperçu du produit
1.Objectif de caméra
2.Microphone
3. Port USB
4.Voyant Rouge
5. Voyant bleu
6.Bouton d'enregistrement vidéo / d’alimentation
7. Bouton Réinitialiser
8.Bouton de caméra / d'enregistrement audio
II. Qu'y a-t-il dans la boite
-1 × carte d'identité de caméra espion
-1 × câble USB
-1 × Cordon
-1 × Clip
III. Opération
>> Veuillez vous assurer que la batterie de votre appareil photo est
complètement rechargée avant de l'utiliser.
>> Veuillez formater la carte mémoire intégrée sur votre ordinateur avant de
l'utiliser.
3.1. MARCHE / ARRÊT
3.1.1. Allumez la caméra en appuyant sur le bouton d'alimentation pendant 2
secondes. Les voyants rouge et bleu s'allument, puis le rouge s'éteint tandis que
le voyant bleu reste allumé, indiquant que l'appareil est entré automatiquement
en mode veille.
3.1.2. Mettez la caméra hors tension en appuyant à nouveau sur le bouton
d'alimentation pendant 2 secondes. Le voyant bleu s'éteint, puis le voyant rouge
clignote deux fois et s'éteint.
[Remarque]: la caméra s'arrête automatiquement s'il est en mode veille sans aucune
opération de plus d'une minute.
3.2. ENREGISTREMENT VIDEO
3.2.1. Allumez la caméra en appuyant sur le bouton d'alimentation pendant 2
secondes. Les voyants rouge et bleu s'allument, puis le rouge s'éteint tandis que
le voyant bleu reste allumé, indiquant que l'appareil est entré automatiquement
en mode veille.
3.2.2. Appuyez une fois sur le bouton d'enregistrement vidéo pour enregistrer la
vidéo. Le voyant bleu clignote 3 fois puis s'éteint.
3.2.3. Appuyez une fois sur le bouton d'enregistrement vidéo pour arrêter
l'enregistrement vidéo. Le témoin lumineux bleu reste allumé, indiquant que
l'appareil est de nouveau en mode veille.
[Remarque]:
1). Un fichier vidéo sera généré et sauvegardé automatiquement toutes les 30 minutes.
2). la caméra peut enregistrer la vidéo pendant 3 heures en continu sur une pleine
charge.
3). Résolution vidéo: 1280x960 Format vidéo: AVI
4). Si la caméra est en batterie faible, les voyants rouges clignotent 4 fois et l'appareil
s'arrête automatiquement, et l'appareil enregistre tous les fichiers vidéo.
3.3. CAMERA / PHOTOGRAPHIE TOUJOURS
3.3.1. Allumez la caméra en appuyant sur le bouton d'alimentation pendant 2
secondes. Les voyants rouge et bleu s'allument, puis le rouge s'éteint tandis que
le voyant bleu reste allumé, indiquant que l'appareil est entré automatiquement
en mode veille.
3.3.2. Appuyez une fois sur la touche Appareil photo pour prendre une photo. Le
voyant rouge clignote une fois et s'éteint chaque fois que vous prenez une
photo.
3.4. ENREGISTREMENT AUDIO
3.4.1. Allumez la caméra en appuyant sur le bouton d'alimentation pendant 2
secondes. Les voyants rouge et bleu s'allument, puis le rouge s'éteint tandis que
le voyant bleu reste allumé, indiquant que l'appareil est entré automatiquement
en mode veille.
3.4.2. Appuyez sur le bouton d'enregistrement audio pendant 2 secondes pour
enregistrer l'audio. Le voyant bleu s'éteint, le voyant rouge clignote 4 fois puis
s'éteint.
3.4.3. Appuyez une fois sur le bouton d'enregistrement audio pour arrêter
l'enregistrement audio. Le témoin lumineux bleu reste allumé, indiquant que
l'appareil est de nouveau en mode veille.
[Remarque]:
1). Un fichier audio sera généré et sauvegardé automatiquement toutes les 30 minutes.
2). Format audio: WAV
IV. Téléchargement de vidéos et d'images
4.1. Mettez la caméra hors tension et connectez la caméra à un port USB de
l'ordinateur approprié à l'aide du câble USB fourni.
4.2. Le dossier du lecteur de disque amovible s'affiche.
4.3. Tous les fichiers sont accessibles dans le lecteur.
V. Réglage de l'heure / date
5.1. Mettez la caméra hors tension et connectez la caméra à un port USB de
l'ordinateur approprié à l'aide du câble USB fourni.
5.2. Le dossier du lecteur de disque amovible s'affiche.
5.3. Cliquez sur le lecteur dans le répertoire racine et à l'intérieur du répertoire
racine, créez un fichier nommé "time.txt".
5.4. Ecrivez la date et l'heure actuelles dans le fichier "time.txt" avec le format
correct:
AAAA-MM-JJ HH: MM: SS (Par exemple: 2016-04-12 14:24:32). Enregistrer ce
fichier.
5.5. Redémarrez la caméra et le système mettra automatiquement à niveau le
programme.
VI. Se charge
6.1. Mettez la caméra hors tension et connectez la caméra à un port USB de
l'ordinateur approprié à l'aide du câble USB fourni.
6.2. Le voyant rouge clignote alors que le voyant bleu s'allume pendant le
processus de charge.
6.3. Il faudra 3 heures pour obtenir une charge complète.
6.4. Lorsque la caméra est complètement rechargé, le voyant rouge s'éteint et
le voyant bleu reste allumé.
Conseils: vous pouvez également utiliser un chargeur de téléphone DC5V pour
charger cet appareil photo.
VII. Réinitialisation
Si, pour une raison quelconque, la caméra cesse de répondre ou ne fonctionne
pas correctement, une réinitialisation rapide le rétablira en mode normal.
Fonctionnement: Lorsque la caméra est sous tension, utilisez une broche pour
appuyer sur le bouton de réinitialisation une fois et l'appareil s'éteindra
automatiquement. Ensuite, vous pouvez redémarrer la caméra aux réglages par
défaut.

IDC100
Guida utente
I. Descrizione del prodotto
1.Camera Lens
2.Microphone
3.USB Port
4.Red Spia
5.Blue SpiaPulsante
6.Power Recording / VideoPulsante
7.ResetPulsante
8.Camera/Audio registrazione
II. Cosa c'è nella scatola
-1 × Spy carta ID telecamera
-1 × Cavo USB
-1 × cordino
-1 Clip ×
III. operazione
>> Si prega di verificare che la batteria della fotocamera è completamente carica
prima dell'uso.
>> Si prega di formattare la scheda di memoria integrata del computer PC prima
di utilizzare.
3.1. POWER ON / OFF
3.1.1. Accendere la fotocamera premendo il pulsante di accensione per 2
secondi. La spia rossa e blu saranno illuminati, poi quello rosso si spegne,
mentre quello blu resterà illuminato, indicando la telecamera è entrato in
modalità standby automaticamente.
3.1.2. Spegnere la fotocamera premendo il pulsante di accensione per 2
secondi. La spia blu si spegne, quindi la spia rossa lampeggia due volte e si
spegne.
[Nota]: La fotocamera si spegne automaticamente se è in modalità standby, senza
alcuna operazione più di 1 minuto.
3.2. REGISTRAZIONE VIDEO
3.2.1. Accendere la fotocamera premendo il pulsante di accensione per 2
secondi. La spia rossa e blu saranno illuminati, poi quello rosso si spegne,
mentre quello blu resterà illuminato, indicando la telecamera è entrato in
modalità standby automaticamente.
3.2.2. Premere il pulsante di registrazione video una volta per registrare video.
La spia blu lampeggia 3 volte e poi si spegne.
3.2.3. Premere il pulsante di registrazione video una volta per interrompere la
registrazione video. La spia blu rimarrà illuminato, indicando la fotocamera è in
modalità standby.
[Nota]:
1). Un file video viene generato e salvato automaticamente ogni 30 minuti.
2). La fotocamera può registrare video in continuo per 3 ore su una carica completa.
3). Risoluzione video: 1280x960 Formato video: AVI
4). Se la fotocamera è in batteria scarica, si accende la spia rossa lampeggia 4 volte e la
fotocamera si spegne automaticamente, e la fotocamera salvare tutti i file video.
3.3. CAMERA / la fotografia
3.3.1. Accendere la fotocamera premendo il pulsante di accensione per 2
secondi. La spia rossa e blu saranno illuminati, poi quello rosso si spegne,
mentre quello blu resterà illuminato, indicando la telecamera è entrato in
modalità standby automaticamente.
3.3.2. Premere il pulsante della fotocamera, una volta per scattare una foto. La
spia rossa lampeggia una volta e si spegne ogni volta che si scatta una foto.
3.4. REGISTRAZIONE AUDIO
3.4.1. Accendere la fotocamera premendo il pulsante di accensione per 2
secondi. La spia rossa e blu saranno illuminati, poi quello rosso si spegne,
mentre quello blu resterà illuminato, indicando la telecamera è entrato in
modalità standby automaticamente.
3.4.2. Premere il pulsante di registrazione audio per 2 secondi per registrare
l'audio. La spia blu si spegne, quello rosso lampeggia 4 volte e poi si spegne.
3.4.3. Premere il tasto di audio una volta per interrompere la registrazione audio.
La spia blu rimarrà illuminato, indicando la fotocamera è in modalità standby.
[Nota]:
1). Un file audio viene generata e salvata automaticamente ogni 30 minuti.
2). Formato audio: WAV
IV. Video / Immagine carica i file
4.1. Spegnere la fotocamera e collegare la fotocamera a una porta USB del
computer PC corretto utilizzando il cavo USB in dotazione.
4.2. appare cartella sul disco rimovibile.
4.3. Tutti i file sono accessibili nel drive.
V. Impostazione di ora / data timbro
5.1. Spegnere la fotocamera e collegare la fotocamera a una porta USB del
computer PC corretto utilizzando il cavo USB in dotazione.
5.2. appare cartella sul disco rimovibile.
5.3. Fare clic sul disco nella directory principale e all'interno della directory
principale, creare un file denominato "time.txt".
5.4. Scrivere la data e l'ora correnti nel file "time.txt" con il formato corretto:
AAAA-MM-GG HH: MM: SS (per esempio: 2016/04/12 14:24:32). Salvare il file.
5.5. Riavviare la telecamera e il sistema aggiornerà automaticamente il
programma.
VI. ricarica
6.1. Spegnere la fotocamera e collegare la fotocamera a una porta USB del
computer PC corretto utilizzando il cavo USB in dotazione.
6.2. La spia rossa lampeggerà quando l'indicatore luminoso blu si illumina
durante il processo di carica.
6.3. Ci vorranno 3 ore per ottenere una carica completa.
6.4. Quando la fotocamera è completamente carica, la spia rossa si spegne e
quello blu rimarrà illuminato.
Suggerimenti: è anche possibile utilizzare un caricatore del telefono DC5V per
caricare questa fotocamera.
VII. Ripristino
Se, per qualsiasi motivo, la fotocamera smette di rispondere o non funziona
correttamente, eseguire un ripristino rapido ripristinerà di nuovo al normale
funzionamento.
Funzionamento: Quando la fotocamera è accesa, usare uno spillo per premere
il pulsante Reset una volta e la fotocamera si spegne automaticamente. Quindi
è possibile riavviare la fotocamera per le impostazioni predefinite.

IDC100
Guía del Usuario
I. Descripción del Producto
1. Lente de cámara
2. Micrófono
3. Puerto USB
4. Luz Indicadora Roja
5. Luz Indicadora Azul
6. Botón de Potencia / Grabación de Video
7. Botón de Restablecimiento
8. Botón de Cámara / Grabación de Audio
II. Qué hay en la caja
-1 × Tarjeta de Identificación Cámara Espía
-1 × Cable USB
-1 × Cordón
-1 × Clip
III. Operación
>> Asegúrese de que la batería de la cámara esté completamente cargada
antes de usarla.
>> Por favor formatee la tarjeta de memoria incorporada en su PC antes de
usarla.
3.1. ENCENDIDO / APAGADO
3.1. Encienda la cámara presionando el Botón de Potencia durante 2
segundos. Las luces indicadoras roja y azul se iluminarán, luego la roja se
apagará y la azul permanecerá iluminada, indicando que la cámara ha entrado
en el modo de espera automáticamente.
3.1.2. Apague la cámara presionando de nuevo el Botón de Potencia durante 2
segundos. La luz indicadora azul se apagará y la luz indicadora roja
parpadeará dos veces y se apagará.
[Nota]: La cámara se apagará automáticamente si está en el modo de espera sin
ninguna operación durante más de 1 minuto.
3.2. GRABACIÓN DE VÍDEO
3.2.1. Encienda la cámara presionando el Botón de Potencia durante 2
segundos. Las luces indicadoras roja y azul se iluminarán, luego la roja se
apagará y la azul permanecerá iluminada, indicando que la cámara ha entrado
en el modo de espera automáticamente.
3.2.2. Pulse el Botón de Grabación de Vídeo una vez para grabar vídeo. La luz
indicadora azul parpadeará 3 veces y luego se apagará.
3.2.3. Pulse el Botón de Grabación de Vídeo otra vez para detener la
grabación de vídeo. La luz indicadora azul permanecerá iluminado, indicando
que la cámara vuelve al modo de espera.
[Nota]:
1). Se generará un archivo de vídeo y se guardará cada 30 minutos automáticamente.
2). La cámara puede grabar video durante 3 horas continuamente con una carga
completa.
3). Resolución de video: 1280x960 Formato de video: AVI
4). Si la cámara está en batería baja, las luces indicadoras rojas parpadeará 4 veces y
la cámara se apagará automáticamente, y la cámara guardará todos los archivos de
vídeo.
3.3. CÁMARA /FOTOGRAFÍA FIJA
3.3.1. Encienda la cámara presionando el Botón de Potencia durante 2
segundos. Las luces indicadoras roja y azul se iluminarán, luego la roja se
apagará y la azul permanecerá iluminada, indicando que la cámara ha entrado
en el modo de espera automáticamente.
3.3.2. Presione el Botón de Cámara una vez para tomar una foto. La luz
indiadora roja parpadeará una vez y se apagará cada vez que tome una foto.
3.4. GRABACIÓN DE AUDIO
3.4.1. Encienda la cámara presionando el Botón de Potencia durante 2
segundos. Las luces indicadoras roja y azul se iluminarán, luego la roja se
apagará y la azul permanecerá iluminada, indicando que la cámara ha entrado
en el modo de espera automáticamente.
3.4.2. Presione el Botón de Grabación de Audio durante 2 segundos para
grabar audio. La luz indicadora azul se apagará, la roja parpadeará 4 veces y
luego se apagará.
3.4.3. Pulse el Botón de Grabación de Audio una vez para detener la
grabación de audio. La luz indicadora azul permanecerá iluminado, indicando
que la cámara vuelve al modo de espera.
[Nota]:
1). Se generará un archivo de audio y se guardará cada 30 minutos automáticamente.
2). Formato de audio: WAV
IV. Subida de archivos de video / imagen
4.1. Apague la cámara y conecte la cámara a un puerto USB del ordenodar de
PC adecuado utilizando el cable USB suministrado.
4.2. Aparece la carpeta de unidad de disco extraíble.
4.3. Se puede acceder a todos los archivos en el disco
V. Configuración de la marca de fecha y hora
5.1. Apague la cámara y conecte la cámara un puerto USB del ordenodar de
PC adecuado utilizando el cable USB suministrado.
5.2. Aparece la carpeta de unidad de disco extraíble.
5.3. Haga clic en el directorio raíz y dentro del directorio raíz, cree un archivo
llamado "time.txt".
5.4. Escriba la fecha y la hora actuales en el archivo "time.txt" con el formato
correcto:
AAAA-MM-DD HH: MM: SS (Por ejemplo: 2016-04-12 14:24:32). Guarde este
archivo.
5.5. Reinicie la cámara y el sistema actualizará el programa automáticamente.
VI. Carga
6.1. Apague la cámara y conecte la cámara un puerto USB del ordenodar de
PC adecuado utilizando el cable USB suministrado.
6.2. La luz indicadora roja seguirá parpadeando mientras la luz indicadora azul
se iluminará durante el proceso de carga.
6.3. Necesitará 3 horas para obtener una carga completa.
6.4. Cuando la cámara está completamente cargada, la luz indicadora roja se
apagará y la azul permanecerá iluminado.
Consejos: también puede utilizar un cargador de teléfono DC5V para cargar
esta cámara.
VII. Restablecimiento
Si, por cualquier motivo, la cámara deja de responder o no funciona
correctamente, un restablecimiento rápido volverá a su funcionamiento normal.
Funcionamiento: Cuando la cámara esté encendida, utilice una aguja para
presionar el botón de restablecimiento una vez y la cámara se apagará
automáticamente. A continuación, puede reiniciar la cámara a la configuración
predeterminada de fábrica.
Table of contents
Languages:
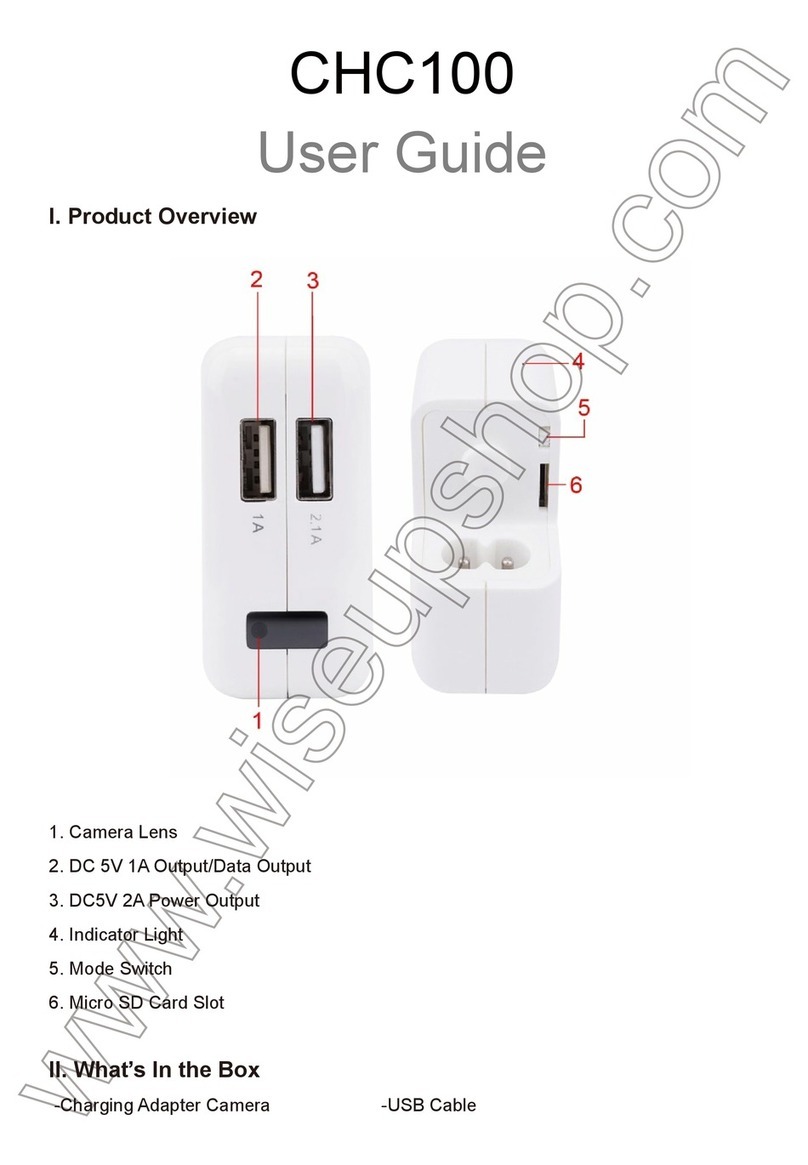
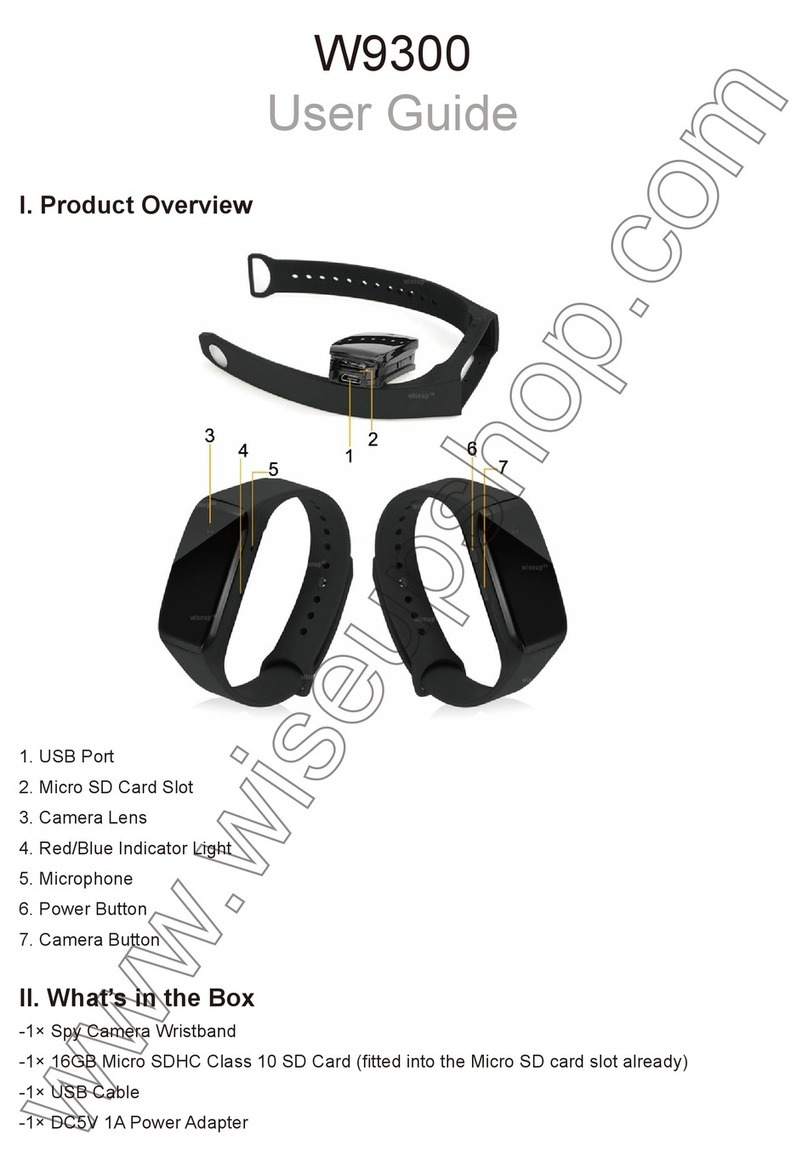
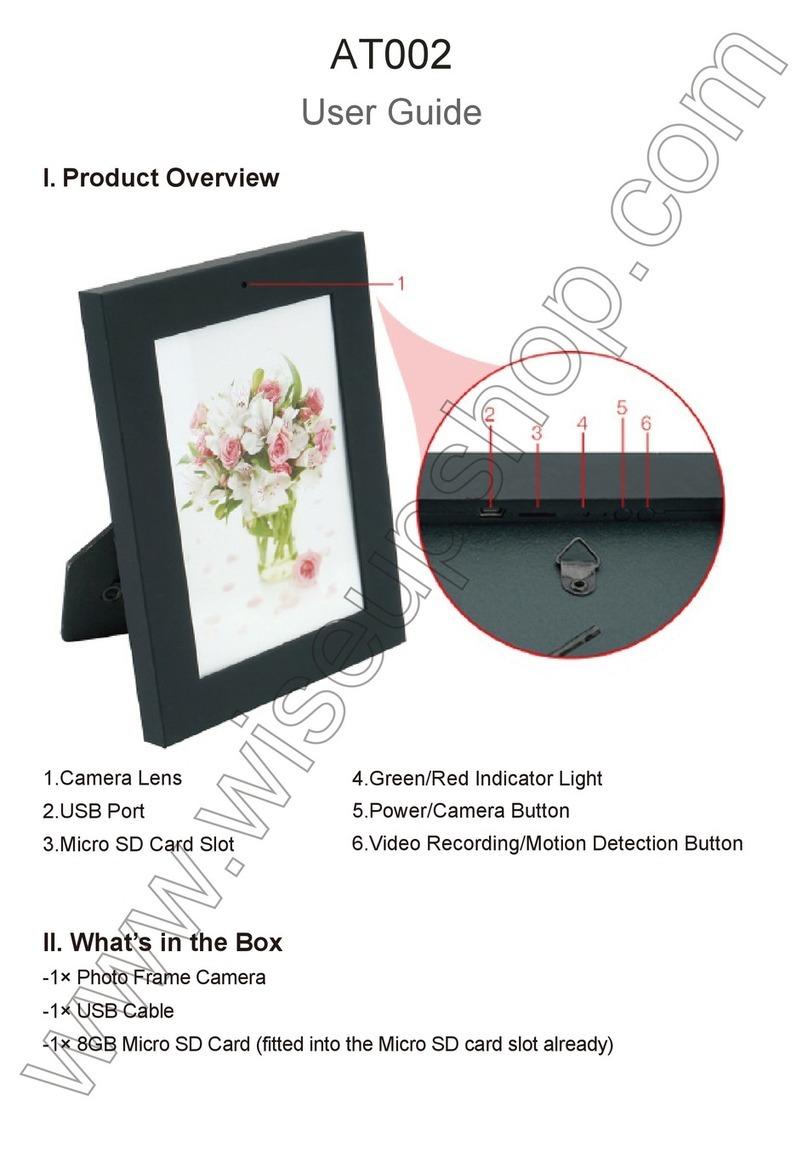
Other WISEUP SHOP Security Camera manuals

WISEUP SHOP
WISEUP SHOP P2000 User manual

WISEUP SHOP
WISEUP SHOP P9000 User manual

WISEUP SHOP
WISEUP SHOP WIFI35 User manual

WISEUP SHOP
WISEUP SHOP P8000 User manual

WISEUP SHOP
WISEUP SHOP CHC100 User manual

WISEUP SHOP
WISEUP SHOP L100 User manual

WISEUP SHOP
WISEUP SHOP AT002 User manual

WISEUP SHOP
WISEUP SHOP WIFI32 User manual

WISEUP SHOP
WISEUP SHOP MT-M130 User manual

WISEUP SHOP
WISEUP SHOP T187 User manual