WIFI38
User Manual (IOS version)
I. Product Overview
1. Reset Button
2. Power Button
3. Micro SD Card Slot
4. USB Port
5. Battery Charging Indicator Light
6. WIFI Indicator Light
7. Power Indicator Light
8. Camera Lens
9. Infrared Leds
II. What's in the Package?
-1× Travelling Mug Camera
-1× USB Cable
-1× AC110-240V to DC 5V Power Adapter
-1× 16GB Micro SDHC Class 10 Card (already inserted into the Micro SD card slot)
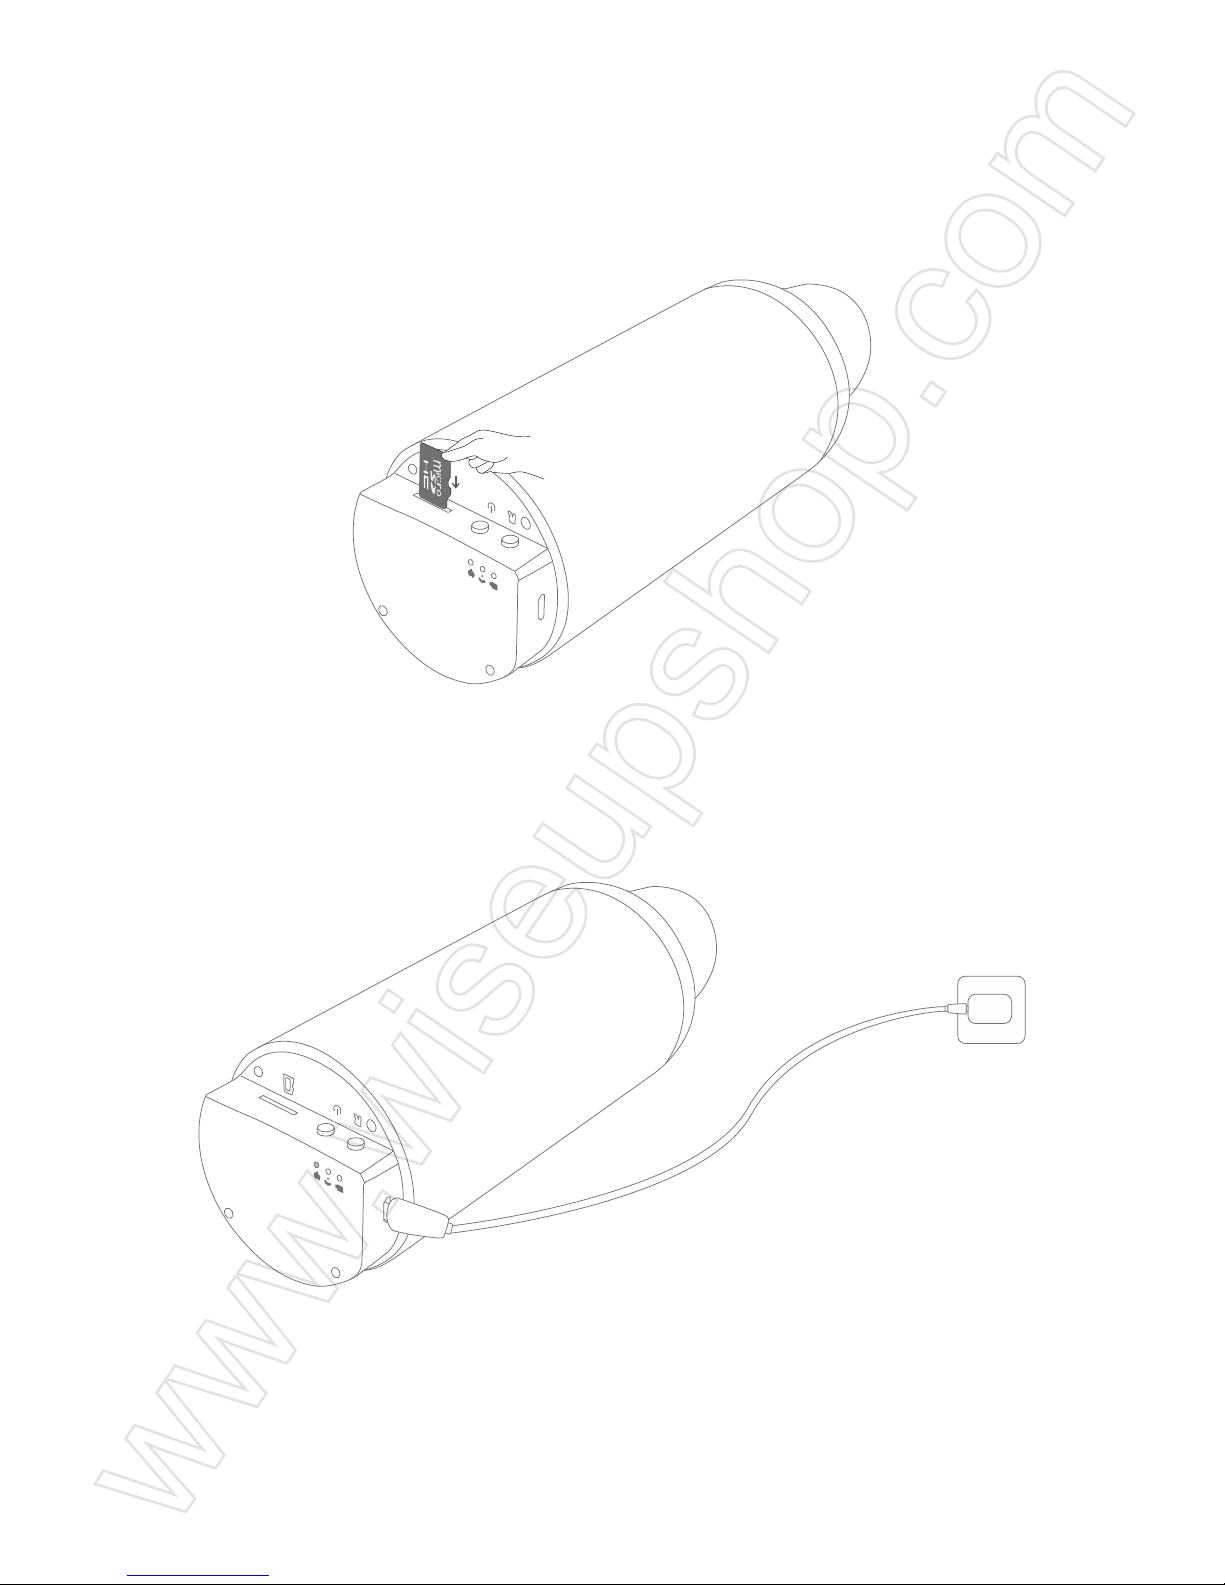
III. Preparation of Camera
3.1. Make sure that a micro SD card which has been formatted in advance has been
inserted into the SD card slot of the camera. The internal memory of this SD card cannot
exceed 64GB and we suggest you use the Micro SDHC Class 10 card only.
3.2 Connect the camera to an external power source, the power indicator light and the
charging indicator light will be solid on and the camera will be turned on automatically.
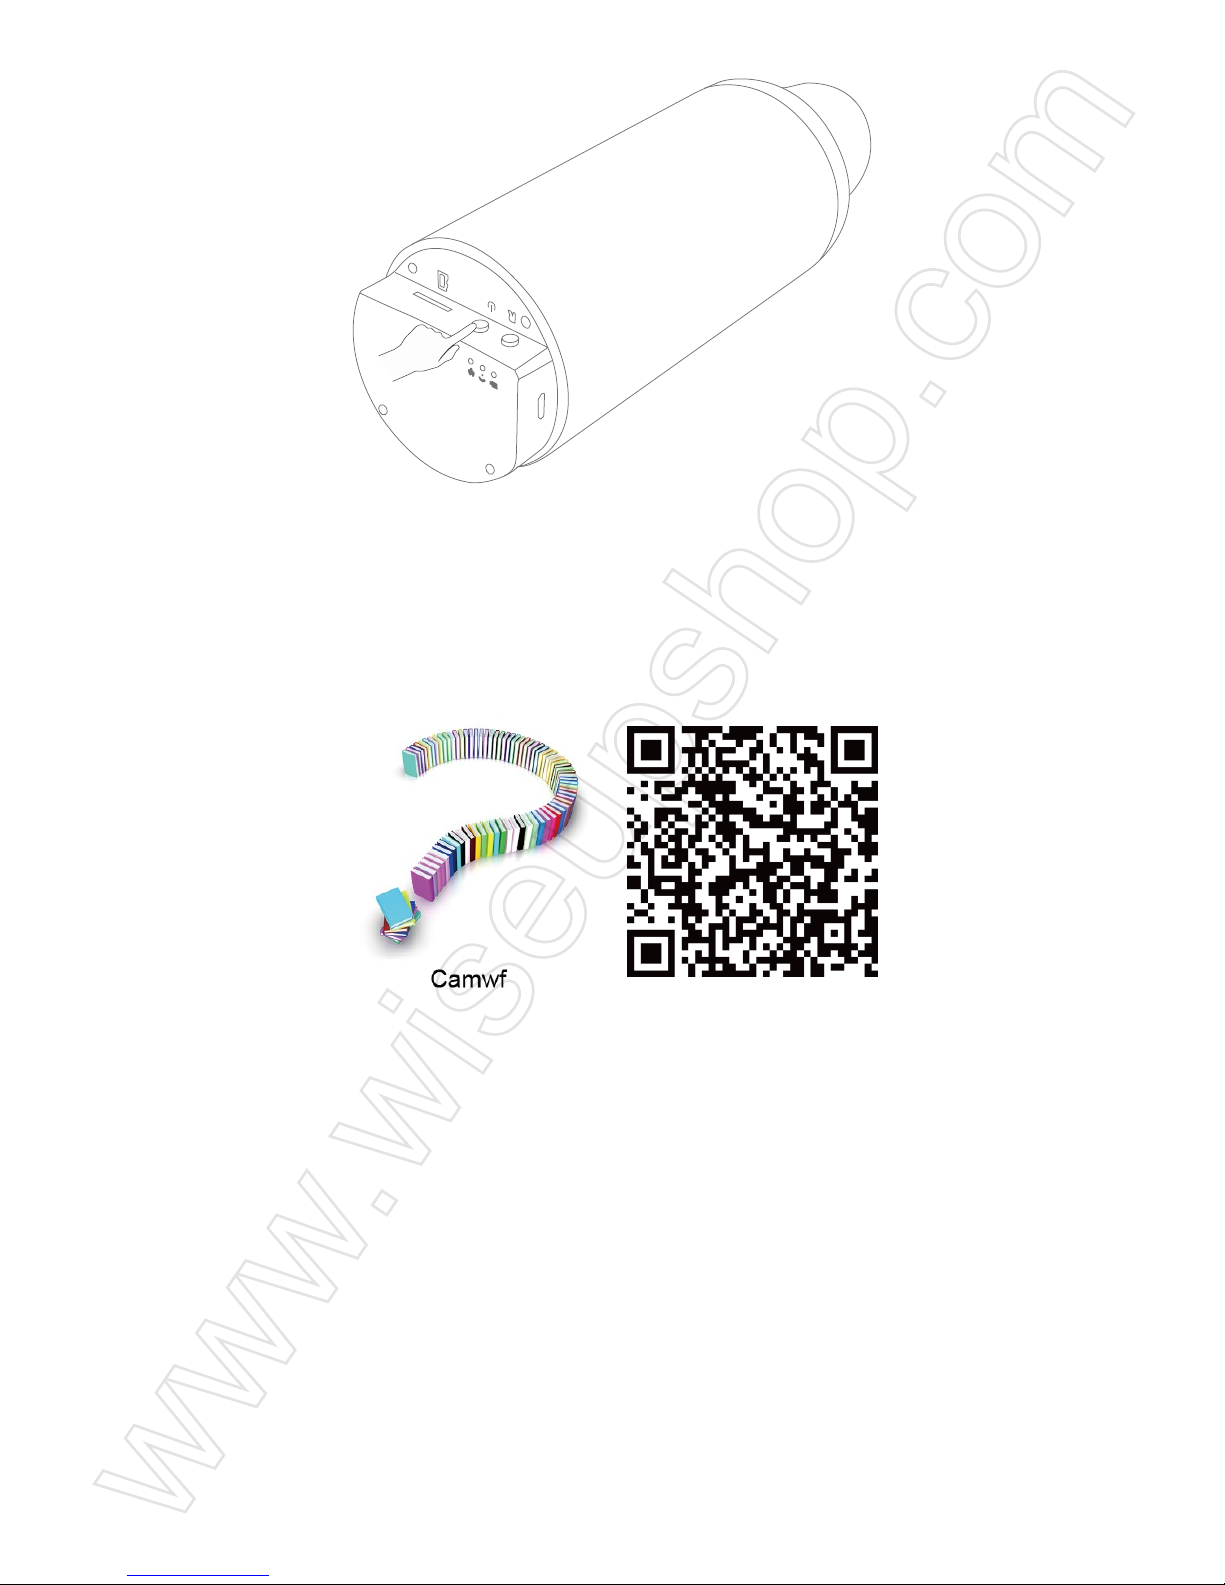
IV. P2P Network Configuration (LAN Mode)
4.1 Connect your camera to an external power source, or press and hold the power button
for 3 seconds to switch on the camera. When the WIFI indicator light flashes slowly,
indicating that the WIFI hotspot of camera has been on and ready.
4.2 Use IOS mobile device to scan the two-dimension code below, or directly search
"Camwf " in the App Store to install the APP.
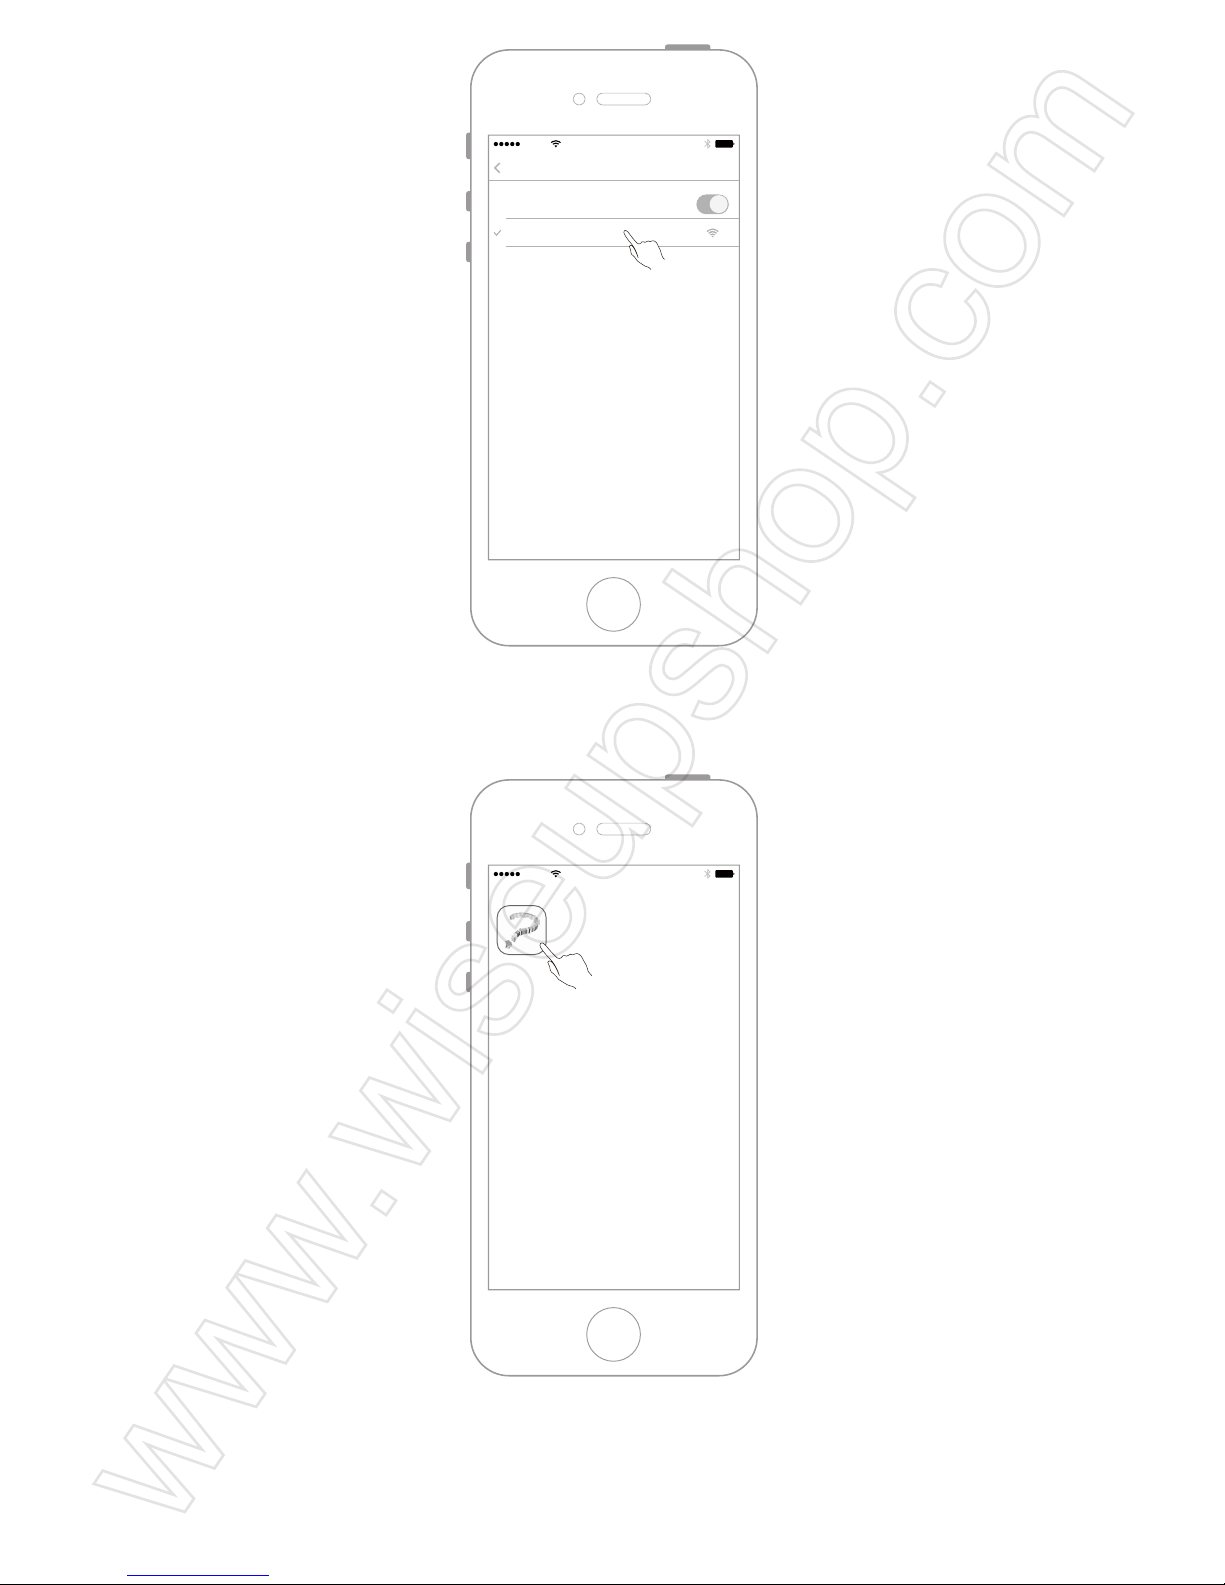
4.3 Open the WLAN settings page of the IOS mobile device and connect the IOS mobile
device to the WIFI hotspot of camera.
4.4 Open the "Camwf " APP.
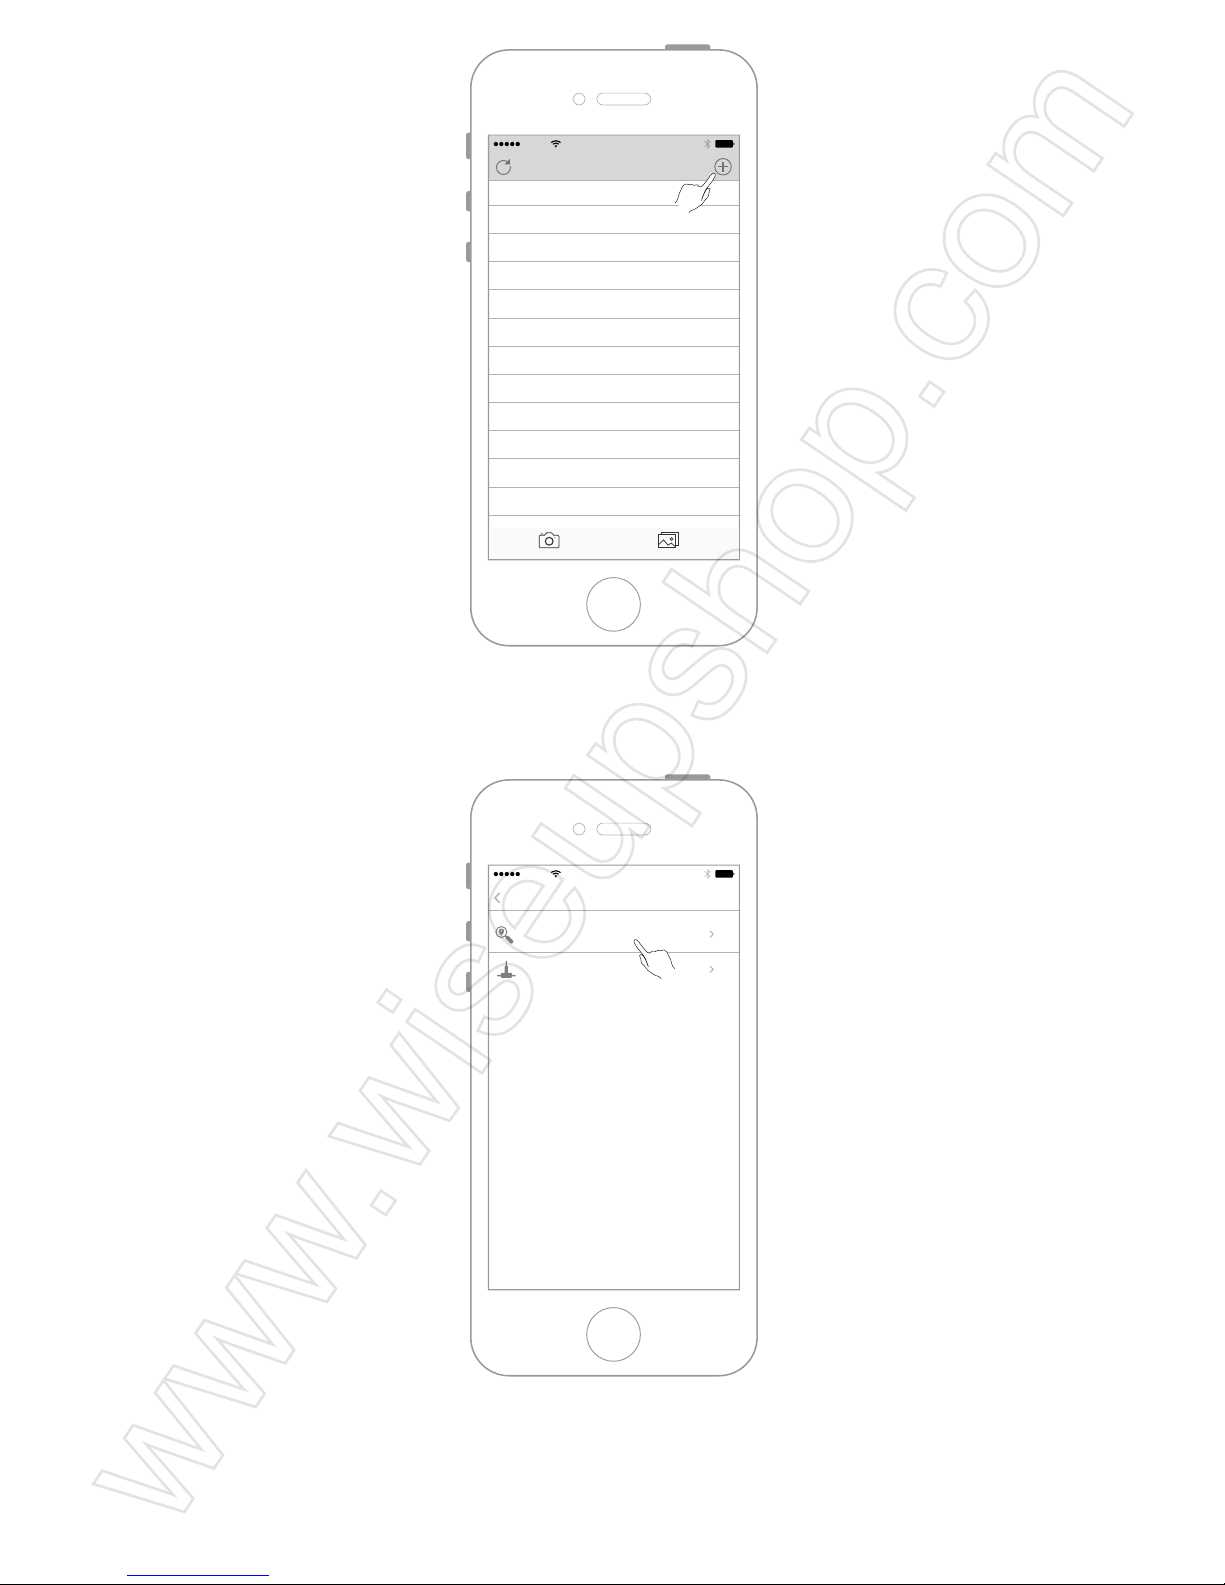
4.5 Add the camera to the "Camwf " APP
Step 1.
Step 2.
Step 3.
Step 4.
4.6 If the status of the camera is "Connected", indicating that the P2P network mode(LAN
mode) of the camera is configured successfully.
<Note>: The effective connection distance between the camera WIFI hotspot and the IOS mobile
device is approximately 15 meters (49 feet).
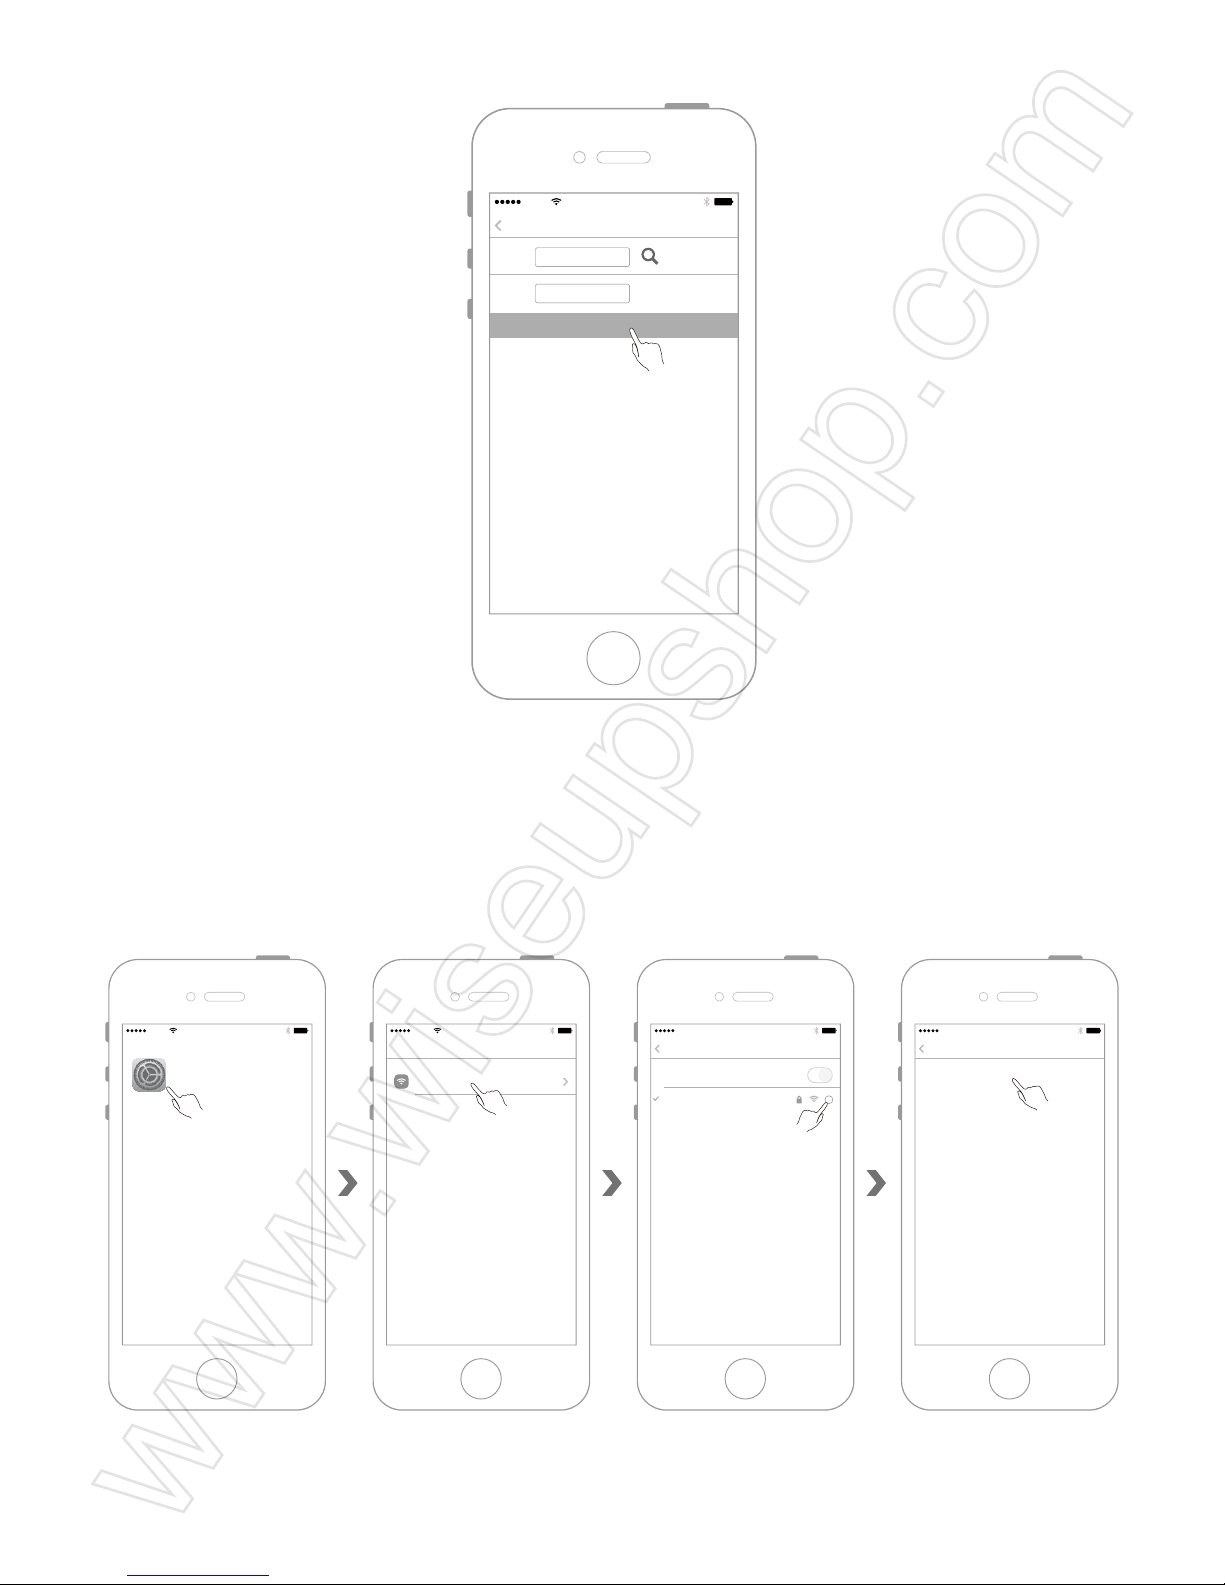
V. Remote Network Configuration (WAN Mode)
5.1 Open the "Camwf " app and make sure that the camera has been successfully added
to the app and is in the online condition.
5.2 Enter the camera menu and then select "Network Settings"
5.3 Enter "Network Settings" to search for the available WIFI hotspots, select the WIFI
hotspot you want to connect.
5.4 Input the password and tap "OK" to enroll the camera in, the camera will restart
automatically.
5.5 Exit the "Camwf " APP.
5.6 Return to the WLAN settings page of the IOS mobile device and disconnect the camera
from the current WIFI hotspot.
5.7 Enroll the IOS mobile device in another WIFI hotspot, or enable the data network
connection of IOS mobile device itself.
5.8 After make sure that your IOS mobile device has Internet access, open the "Camwf "
APP again. If the status of the camera is "Connected", indicating that the remote network
mode (WAN mode) of the camera is configured successfully.
<Note>: If the status of the camera is "Connect Fail", indicating that the remote network configuration
failed, please re-configure the remote network.
VI. Settings of Motion Detection Video Recording Mode
6.1 Open the "Camwf " app and make sure that the camera has been successfully added
to the app and is in the online condition.
6.2 Enter the camera menu and select "Device Settings".
6.3 Select "Alarm Record" and then select the desired motion detection sensitivity under
"Motion Detection".
6.4 Tap "Confirm" to complete the motion detection video recording settings. The video files
will be automatically saved in the micro SD card of the camera.
<Note>: The motion detection video resolution is 1280x720P and the video format is AVI.
VII. Settings of Local Uninterrupted Video Recording Mode
7.1 Open the "Camwf " app and make sure that the camera has been successfully added
to the app and is in the online condition.
7.2 Enter the camera menu and select "Device Settings".
7.3 Select "24h Video" and turn off the "Motion Detection" function.
7.4 Tap "Confirm" to complete the settings. The camera will automatically start the 24-hours
uninterrupted video recording.
VIII. Manual Remote Video Recording by Using IOS Mobile Device
8.1 Open the "Camwf " app and make sure that the camera has been successfully added
to the app and is in the online condition.
8.2 Tap the camera.
8.3 Tap the video recording button to start video recording.
8.4 Tap the sound recording button to turn on/off the sound recording function.
8.5 Play the video files saved on the IOS mobile device.
Step 1
Step 2
Step 3
<Note>: The video resolution is 1280x720P and the video format is MP4.
IX. Play the Camera SD Card Video Files on the IOS Mobile Device
9.1 Open the "Camwf " APP.
9.2 Enter the camera menu and select "SDCard Record".
9.3 Select one of the video files to play.
X. Reset
Operation: When the camera is powered on, press and hold the reset button for 10 seconds
to restore the factory settings.
XI. Change the Camera Name
11.1 Open the "Camwf " APP.
11.2 Make sure that the camera has been successfully added to the app and is in the online
condition.
11.3 Enter the camera menu and select "User Settings".
11.4. Input the new camera name.
11.5 Tap "OK" to confirm the modification.
XII. Change the Camera's Login Password
12.1 Open the "Camwf" app and make sure that the camera has been successfully added
to the app and is in the online condition.
12.2 Enter the camera menu and select "User Settings".
12.3 Input the new password.
12.4 Tap "OK" to save the modification.
XIII. Back-up Battery Charging
Connect your camera to an external power source to charge the battery, the power indicator
light and the charging indicator light will be solid on at the same time during the charging
process. When the charging time is over 6 hours, please disconnect the camera from the outlet
power source.
Frequently Asked Questions:
Q: Why I cannot find the camera’s WIFI hotspot on my IOS mobile device?
A: Please try one of the following methods to solve the problem:
1. Connect the camera to an external power source with the power adapter.
2. Reset the camera.
3. Check the distance between the IOS mobile device and the camera, make sure that the
IOS mobile device is within the effective connection range of the camera's WIFI hotspot.
Refresh the WIFI setting page on your mobile device 2 minutes later.
4. Disable the WIFI connection function of your IOS mobile device, enable it later and
check.
Q: Why there is no video signal on the APP screen, the live video screen is black or the
video is always in loading status?
A: Exit the APP and log in again, make sure that the camera is online.
Q: Why the camera often shows offline?
A: Check if the camera is connected to an outlet power source. Or check the distance
between the camera and your IOS mobile device.
Q: How to add the camera to more IOS mobile devices?
A: Install and launch the APP "Camwf"on other IOS mobile devices, tap "+" to scan the QR
code on the camera, or input the camera UID and password to add the camera.
Q: What can I do if I forget the login password?
A: Reset the camera to factory default settings.
Q: How many IOS mobile devices can be connected to the camera at the same time?
A: Theoretically there is no limit, but we suggest 4 devices in max.
Q: How many cameras can be added to the APP?
A: No limit.
Q: Can I connect the camera to my Windows PC?
A: Yes, you can, but you need to use an IOS mobile device to add the camera on the APP
in the first place, then add the camera on the PC client software. The PC client software
download address is: http://www.mymitech.com/download.html
600ml
500ml
400ml
300ml
200ml
100ml
1
4
8
9
5
6
7
2
3