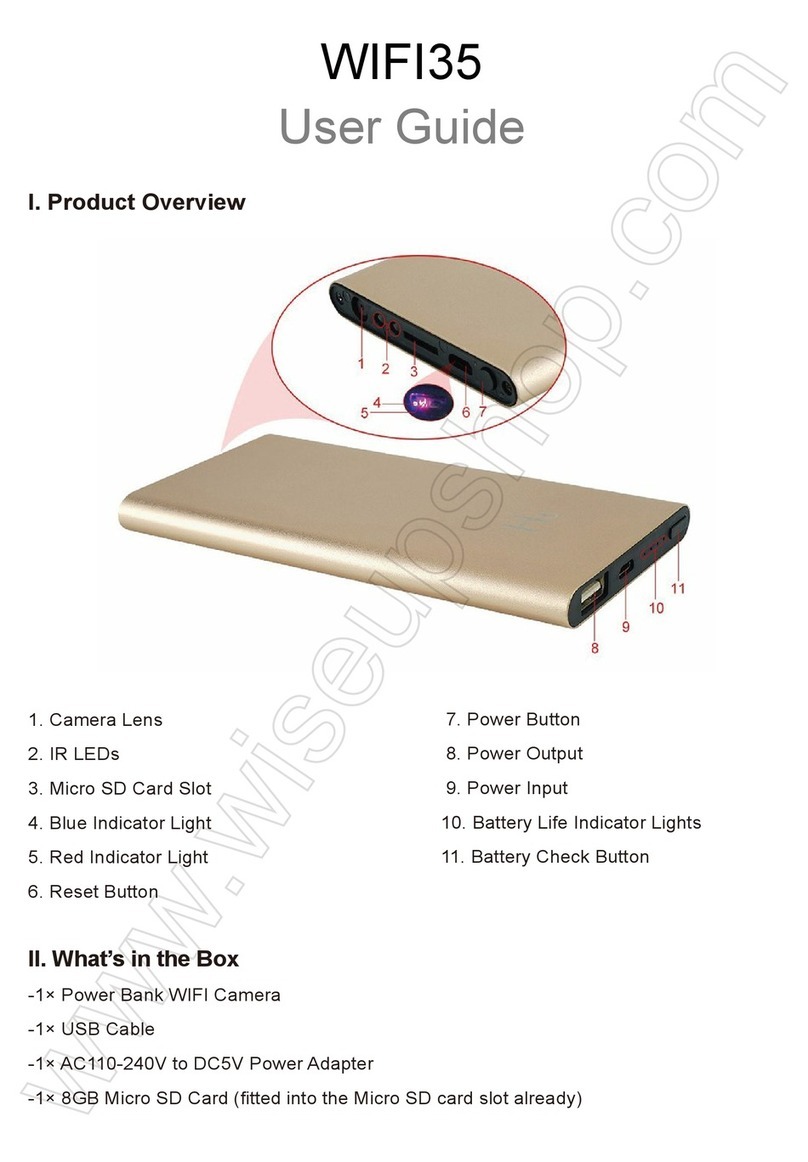
WISEUP SHOP L100 User manual

L100
User Guide
I. Product Overview
1. Electric Arc Spark
2. USB Port
3. Micro SD Card Slot
4. Blue/Red Indicator Light
5. Camera Lens
6. Power Button
7. Video Recording/Camera Button
8. Motion Detection Recording Button
II. What’s in the Box
-1× Electric Lighter Camera
-1× USB Cable
-1× 8GB Micro SD Card (fitted into the Micro SD card slot already)
III. Operation
>> Please make sure your camera is fully charged before using.
>> Please make sure the Micro SD card has been formatted already and is securely fitted
into the camera’s SD card slot, or it will not work. We recommend you use a SDHC Class
10 Micro SD card.
[Note]: If no Micro SD card is fitted into the camera, it will shut down automatically. Both blue
and red indicator lights will come on and the camera will vibrate for 1 second. 5 seconds later, the
camera will vibrate for 1 second again and the red indicator light will flash 3 times then turn off.
3.1. POWER ON/OFF
3.1.1. Power on the camera by pressing the Power Button for 2 seconds. Both blue and
red indicator lights will come on and the camera will vibrate once. Then the blue indicator
light will turn off while the red one will stay on, indicating the camera has entered into
standby mode.
3.1.2. Power off the camera by pressing the Power Button for 2 seconds in standby mode.
The camera will vibrate once and the red indicator light will flash twice then turn off.
[Note]: The camera will shut down automatically if it is in standby mode without any operation
more than 3 minutes.
3.2. VIDEO RECORDING
3.2.1. Power on the camera by pressing the Power Button for 2 seconds. Both blue and
red indicator lights will come on and the camera will vibrate once. Then the blue indicator
light will turn off while the red one will stay on, indicating the camera has entered into
standby mode.
3.2.2. Press the Video Recording Button for 2 seconds to start video recording. The
camera will vibrate twice and the red indicator light will flash 4 times then turn off.
3.2.3. Press the Power Button once to stop video recording. The camera will vibrate once
and the red indicator light will come on and stay illuminated, indicating the camera is back
to standby mode.
[Note]:
1). A video clip will be generated and saved every 30 minutes automatically.
2). The camera can record video for 80 minutes continuously on a full charge.
3). Video Resolution: 1280x720P Video Format: AVI
4). If the battery is low, the camera will save all video files and then shut down automatically. The
camera will vibrate for 1 second and the red indicator light will flash 5 times then turn off.
3.3. CAMERA/STILL PHOTOGRAPHY
3.3.1. Power on the camera by pressing the Power Button for 2 seconds. Both blue and
red indicator lights will come on and the camera will vibrate once. Then the blue indicator
light will turn off while the red one will stay on, indicating the camera has entered into
standby mode.
3.3.2. Press the Camera Button once to take a photo. Every time you take a photo, the
red indicator light will turn off while the blue one will flash once and turn off, then the
camera will vibrate once.
3.4. AUDIO RECORDING
3.4.1. Power on the camera by pressing the Power Button for 2 seconds. Both blue and
red indicator lights will come on and the camera will vibrate once. Then the blue indicator
light will turn off while the red one will stay on, indicating the camera has entered into
standby mode.
3.4.2. Press the Power Button once to start audio recording. The camera will vibrate once
and the red indicator light will turn off while the blue one will flash 3 times then turn off.
3.4.3. Press the Power Button once again to stop recording audio. The camera will vibrate
once and the red indicator light will come on and stay illuminated, indicating the camera
is back to standby mode.
[Note]:
1). An audio file will be generated and saved every 20 minutes automatically.
2). The camera can record audio for 130 minutes continuously on a full charge.
3). Audio Format: WAV
3.5. MOTION DETECTION RECORDING
3.5.1. Power on the camera by pressing the Power Button for 2 seconds. Both blue and
red indicator lights will come on and the camera will vibrate once . Then the blue indicator
light will turn off while the red one will stay on, indicating the camera has entered into
standby mode.
3.5.2. Press the Motion Detection Recording Button once to enter into motion detection
recording mode. The camera will vibrate 3 times and both blue and red indicator lights will
flash 4 times then turn off. The camera will record a 60-second video automatically when
motion is detected.
3.5.3. Press the Motion Detection Recording Button once again to exit motion detection
recording mode. The camera will vibrate once and the red indicator light will come on and
remain solid, indicating the camera is back to standby mode.
[Note]: The camera can run up to 80 minutes when no motion is detection all long.
IV. Video/Image/Audio File Uploads
4.1. Using the USB Cable
4.1.1. Power off the camera, connect it to a proper PC computer USB port using the USB
cable attached.
4.1.2. The camera will be recognized as a removable disk drive.
4.1.3. All the files can be accessed in the drive.
4.2. Using a Card Reader
4.2.1. Power off the camera, remove the Micro SD card and then insert it into a card reader.
4.2.2. Insert the card reader into a proper PC computer USB port.
4.2.3. The Micro SD card will be recognized as a removable disk drive.
4.2.4. All the files can be accessed in the drive.
V. Setting Time/Date Stamp
5.1. Power off the camera, connect it to a proper PC computer USB port using the USB
cable provided.
5.2. Removable disk drive folder appears.
5.3. Click on the drive in the root directory and inside root directory, create a txt file named
“time.txt”.
5.4. Write the current date and time in the “time.txt” file with the correct format:
YYYY/MM/DD HH:MM:SS (For example: 2017/03/14 14:24:32). Save this file.
5.5. Restart the camera and the system will upgrade the program automatically.
VI. Charging
6.1. Power off the camera, connect it to a proper PC computer USB port using the
included USB cable and your DC 5V 1A phone charger.
6.2. The blue indicator light will keep flashing during the charging process.
6.3. It will take 1.5 hours to obtain a full charge.
6.4. The blue indicator light will stay illuminated when the camera is fully charged.

L100
Benutzerhandbuch
I. Produktübersicht
1. Elektrischer Lichtbogen
2. USB-Anschluss
3. Mikro-Sd-Einbauschlitz
4. Blaue / Rote Anzeigeleuchte
5. Kameraobjektiv
6. Netzschalter
7. Videoaufnahme / Kamerataste
8. Bewegungserkennung Aufnahmetaste
II. Was ist in der Box
-1 × Elektro-Feuerzeug-Kamera
-1 × USB-Kabel
-1 × 8GB Micro SD Card (bereits in den Micro SD Kartensteckplatz eingebaut)
III. Betrieb
>> Bitte stellen Sie sicher, dass Ihre Kamera vor dem Gebrauch vollständig aufgeladen
ist.
>> Bitte stellen Sie sicher, dass die Micro SD-Karte bereits formatiert ist und sicher in den
SD-Kartensteckplatz der Kamera eingepasst ist, oder es funktioniert nicht. Wir empfehlen
Ihnen, eine SDHC Class 10 Micro SD Karte zu verwenden.
[Hinweis]: Wenn keine Micro SD-Karte in die Kamera eingelegt ist, wird sie automatisch
heruntergefahren. Die blauen und roten Kontrollleuchten leuchten auf und die Kamera wird für 1
Sekunde vibrieren. 5 Sekunden später wird die Kamera für 1 Sekunde vibrieren und die rote
Kontrollleuchte blinkt 3 mal und schaltet sich dann aus.
3.1. EINSCHALTEN / AUSSCHALTEN
3.1.1. Schalten Sie die Kamera ein, indem Sie den Netzschalter 2 Sekunden lang
drücken. Beide blauen und roten Kontrollleuchten leuchten auf und die Kamera wird
einmal vibrieren. Dann schaltet sich die blaue Kontrollleuchte aus, während die rote
eingeschaltet bleibt, was anzeigt, dass die Kamera in den Standby-Modus geschaltet ist.
3.1.2. Schalten Sie die Kamera aus, indem Sie im Standby-Modus 2 Sekunden lang den
Netzschalter drücken. Die Kamera vibriert einmal und die rote Kontrollleuchte blinkt
zweimal und schaltet sich dann aus.
[Hinweis]: Die Kamera schaltet sich automatisch aus, wenn sie sich im Standby-Modus befindet,
ohne jeglichen Betrieb mehr als 3 Minuten.
3.2 VIDEOAUFNAHME
3.2.1. Schalten Sie die Kamera ein, indem Sie den Netzschalter 2 Sekunden lang drücken.
Beide blauen und roten Kontrollleuchten leuchten auf und die Kamera wird einmal vibrieren.
Dann schaltet sich die blaue Kontrollleuchte aus, während die rote eingeschaltet bleibt, was
anzeigt, dass die Kamera in den Standby-Modus geschaltet ist.
3.2.2. Drücken Sie die Videoaufnahme-Taste für 2 Sekunden, um die Videoaufnahme zu
starten. Die Kamera vibriert zweimal und die rote Kontrollleuchte blinkt 4 mal und schaltet
sich dann aus.
3.2.3. Drücken Sie einmal die Ein- / Aus-Taste, um die Videoaufnahme zu beenden. Die
Kamera vibriert einmal und die rote Kontrollleuchte leuchtet auf und leuchtet auf und zeigt an,
dass die Kamera wieder in den Standby-Modus versetzt wird.
[Hinweis]:
1). Ein Videoclip wird alle 30 Minuten automatisch generiert und gespeichert.
2). Die Kamera kann Video für 80 Minuten kontinuierlich auf eine volle Ladung aufnehmen.
3). Video Auflösung: 1280x720P Video Format: AVI
4). Wenn die Batterie leer ist, speichert die Kamera alle Videodateien und schaltet sich dann
automatisch ab. Die Kamera wird für 1 Sekunde vibrieren und die rote Kontrollleuchte blinkt 5
mal und schaltet sich dann aus.
3.3. KAMERA / NOCH FOTOGRAFIE
3.3.1. Schalten Sie die Kamera ein, indem Sie den Netzschalter 2 Sekunden lang drücken.
Beide blauen und roten Kontrollleuchten leuchten auf und die Kamera wird einmal vibrieren.
Dann schaltet sich die blaue Kontrollleuchte aus, während die rote eingeschaltet bleibt, was
anzeigt, dass die Kamera in den Standby-Modus geschaltet ist.
3.3.2. Drücken Sie einmal die Kamera-Taste, um ein Foto aufzunehmen. Jedes Mal, wenn
Sie ein Foto aufnehmen, schaltet sich die rote Kontrollleuchte aus, während die blaue einmal
blinkt und ausschaltet, dann wird die Kamera einmal vibrieren.
3.4 AUDIO AUFNAHME
3.4.1. Schalten Sie die Kamera ein, indem Sie den Netzschalter 2 Sekunden lang
drücken. Beide blauen und roten Kontrollleuchten leuchten auf und die Kamera wird
einmal vibrieren. Dann schaltet sich die blaue Kontrollleuchte aus, während die rote
eingeschaltet bleibt, was anzeigt, dass die Kamera in den Standby-Modus geschaltet ist.
3.4.2 Drücken Sie einmal die Ein- / Aus-Taste, um die Audioaufnahme zu starten. Die
Kamera vibriert einmal und die rote Kontrollleuchte schaltet sich aus, während die blaue
3 mal blinkt und dann ausschaltet.
3.4.3. Drücken Sie erneut die Power-Taste, um die Aufnahme von Audio zu beenden. Die
Kamera vibriert einmal und die rote Kontrollleuchte leuchtet auf und leuchtet auf und zeigt
an, dass die Kamera wieder in den Standby-Modus versetzt wird.
[Hinweis]:
1). Eine Audiodatei wird alle 20 Minuten automatisch generiert und gespeichert.
2). Die Kamera kann Audio für 130 Minuten kontinuierlich auf eine volle Ladung aufnehmen.
3). Audioformat: WAV
3.5 MOTION DETECTION AUFNAHME
3.5.1. Schalten Sie die Kamera ein, indem Sie den Netzschalter 2 Sekunden lang drücken.
Beide blauen und roten Kontrollleuchten leuchten auf und die Kamera wird einmal vibrieren.
Dann schaltet sich die blaue Kontrollleuchte aus, während die rote eingeschaltet bleibt, was
anzeigt, dass die Kamera in den Standby-Modus geschaltet ist.
3.5.2 Drücken Sie einmal die Motion Detection Recording-Taste, um in den
Bewegungserkennungs-Aufnahmemodus zu gelangen. Die Kamera vibriert 3 mal und
die blaue und rote Kontrollleuchte blinkt 4 mal und schaltet sich dann aus. Die
Kamera wird automatisch ein 60-Sekunden-Video aufzeichnen, wenn eine Bewegung
erkannt wird.
3.5.3 Drücken Sie erneut die Motion Detection Recording-Taste, um den
Bewegungserkennungs-Aufnahmemodus zu verlassen. Die Kamera vibriert einmal
und die rote Kontrollleuchte leuchtet auf und bleibt solide, dass die Kamera wieder in
den Standby-Modus versetzt wird.
[Hinweis]: Die Kamera kann bis zu 80 Minuten laufen, wenn keine Bewegung alleine erkennbar ist.
IV. Video/Bild/Audio-Datei Hochgeladen
4.1. Verwenden des USB-Kabels
4.1.1. Schalten Sie die Kamera aus, schließen Sie sie an einen geeigneten PC-Computer
an. USB-Anschluss über das angeschlossene USB-Kabel.
4.1.2. Die Kamera wird als Wechseldatenträger erkannt.
4.1.3. Auf alle Dateien kann im Laufwerk zugegriffen werden.
4.2. Mit einem Kartenleser
4.2.1. Schalten Sie die Kamera aus, entfernen Sie die Micro SD Karte und legen Sie sie
dann in einen Kartenleser ein.
4.2.2. Legen Sie den Kartenleser in einen geeigneten PC-Computer ein.
4.2.3. Die Micro SD-Karte wird als Wechseldatenträger erkannt.
4.2.4. Auf alle Dateien kann im Laufwerk zugegriffen werden.
V. Einstellzeit / Datumsstempel
5.1. Schalten Sie die Kamera aus und schließen Sie sie an einen geeigneten PC-Computer
an. USB-Anschluss über das mitgelieferte USB-Kabel.
5.2. Der Ordner "Wechseldatenträger" wird angezeigt.
5.3. Klicken Sie auf das Laufwerk im Stammverzeichnis und im Stammverzeichnis,
erstellen Sie eine txt-Datei mit dem Namen "time.txt".
5.4 Schreiben Sie das aktuelle Datum und die Uhrzeit in der Datei "time.txt" mit dem
richtigen Format:
JJJJ / MM / TT HH: MM: SS (Zum Beispiel: 2017/03/14 14:24:32). Diese Datei speichern
5.5 Starten Sie die Kamera neu und das System wird das Programm automatisch
aktualisieren.
VI. Aufladen
6.1. Schalten Sie die Kamera aus, schließen Sie sie an einen geeigneten PC-Computer
USB-Anschluss mit dem mitgelieferten USB-Kabel und Ihrem DC 5V 1A Telefon-Ladegerät an.
6.2. Die blaue Kontrollleuchte blinkt während des Ladevorgangs.
6.3. Es dauert 1,5 Stunden, um eine volle Ladung zu erhalten.
6.4 Die blaue Kontrollleuchte bleibt leuchtet, wenn die Kamera voll aufgeladen ist.

L100
Mode d'emploi
I. Aperçu du produit
1. Étincelle d'arc électrique
2. Port USB
3. Emplacement pour carte micro SD
4. Indicateur lumineux bleu / rouge
5. Objectif de la caméra
6. Bouton d’Alimentation
7. Enregistrement Vidéo / Bouton de la caméra
8. Bouton d’Enregistrement de Détection de Mouvement
II. Qu'y a-t-il dans la boite
-1 × caméra allumeuse électrique
-1 × câble USB
-1 × 8 GB Carte Micro SD (déjà installée dans la fente Micro SD)
III. Opération
>> Assurez-vous que votre appareil photo est complètement chargé avant de l'utiliser.
>> Assurez-vous que la carte Micro SD a déjà été formatée et qu'elle est correctement
insérée dans l'emplacement pour carte SD de la caméra, sinon elle ne fonctionnera pas.
Nous vous recommandons d'utiliser une carte SDHC Class 10 Micro SD.
[Note]: Si aucune carte Micro SD n'est installée dans la caméra, elle s'arrêtera automatiquement.
Les voyants bleu et rouge s'allument et l'appareil vibre pendant 1 seconde. 5 secondes plus tard, la
caméra vibrera de nouveau pendant 1 seconde et le voyant rouge clignotera 3 fois puis s'éteindra.
3.1. MARCHE / ARRÊT
3.1.1. Allumez la caméra en appuyant sur le Bouton d’Alimentation pendant 2 secondes.
Les voyants bleus et rouges s'allument et l'appareil vibre une fois. Le voyant bleu s'éteint
alors que le voyant rouge reste allumé, indiquant que la caméra est entré en mode veille.
3.1.2. Mettez l'appareil hors tension en appuyant sur le Bouton d’Alimentation pendant 2
secondes en mode veille. La caméra vibre une fois et le voyant rouge clignote deux fois
puis s'éteint.
[Note]: L'appareil s'éteint automatiquement s'il est en mode veille sans aucune opération de
plus de 3 minutes.
3.2. ENREGISTREMENT VIDEO
3.2.1. Allumez la caméra en appuyant sur le Bouton d’Alimentation pendant 2 secondes.
Les voyants bleus et rouges s'allument et l'appareil vibre une fois. Le voyant bleu s'éteint
alors que le voyant rouge reste allumé, indiquant que la caméra est entré en mode veille.
3.2.2. Appuyez sur le Bouton d’Enregistrement Vidéo pendant 2 secondes pour démarrer
l'enregistrement vidéo. La caméra vibre deux fois et le voyant rouge clignote 4 fois puis
s'éteint.
3.2.3. Appuyez une fois sur le Bouton d’Alimentation pour arrêter l'enregistrement vidéo.
La caméra vibre une fois et le voyant rouge s'allume et reste allumé, indiquant que
l'appareil est de nouveau en mode veille.
[Note]:
1). Un clip vidéo sera généré et enregistré toutes les 30 minutes automatiquement.
2). La caméra peut enregistrer la vidéo pendant 80 minutes en continu sur une pleine charge.
3). Résolution vidéo: 1280x720P Format vidéo: AVI
4). Si la batterie est faible, l'appareil enregistre tous les fichiers vidéo et s'éteint automatiquement. La
caméra vibre pendant 1 seconde et le voyant rouge clignote 5 fois puis s'éteint.
3.3. PHOTOGRAPHIE CAMERA / STILL
3.3.1. Allumez la caméra en appuyant sur le Bouton d’Alimentation pendant 2 secondes.
Les voyants bleus et rouges s'allument et l'appareil vibre une fois. Le voyant bleu s'éteint
alors que le voyant rouge reste allumé, indiquant que la caméra est entré en mode veille.
3.3.2. Appuyez une fois sur la touche Appareil photo pour prendre une photo. Chaque fois
que vous prenez une photo, le voyant rouge s'éteint tandis que le bleu clignote une fois
et s'éteint, puis la caméra vibre une fois.
3.4. ENREGISTREMENT AUDIO
3.4.1. Allumez la caméra en appuyant sur le Bouton d’Alimentation pendant 2 secondes.
Les voyants bleus et rouges s'allument et l'appareil vibre une fois. Le voyant bleu s'éteint
alors que le voyant rouge reste allumé, indiquant que la caméra est entré en mode veille.
3.4.2. Appuyez une fois sur le Bouton d’Alimentation pour démarrer l'enregistrement
audio. La caméra vibre une fois et le voyant rouge s'éteint tandis que le bleu clignote 3
fois puis s'éteint.
3.4.3. Appuyez de nouveau sur le Bouton d’Alimentation pour arrêter l'enregistrement
audio. La caméra vibre une fois et le voyant rouge s'allume et reste allumé, indiquant que
l'appareil est de nouveau en mode veille.
[Note]:
1). Un fichier audio sera généré et enregistré toutes les 20 minutes automatiquement.
2). La caméra peut enregistrer l'audio pendant 130 minutes en continu sur une pleine charge.
3). Format audio: WAV
3.5. ENREGISTREMENT DE DÉTECTION DE MOUVEMENT
3.5.1. Allumez la caméra en appuyant sur le Bouton d’Alimentation pendant 2 secondes.
Les voyants bleus et rouges s'allument et l'appareil vibre une fois. Le voyant bleu s'éteint
alors que le voyant rouge reste allumé, indiquant que la caméra est entré en mode veille.
3.5.2. Appuyez une fois sur le Bouton d’Enregistrement de Détection de Mouvement pour
entrer en mode d'enregistrement de détection de mouvement. La caméra vibre 3 fois et
les voyants bleu et rouge clignotent 4 fois puis s'éteignent. L'appareil enregistre
automatiquement une vidéo de 60 secondes lorsque le mouvement est détecté.
3.5.3. Appuyez à nouveau sur le Bouton d’Enregistrement de Détection de Mouvement
pour quitter le mode d'enregistrement de détection de mouvement. La caméra vibre une
fois et le voyant rouge s'allume et reste allumé, indiquant que l'appareil est de nouveau
en mode veille.
[Note]: La caméra peut fonctionner jusqu'à 80 minutes si aucun mouvement n'est détecté
pendant longtemps.
IV. Téléchargement de fichiers vidéo/image/audio
4.1. Utilisation du câble USB
4.1.1. Mettez la caméra hors tension et connectez-le à un port USB de l'ordinateur
approprié à l'aide du câble USB fourni.
4.1.2. La caméra sera reconnu comme un lecteur de disque amovible.
4.1.3. Tous les fichiers sont accessibles dans le lecteur.
4.2. Utilisation d'un lecteur de carte
4.2.1. Mettez l'appareil hors tension, retirez la carte Micro SD, puis insérez-la dans un
lecteur de carte.
4.2.2. Insérez le lecteur de carte dans un port USB de l'ordinateur approprié.
4.2.3. La carte Micro SD sera reconnue comme un lecteur de disque amovible.
4.2.4. Tous les fichiers sont accessibles dans le lecteur.
V. Réglage de l'heure / date
5.1. Mettez la caméra hors tension et connectez-le à un port USB de l'ordinateur approprié à
l'aide du câble USB fourni.
5.2. Le dossier du lecteur de disque amovible s'affiche.
5.3. Cliquez sur le lecteur dans le répertoire racine et dans le répertoire racine, créez un
fichier txt nommé "time.txt".
5.4. Ecrivez la date et l'heure actuelles dans le fichier "time.txt" avec le format correct:
AAAA / MM / JJ HH: MM: SS (Par exemple: 2017/03/14 14:24:32). Enregistrer ce fichier.
5.5. Redémarrez la caméra et le système mettra automatiquement à niveau le programme.
VI. Chargement
6.1. Mettez l'appareil hors tension, connectez-le à un port USB de l'ordinateur approprié
à l'aide du câble USB fourni et de votre chargeur de téléphone DC 5V 1A.
6.2. Le voyant bleu clignote pendant le chargement.
6.3. Il faudra 1,5 heures pour obtenir une charge complète.
6.4. Le voyant bleu s'allume lorsque l'appareil est complètement chargé.

L100
Guida Utente
I. Panoramica del Prodotto
1. Arco Elettrico Spark
2. Porta USB
3. Slot Micro SD Card
4. Blu / Rosso SPIA
5. Camera Lens
6.Pulsante di Alimentazione
7. Pulsante Camera /Registrazione Video
8. Pulsante Registrazione Rilevamento Movimento
II. Cosa c'è nella scatola
-1 × Elettrico Macchina Fotografica Più Chiara
-1 × Cavo USB
-1 × 8 GB Micro SD Card (montato nello slot per schede Micro SD già)
III. Operazione
>> Si prega di assicurarsi che la fotocamera sia completamente carica prima di utilizzare.
>> Si prega di verificare che la scheda Micro SD è stata formattata già ed è dotato
saldamente nella slot per scheda SD della fotocamera, o non funzionerà. Si consiglia di
utilizzare una scheda SD SDHC Classe 10 Micro.
[Nota]: Se nessuna scheda micro SD è montata nella fotocamera, si spegnerà automaticamente.
Entrambi gli indicatori blu e rosso le luci si accendono e la fotocamera vibra per 1 secondo. 5 secondi
dopo, la fotocamera vibra per 1 secondo ancora e la spia rossa lampeggia 3 volte poi si spegne.
3.1. ACCENSIONE/SPEGNIMENTO
3.1.1. Accendere la fotocamera premendo il pulsante di accensione per 2 secondi.
Entrambi gli indicatori blu e rosso le luci si accendono e la fotocamera vibra una volta. Poi
l'indicatore luminoso blu si spegne, mentre quello rosso rimane accesa, indicando la
telecamera è entrato in modalità standby.
3.1.2. Spegnere la fotocamera premendo il pulsante di accensione per 2 secondi in
modalità standby. La fotocamera vibrerà una volta e la spia rossa lampeggia due volte poi
si spegne.
[Nota]: La fotocamera si spegne automaticamente se è in modalità standby, senza alcuna
operazione più di 3 minuti.
3.2. REGISTRAZIONE VIDEO
3.2.1. Accendere la fotocamera premendo il pulsante di accensione per 2 secondi.
Entrambi gli indicatori blu e rosso le luci si accendono e la fotocamera vibra una volta. Poi
l'indicatore luminoso blu si spegne, mentre quello rosso rimane accesa, indicando la
telecamera è entrato in modalità standby.
3.2.2. Premere il pulsante di registrazione video per 2 secondi per avviare la registrazione
video. La fotocamera vibrerà due volte e la spia rossa lampeggia 4 volte poi si spegne.
3.2.3. Premere il tasto Power una volta per interrompere la registrazione del video. La
fotocamera vibrerà una volta e la spia rossa si accende e rimane accesa, indicando la
fotocamera è in modalità standby.
[Nota]:
1). Un video clip verrà generata e salvata automaticamente ogni 30 minuti.
2). La fotocamera può registrare video per 80 minuti in modo continuo su una carica completa.
3). Risoluzione video: 1280x720P Formato video: AVI
4). Se la batteria è scarica, la fotocamera salvare tutti i file video e poi spegne automaticamente.
La fotocamera vibra per 1 secondo e la spia rossa lampeggerà 5 volte poi si spegne.
3.3. CAMERA / LA FOTOGRAFIA
3.3.1. Accendere la fotocamera premendo il pulsante di accensione per 2 secondi.
Entrambi gli indicatori blu e rosso le luci si accendono e la fotocamera vibra una volta. Poi
l'indicatore luminoso blu si spegne, mentre quello rosso rimane accesa, indicando la
telecamera è entrato in modalità standby.
3.3.2. Premere il pulsante della fotocamera, una volta per scattare una foto. Ogni volta
che si scatta una foto, la luce rossa si spegne, mentre quello blu lampeggia una volta e
spegnere, quindi la fotocamera vibra una volta.
3.4. REGISTRAZIONE AUDIO
3.4.1. Accendere la fotocamera premendo il pulsante di accensione per 2 secondi.
Entrambi gli indicatori blu e rosso le luci si accendono e la fotocamera vibra una volta. Poi
l'indicatore luminoso blu si spegne, mentre quello rosso rimane accesa, indicando la
telecamera è entrato in modalità standby.
3.4.2. Premere il tasto Power una volta per avviare la registrazione audio. La fotocamera
vibrerà una volta e la spia rossa si spegne mentre quello blu lampeggia 3 volte poi si
spegne.
3.4.3. Premere il tasto Power una volta per interrompere la registrazione audio. La
fotocamera vibrerà una volta e la spia rossa si accende e rimane accesa, indicando la
fotocamera è in modalità standby.
[Nota]:
1). Un file audio viene generata e salvata automaticamente ogni 20 minuti.
2). La fotocamera può registrare l'audio per 130 minuti in continuo su una carica completa.
3). Formato audio: WAV
3.5. REGISTRAZIONE RILEVAMENTO MOVIMENTO
3.5.1. Accendere la fotocamera premendo il pulsante di accensione per 2 secondi.
Entrambi gli indicatori blu e rosso le luci si accendono e la fotocamera vibra una volta. Poi
l'indicatore luminoso blu si spegne, mentre quello rosso rimane accesa, indicando la
telecamera è entrato in modalità standby.
3.5.2. Premere il pulsante Registrazione rilevamento movimento una volta per entrare in
modalità di registrazione di rilevazione di movimento. La fotocamera vibra 3 volte ed
entrambe le spie luminose blu e rosso lampeggia 4 volte poi si spengono. La fotocamera
registrerà un 60-secondo video automaticamente quando viene rilevato il movimento.
3.5.3. Premere il pulsante Registrazione rilevamento movimento, ancora una volta per
uscire dalla modalità di registrazione di rilevazione di movimento. La fotocamera vibrerà
una volta e la spia rossa si accende e rimane solido, indicando la fotocamera è in
modalità standby.
[Nota]: La fotocamera può funzionare fino a 80 minuti quando nessun movimento è la diagnosi
lungo tutto.
IV. Caricamento File di Video/Immagini/Audio
4.1. Uso del cavo USB
4.1.1. Spegnere la fotocamera, collegarla ad una vera e propria porta USB del computer
PC utilizzando il cavo USB in dotazione.
4.1.2. La fotocamera viene riconosciuta come unità disco rimovibile.
4.1.3. Tutti i file sono accessibili nel drive.
4.2. Uso di un lettore di schede
4.2.1. Spegnere la fotocamera, rimuovere la scheda Micro SD e inserirla in un lettore di schede.
4.2.2. Inserire il lettore di schede in una porta USB del computer corretta PC.
4.2.3. La scheda Micro SD verrà riconosciuta come unità disco rimovibile.
4.2.4. Tutti i file sono accessibili nel drive.
V. Impostazione Ora / Data
5.1. Spegnere la fotocamera, collegarla ad una vera e propria porta USB del computer
PC utilizzando il cavo USB in dotazione.
5.2. appare cartella sul disco rimovibile.
5.3. Fare clic sul disco nella directory principale e dentro directory root, creare un file txt
denominato “time.txt”.
5.4. Scrivere la data e l'ora correnti nel file “time.txt” con il formato corretto:
AAAA / MM / GG HH: MM: SS (Ad esempio: 2017/03/14 14:24:32). Salvare il file.
5.5. Riavviare la telecamera e il sistema aggiornerà automaticamente il programma.
VI. Ricarica
6.1. Spegnere la fotocamera, collegarla a una porta USB del computer PC corretto
utilizzando il cavo USB in dotazione e il vostro caricatore del telefono 1A DC 5V.
6.2. L'indicatore luminoso blu continuerà a lampeggiare durante la carica.
6.3. Ci vorranno 1.5 ore per ottenere una carica completa.
6.4. La spia blu rimane illuminato quando la fotocamera è completamente carica.
Table of contents
Languages:
Other WISEUP SHOP Security Camera manuals

WISEUP SHOP
WISEUP SHOP P2000 User manual

WISEUP SHOP
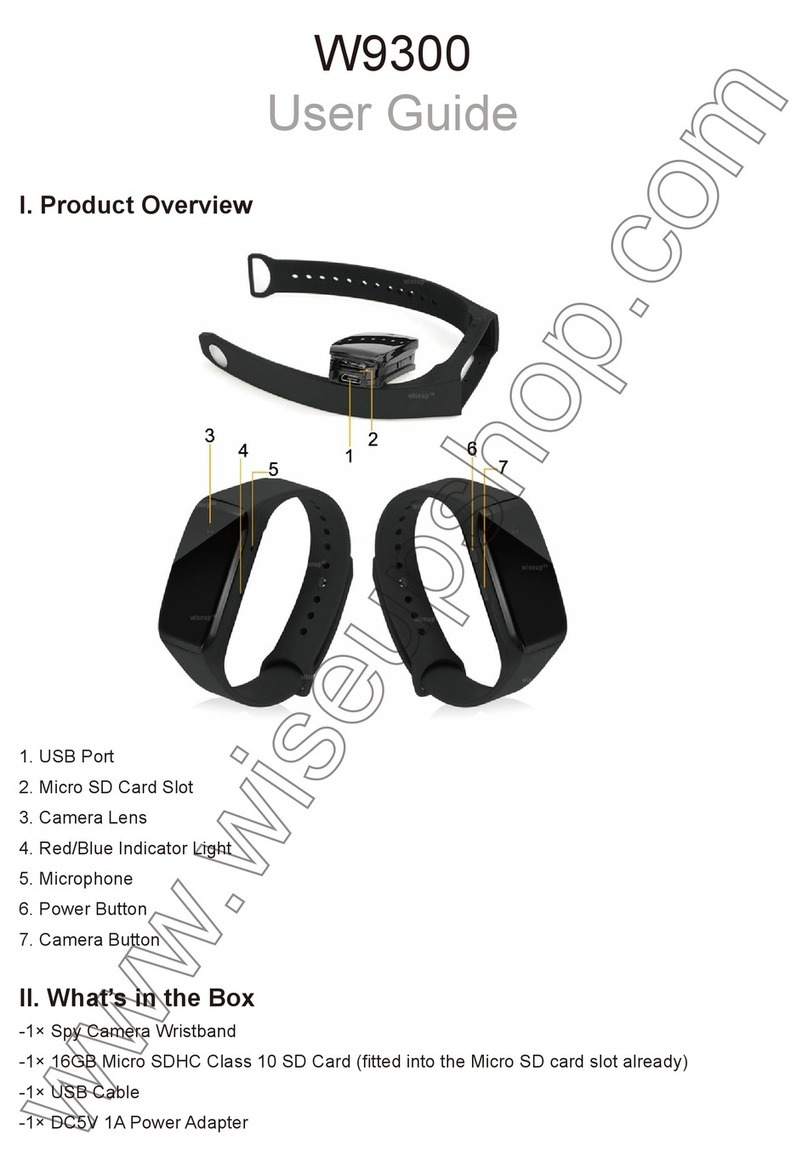
WISEUP SHOP W9300 User manual

WISEUP SHOP
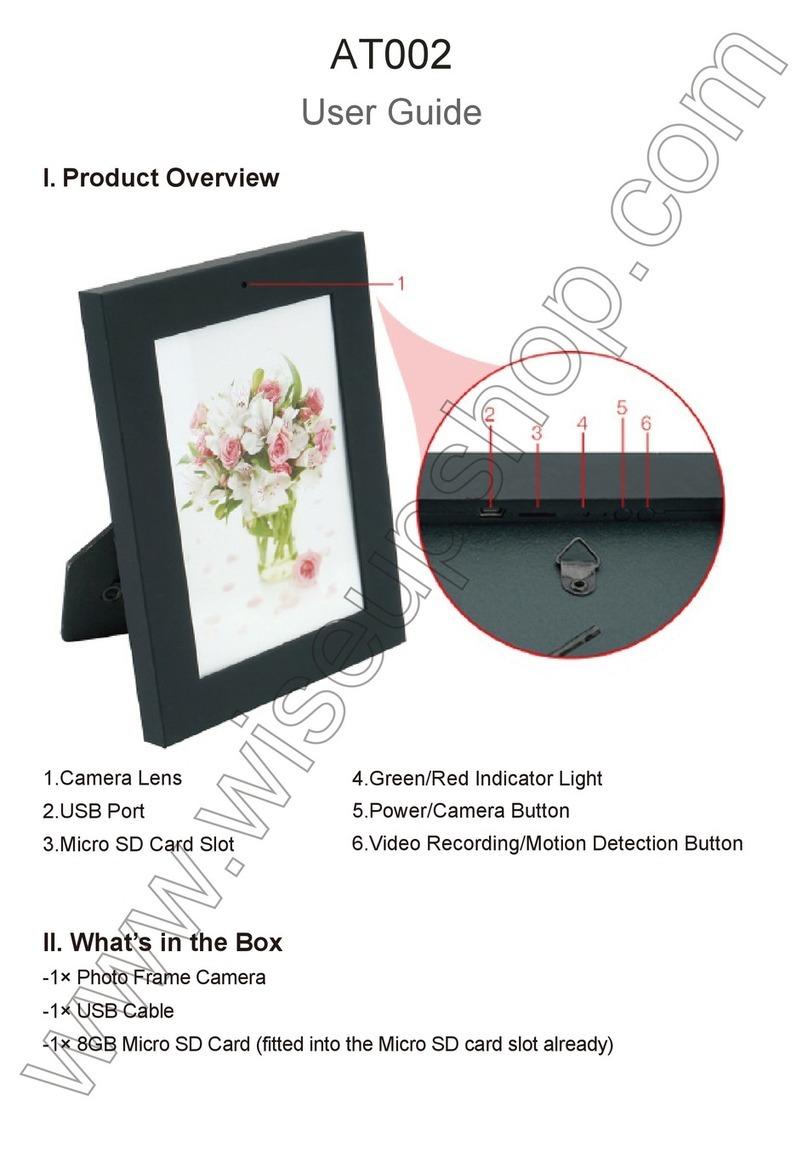
WISEUP SHOP AT002 User manual

WISEUP SHOP
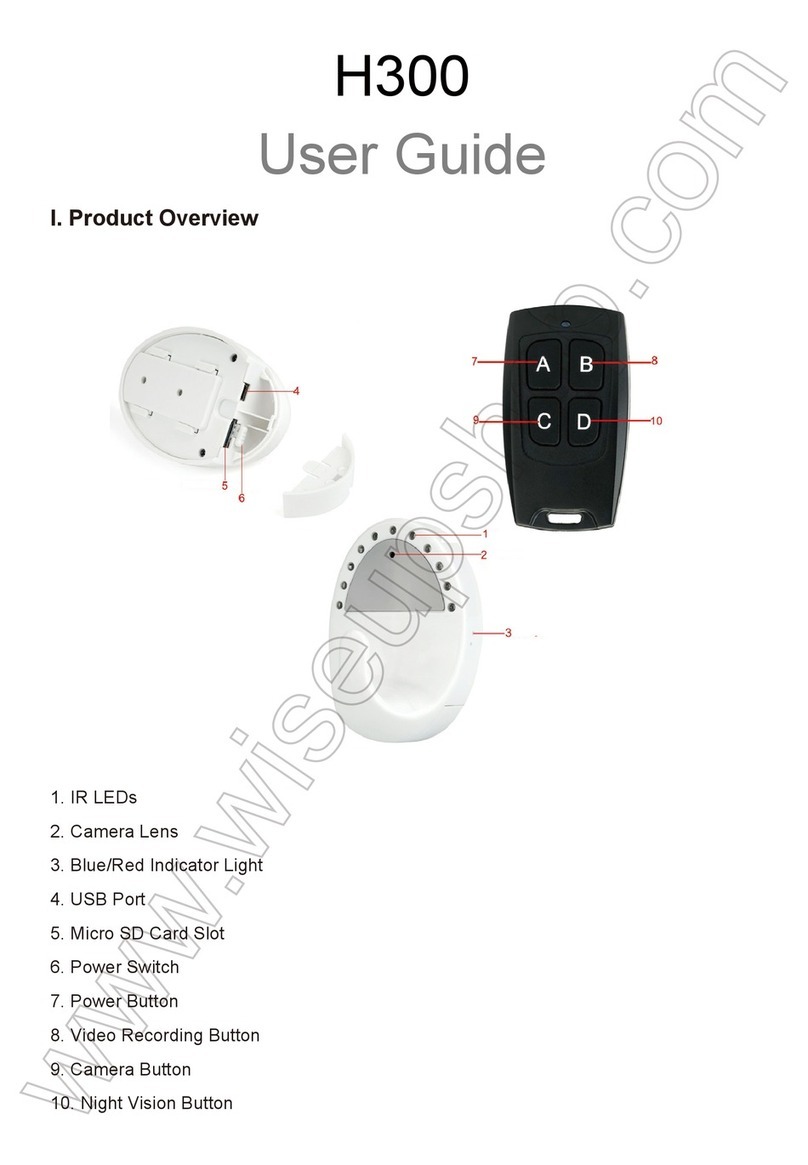
WISEUP SHOP H300 User manual

WISEUP SHOP
WISEUP SHOP T187 User manual

WISEUP SHOP
WISEUP SHOP P8000 User manual

WISEUP SHOP
WISEUP SHOP WIFI38 User manual

WISEUP SHOP
WISEUP SHOP MT-M130 User manual

WISEUP SHOP
WISEUP SHOP WIFI35 User manual

WISEUP SHOP
WISEUP SHOP IDC100 User manual