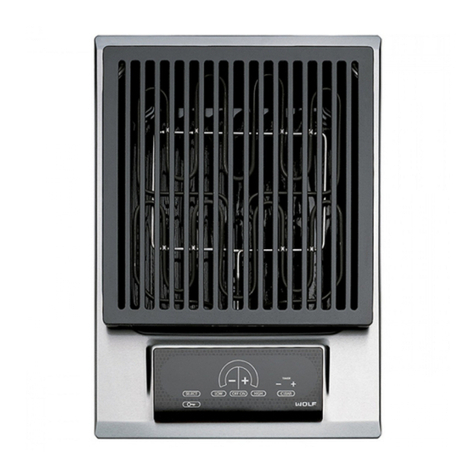
Wolf OG30-LP User manual

OUTDOOR GAS GRILL
USE AND CARE GUIDE
CLEANING, MAINTENANCE, AND MORE

2
|
Wolf Customer Care 800.222.7820
Contents
4Safety Precautions
6Outdoor Gas Grill Features
7Grill Operation
12 Care Recommendations
14 Troubleshooting
15 Wolf Warranty
OUTDOOR GAS GRILL

wolfappliance.com
|
3
Customer Care
The model and serial number are printed on the enclosed
product registration card. Both numbers are also listed on
the product rating plate. Refer to page 6 for rating plate
location. For warranty purposes, you will also need the date
of installation and name of your authorized Wolf dealer.
Record this information below for future reference.
SERVICE INFORMATION
Model Number
Serial Number
Date of Installation
Certied Service Name
Certied Service Number
Authorized Dealer
Dealer Number
If your product ever needs attention, be sure to use a Wolf
Factory Certied Service provider recommended by our
customer care center, or select one from our list of providers
available at wolfappliance.com/locator. All Factory Certi-
ed Service providers are carefully selected and thoroughly
trained by us.
OUTDOOR GAS GRILL
Important Note
To ensure this product is installed and operated as safely
and efciently as possible, take note of the following types
of highlighted information throughout this guide:
IMPORTANT NOTE highlights information that is especially
important.
CAUTION indicates a situation where minor injury or product
damage may occur if instructions are not followed.
WARNING states a hazard that may cause serious injury or
death if precautions are not followed.
IMPORTANT NOTE: Throughout this guide, dimensions in
parentheses are millimeters unless otherwise specied.

4
|
Wolf Customer Care 800.222.7820
SAFETY PRECAUTIONS
IMPORTANT INSTRUCTIONS
WARNING
If the information in this guide is not followed
exactly, a re or explosion may result, causing
property damage, personal injury or death.
WHAT TO DO IF YOU SMELL GAS:
•Shut off gas to the appliance.
•Extinguish any open ames.
•Open hood or remove cover.
•If odor continues, keep away from the appli-
ance and immediately call your gas supplier or
re department.
FOR YOUR SAFETY:
•Do not store or use gasoline or other ammable
vapors and liquids in the vicinity of this or any
other appliance.
•An LP cylinder not connected for use shall not
be stored in the vicinity of this or any other
appliance.
•Keep any electrical supply cord and the fuel
supply hose away from any heated surfaces.
FOR OUTDOOR USE ONLY:
If stored indoors, detach and leave LP cylinder
outdoors.
BEFORE LIGHTING:
•Read instructions before lighting.
•Open hood or remove cover before lighting.
•If ignition does not occur in 5 seconds, turn the
burner control(s) off, wait 5 minutes, and repeat
the lighting procedure.
•Read this use & care guide carefully before using
your outdoor product to reduce the risk of re,
electric shock or injury to persons.
•Installation must be performed by a qualied
installer, service agency or the gas supplier.
•Warranty service must be performed by Wolf
Factory Certied Service.
•Make sure the outdoor product is properly installed
and connected to the gas for which your unit was
designed. Do not use charcoal or other material in
your outdoor product.
•Make sure the outdoor product is connected to a
properly grounded GFCI 120 VAC electrical supply.
•Have the installer show you where the gas shut-off
valve is so you can shut off the gas supply in an
emergency.
•If the smell of gas is present, gas connections may
not be properly sealed or you may have a gas leak.
Determining where the gas leak is should be done
by Wolf Factory Certied Service or the gas
supplier.
WARNING
Wolf outdoor products are for outdoor use only!
Do not operate in enclosed areas. This could
result in carbon monoxide buildup which would
result in injury or death.

wolfappliance.com
|
5
SAFETY PRECAUTIONS
•Check all gas connections for leaks with soapy
water solution and brush. Never use an open
ame. Refer to the outdoor gas grill installation
guide for the leak testing procedure.
•Check exible hoses for cuts and wear that may
affect the safety before each use.
•Never light the outdoor product with cover in place.
•Never use the grill without the drip pan installed
and pushed all the way to the back of the grill.
•Never ll an LP cylinder beyond 80% full.
WARNING
PROPOSITION 65 FOR CALIFORNIA RESIDENTS
Cancer and Reproductive Harm—
www.P65Warnings.ca.gov
COMMONWEALTH OF MASSACHUSETTS
•Installations and repairs must be performed by a
qualied or licensed contractor, plumber or gas
tter, qualied or licensed by the state, province or
region where this appliance is being installed.
•Use only gas shut-off valves approved for use
within the state, province or region where this
appliance is being installed.
•A exible gas connector, when used, must not
exceed 3' (.9 m).
IMPORTANT INSTRUCTIONS
GENERAL SAFETY PRECAUTIONS
•The installation of this appliance must conform
with local codes or, in the absence of local codes,
either the National Fuel Gas Code, ANZI Z223.1/
NFPA 54, or CAN/CGA-B149.1, Natural Gas Instal-
lation Code or CAN/CGA-B149.2, Propane Installa-
tion Code.
•Minimum clearance of 12" (305) from the back and
sides of the grill to adjacent combustible construc-
tion must be maintained. This outdoor cooking gas
appliance should not be located under overhead-
unprotected combustible construction.
•The utilization of an external electrical source
requires that when installed, this outdoor cooking
gas appliance must be electrically grounded in
accordance with the local codes or, in the absence
of local codes, with the National Electrical Code,
ANSI/NFPA 70, or the Canadian Electrical Code,
CSA C22.1. Keep any electrical supply cord, or
the rotisserie motor cord and the fuel supply hose
away from any heated surfaces.
•It is critical that the gas burners are properly
installed with their orices inside the burners air
shutters. If not properly installed, gas may leak out-
side of the burner that could lead to re, potential
damage to your grill and bodily injury.
•When choosing an area for the grill, whether a
portable or built-in application, consider exposure
to wind, proximity to trafc paths and length of the
gas supply line.
•LP cylinder must be disconnected when not in use.
•This outdoor cooking gas appliance is not intended
to be installed in or on recreational vehicles and/or
boats.
•Do not obstruct the ow of combustion and ven-
tilation air to this appliance. Keep the ventilation
openings of the cylinder enclosure free and clear
from debris.

6
|
Wolf Customer Care 800.222.7820
OUTDOOR GAS GRILL
Outdoor gas grill (model OG36 shown)
Outdoor Gas Grill Features
FEATURES
1Product Rating Plate
2Control Knob
3Hood
4Thermometer
5Burner Grates
6Warming Rack
7Rotisserie Motor
8Rotisserie Burner
9Interior and Knob Light Button
10 Drip Tray
Outdoor Module Features
FEATURES
1Product Rating Plate
2Control Knob
3Burner Grate
4Knob Light Button (burner module)
Outdoor module (burner module shown)
5
8
2
6
7
3 4
1 9
10
4
2
3
1

wolfappliance.com
|
7
OUTDOOR GAS GRILL
Outdoor Grill | Module
For portable applications, Wolf grill carts are designed
specically to t grill models OG30, OG36 and OG42 and
the side burner. Model OG54 is designed for built-in appli-
cations only.
Wolf outdoor grills and the burner module are designed for
easy placement into a built-in enclosure. For outdoor grills,
installation in a combustible enclosure requires an insu-
lating liner. For the burner module, an insulating liner is not
required.
For built-in applications, stainless steel accessory doors and
drawers are available through an authorized Wolf dealer. For
local dealer information, visit the nd a showroom section of
our website, wolfappliance.com.
BURNER RATING
GRILL BURNERS BTU (kW)
OG30, OG36, OG42, BM13, SB13 25,000 (7.3)
OG54 25,500 (7.5)
SEAR ZONE BTU (kW)
OG36, OG42 25,000 (7.3)
OG54 25,500 (7.5)
ROTISSERIE BTU (kW)
OG30 14,000 (4.1)
OG36, OG42 16,000 (4.7)
OG54 (2) 14,000 (4.1)

8
|
Wolf Customer Care 800.222.7820
GRILL OPERATION
Grill Operation
BURNER LIGHTING
1Open hood completely. Do not attempt to light the grill
with hood closed. For module, remove cover.
2Open gas supply shut-off valve.
3Push in burner control knob and verify the hot surface
igniter glows. Hot surface igniters are located below the
burner grates inside the ash tubes (for module, at the
rear of the burner). Refer to the illustrations below.
4Once a glow is veried, push in and turn control knob
counterclockwise to HI. Hold knob in for ve seconds.
Once a ame is visible, release knob. If the burner fails
to light within ve seconds, turn knob to OFF, wait ve
minutes and repeat lighting procedure.
5Close hood and allow the grill to preheat until desired
temperature is displayed on the thermometer.
CONTROL
KNOB ON HI
FLASH TUBE
Burner control knob
Flash tube location
Getting Started
We know you are eager to start grilling, but before you
do, please take some time to read this use & care guide.
Whether you are an occasional cook or an expert chef, it
will be to your benet to familiarize yourself with the safety
practices, features, operation and care recommendations of
your Wolf outdoor gas grill.
•To ensure all residual oil from the manufacturing process
has been removed, turn burner control knobs to HI and
allow grill to heat for 10 minutes with hood closed. A
small amount of smoke and odor may be noticed during
the initial break-in period.
•Clean the grill thoroughly with hot water and mild
detergent prior to use. Rinse and dry with a soft cloth.
Refer to care recommendations on page 13.
•Verify all components are assembled correctly.
•Wolf outdoor products are manufactured for use with
natural gas or LP gas. Check the product rating plate for
the type of gas for your specic model. If this appliance
does not correspond to your type of gas, contact your
authorized Wolf dealer.

wolfappliance.com
|
9
GRILL OPERATION
Grill Operation
MANUAL LIGHTING
If electrical power is not available, surface burners can be lit
manually using a multi-purpose lighter.
1Open hood completely. Do not attempt to light the grill
with hood closed. For module, remove cover.
2Open gas supply shut-off valve.
3Push in and turn control knob counterclockwise to HI.
Hold knob in for ve seconds.
4Insert multi-purpose lighter (or match held by the lanyard
provided) through burner grates and near the top of the
ash tube (for module, near the top of the burner). Once
a ame is visible, release knob. If the burner fails to light
within ve seconds, turn knob to OFF, wait ve minutes
and repeat lighting procedure.
WARNING
When lighting, always keep face and body as far away
as possible.
GENERAL GRILLING
1After lighting, allow grill burners to preheat for 10 min-
utes on desired heat setting.
2Place food on the grill and cook to desired temperature
or doneness, turning food halfway through cooking time.
Adjust heat setting if necessary. The burner control knob
may be set to any position between HI and LO.
3Remove food or transfer to warming rack to keep warm.
4Allow grill to cool. Clean the drip tray after each use.
INFRARED SEAR BURNER
Searing steaks and other meats over the infrared sear
burner to begin grilling helps seal in avorful juices. Sear
meats quickly, followed by regular grilling over grill burners.
1After lighting, allow the infrared sear burner to preheat
for 10 minutes on HI.
2Sear meat up to two minutes on each side, then move
food to grilling area.

10
|
Wolf Customer Care 800.222.7820
GRILL OPERATION
Grill Operation
ROTISSERIE GRILLING
The rotisserie rotates food in front of an infrared burner for
even cooking and a more juicy taste. Additional radiant heat
from the outside grill burners on LO, may be used to speed
up cooking time. The hood must be closed. Use for grilling
large roasts and whole poultry.
When not in use, the rotisserie motor should be stored in a
protected area.
1Install rotisserie motor on the motor bracket and plug it
into the electrical outlet.
2Insert food in the middle of the spit rod and secure with
meat forks on both ends by tightening thumb screws.
Make sure food is evenly balanced.
3Insert spit rod in the rotisserie motor at desired position.
4Place basting pan under food to catch drippings.
5Push in and turn rotisserie knob counterclockwise to HI.
Rotisserie igniter is located on the rear panel next to the
rotisserie burner. Refer to the illustration below.
6Close hood and allow the rotisserie burner to preheat for
10 minutes on desired heat setting.
7Place spit rod with food into the rotisserie motor. Cook to
desired temperature or doneness.
8To remove spit rod, lift slightly on the rotisserie motor
and pull rod out.
ROTISSERIE POSITION
The two-position rotisserie allows for food of different sizes
to cook at the proper distance from the infrared rotisserie
burner. Maximum load is 25 lbs (11 kg).
1Install rotisserie motor in the low position for large loads
or high position for small loads. Refer to the illustrations
below. The motor socket hole will line up with the lower
notch of the spit saddles in low position and upper notch
in high position.
2Insert spit rod into the motor socket hole and place rod
on the appropriate notch of each spit saddle.
3For large loads, remove burner grates and place basting
pan on top of the briquette trays to catch drippings.
For small loads, place basting pan on top of the burner
grates.
LOW POSITION HIGH POSITION
Low rotisserie position
High rotisserie position
ROTISSERIE
IGNITER
Rotisserie igniter

wolfappliance.com
|
11
GRILL OPERATION
Grill Operation
WARMING RACK
The warming rack has three positions. Warm food in the
high or low position, or when not in use, place on the top
support hooks for storage position. Refer to the illustration
below.
From the high position, the warming rack must be removed
and rotated 180° for low position and storage position. The
warming rack must be removed or in the storage position
during rotisserie operation.
STORAGE
HIGH
LOW
Warming rack
SMOKER BOX
The sealed smoker box included with the grill, can hold
soaked wood chips to smoke enhance foods. The smoker
box may warp slightly with heat, but will retain its original
shape after it cools.
1Remove one burner grate section and slide remaining
sections aside so the center is exposed. Remove a
center half-size briquette tray without ash tube.
2Position smoker box in place of the briquette tray.
Smoker box will line up above the burner. For best
results, center smoker box in the grill.
3Add soaked wood chips to the smoker box.
4Turn control knob for the burner under the smoker
box on HI. Once smoking begins, turn heat to desired
setting.
5Position burner grate section over the smoker box and
place food directly on the grate.
6Every 30 to 45 minutes, slide grate section aside to
access the smoker box. Stir wood chips and add more if
needed.
7Cook food to desired temperature, doneness or smoke
enhancement.
CAUTION
Do not use the smoker box over the infrared sear
burner.

12
|
Wolf Customer Care 800.222.7820
CARE RECOMMENDATIONS
Grill Lights
Outdoor gas grills are equipped with halogen interior lights
and LED lights in the control knobs for night grilling.
Turn interior and knob lights on and off using the button
located on the front panel of the grill. Interior lights turn off
automatically when the hood is closed but the control knob
lights will remain on.
Interior lights require 10W, type G4 halogen bulbs and are
available through an authorized Wolf dealer. For local dealer
information, visit the nd a showroom section of our web-
site, wolfappliance.com.
LIGHT BULB REPLACEMENT
IMPORTANT NOTE: Use a paper towel when handling
the replacement halogen bulb to keep oil on ngers from
touching the bulb. Failure to do this will shorten the life of
the bulb.
1Unplug grill from the electrical outlet and allow the
halogen bulb to cool before replacing.
2Remove the light cover lens, by pushing in on one of the
side retaining brackets with a screwdriver.
5Remove the old halogen bulb by pulling it straight out.
6Using a paper towel to handle the new halogen bulb,
insert bulb securely into the socket and replace the light
cover lens.
CAUTION
Use caution when handling light bulbs. Halogen bulbs
get hot instantly and adjacent parts may retain heat.

wolfappliance.com
|
13
CARE RECOMMENDATIONS
Care Recommendations
CLEANING
Stainless steel After grill has cooled, use a nonabrasive stainless steel cleaner and apply with a soft lint-free cloth. To
bring out the natural luster, lightly wipe surface with a water-dampened microber cloth followed by a dry
polishing chamois. Always follow the grain of stainless steel. Baked-on residue can be removed using a mild
abrasive pad with stainless steel cleaner. Do not use steel wool. It is normal for certain areas of the stainless
steel to discolor due to intense heat given off by the burners.
Grill interior Turn all grill burners on HI (including sear, but not rotisserie burner). Allow grill to heat for 10–12 minutes with
hood closed. Turn burners OFF and allow grill to cool completely. Remove burner grates and briquette trays.
Cover burner tubes and infrared sear burner with plastic wrap and clean interior with oven cleaner according
to directions.
Burner grates While grates are still hot, scrub with grill brush and water. The steam created will loosen food particles on
briquettes and drip tray. Do not clean the burner grate section while in place over the infrared sear burner.
Liquid should not come in contact with the sear burner. Grates may be rotated for cleaning.
Grill burners Inspect grill burners for spiders, insects and other obstructions periodically. Clear obstructions.
IMPORTANT NOTE: Spiders and insects can nest in burners causing a re hazard and damage to the grill.
Infrared sear burner Clean the protective screen of the sear burner and remove trapped particles periodically. To avoid damage
to ceramic tiles, do not allow liquid to come in contact with the infrared sear burner. Do not place briquette
trays over the sear burner.
Ceramic briquettes
Briquette trays
Turn all grill burners on HI (including sear, but not rotisserie burner). Allow grill to heat for 10–12 minutes with
hood closed. Turn burners OFF and allow grill to cool completely. Remove briquette trays and wipe clean.
Smoker box After grill has cooled, remove smoker box, empty and clean with warm water and mild detergent.
Drip tray After grill has cooled, slide drip tray out and wipe clean. To avoid a grease re, drip tray should be cleaned
after each use.

14
|
Wolf Customer Care 800.222.7820
Troubleshooting
Burners do not light.
•Push burner control knob in and verify igniter glows.
•Verify electrical power to grill and home circuit breaker
is on.
•Verify GFCI has not been tripped.
•Purge line of trapped air.
•If no electrical supply is available, burners can be lit
manually. Refer to page 9.
Hot surface igniter does not operate.
•Verify electrical power to grill and home circuit breaker
is on.
•Verify GFCI has not been tripped.
Burners do not heat properly.
•Verify proper gas supply.
•Verify gas supply line is not bent or kinked.
•Preheat burners for 10 minutes.
•Inspect grill burners for spiders, insects or other
obstructions.
WARNING
Spiders and insects can nest in burners causing a re
hazard and damage to the grill.
Burner ame blows out.
•Verify proper gas supply.
•If exposed to wind, provide a wind block.
Smell of gas is present.
•Contact Wolf Factory Certied Service or gas supplier to
check for gas leak.
Excessive are-ups occur.
•Clean burner grates.
•Excess fat on meat or excessive cooking temperature.
Interior or control knob lights do not operate.
•Verify electrical power to grill and home circuit breaker
is on.
•Verify GFCI has not been tripped.
•Interior light bulb may need to be replaced.
SERVICE
•Maintain the quality built into your product by contacting
Wolf Factory Certied Service. For the name of the
nearest Wolf Factory Certied Service, check the contact
& support section of our website, wolfappliance.com or
call Wolf customer care at 800-222-7820.
•When contacting service, you will need the model and
serial number of your product. Both numbers are listed
on the product rating plate. Refer to page 6 for rating
plate location.
•For warranty purposes, you will also need the date of
installation and name of your authorized Wolf dealer. This
information should be recorded on page 3 of this guide.
TROUBLESHOOTING
Sub-Zero, Sub-Zero & Design, Sub-Zero & Snowake Design, Dual Refrigeration, The Living Kitchen, Great American Kitchens The Fine Art of Kitchen Design, Wolf, Wolf &
Design, Wolf Gourmet, W & Design, red colored knobs, Cove, and Cove & Design are registered trademarks and service marks of Sub-Zero Group, Inc. and its subsidiaries.
All other trademarks are property of their respective owners in the United States and other countries.

Wolf Appliance Outdoor Limited Warranty*
FOR RESIDENTIAL USE
FULL ONE YEAR WARRANTY**
For one year from the date of original installation, this Wolf Appliance product warranty covers all parts and
labor to repair or replace, under normal residential use, any part of the product that proves to be defective
in materials or workmanship. All service provided by Wolf Appliance under the above warranty must be
performed by Wolf factory certied service, unless otherwise specied by Wolf Appliance, Inc. Service will
be provided during normal business hours.
LIMITED FIVE YEAR WARRANTY
For ve years from the date of original installation, Wolf Appliance will repair or replace the following parts
that prove to be defective in materials or workmanship: stainless steel briquette trays, gas valves, drip
pans, electronic control boards and electric heating elements. If the owner uses Wolf factory certied
service, the service provider will repair or replace these parts with the owner paying for all other costs,
including labor. If the owner uses non-certied service, the owner must contact Wolf Appliance, Inc. (using
the information below) to receive repaired or replacement parts. Wolf Appliance will not reimburse the
owner for parts purchased from non-certied service or other sources.
LIMITED LIFETIME WARRANTY
For the life of the product, Wolf Appliance will repair or replace the following parts that prove to be defec-
tive in materials or workmanship: all stainless steel components (excludes surface corrosion, scratches,
discoloration, weather and atmospheric related staining and minor surface rust and oxidation). If the owner
uses Wolf factory certied service, the service provider will repair or replace these parts with the owner
paying for all other costs, including labor. If the owner uses non-certied service, the owner must contact
Wolf Appliance, Inc. (using the information below) to receive repaired or replacement parts. Wolf Appliance
will not reimburse the owner for parts purchased from non-certied service or other sources.
TERMS APPLICABLE TO EACH WARRANTY
The warranty applies only to products installed for normal residential use. The warranty applies only to
products installed in any one of the fty states of the United States, the District of Columbia or the ten
provinces of Canada. This warranty does not cover any parts or labor to correct any defect caused by
negligence, accident or improper use, maintenance, installation, service or repair.
THE REMEDIES DESCRIBED ABOVE FOR EACH WARRANTY ARE THE ONLY ONES THAT WOLF APPLIANCE,
INC. WILL PROVIDE, EITHER UNDER THIS WARRANTY OR UNDER ANY WARRANTY ARISING BY OPERATION
OF LAW. WOLF APPLIANCE, INC. WILL NOT BE RESPONSIBLE FOR ANY CONSEQUENTIAL OR INCIDEN-
TAL DAMAGES ARISING FROM THE BREACH OF THIS WARRANTY OR ANY OTHER WARRANTY, WHETHER
EXPRESS, IMPLIED OR STATUTORY.
Some states do not allow the exclusion or limitation of incidental or consequential damages, so the above
limitation or exclusion may not apply to you. This warranty gives you specic legal rights and you may also
have other legal rights that vary from state to state.
To receive parts and/or service and the name of Wolf factory certied service nearest you, contact Wolf
Appliance, Inc., P.O. Box 44848, Madison, WI 53744; check the contact & support section of our website,
*Product must be approved for outdoor use, designated by model and serial number.
**Stainless steel (doors, panels, handles, product frames and interior surfaces) are covered by a limited
60-day parts and labor warranty for cosmetic defects.

2
|
Atención al cliente de Wolf 800.222.7820
Contenido
4Precauciones de seguridad
6Características de la parrilla de gas para exteriores
7Funcionamiento de la parrilla
12 Recomendaciones sobre el cuidado
14 Resolución de problemas
15 Garantía de Wolf
PARRILLA DE GAS PARA EXTERIORES

wolfappliance.com
|
3
Atención al cliente
El modelo y número de serie están impresos en la tarjeta
de registro del producto adjunta. Los dos números también
aparecen en la placa de datos del producto. Consulte la
página 6 para encontrar la placa de datos. Para nes de la
garantía, usted también necesitará la fecha de instalación y
el nombre de su distribuidor autorizado de Wolf. Anote esta
información abajo para referencia futura.
INFORMACIÓN PARA SERVICIO
Número de modelo
Número de serie
Fecha de instalación
Nombre de servicio certicado
Número de servicio certicado
Distribuidor autorizado
Número de distribuidor
Si su producto alguna vez necesita servicio asegúrese
de usar un proveedor de servicios certicado por Wolf y
recomendado por nuestro centro de atención al cliente,
o seleccione uno de nuestra lista de proveedores en
wolfappliance.com/locator. Todos los proveedores de los
centros de servicio autorizados han sido cuidadosamente
seleccionados y entrenados a fondo por nosotros.
PARRILLA DE GAS PARA EXTERIORES
Aviso importante
Para garantizar que este producto se instale y opere de
la forma más segura y eciente posible, tome nota de los
siguientes tipos de información resaltada en esta guía:
AVISO IMPORTANTE señala la información que es
especialmente importante.
PRECAUCIÓN indica una situación en la que se pueden
sufrir heridas leves o provocar daños al producto si no se
siguen las instrucciones.
ADVERTENCIA indica peligro de que se produzcan heridas
graves o incluso la muerte si no se siguen las precauciones.
AVISO IMPORTANTE: en toda esta guía, las dimensiones
entre paréntesis son milímetros, a menos que se especique
lo contrario.

4
|
Atención al cliente de Wolf 800.222.7820
PRECAUCIONES DE SEGURIDAD
•Lea este manual de uso y cuidado con atención
antes de utilizar su producto para exteriores a n
de reducir el riesgo de incendio, descarga eléctrica
o lesiones personales.
•La instalación la debe realizar un instalador cali-
cado, agencia de servicio o proveedor de gas.
•El servicio de garantía debe ser realizado por un
centro de servicio autorizado de Wolf.
•Asegúrese de que el producto para exteriores
esté correctamente instalado y conectado al gas
para el que fue diseñada la unidad. No utilice
carbón vegetal ni otro material en su producto para
exteriores.
•Conecte el producto para exteriores a una fuente
eléctrica de 120 V CA con GFCI.
•Pídale al instalador que le muestre dónde se cierra
la válvula para que pueda apagar el suministro de
gas en una emergencia.
•Si hay olor a gas, es posible que las conexiones
de gas no estén bien selladas o que haya una fuga.
El trabajo de determinar el lugar de una fuga de gas
lo debe realizar un centro de servicio autorizado de
Wolf o el proveedor de gas.
ADVERTENCIA
Los productos para exteriores de Wolf solo se
deben usar en exteriores. No los opere en áreas
cerradas, pues podría acumularse monóxido de
carbono y ocasionar lesiones o muertes.
INSTRUCCIONES IMPORTANTES
ADVERTENCIA
Si no se sigue la información de esta guía al
pie de la letra se puede provocar un incendio o
una explosión, y causar daños a la propiedad,
lesiones personales o incluso la muerte.
QUÉ HACER SI PERCIBE OLOR A GAS:
•Cierre la conexión de gas del electrodoméstico.
•Apague todas las llamas expuestas.
•Abra la campana o retire la tapa.
•Si persiste el olor, aléjese del electrodoméstico
y llame de inmediato a su proveedor de gas o al
departamento de bomberos.
POR SU SEGURIDAD:
•No almacene ni utilice gasolina u otros vapores
o líquidos ignífugos cerca de este o de cual-
quier otro electrodoméstico.
•No se deben almacenar cilindros de gas que no
estén conectados cerca de este o de cualquier
otro electrodoméstico.
•Mantenga el cable de corriente y la manguera
de suministro de combustible lejos de las
supercies calientes.
PARA USO EN EXTERIORES SOLAMENTE:
Si se guarda en interiores, desconecte y deje el
cilindro de gas afuera.
ANTES DEL ENCENDIDO:
•Lea las instrucciones antes de encender el
electrodoméstico.
•Abra la campana o retire la tapa antes de
encender el electrodoméstico.
•
Si no hay ignición en 5 segundos, apague los
controles del quemador y repita el procedimiento
.

wolfappliance.com
|
5
PRECAUCIONES DE SEGURIDAD
•Revise que no haya fugas en ninguna de las cone-
xiones de gas con una solución de agua jabonosa.
Nunca lo haga con una llama expuesta. Consulte
el manual de instalación de parrillas de gas para
exteriores para conocer el procedimiento de
prueba de fugas.
•Antes de cada uso, revise que las mangueras exi-
bles no estén rotas ni desgastadas pues ello puede
afectar la seguridad.
•Nunca encienda el producto para exteriores con la
tapa puesta.
•Nunca utilice la parrilla sin instalar la bandeja reco-
lectora ni empujarla totalmente hacia atrás de la
parrilla.
•Nunca llene un cilindro de gas más del 80% de su
capacidad.
ADVERTENCIA
PROPUESTA 65 PARA RESIDENTES DE
CALIFORNIA
Cáncer y Daño Reproductivo—
www.P65Warnings.ca.gov
MANCOMUNIDAD DE MASSACHUSETTS
•Las instalaciones y reparaciones deben ser reali-
zadas por un contratista, plomero o un instalador
de gas autorizado o calicado por el estado, la
provincia o región donde se va a instalar este
electrodoméstico.
•Utilice únicamente llaves de paso para gas
aprobadas para su uso dentro del estado, pro-
vincia o región donde se va a instalar este
electrodoméstico.
•Un conector de gas exible, cuando se utilice, no
debe sobrepasar 3' (.9 m).
INSTRUCCIONES IMPORTANTES
PRECAUCIONES GENERALES DE SEGURIDAD
•La instalación de este electrodoméstico debe
cumplir los códigos locales y, en caso de que no
los haya, el Código Nacional de Gas Combus-
tible, ANZI Z223.1/NFPA 54, o CAN/CGA-B149.1,
Código de Instalaciones de Gas Natural o CAN/
CGA-B149.2, Código de Instalaciones de Propano.
•Se debe mantener un espacio mínimo de 12" (305)
entre la parte posterior y los lados de la parrilla y
las estructuras combustibles. Este electrodomés-
tico de gas para exteriores no se debe colocar
debajo de estructuras combustibles suspendidas
que no estén protegidas.
•Si se usa una fuente eléctrica externa, este elec-
trodoméstico de gas para exteriores se debe
conectar a tierra en el momento de la instalación,
de conformidad con todos los códigos locales
o, en caso de que no los haya, con el Código
Nacional de Electricidad, ANSI/NFPA 70, o el
Código de Electricidad de Canadá, CSA C22.1.
Mantenga el cable de corriente, el cable del motor
del asador y la manguera de suministro de com-
bustible lejos de las supercies calientes.
•Es de vital importancia que los quemadores de gas
estén instalados correctamente con los oricios
dentro de los obturadores de aire de los quema-
dores, pues, en caso contrario, puede escapar
gas del quemador y provocar incendios, posibles
daños en la parrilla y lesiones corporales.
•Cuando seleccione el área para poner la parrilla,
ya se trate de una ubicación portátil o empotrada,
tenga en cuenta la exposición al viento, la proxi-
midad a vías de tránsito y la longitud de la línea de
suministro de gas.
•El cilindro de gas se debe desconectar cuando no
esté en uso.
•Este electrodoméstico de gas no debe instalarse
en vehículos recreativos ni en botes.
•No obstruya el ujo del aire de combustión y de
ventilación del electrodoméstico. Mantenga las
aberturas de ventilación de la carcasa del cilindro
despejadas y sin residuos.

6
|
Atención al cliente de Wolf 800.222.7820
PARRILLA DE GAS PARA EXTERIORES
Parrilla de gas para exteriores (modelo OG36 en la imagen)
CARACTERÍSTICAS
1Placa de datos del producto
2Perilla de control
3Campana
4Termómetro
5Rejillas de quemadores
6Parrilla de calentamiento
7Motor del asador
8Quemador del asador
9Botón de luz interior y de perillas
10 Charola vertedora
Características del modelo para exteriores
CARACTERÍSTICAS
1Placa de datos del producto
2Perilla de control
3Rejillas de quemadores
4Botón de luz de perillas (módulo de quemador)
Módulo para exteriores (módulo de quemador en la imagen)
5
8
2
6
7
3 4
1 9
10
4
2
3
1
Características de la parrilla de gas para exteriores
This manual suits for next models
11
Table of contents
Languages:
Other Wolf Grill manuals

Wolf
Wolf BBQ36C Instructions for use

Wolf
Wolf OG54NG User manual

Wolf
Wolf Sub-Zero ICBIG15/S User manual

Wolf
Wolf BBQ242 User manual

Wolf
Wolf OG30 User manual

Wolf
Wolf OG36 User manual

Wolf
Wolf BBQ242BI User manual

Wolf
Wolf Outdoor Gas Grill User manual

Wolf
Wolf Outdoor Gas Grills User manual

Wolf
Wolf OG54LP User manual

Wolf
Wolf OG42-LP User manual

Wolf
Wolf OG30 User manual

Wolf
Wolf IG15/S User manual

Wolf
Wolf BBQ36CLP Owner's manual

Wolf
Wolf BBQ36BI Owner's manual

Wolf
Wolf Sub-Zero ICBIG15/S User manual

Wolf
Wolf OG36-LP Operating manual

Wolf
Wolf IG15/S User manual

Wolf
Wolf IG15/S User manual

Wolf
Wolf BBQ362BI Instructions for use