manuals.online logo
Brands
  1. Home
  2. •
  3. Brands
  4. •
  5. Wolf
  6. •
  7. Warming Drawer
  8. •
  9. Wolf WARMING DRAWERS User manual

Wolf WARMING DRAWERS User manual

This manual suits for next models

1

Other Wolf Warming Drawer manuals

Wolf ICBWWD30 User manual

Wolf

Wolf ICBWWD30 User manual

Wolf ICBWWD30O User manual

Wolf

Wolf ICBWWD30O User manual

Wolf Warming Drawer User manual

Wolf

Wolf Warming Drawer User manual

Wolf WWD30 User manual

Wolf

Wolf WWD30 User manual

Wolf WWD30O User manual

Wolf

Wolf WWD30O User manual

Wolf 802727 User manual

Wolf

Wolf 802727 User manual

Wolf WD30 User manual

Wolf

Wolf WD30 User manual

Wolf WWD30 User manual

Wolf

Wolf WWD30 User manual

Wolf MWD24-2 User manual

Wolf

Wolf MWD24-2 User manual

Wolf WWDFRONT/B User manual

Wolf

Wolf WWDFRONT/B User manual

Wolf WWD30 Instructions for use

Wolf

Wolf WWD30 Instructions for use

Wolf WWD30 User manual

Wolf

Wolf WWD30 User manual

Wolf WWD30 Instructions for use

Wolf

Wolf WWD30 Instructions for use

Wolf WWD30-2 User manual

Wolf

Wolf WWD30-2 User manual

Wolf WWD30 User manual

Wolf

Wolf WWD30 User manual

Wolf CW24/S User manual

Wolf

Wolf CW24/S User manual

Wolf WWD30 User manual

Wolf

Wolf WWD30 User manual

Wolf WWD30 User manual

Wolf

Wolf WWD30 User manual

Wolf ICBWWD30 Owner's manual

Wolf

Wolf ICBWWD30 Owner's manual

Wolf 13005870 Service manual

Wolf

Wolf 13005870 Service manual

Wolf WD30 Owner's manual

Wolf

Wolf WD30 Owner's manual

Wolf WWD30 User manual

Wolf

Wolf WWD30 User manual

Wolf WWDFRONT/B User manual

Wolf

Wolf WWDFRONT/B User manual

Wolf WWD30 Owner's manual

Wolf

Wolf WWD30 Owner's manual

Popular Warming Drawer manuals by other brands

Siemens HW 290 Series instruction manual

Siemens

Siemens HW 290 Series instruction manual

Viking DEWD102SS Quick reference guide

Viking

Viking DEWD102SS Quick reference guide

Miele ESW 6229 Operating and installation instructions

Miele

Miele ESW 6229 Operating and installation instructions

Brandt WD1014X user guide

Brandt

Brandt WD1014X user guide

APW Wyott WD-2CMF Specification sheet

APW Wyott

APW Wyott WD-2CMF Specification sheet

KitchenAid KOWT107ESS installation instructions

KitchenAid

KitchenAid KOWT107ESS installation instructions

Hanseatic TCN14J6D-S user manual

Hanseatic

Hanseatic TCN14J6D-S user manual

Cardini WD6299 instruction manual

Cardini

Cardini WD6299 instruction manual

GE Monogram ZTD910SBSS Dimension Guide

GE

GE Monogram ZTD910SBSS Dimension Guide

Dacor IWD24 Planning guide

Dacor

Dacor IWD24 Planning guide

Nordmende WD515IX user manual

Nordmende

Nordmende WD515IX user manual

Electrolux EW30WD55GS Use and care guide

Electrolux

Electrolux EW30WD55GS Use and care guide

Jenn-Air JWD6030CDX user guide

Jenn-Air

Jenn-Air JWD6030CDX user guide

Fisher & Paykel WB30SDEX1 Quick reference guide

Fisher & Paykel

Fisher & Paykel WB30SDEX1 Quick reference guide

Fisher & Paykel WB60SDTB1-SET Quick reference guide

Fisher & Paykel

Fisher & Paykel WB60SDTB1-SET Quick reference guide

Bosch HWD2720UC installation manual

Bosch

Bosch HWD2720UC installation manual

KitchenAid KEWS105 Use & care guide

KitchenAid

KitchenAid KEWS105 Use & care guide

Baumatic WD01SS user manual

Baumatic

Baumatic WD01SS user manual

manuals.online logo
manuals.online logoBrands
  • About & Mission
  • Contact us
  • Privacy Policy
  • Terms and Conditions

Copyright 2025 Manuals.Online. All Rights Reserved.

USE & CARE GUIDE
Warming Drawers
Important Note
To ensure the safe and efficient use of Wolf equipment,
please take note of the following types of highlighted
information throughout this guide:
I PORTANT NOTE highlights information that is
especially important.
CAUTION signals a situation where minor injury or product
damage may occur if instructions are not followed.
WARNING states a hazard that may cause serious injury or
death if precautions are not followed.
Contents
WolfWarmingDrawers .........................3
SafetyInstructions ............................4
Warming Drawer Features . . . . . . . . . . . . . . . . . . . . . . 6
Warming Drawer Operation . . . . . . . . . . . . . . . . . . . . . 7
WarmingDrawerCare.........................12
ServiceInformation...........................13
WolfWarranty ...............................14
Features and specifications are subject to change at any time
without notice. Visit our website, wolfappliance.com for the
most up-to-date information.
I PORTANT NOTE: Throughout this guide, dimensions in
parentheses are millimeters unless otherwise specified.
Wolf Warming Drawers 3
wolfappliance.com
Thank You
Your purchase of a Wolf warming drawer attests to the
importance you place upon the quality and performance of
your cooking equipment. We understand this importance
and have designed and built your warming drawer with
quality materials and workmanship to give you years of
dependable service.
Before you begin using your warming drawer, please take
some time to read this use & care guide. It will be to your
benefit to familiarize yourself with the safety practices,
features, operation and care recommendations of the Wolf
warming drawer.
Your Wolf warming drawer is protected by a warranty that
is one of the finest in the industry. Take a moment to read
the warranty statement at the end of this guide and refer
to it should service become necessary.
I PORTANT NOTE: The warming drawer must be installed
with a Wolf stainless steel or integrated drawer front.
Safety Instructions 4
IMPORTANT INSTRUCTIONS
I PORTANT NOTE: Read all safety instructions before
using this appliance.
•
Read this use & care guide carefully before using
your new warming drawer to reduce the risk of fire,
electric shock or injury to persons.
•
Ensure proper installation and servicing. This appli-
ance must be properly installed and grounded by a
qualified technician. Have the installer show you the
location of the circuit breaker or fuse so that you
know where to turn off power.
•
Warranty service must be performed by a Wolf
authorized service center.
•
Before performing any service, unplug or disconnect
the power supply for the warming drawer by switch-
ing off the circuit breaker or removing the fuse.
GENERAL SAFETY REQUIRE ENTS
•
Ensure that towels are stacked only as high as the
sides of the drawer pan. Any higher may result in
discoloration of the towels.
•
The purpose of the warming drawer is to hold hot
cooked foods at serving temperature and proof
yeast dough. Cold food cannot be heated thoroughly
or cooked in the warming drawer.
•
Make sure the warming drawer is securely installed
in a firmly attached cabinet.
•
Use care when opening the warming drawer.
Partially open the warming drawer and let warm air
escape prior to removing or replacing food.
•
Always place the rack in the desired location while
the warming drawer is cool.
•
Always use dry pot holders when removing items
from the warming drawer. Wet or damp pot holders
can cause burns. Do not use a towel or bulky cloth
in place of pot holders.
•
Do not store or use gasoline or other flammable
vapors and liquids in the vicinity of this or any other
appliance.
•
Do not touch the heating element or the interior
surface of the warming drawer. These surfaces may
be hot enough to burn. The inside surfaces of the
warming drawer may be hot when opened.
•
Do not heat unopened food containers. Pressure
could build up and the container could burst and
cause serious injury.
•
Do not use aluminum foil to line the warming drawer.
This may cause damage to interior surfaces of the
warming drawer.
•
Do not overfill the warming drawer. This may lead to
difficulty in opening or closing the drawer, as well as
items falling out of the drawer or behind the drawer.
Safety Instructions 5
wolfappliance.com
IMPORTANT INSTRUCTIONS
GENERAL SAFETY REQUIRE ENTS
•
Do not operate the warming drawer if the front panel
has not been installed.
•
Do not repair or replace any part of the warming
drawer unless specifically recommended in literature
accompanying this appliance. All service should be
referred to a Wolf authorized service center.
•
Do not leave children alone or unattended in the area
when the warming drawer is in use. Never allow
children to sit, stand or hide in the appliance. Do not
let children play with the warming drawer.
•
Never leave the warming drawer open when you are
not attending to the warming drawer.
•
Never use the warming drawer or other appliances
for warming or heating the room.
•
Do not wear loose fitting or hanging garments while
using this appliance.
•
Do not place more than 75 lbs (34 kg) into the
warming drawer. Do not use the warming drawer to dry paper
products. If overheated, paper products can catch
fire.
Warming Drawer Features 6
Warming Drawer Features
•Optional stainless steel drawer fronts match the look of
Wolf built-in ovens and outdoor grills.
•Optional integrated drawer front allows for custom
wood panel and handle.
•Model WWD30O is CSA approved for outdoor
installations.
•Model WWD30 can be installed in a standard or flush
inset application.
•UL approved for warming towels.
•Crafted of heavy-duty stainless steel.
•Hidden electronic touch controls for sleek appearance.
•850-watt heating element with temperature control
range of 80°F to 200°F.
•Four preset temperatures: high 200°F, medium 160°F,
low 120°F and proof 85°F.
•Programmable automatic shutoff up to four hours.
•Fan assist for even heat distribution.
•Fast preheat times.
•Removable rack for stacking food.
•Three ball-bearing drawer glides for smooth, full
extension.
•Removable stainless steel drawer for easy cleaning.
•CSA certified for US and Canada.
•Two and five year residential warranty—exclusions
apply, see warranty at the end of this guide.
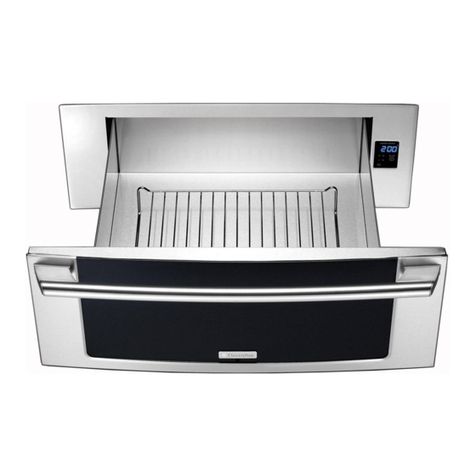
Hidden electronic
touch control panel
Removable stainless
steel drawer pan
Stainless steel and integrated
drawer front options
Location of
rating plate
Removable rack
for stacking food
Ball-bearing
drawer glides
This appliance is certified by Star- to meet
strict religious regulations in conjunction with
specific instructions found on www.star-k.org.
WAR ING DRAWER
Model WWD30 shown with L series drawer front.
Warming Drawer Operation 7
wolfappliance.com
Warming drawer control panel.
ON/OFFLCD Display Preset
temperatures
Variable
temperature
(UP/DOWN)
Automatic
shut-off timer
(UP/DOWN)
Electronic Controls
The electronic touch control panel is hidden when the
warming drawer is closed. With the warming drawer open,
the controls can be accessed at the top of the drawer just
behind the drawer front.
PRESETS
Your warming drawer features four preset temperature
settings; PROOF, LOW, MED and HIGH. Using the
PRESETS eliminates the need to manually set the temper-
ature and time.
TO SET THE TE PERATURE:
1) Touch POWER ON/OFF.
2) Touch one of the PRESETS; PROOF, LOW, MED or
HIGH or touch the TEMP UP or DOWN arrow pad.
Touch the UP arrow to increase the temperature and
the DOWN arrow to decrease the temperature. Two
seconds after selecting the temperature/time, the ON
indicator will illuminate as well as a beep indicating
that the unit is on.
I PORTANT NOTE: One of the PRESETS or the TEMP UP
or DOWN arrow pad must be pressed within 20 seconds
of turning unit on, or the unit will automatically shut off.
PREHEAT
During preheat, the temperature read-out in the LCD
display alternates between the setpoint and the actual
temperature. The word ”Lo” will appear in the LCD display
until the temperature reaches 85˚F (30˚C). The unit will
beep once to signal preheat is complete.
AUTO ATIC SHUT-OFF
Your Wolf warming drawer has a factory preset automatic
shut-off time of four hours. The time interval of the auto-
matic shut-off can be adjusted from one minute to 24
hours.
TO SET AUTO ATIC SHUT-OFF:
1) Warming drawer must be OFF.
2) Touch POWER ON/OFF.
3) Touch one of the PRESETS; PROOF, LOW, MED or
HIGH or touch the TEMP UP or DOWN arrow pad.
Touch the UP arrow to increase the temperature and
the DOWN arrow to decrease the temperature.
4) Touch and hold the TIMER UP arrow to increase the
shut-off time or the DOWN arrow to decrease the
shut-off time.
5) The word TIMER will illuminate and the automatic
shut-off time will appear in the LCD display.
Preset Temperature Settings
PROOF 85°F (30°C)
LOW 120°F (50°C)
MED 160°F (70°C)
HIGH 200°F (95°C)
Sabbath Mode
Sabbath mode is for certain religious observances where
some warming drawer functions need to be turned off. In
Sabbath mode, the automatic shut-off feature is disabled,
allowing the warming drawer to operate continuously.
TO INITIATE SABBATH ODE:
1) Warming drawer must be OFF.
2) Touch and hold POWER ON/OFF for 5 seconds. The
word ”Sab” will flash in the LCD display after 5
seconds.
3) While ”Sab” is flashing, select one of the PRESETS or
set the temperature with the TEMP UP or DOWN arrow
pads. Touch the UP arrow to increase the temperature
and the DOWN arrow to decrease the temperature.
Two tones will signify that the Sabbath mode has been
initiated.
4) In Sabbath mode, the warming drawer will operate
continuously until POWER ON/OFF is touched. The
word ON will remain illuminated in the LCD display all
the while the unit is in Sabbath mode. No other read-
outs will appear in the LCD display.
5) Touch POWER ON/OFF to shut off the warming drawer
and exit Sabbath mode.
Warming Drawer Operation 8
Electronic Controls
PRESET PROGRA ING
Preset temperatures and time settings can be adjusted for
the PROOF, LOW, MED and HIGH PRESETS.
The PROOF temperature range is 80–110˚F (25–40˚C).
The LOW, MED and HIGH PRESETS can be adjusted from
80–200˚F (25–95˚C).
TO ADJUST PRESET TE PERATURE AND TI E SETTING:
1) Warming drawer must be OFF.
2) Touch POWER ON/OFF.
3) Touch and hold the desired PRESET, PROOF, LOW,
MED or HIGH for 5 seconds. The word TIMER will illu-
minate and ”4:00” will flash in the LCD display along
with the temperature. Adjustments to the settings
should be made within 30 seconds. The unit will exit
the preset programming mode if no adjustment is
made within this time.
4) To adjust the temperature, touch and hold the TEMP
UP arrow to increase or the DOWN arrow to decrease
the temperature until the desired preset temperature is
shown in the LCD display.
5) To adjust the time setting, touch and hold the TIMER
UP arrow to increase or the DOWN arrow to decrease
the time until the desired preset time setting is shown
in the LCD display.
6) Touch and hold the adjusted PRESET again for 5
seconds. Three quick tones will signify that settings for
the PRESET have been changed. If 30 seconds elapse
before you touch and hold the PRESET, the unit will
exit the preset programming mode with no adjustments
made.
When Sabbath mode is initiated, the automatic shut-off
is disabled, requiring the unit to be turned off manually
by touching POWER ON/OFF.
Warming Drawer Operation 9
wolfappliance.com
Temperature Display
The warming drawer temperature display can be changed
from Fahrenheit (F) to Celsius (C) or vice versa.
TO CHANGE TE PERATURE DISPLAY:
1) Warming drawer must be OFF.
2) Touch and hold both the TEMP UP and DOWN arrows
for 5 seconds.
3) After 5 seconds, the unit will beep, the backlighting will
turn on, and either F or C will appear, depending on the
current display setting.
4) Touch the TEMP UP or DOWN arrow to select either
Fahrenheit (F) or Celsius (C).
5) With the desired temperature display selected, touch
POWER ON/OFF to save the setting.
Control Panel Backlighting
The Wolf warming drawer has three options for control
panel backlighting; backlight off in Sabbath, backlight on
in Sabbath and backlight off in all modes. The backlight
defaults to ON in normal use and OFF in Sabbath mode.
TO CHANGE CONTROL PANEL BACKLIGHTING:
1) Warming drawer must be OFF.
2) Touch and hold TEMP UP arrow and TIMER UP arrow
for 5 seconds. The current backlight setting will appear
in the LCD display.
3) Use the TIMER UP arrow to scroll through the three
backlight options; backlight off in Sabbath, backlight
on in Sabbath (50% power), and backlight off in all
modes. A selection should be made within 30 seconds.
The unit will default to the current backlight setting if a
new selection is not made within this time.
4) With the desired backlight setting selected, touch
POWER ON/OFF to save the setting.
Warming Drawer Operation 10
Using the Warming Drawer
Before using for the first time, remove all packaging mate-
rials from inside the warming drawer. Clean the warming
drawer thoroughly with hot water and a mild detergent to
remove residual oil and grease from the manufacturing
process. Rinse and dry with a soft cloth. Refer to cleaning
recommendations on page 12.
WAR ING DRAWER OPERATION
•Always start with hot food. The warming drawer will
keep hot food at serving temperature. Do not use the
warming drawer to heat cold food other than for
proofing yeast dough and crisping crackers, chips or
dry cereal.
•Always preheat the warming drawer. Preheat 3 minutes
for PROOF, 4 minutes for LOW, 7 minutes for MEDIUM
and 13 minutes for HIGH.
•Food in heat-safe glass and glass ceramic containers
may need higher temperature settings as compared to
food in metal containers.
•Repeated opening of the warming drawer will allow hot
air to escape and the food to cool.
•With large loads, it may be necessary to use a higher
temperature setting and to cover some of the cooked
food items.
•Food should be kept hot in the cooking container or
transferred to a heat-safe serving dish prior to being
placed into the warming drawer.
•Remove serving spoons, etc., before placing food
containers in warming drawer.
•Aluminum foil may be used to cover food to increase
moisture content.
•Do not place plastic containers or plastic wrap in the
warming drawer.
WAR ING DRAWER RACK
The rack will fit in the warming drawer front to back and
allows you to double stack items. Always preheat the
warming drawer with the rack in position.
When holding hot, cooked foods and warming empty
serving dishes at the same time, place the serving dishes
on the bottom of the warming drawer and place food on
the rack.
WAR ING DRAWER PAN
The stainless steel warming drawer pan is removable for
cleaning. To remove, open the warming drawer
completely. Slide fingertips under the right and left side
edges of the pan. Firmly pull the pan upward, making sure
that all edges are clear from the interior of the unit.
To replace the warming drawer pan, open the warming
drawer completely. The pan should be inserted so that the
holes for the fan are at the rear. Place pan edges on the
side rails of the drawer frame. Open and close the drawer
completely to check operation.