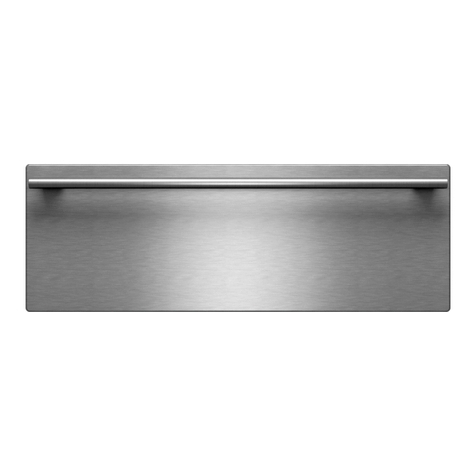
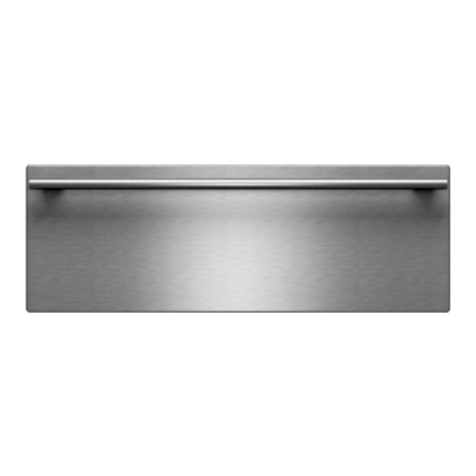
Wolf WWD30-2 User manual

Warming Drawer WWD30-2
Electronic Control Info.
3-2
#814750 - Revision A - January, 2011
GENERAL INFORMATION:
Electronic control will provide temperature control in the warming drawer as determined and set by user. Up and
down arrow keys are provided to increase and decrease, respectively, the temperature of the drawer and operation
time. Temperature control range of the warming drawer main board control will be 80ºF to 200ºF (26.7ºC to 93.3ºC).
Amplitude of this temperature control will be ± 5ºF. When the control sees a temperature at the thermistor 5ºF above
set-point, control will open the element relay. Once the control sees a thermistor temperature of 5ºF below set-point,
the relay will close allowing element to cycle on.
Power/Relay Board
Circulation Fan
Element
Display Board/
Keypad
Flex Cable
(Inner ceiling)
(Network Cable)
Electronic Control Board
(Behind Front Panel)
Door Switch
(Bottom of Drawer Front)
Display
Beeper
CONTROL (all low
temp components)
Keypad
Communications
Thermistor POWER BOARD
AC Fan
Element
(850W)
Flex Cable
Door Input
DLB
(CB/CE Model only)
Figure 3-1. Component Location Top View.
Figure 3-2. Electronic Control System Diagram.
TIMER
PROOF
LOW
PRESETS
HIGH
MED
TEMP
POWER
ON/OFF
PROOF
F
TEMPTEMPTEMP
ON TIMER
LCD Display Power On/Off Temperature
Controls
Preset Controls Timer Controls
Figure 3-3. Keyboard Layout.

Electronic Control Info.
Warming Drawer WWD30-2
3-3 #814750 - Revision A - January, 2011
DESCRIPTION OVERVIEW:
Element:
The element will be powered by the element relay (normally-open contacts). This allows the element to be disabled
under most conditions. Only during a call for heat from the main controller, will the element relay be energized.
Fan:
The fan will be powered by the fan relay (normally-open contacts). This allows the fan to be disabled under most
conditions. Only during a warming mode from the main controller, will the fan be in use.
Drawer Input:
The drawer switch will be a normally open switch, (when drawer is open), and closed when drawer is closed.
When drawer is opened and is in a normal heating mode, unit will de-energize relays to fan and element. If back
lighting of the LCD is enabled, then opening of the drawer will turn on back lighting, and by closing the drawer, back
lighting will go off.
NOTE:Sabbath mode has unique requirements. Please see Sabbath mode this section.
User Display:
The user display shows warming drawer preset temperature, any timed feature which is in process, and whether the
unit is in Proof mode. Other indicators include the ‘ON’ indicator which notes when unit is heating, (always on when
in the Sabbath mode), and displays which temperature units, (°F or °C), the temperature is being displayed in.
This area also informs user if there is an issue with the control and will display an error code in the temperature
and/or timer display. The user display numbers will be displayed as shown in the following pages.
The characters in the user display will only be illuminated when a normal warming mode, service diagnostic mode, or
kitchen timer is being used. At all other times, display will be remain off.
The “PROOF” is on anytime “PROOF” mode is being used.
The “ON” indicator is on anytime control is calling for heat. The exception is during Sabbath mode where the ”ON”
indicator stays on constantly.
NOTE:“TIMER” is on anytime there is a timed warming event or if kitchen timer is being used.
NOTE: “TIMER” is not an option in Sabbath mode.
POWER Key:
The “POWER” key is used to turn unit on and off. While unit is in “OFF” mode, the Power key and “TIMER” up and
down arrow keys remain active. If unit is powered up and Power key is pressed, the display will turn off along with
any associated backlighting. If unit is off and the Power key is pressed, the control backlighting (if applicable), will
turn on and the rest of the keys will be active.
NOTE: If no other key is pressed within 20 seconds, unit will turn off.
TEMP Up/Down Key:
The “TEMP” up or down arrow keys can be used to adjust temperature. By pressing and holding the up or down
arrow, unit will begin changing at the rate of 1º per ½ second until the first 5º increment is obtained. If the user con-
tinues pressing, control will increment in 5º increments per ½ second. The “TEMP” up or down arrow keys remain
active as long as control is On.
NOTE: Exception to this is in the Sabbath Mode.
NOTE: Temperature range is 80ºF to 200ºF, except in “PROOF” mode where maximum temperature is 120ºF.
TIMER Key:
The “TIMER” up or down arrow key is used to change time left in normal warming mode. Timer keys can also be
used as a Kitchen Timer. The rate of this ascension shall be ½ second per increment and in the following order: one
minute from 1-5 minutes; every five minutes from 5-30 minutes; 30 minute increments up to 5 hours; then hourly up
to 24 hours. At any time during a Normal Heating Mode, operator can adjust time left for warming by pressing
“TIMER” up or down arrow keys.
NOTE:The exception to this is during the Sabbath Mode (only the “Power On/Off” key is active in this mode).
Warming Drawer WWD30-2
Electronic Control Info.
3-4
#814750 - Revision A - January, 2011
SYSTEM MODES:
The control can be placed into several different operational modes which changes preset conditions inside the warm-
ing drawer. Details as to what each mode does to the operation of the drawer can be found below.
POWER UP:
Power up is defined as the initial application of power to the appliance through the power cord; not to be confused
with switching the unit on/off with the “Power On/Off” key. During power up, all segments of the LCD will illuminate
for 5 seconds before the unit goes into off mode.
After entering unit off mode, display will show “PF” in the time display until user presses a key. If unit was previously
in a warming mode prior to power loss, control will also emit a power failure chime every 30 seconds while displaying
“PF” until the “Power On/Off” is pressed.
NOTE: Pressing any key will clear “PF” error and unit will operate normally.
ON MODES:
ON Modes control behavior of electrical components of the appliance when it is “ON”. Switching the unit on is
accomplished buy pressing the “Power On/Off” key. When ON, any back lighting will immediately activate “- - -” will
be displayed in the temperature display with the respective temperature scale (F or C) blinking. (See Figure 3-4)
NOTE: If no other key is pressed within 20 seconds, unit will switch off.
NORMAL WARMING MODE:
Normal warming mode is the basic operating mode when power is turned on and any warming function is selected.
This will include heating by the element and circulation of air by use of the fan.
Mode Entry:
The unit can be placed into a normal warming mode by simply pressing the “Power On/Off” key followed by either
“TEMP” up or down arrow keys, or any preset is pressed. (See Figure 3-4)
NOTE: If no other key is pressed within 20 seconds, unit will switch off.
Operations:
Once unit is turned on and “TEMP” up or down arrow is pressed, unit will initiate at 120°F and can be adjusted in
increments of 1°F. If you press and hold either arrow, the display will increase by 1° each 1/2 second until the first 5°
increment is obtained then will increase by 5° per 1/2 seconds. (See Figure 3-5)
NOTE: Temperature is adjustable from 80°F to 200°F (26.7°C to 93.3°)
Mode Exit:
Pressing “Power On/Off” key will terminate Normal Warming Mode and shut unit off.
NOTE:The mode will also exit by reaching ‘0:00,’ on the timer. At this point, ‘0:00’ will begin flashing and the ele-
ments and fan will shut off. The control will also yield three chimes every 30 seconds to denote unit has shut off.
After 5 minutes the timer will self power down if the “Power On/Off” key is not pressed.
TIMER
PROOF
LOW
PRESETS
HIGH
MED
TEMP
POWER
ON/OFF
PROOF
F
TEMPTEMPTEMP
ON TIMER
Figure 3-5. Temperature Adjustment in Normal Warming Mode.
TIMER
PROOF
LOW
PRESETS
HIGH
MED
TEMP
POWER
ON/OFF
PROOF
F
TEMPTEMPTEMP
ON TIMER
Figure 3-4. Power On Mode.

Electronic Control Info.
Warming Drawer WWD30-2
3-5 #814750 - Revision A - January, 2011
NORMAL WARMING MODE:
Operations: (Continued)
If temperature of unit is greater than 10ºF above set-point, control will chime and “hot” will flash in the temperature
display. Control will continue to check if temperature has dropped, every 20 seconds. Once temperature, as moni-
tored by the thermistor, is within 10°F of set temperature, set temperature will be displayed and resume cycling nor-
mally. “HOT” indicator will no longer be illuminated. (See Figure 3-6)
NOTES:
•If drawer is closed at the time of power down, control will initiate a failure tone.
•If no time is set, timer will automatically default to 4:00 hours. This ensure a definitive stop time. This does not
occur in Sabbath Mode.
•If any presets are depressed, unit will begin to function. See Preset for further information.
•During normal warming mode, all keys remain active to allow for changes to mode.
PRESET MODES: (High, Medium and Low Presets)
Mode Entry:
Press “Power On/Off” key followed by either the HIGH, MED or LOW preset key. (See Figure 3-7)
NOTES:
•“TIMER” will illuminate and flash when first entering mode. Once mode is active the “TIMER” will no longer be
illuminated.
•If no time is set, timer will automatically default to 4:00 hours. This ensures a definitive stop time.
Operations:
When “HIGH” Preset key is depressed, control will display “200F” in temperature display. For “MED” temperature
display will read “160F” and for “LOW” temperature display will read “120F”. In timer area of display, “4:00” along
with “TIMER”’ will be flashing. Temperature can be adjusted by pressing the “TEMP” up or down arrow keys. By
touching the “TIMER” up or down arrow keys, additional time can be added or subtracted. Anytime a change is
being made, the control begins flashing the changing value. Mode activation time for the control will be 2 seconds
and the “ON” indicator will illuminate and “TIMER” will no longer be illuminated.
Mode Exit:
Pressing “Power On/Off” key will cancel preset and any related timer feature of this mode. If timer expires during
preset mode, and after signaling end of time chime for 5 minutes, the unit will time out and power off.
TIMER
PROOF
LOW
PRESETS
HIGH
MED
TEMP
POWER
ON/OFF
PROOF
F
TEMPTEMPTEMP
ON TIMER
Figure 3-6. “HoT” Indication if Temperature of unit is 10° above set-point.
TIMER
PROOF
LOW
PRESETS
HIGH
MED
TEMP
POWER
ON/OFF
PROOF
F
TEMPTEMPTEMP
ON TIMER
Figure 3-7. Example of “LOW” preset.

Warming Drawer WWD30-2
Electronic Control Info.
3-6
#814750 - Revision A - January, 2011
PRESET MODES: (Proof Mode)
Proof mode allows the customer to use the warming drawer for bread dough proofing. (See Figure 3-8)
Mode Entry:
Press the “Power On/Off” key followed by the “PROOF” key.
Operations:
Upon pressing the “PROOF” key. Control will display “85F” in the temperature display. In the timer area of display,
‘“4:00” along with “TIMER” will be flashing. Temperature can be adjusted by pressing the “TEMP” up or down arrow
keys. By touching the TIMER up or down keys, additional time can be added or subtracted from this mode. Anytime
a change is being made, the control begins flashing the changing value.
The mode activation time for the control will be 2 seconds at which time the ‘ON’ indicator will illuminate and
changes will be applied and additional indicators will stop flashing.
NOTE: Circulation fan runs while heating element is on during Proof Mode.
NOTE: If the unit is greater than 10ºF above the set-point, control will chime and “hot” will flash in the temperature
display until the unit temperature is within 10° of set temperature. The control will continue to check if temperature
has dropped every 20 seconds.
Mode Exit:
Pressing “Power On/Off” key will cancel this mode and any related timer feature. If timer expires during “PROOF”,
and after signaling end of time chime for 5 minutes, unit will time out and power off.
TEMPERATURE MAINTENANCE:
During temperature maintenance, element and fan maintains drawer temperature to set-point temperature. Fan is on
while element is on during warming mode, (as long as drawer switch returns a drawer closed value). If element has
cycled off, fan will continue to circulate air inside drawer for a pre-determined time before turning off. Fan will then
re-energize when element is turned back on during a call for heat.
PREHEAT:
Preheat can be described as the control operation occurring when trying to raise the temperature from more of an
ambient temperature to the operating temperature desired by the user.
Mode Entry:
The unit can be placed into a preheat mode by simply pressing the “Power On/Off” key and any other keys, when
the drawer is cool (room temperature or less than set-point).
Operations:
If the “TEMP” up or down arrow key is pressed, unit will initiate at “120F” and can be adjusted in increments of 1°.
NOTE: If you press and hold either arrow, the display will increase by 1° each 1/2 second until the first 5° increment
is obtained then will increase by 5° per 1/2 second.
During preheat, control temperature read out will toggle between the set-point and actual drawer temperature. At
temperatures lower than 85F, “LO” will be displayed. Temperatures equal to or greater than 85F, the actual tempera-
ture measured by the thermistor and set-point temperature, will be toggled back and forth at a rate of 5 seconds.
Once temperature has reached desired set-point temperature, control will emit a chime.
Mode Exit:
A press of the “Power On/Off” key will terminate Preheat mode and shut unit off.
TIMER
PROOF
LOW
PRESETS
HIGH
MED
TEMP
POWER
ON/OFF
PROOF
F
TEMPTEMPTEMP
ON TIMER
Figure 3-8. Example of “PROOF” preset.

Electronic Control Info.
Warming Drawer WWD30-2
3-7 #814750 - Revision A - January, 2011
END OF WARMING TIME:
Upon reaching “0:00”, “0:00” will begin flashing. Element and fan will shut off at this time. Control will also emit
three chimes every 30 seconds to denote unit has shut off. After 5 minutes the timer will power down and turn unit
off.
NOTE: Operator can cancel chime earlier by pressing the “Power On/Off” key.
OFF MODES:
This mode is obtained by pressing the “Power On/Off” key once unit is in any “On” mode. All active modes on unit
will be cancelled, including Sabbath Mode.
TIMER MODE:
This allows the unit to be used as a kitchen timer, if so desired. (See Figure 3-9)
Mode Entry:
To set timer, first depress “TIMER” up or down arrow keys. “TIMER” will be flashing in display. Press “TIMER” up
arrow key and unit begins counting up from “00:00”.
NOTE: Pressing and holding “TIMER” up or down arrow key, display will increase, or decrease, by 1 second each
1/2 second until the first 5 second increment is obtained then will increase by 5 seconds per 1/2 second. If “TIMER”
up or down arrow key is depressed for longer than 30 seconds display will increase by 30 minute increments each
1/2 second until 5:00 Hours is reached then increase in one hour increments up to 24:00 hours.
NOTE: Timer will count up in time with 1 minute as the minimum setting and going up to 24:00 (hours:minutes).
Operations:
In Timer mode, the temperature display will show nothing and “ON” indicator will not illuminate.
Once set, this timer will count down in hours and minutes. Upon reaching 1 minute, the control will produce an audi-
ble tone.
Mode Exit:
Upon reaching “0:00”, “0:00” will begin flashing. The control will also chime three times every 30 seconds to denote
the unit has shut off.
NOTE:After 5 minutes the timer will power down.
NOTE: Timer mode can be cancelled at any time by pressing the “Power On/Off” key.
NOTE:Operator may cancel chime by pressing “Power On/Off” key. This will also remove the flashing “0:00” from
display.
TIMER
PROOF
LOW
PRESETS
HIGH
MED
TEMP
POWER
ON/OFF
PROOF
F
TEMPTEMPTEMP
ON TIMER
Figure 3-9. Example of “TIMER” mode set at 4 minute.

Warming Drawer WWD30-2
Electronic Control Info.
3-8
#814750 - Revision A - January, 2011
SABBATH MODE:
To accommodate observance of the Sabbath, a special mode exists where the control will only react to the “Power
On/Off” key. In Sabbath Mode, the display will not change. “ON” remains on constantly. LCD back lighting will also
remain on at all times during this mode at a rate of 50% normal power.
Mode Entry:
Starting from “Off” mode, press the “Power On/Off” key for 5 seconds. (See Figure 3-10)
Operations:
The control will flash “SAb” in timer display area and selections can be made for 5 seconds, while the “SAb” is flash-
ing, at which time control will emit a tone twice and unit will remain in Sabbath mode.
NOTES:
•If back lighting was turned off prior to entering Sabbath mode then back light will remain off.
•Selections for Sabbath mode include “TEMP” up or down arrow keys and any “PRESET” keys.
•“TIMER” up or down arrow keys will yield an invalid key press in Sabbath mode.
•If unit power is interrupted, unit will return to Sabbath Mode upon next power up.
Once in Sabbath mode, unit will read “SAb” in the timer display area. The display will show no changes. The ele-
ment cycles normally. Fan runs while element is on and for a short time after element turns off. If drawer is opened,
fan and element will not shut off.
NOTES:
•If drawer is open for longer than 1 minute and the unit calls for heat, element will randomly turn on and off.
•If in Sabbath mode but a second key press does not occur withing 10 seconds, the unit will enter “OFF” mode.
Mode Exit:
A press of the “Power On/Off” key will terminate Sabbath mode and shut off unit at any time.
TIMER
PROOF
LOW
PRESETS
HIGH
MED
TEMP
POWER
ON/OFF
PROOF
F
TEMPTEMPTEMP
ON TIMER
Figure 3-10. Press and hold Power On/Off for 5 second to enter Sabbath Mode.
SHOWROOM MODE:
Showroom mode allows unit to be run in a demonstration mode. Heating element and fan operation are disabled.
Mode Entry:
Starting from Unit Off mode, press “Power On/Off” key along with “HIGH” and “LOW” PRESET keys for 5 seconds.
A single soft tone will signify unit is in showroom mode and “Sr” will show in timer display. (See Figure 3-11)
NOTES:
•If power is turned off to unit, showroom mode will remain active.
•If unit power is interrupted (unplugged), unit will exit showroom mode upon next power up.
Operations:
Unit will function just as it normally would, but the fan and element will not energize while in this mode. The unit can
be turned on and/or off, temperature adjusted, and timer used, but the unit will not provide heat/air circulation.
Mode Exit:
Another press of the same key combination from the Showroom mode will toggle showroom mode off.
TIMER
PROOF
LOW
PRESETS
HIGH
MED
TEMP
POWER
ON/OFF
PROOF
F
TEMPTEMPTEMP
ON TIMER
Figure 3-11. Press and hold Power On/Off, HIGH and LOW PRESET Keys simultaneously for 5 seconds.

Electronic Control Info.
Warming Drawer WWD30-2
3-9 #814750 - Revision A - January, 2011
USER PREFERENCE SETUP
NOTE: Following changes must be made when unit is in “ON” mode.
Preset Change:
Changes can be made to presets by completing the following sequence. Press “Power On/Off” key, then press pre-
set key you wish to change and hold for 5 seconds. After 5 seconds, timer display, temperature display and “TIMER”
will illuminate and flash. Using “TEMP” up or down arrow keys, and/or the “TIMER” up or down arrow keys, change
the values to your own personalized presets. After all settings are complete, press and hold the preset key being
changed for 5 seconds again. Three quick tones will signify preset has been changed and unit will shut off.
NOTES:
•“PROOF” mode can only be adjusted from 80°F to 120°F.
•Unit will turn off after 30 seconds if no key presses are made.
•Changes to preset mode entered will be saved only if key being changed is pressed and held for 5 seconds after
making changes.
USER PREFERENCE OFFSETS (UPO)
NOTES:
•Following changes must be made when unit is in “OFF” mode.
•See Figure 3-20 for a quick reference to keystrokes to enter modes and features.
Temperature Display Preference:
Control can be switched between Fahrenheit or Celsius by pressing and holding both “TEMP” up and down arrow
key for 5 seconds. Use the “TEMP” Up or Down arrow key to change from °F to °C or °C to °F. (See Figure 3-12)
NOTE: Press “Power On/Off” key to exit and save changes.
Display Contrast Change:
Display contrast can be adjusted by pressing and holding both the TIMER up and down arrow keys for 5 seconds.
Use the “TIMER” Up and/or down arrow keys to change contrast from the preset. (See Figure 3-13)
NOTE:Contrast setting is from 0 to 15 with 15 being the darkest contrast setting. Unit default is 7.
Press the “Power On/Off” key to exit and save changes.
NOTE: Unit will turn off after 30 seconds if no key presses are made.
TIMER
PROOF
LOW
PRESETS
HIGH
MED
TEMP
POWER
ON/OFF
PROOF
TEMPTEMPTEMP
ON TIMER
Figure 3-12. Press TEMP up and down arrow key to enter. Press TEMP arrow up or down to change scale.
TIMER
PROOF
LOW
PRESETS
HIGH
MED
TEMP
POWER
ON/OFF
PROOF
TEMPTEMPTEMP
ON TIMER
Figure 3-13. Press TIMER up and down arrow key to enter. Press TIMER arrow up or down to change scale.

Warming Drawer WWD30-2
Electronic Control Info.
3-10
#814750 - Revision A - January, 2011
LED Back Lighting Change:
Mode Entry:
Enter backlight setting preference by pressing and holding both “TEMP” and “TIMER” up arrow keys for 5 seconds.
Current backlight setting will appear in display. (See Figure 3-14)
Operations:
Use “TIMER” up arrow key to select the various setting. Setting will be saved and recalled in the event of a power
loss. Three settings available are Continuous mode Off (off bclt ALL, Continuous mode On, and ALL disabled.
Default setting is Continuous Mode Off.
Continuous mode refers to the Sabbath mode where appliance is running continuously and backlight can be selected
to be off or on.
Continuous mode On, refers to backlight on continuously at a reduced illumination level to conserve `
LED life. Outside of Sabbath mode, backlight works as normal based on drawer state at full illumination.
NOTE:Left side of display will show “On” continuously, and the right side of display will flash between “bclt” and
“Sab”.
Continuous mode Off, refers to backlight continuously off only in Sabbath mode. Outside of Sabbath mode, back-
light works as normal based on drawer state at full illumination.
NOTE:Left side of display will show “Off” continuously, and the right side of display will flash between “bclt” and
“Sab”.
Disabled mode, refers to backlight is always off regardless of operating mode.
NOTE:Left side of display will show “Off” continuously, and the right side of display will flash between “bclt” and
“ALL”.
Mode Exit:
Once back lighting has been set to desired state, press “Power On/Off” key and setting will be saved.
NOTE: If after 30 seconds of no additional key presses, mode will exit with last known state saved as LCD back
lighting preference.
TIMER
PROOF
LOW
PRESETS
HIGH
MED
TEMP
POWER
ON/OFF
PROOF
TEMPTEMPTEMP
ON TIMER
Figure 3-14. Press TEMP & TIMER up arrow keys to enter. Press TIMER up arrow key to change settings.

Electronic Control Info.
Warming Drawer WWD30-2
3-11 #814750 - Revision A - January, 2011
FIELD SERVICE MODE
Initiating Diagnostics Mode:
Note: Diagnostics mode can only be entered from “‘OFF” mode.
Mode Entry:
The Field Service mode can be entered by pressing and holding “Power On/Off” key, along with “MED” and
“PROOF” keys simultaneously for 5 seconds. (See Figure 3-16)
Operations:
Once in this mode, software version will read in timer area. Revision will be displayed initially. (See Figure 3-16)
NOTE: If in Showroom Mode, temperature display will read “Sr” upon entering Field Service Mode. Display will
show Can-CEL then Sr will be displayed at 1 second intervals until Field Service Mode is canceled or times out. To
use this feature, Showroom Mode must be canceled. See Showroom Mode for details.
To scroll through errors, use “TIMER” up or down arrow keys. Once you begin scrolling through errors, (i.e. “Err 10”,
where “Err” is displayed in the temperature readout and “10” is displayed in the timer section). You can also scroll
through additional control information parameters such as total hours used. (See Figure 3-17 & 3-19)
NOTES:
•Using the opposite “TIMER” up or down arrow key will reverse your previous order.
•To clear error codes logged, press and hold “TIMER” up and down arrow keys for 5 seconds, while in Field
Service Mode. See Troubleshooting, Section 5, for list of error codes and meanings.
•NOTE:Once you have made it through all errors and information parameters, revision of the control will again
illuminate, starting the sequence over.
Functionality of fan, element and drawer switch can be tested by pressing the “TEMP” up or down arrow key.
(See Figure 3-18)
Mode Exit:
Pressing the “Power On/Off key will cancel field service mode.
NOTE: If no other key presses are noted after 2 minutes, control will also exit field service mode and power down.
TIMER
PROOF
LOW
PRESETS
HIGH
MED
TEMP
POWER
ON/OFF
PROOF
F
TEMPTEMPTEMP
ON TIMER
Figure 3-16. Press Power On/Off, MED & PROOF Simultaneously to Enter Diagnostics Mode.
TIMER
PROOF
LOW
PRESETS
HIGH
MED
TEMP
POWER
ON/OFF
PROOF
F
TEMPTEMPTEMP
ON TIMER
Figure 3-17. Example of Error 10 displayed.
TIMER
PROOF
LOW
PRESETS
HIGH
MED
TEMP
POWER
ON/OFF
PROOF
F
TEMPTEMPTEMP
ON TIMER
Figure 3-18. Example of Element ON display.

Warming Drawer WWD30-2
Electronic Control Info.
3-12
#814750 - Revision A - January, 2011
Enter Diagnostics rE (Sr if in showroom mode) 0018 (Meaning revision 1.8)
TIMER Err 10
TIMER Err 20
TIMER Err 30
TIMER Err 40
TIMER Err 50
TIMER Err 60
TIMER Con (Control On Time) 1:60 = 16000 hr. (See note below)
TIMER ELE (Element On Time) 95:00 = 950000 hr. (See note below)
TIMER FAn (Fan On Time) 12:60 = 126000 hrs. use (See note below)
TIMER Dor (Drawer Open/Close) 1:60 = 16000 cycles (See note below)
TIMER 119 (Current Temp) deg
key press TEMP DISPLAY TIMER DISPLAY
Figure 3-19. Field Service Mode.
Field Service Mode Unique Keystrokes:
NOTE: A colon (:) signifies the need to add two zeros (0) to the time shown. (i.e. 1:60 = 16000)
ERROR CODE TROUBLESHOOTING GUIDE:
ERROR CODE CAUSE TEST / ACTION
10
(Invalid Checksum Error)
20
(Thermistor Open)
30
(Thermistor Short)
40
(Element Sensing)
50
(Door Switch)
60
(Stuck Relay)
70
(Cable Open)
Incorrect checksum
Temperature >300ºF
Temperature <-30ºF
<5º change in temperature over 10
minutes of continuous call for heat.
Occurs only during preheat mode and
the door is closed.
Door switch closed when the keypad is
being operated or unit turned on.
Drawer temperature rises to 250ºF in
any mode/state.
Cable wires that activate element or
fan relays on power board are not
making connection.
Replace Control Board
In FSM (Field Service Mode), view temper-
ature as view by thermistor. Verify wiring
ok to element. Replace Thermistor if ok.
In FSM (Field Service Mode), view temper-
ature as view by thermistor. Verify wiring
ok to element. Replace Thermistor if ok.
If unit outdoors and temperature below
freezing point, instruct on unit limitations.
Verify Thermal Cutout is not open.
Verify Element is not open.
Replace TCO or Element if open.
Check operation of Door Switch with Ohm
meter. Replace if defective.
See Answer Advisor: WWD30 Error
Code 60
Check connection of comm cable. Use
Figure 5-1 to check voltage and/or ohm
reading of cable. If open, replace.
NOTE: After correcting problem, errors code must be cleared. To clear error codes logged, press and hold
“TIMER” up and down arrow keys for 5 seconds, while in Field Service Mode.

Electronic Control Info.
Warming Drawer WWD30-2
3-13 #814750 - Revision A - January, 2011
Diagnostic Mode
Resetting Error Codes in Diagnostic Mode
Sabbath Mode
Showroom Mode
HIGH Preset Change (Range of 80°F to 200°F)
(Press HIGH for 5 seconds again to save changes)
MED Preset Change (Range of 80°F to 200°F)
(Press MED for 5 seconds again to save changes)
LOW Preset Change (Range of 80°F to 200°F)
(Press LOW for 5 seconds again to save changes)
PROOF Preset Change (Range of 80°F to 110°F only)
(Press PROOF for 5 seconds again to save changes)
Temperature Scale Change Mode
Display Contrast Change Mode
LED Back Lighting Change Mode
TEMP ELE Func ON (Relay closed,
Element on)
TEMP ELE Func OFF (Relay Opens,
Element Off)
TEMP Fan Func ON (Relay closed, Fan
turns on)
TEMP Fan Func OFF (Relay Opens, Fan
turns Off)
TEMP Dor CLOS if Drawer Closed / OPEn If Drawer Open
key press TEMP DISPLAY TIMER DISPLAY “ON” INDICATOR
POWER
ON/OFF
PROOF
MED
POWER
ON/OFF
&&5 Seconds
5 Seconds
POWER
ON/OFF
LOW
HIGH
&&5 Seconds
POWER
ON/OFF
Followed by
HIGH
5 Seconds
POWER
ON/OFF
Followed by
MED
5 Seconds
POWER
ON/OFF
Followed by
LOW
5 Seconds
POWER
ON/OFF
Followed by
PROOF
5 Seconds
MODE/FUNCTION KEY PRESSES to ENTER
Field Service Mode Functional Test Keystrokes:
Mode/Function Unique Keystroke:
&5 Seconds
TEMP &5 Seconds
TIMER &5 Seconds
TEMP &5 Seconds
TIMER
TIMER
Other manuals for WWD30-2
2
Table of contents
Other Wolf Warming Drawer manuals

Wolf
Wolf WARMING DRAWERS User manual

Wolf
Wolf WD30 Owner's manual

Wolf
Wolf WWDFRONT/B User manual

Wolf
Wolf 802727 User manual

Wolf
Wolf Warming Drawer User manual

Wolf
Wolf ICBWWD30O User manual

Wolf
Wolf WWD30 User manual

Wolf
Wolf WWD30 User manual

Wolf
Wolf WWD30 Instructions for use

Wolf
Wolf ICBWWD30 User manual
Popular Warming Drawer manuals by other brands

Fisher & Paykel
Fisher & Paykel DCS RF24DE Installation, operation and maintenance instructions

Electrolux
Electrolux Icon E30WD75GSS Specifications

Electrolux
Electrolux E30WD75EPS installation instructions

CSA
CSA DEWD170 installation instructions

Miele
Miele ESW 6114 Operating and installation instructions

Fisher & Paykel
Fisher & Paykel WB24SDB1-SET user guide