WOODLAND SCENICS S927 User manual

INSTRUCTION BOOKLET
The Scenery Kit S927
We feel confident you will be happy with the display piece that you are about to build.
This kit includes the base and materials needed to construct a 10" x 18" diorama on
which you can display an engine, piece of rolling stock, or military model. We will
teach you how to use our terrain and landscaping systems.
Before you begin, identify the contents of the box as listed on the next page. Be
sure to save the cardboard box the items are packed in, because this will be used in
the construction. Make sure you have the additional items required for construction
available. Then, begin building!

Pre-cut side frames: 1/8" thick hardboard 4
Corner Blocks 5
Pre-cut Sub-roadbed piece: 1/4" thick hardboard 1
Cardboard packing box for the kit 1
Plaster Cloth 5 sq.ft.
Concrete Culvert Casting 1
Strip of Liquid Pigments - Black, Burnt Umber, Yellow Ocher 1
Sprayhead for bottle 1
Scenic Cement 8 fl. oz.
Lightweight Hydrocal* 4.5 oz. wt.
Craft sticks 2
Castings from Rock Mold C1234 4
Foam pad applicator 1
Earth Undercoat Liquid Pigment 1 fl. oz.
18" Track-HO scale 1
Track-Bed HO scale 1
Hob-e-Tac Adhesive (please read bottle instructions before using) 1 fl. oz.
Gray Blend Ballast 3 cu. in.
Green Blend Blended Turf 9 cu. in.
Burnt Grass Fine Turf 3 cu. in.
Yellow Grass Fine Turf 3 cu. in.
Earth Fine Turf 3 cu. in.
Soil Fine Turf 3 cu. in.
Medium Green Coarse Turf 3 cu. in.
Medium Green Clump-Foliage 13.5 cu. in.
Dark Green Clump-Foliage 13.5 cu. in.
Talus (Brown Fine/ Brown Medium Mix) 2 oz. vol.
Green Poly Fiber 1 gr.
Tree Armatures 2 1/2" - 3" tall 3
Light Green Field Grass 3 gr.
2
THE SCENERY KIT CONTENTS
Listed below are the items contained in this kit.
DESCRIPTION QUANTITY
Additional items needed to complete the diorama which are not included:
newspaper
pan or bowl for water
scissors
straw or eyedropper
paintbrush 1/2" or 1" wide
masking tape
hobby knife (X-ACTO)
Scenic Glue (S190) or white glue
fine sandpaper
measuring spoons (1/8 tsp., 1/4 tsp., 1/2 tsp.,1 tsp.)
paint roller, black spray paint and primer, or black latex paint, appropriate primer
small paper cups or disposable containers (for mixing Lightweight Hydrocal and Liquid
Pigments)
* Hydrocal is a product of U.S. Gypsum

BEGINNING CONSTRUCTION
In this section of The Scenery Kit instructions you will assemble the hardboard base to
which terrain and landscaping will be added. Check the illustrations carefully during
assembly. Try to match your diorama to the drawings. Let all the glue dry completely
before continuing.
1. SIDES AND FRAME SUPPORTS
A. Select the two shorter sections of pre-cut hardboard. These are the sides of the
diorama. Find the five small wooden blocks which will be the supports for the frame. Sand
any rough burrs off the wooden blocks, being careful to keep them square.
B. Lay the two shorter
hardboard sections on your
workbench, smooth side down.
We recommend using Scenic
Glue (S190) or white glue to
attach a wooden block to each of
the 90º angle corners of the two
pieces of hardboard. See Fig. 1
for positioning. The edges of the
blocks should be exactly even
with the hardboard. Use the fifth
block to check for evenness,
by holding it tightly against
each side of the hardboard and
butting the glued block against
it (Fig. 2).
C. Glue the fifth block at the
top corner of the tallest side, having one side even with the edge of the hardboard. The top
of this block should be about 1/2" below the contour of the side (Fig. 1).
D. Allow to dry completely.
2. FRONT AND BACK SECTIONS
A. Find the two longer sections of pre-cut hardboard. These are the front and back of
the diorama box (Fig. 3 assembly diagram).
B. Begin with the larger section, or back of the diorama box, and the smaller side
piece. Apply Scenic Glue
generously to the taller edge
and wooden block of the side
section. With pieces in an
upright position, attach the
side to the shorter (left) edge
of the back section, smooth
sides on the outside. Make
sure the edges are even and
square. Place several strips
of masking tape over the
glue joint to hold the pieces
in place until the glue sets.
3
Fig. 1
TEXTURED SIDE TEXTURED SIDE
1/2"
Fig. 2 1" SQUARE BLOCKS
Fig. 3

C. Apply Scenic Glue generously to the taller edge and two wooden blocks of the
other side section. With the pieces in an upright position, attach the side to the back section
(right side). Make sure the edges are even and square. Use masking tape to hold in place
until glue sets.
D. With hardboard frame in an upright position, apply Scenic Glue generously to the
remaining edges and wooden blocks of the two side sections. Put the front section in place,
smooth side out, making sure the corners are even and square. Use masking tape to hold
in place until the glue sets. Make sure the frame is squared on each corner.
E. Allow to dry completely and remove masking tape strips.
3. CARDBOARD BASE
A. With a hobby knife, cut one corner seam and lay the box flat.
B. Place the hardboard base
on the cardboard. Carefully
trace the inside perimeter of the
hardboard onto the cardboard
(Fig. 4). Remove the base. With
a straight edge, square off the
corners to eliminate the notches
made by the wooden blocks.
C. Using the straight-edge
and hobby knife, carefully cut
out the traced pattern.
D. Fit in place, by inserting
the cardboard into the base from
the top. The cardboard should
rest on the tops of the four
corner blocks (Fig. 5). Trim
slightly if necessary for perfect
fit.
E. If needed, add strips
of masking tape to hold the
cardboard in place. With the
cardboard in place, turn
hardboard base over and run a line of Scenic Glue along the edge of the cardboard where
it meets the hardboard. If the hardboard does not exactly meet the cardboard, use strips of
masking tape stretched from front to back and side to side to pull the hardboard in. This
forms a tight joint with the cardboard. Leave in position until dry.
4. SUB-ROADBED
A. Use the 1/4" thick piece of hardboard for the sub-roadbed. The smooth side of the
hardboard should be up.
B. A strip of revolutionary
Track-Bed has been included in
this kit. You will have to cut it to
fit the diorama. Use the pre-cut
hardboard piece of sub-roadbed
(Fig. 6) as a template before
setting it on the diorama. Hold
4
Fig. 4
Fig. 5
CARDBOARD
Fig. 6
TRIM
TRACK-BED
TRACK-BED
SUB-ROADBED

the Track-Bed against the sub-
roadbed. With a pair of scissors,
or a hobby knife, trim the ends
of the Track-Bed to match the
angles of the sub-roadbed. Set
the Track-Bed aside for later.
C. Apply Scenic Glue to the
ends of the hardboard piece and
attach inside the front and left
sides of the base. See Fig. 7 for
placement. The top of the sub-
roadbed piece should be even with the top of the hardboard. Use strips of masking tape
to hold the hardboard in place until the glue dries (Fig. 7). You may also want to place a
small bottle or other item under the sub-roadbed piece to hold it in place while it dries.
Carefully remove the masking tape after the glue dries.
5. SANDING AND PAINTING
A. Smooth rough edges of the hardboard frame with sandpaper. The sub-roadbed
piece does not need to be sanded because it will be covered with Plaster Cloth.
B. Use a roller or paintbrush to apply an even coat of primer to the outside of the
hardboard frame. Allow it to dry and lightly sand.
C. Use a damp rag to wipe off the dust. Then use a flat or satin black paint over the
primer. When dried, apply a second coat if needed. A third coat may be applied after the
diorama is complete.
TERRAIN
Read the following instructions carefully and study the illustrations. For the best use of the
enclosed materials, try to make your diorama similar to the illustrations.
Terrain can be defined as the earth contours or physical features of a tract of land. The
terrain can include rolling hills and broad valleys, mountains and narrow canyons, flat
plateaus and undulating prairies. In building a model railroad layout, the terrain is the first
feature to be added after the bench work construction and track have been completed.
When you build a module or large layout, you have
almost unlimited choices in the type of terrain you
build. You can model a particular area or create some
imaginary scenery. The techniques you learn with this
diorama can be applied to any large layout or model.
1. NEWSPAPER WADS
A. Tightly wad several sheets of newspaper. Begin
at the outside of the sheet of newspaper and roll the
edges under to form a rounded pillow shape. This shape
is the easiest to stack, to create contours (Fig. 8).
B. See Fig. 9 for placement on the diorama. Use
small wads in the front of the sub-roadbed piece,
as some may need to be removed when the Culvert
is installed. Push newspaper wads under the sub-
roadbed piece to help hold the other wads in place. The
5
Fig. 7
SUB-ROADBED
Fig. 8

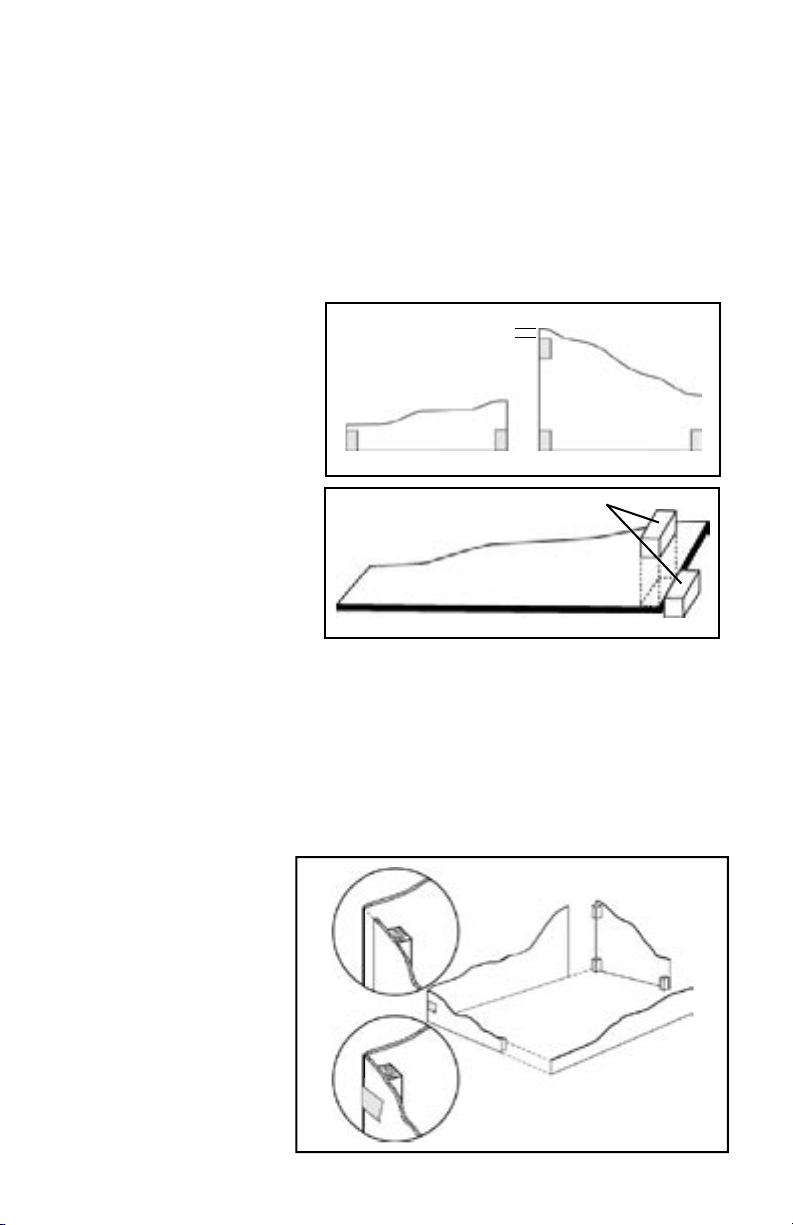
newspaper wads should create
a gentle slope which generally
follows the contours of the
back, sides and front of the
hardboard frame but should be
no higher than the illustrations
show. A shallow ditch will later
be formed along the back of the
sub-roadbed piece, so leave the
paper in this area lower than the
sub-roadbed (Fig. 12; pg. 7).
C. Use masking tape to hold
newspaper wads in place.
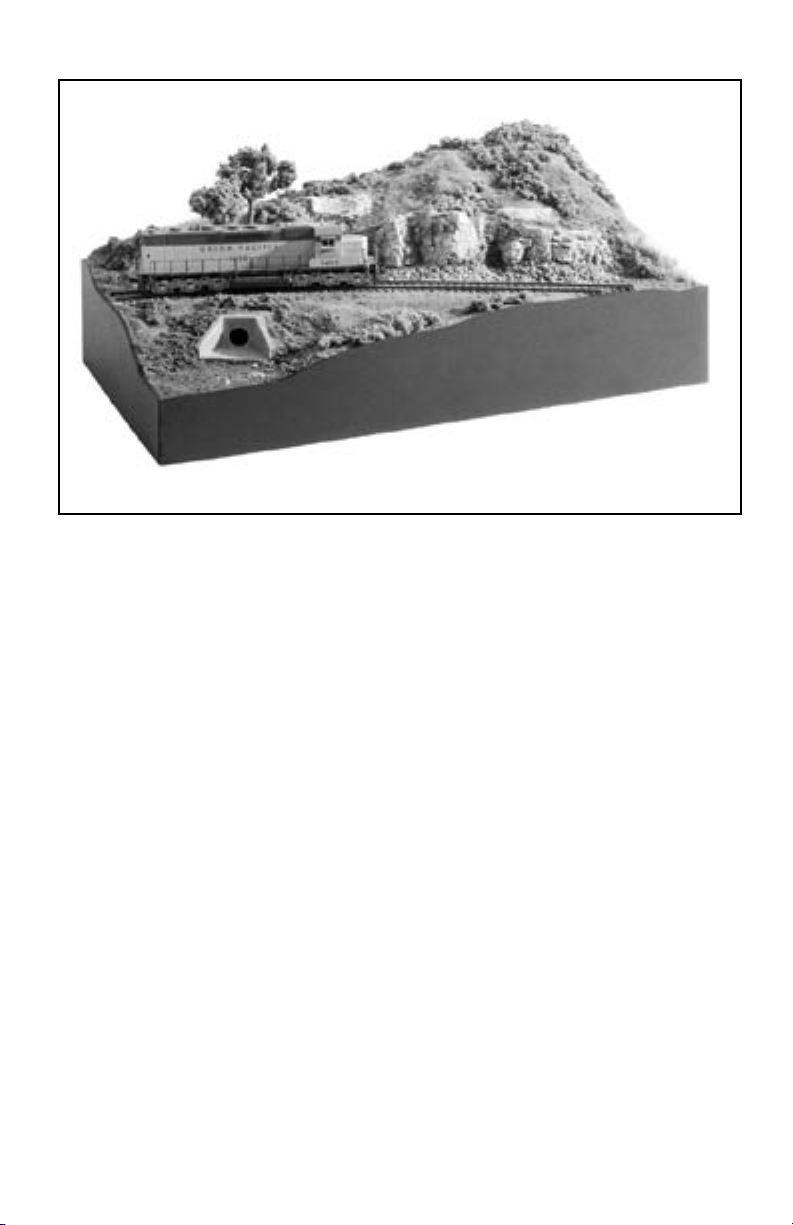
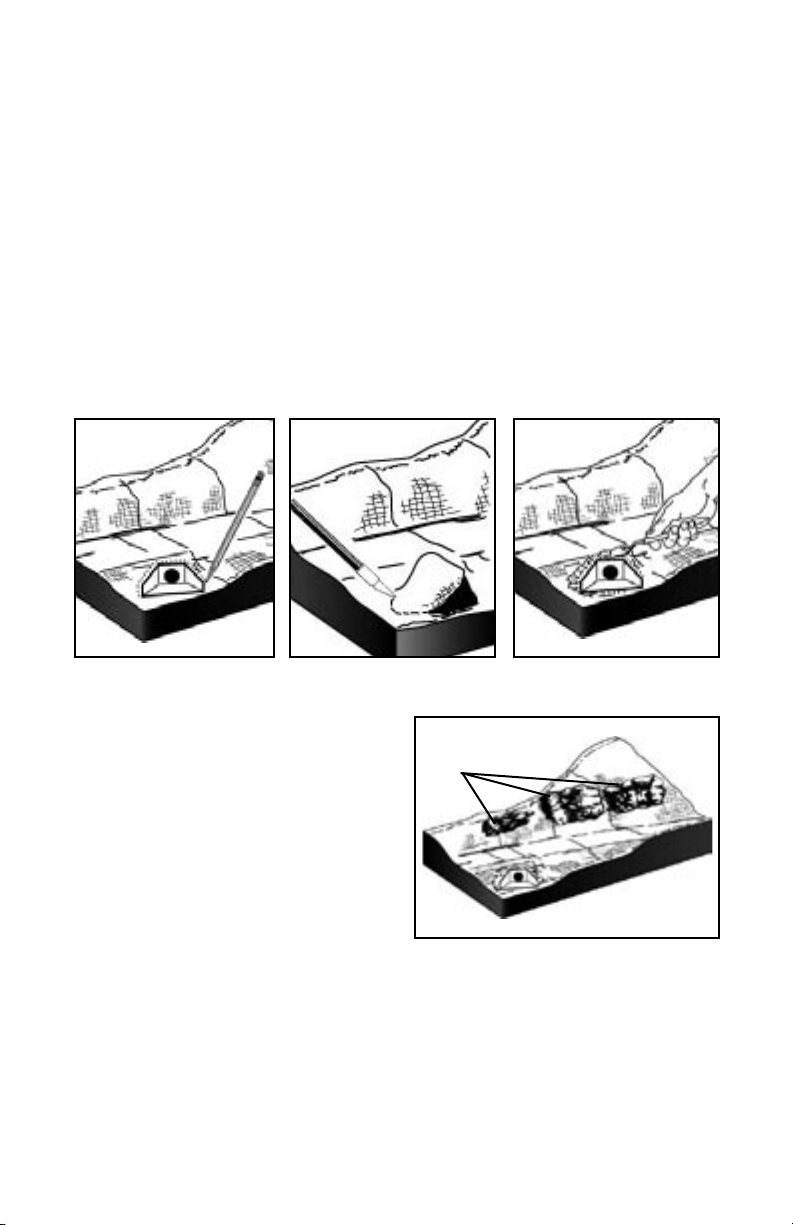
D. Trial fit the rock casting and track to check for sufficient clearance for the engine or
rolling stock you intend to display. See Fig. 17 (pg. 8) for placement. If you have too many
newspaper wads, remove some or push them in a little and re-tape to compact them.
Note: The track section included with this kit is HO scale. The kit can be adapted to
any other scale, O or smaller, by substituting your own section of the track for the one
included with the kit. Be sure to check track clearances carefully for any scale larger
than HO. If you plan to display something other than model railroad equipment, such as
military models, a road can be substituted for the track (Section 2D under Landscape).
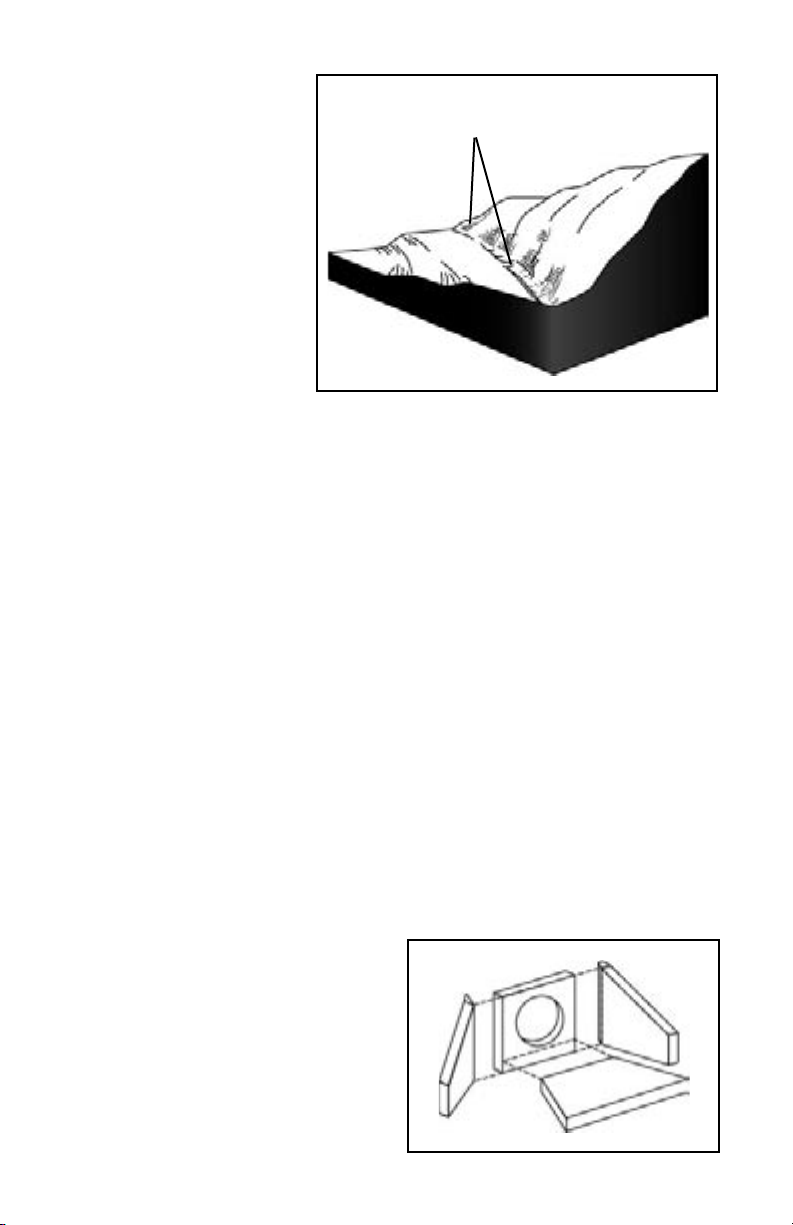
2. PLASTER CLOTH
A. A hard terrain shell is applied next on top of the newspaper wads. Unroll the
Plaster Cloth. With scissors, cut off five 14" sections. One of these pieces should be split
lengthwise into two equal strips about four inches wide.
B. Cover the entire top surface of the diorama with Plaster Cloth. Notice that one side
of the Plaster Cloth is smooth and the other slightly bumpy. The Plaster Cloth should be
used bumpy side up, making more plaster available for smoothing into the contours. Apply
the Plaster Cloth, beginning on the left side of the diorama, with the pieces being laid from
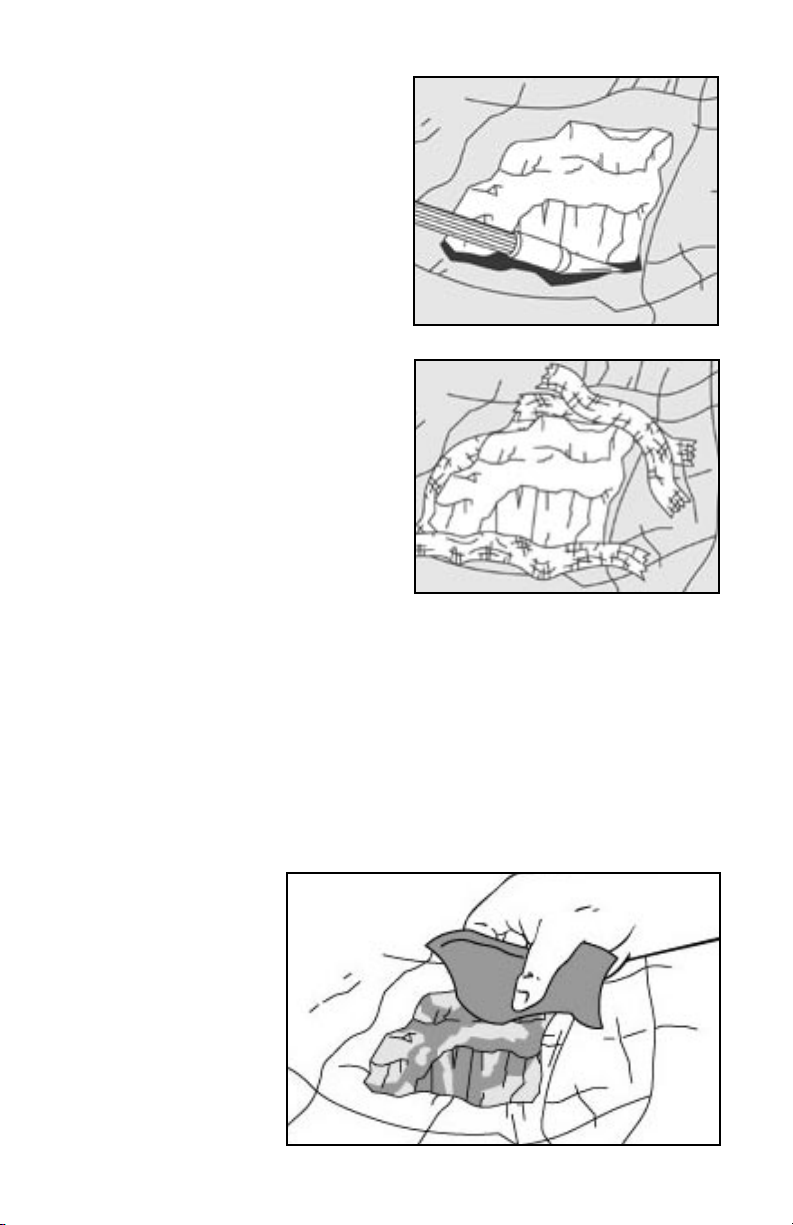
the back to the front. Briefly dip one of the full width strips in a pan of water and lay it
on top of the newspapers along the left side of the diorama. Plaster Cloth can be stretched
to cover voids in the newspaper or indented in voids with slight finger pressure (Fig. 10).
Extend the edge of the Plaster Cloth approximately one inch outside the hardboard frame
on the side, front and back. Fold over the excess Plaster Cloth on top of itself to create a
clean, finished edge that is flush
with the edge of the hardboard
and is extra strong (Fig. 11).
Press this edge smoothly over
the Plaster Cloth to help fill
the holes and smooth out the
surface.
C. Dip a second section of
Plaster Cloth in water and place
on the diorama, overlapping
50% on the first sheet and 50%
on the newspaper area. Fold
over the excess Plaster Cloth to
6
Fig. 9
Fig. 10
Fig. 11

create a clean, finished edge at
the front and back.
D. Continue, adding the
rest of the full sheets in the
same manner, working from
left to right on the diorama.
Press each edge down firmly
on the hardboard. Leave a
shallow ditch along the entire
back edge of the sub-roadbed
piece (Fig. 12). Extend the last
full sheet over the right ridge
of the diorama (approximately
one inch) and fold back on
itself.
E. Dip one of the sheets of
Plaster Cloth in water. Place it on the left side area, which only has a single coating area
on the right side of the diorama. Fold the edges back into themselves and press evenly and
firmly onto the hardboard edge.
F. While the Plaster Cloth is still damp, check all the edges where the Plaster Cloth
meets the hardboard. Press the Plaster Cloth firmly and smoothly onto the top edge of the
outside frame of the diorama.
G. Save any extra Plaster Cloth for later use around the Culvert or rock castings.
H. Allow the Plaster Cloth to dry completely.
3. CULVERT ASSEMBLY AND INSTALLATION
A. Remove any rough edges from the high density Hydrocal Culvert pieces with a
hobby knife, sandpaper, file, or emery board. Figure 13 shows how the Culvert pieces fit
together. Trial fit them as you smooth the pieces.
B. Stain the Culvert pieces before assembly. Using a small paper cup or container, mix
1/8 teaspoon Black pigment and four teaspoons of water to create a wash. Mix thoroughly
with a craftstick. Spread the Culvert pieces on paper towels so all sides can be painted.
Dab several applications of Black wash on the Culvert pieces with the foam pad applicator
until an even color is achieved. Allow the pieces to dry. Save the rest of the Black wash
for later use. Wash the foam pad applicator.
C. Glue Culvert together using Scenic Glue. Assemble as shown in Fig. 13. Hold
firmly in place until setting begins. Be careful to keep Scenic Glue off the finished
surfaces. Although it will dry clear, Scenic Glue will leave a shiny surface, which is not
desirable. If Scenic Glue does get on the finished surfaces, use a hobby knife to gently
scrape it off before it dries. Allow the
Culvert to dry completely.
D. Hold the completed Culvert up to
the diorama area where it will be installed.
With a pencil, draw around the outside of
the Culvert (Fig. 14). Use a hobby knife to
slice out a small section of the Plaster Cloth
to accommodate placement of the Culvert
(Fig. 15). Remove enough newspaper wads
to allow the Culvert to fit snugly into the
7
Fig. 12
SHALLOW DITCH
Fig. 13

embankment beneath the track.
E. Mix Lightweight Hydrocal to use as an adhesive. In a disposable container add 2
1/2 teaspoons of Lightweight Hydrocal to one teaspoon of water. Mix thoroughly with a
craftstick.
F. When using Lightweight Hydrocal as an adhesive, both surfaces must be wet for
the adhesive to be effective. Soak the Culvert in water. Use a Scenic Sprayer to spray water
on the area where the Culvert is to be installed. Apply Lightweight Hydrocal generously
to the back sides of the Culvert and attach it to the diorama. Hold in place until setting
begins.
G. Use any excess Lightweight Hydrocal mixed for Culvert installation to fill gaps
between the Culvert and the embankment where it is installed (Fig. 16).
H. Wash measuring spoons and craftstick before the Lightweight Hydrocal is
completely set. Do not wash plaster down drains, as it will collect in low places in pipes
and clog the sewer lines.
I. Allow the Hydrocal to dry completely.
4. INSTALLING ROCK CASTINGS
A. See Fig. 17 for placement of rock
castings. Trial fit in place. You may need to
push in a little on the Plaster Cloth terrain
shell to get the realistic look of rocks jutting
out the hillside. If needed, a horizontal cut
can be made with a hobby knife (Fig. 18)
in the area where the rock casting will be
installed. This will allow you to collapse the
hillside a little further.
B. Two of the rock castings, which were
originally one piece, have been broken to
give you more options in the placement on
the diorama. These two pieces should have an exact fit if you want them to be adjacent to
each other, or they can be separated.
C. Add 10 teaspoons of Lightweight Hydrocal to four teaspoons of water and mix well
with a craftstick.
D. Both rock casting and the Plaster Cloth terrain shell must be wet for the
Lightweight Hydrocal to be effective as an adhesive. Briefly soak the rock casting in
water. Use the Scenic Sprayer to spray water on the Plaster Cloth terrain base where the
castings are to be attached.
8
Fig. 14 Fig. 15 Fig. 16
Fig. 17
ROCK POSITION

E. Generously spread Lightweight
Hydrocal on the back of the rock castings
and press into place on the Plaster Cloth.
Hold in place until setting begins.
F. Use any remaining Lightweight
Hydrocal you have mixed to fill in behind the
rock castings. Smooth out the Lightweight
Hydrocal and blend it into the Plaster Cloth
with a paintbrush dipped in water. Keep the
Lightweight Hydrocal off rock surfaces.
G. If you still have gaps between the
Culvert or rock castings and the Plaster Cloth
terrain shell, these should be filled before
continuing. Small strips of Plaster Cloth
(Fig. 19), or more Lightweight Hydrocal can
be used to bridge or fill cuts in the terrain.
Cut appropriately sized strips of Plaster
Cloth, dip in water and lay in place to bridge
gaps (or add five teaspoons of Lightweight
Hydrocal to two teaspoons of water and mix
well). Use this to fill any open areas. Try to
make the terrain flow smoothly between the
Culvert and the surrounding areas.
H. Allow to dry completely.
5. COLORING ROCK CASTINGS
A. Using two small paper cups or containers, dilute the Burnt Umber and Yellow
Ocher pigments with water to create washes. Mix 1/4 teaspoon of each color, plus four
teaspoons of water in separate containers. Mix thoroughly with a craftstick.
B. Dip the foam pad applicator in the Burnt Umber wash. Dab on the rock castings
(Fig. 20) and refer to the box label for sample rock coloring. Rinse the foam pad, dab the
Yellow Ocher on the rock castings to create a random “leopard spot” pattern. Allow to dry
completely.
C. Overlapping layers of transparent washes will create multiple shades of color.
Continue dabbing on the Burnt Umber and Yellow Ocher washes in a leopard spot pattern
to produce many varying shades and hues of color.
D. If you have white
areas of plaster which are
not coloring, use much
higher concentration of
color, or full-strength
Burnt Umber and Yellow
Ocher pigments to color
them. Dip the foam pad
applicator in water, then
in the pigment. Dab on
the rock castings. This
will cover areas that have
remained white, intensify
9
Fig. 18
Fig. 19
Fig. 20

the color and add highlights. Dry completely.
E. Shake the bottle of Scenic Cement to mix it. Attach the spray head to the bottle.
Spray the Scenic Cement on the rock castings to set the color. Dry completely.
F. Use the remaining Black wash (left from staining the Culvert), or make more if
you need it, to add more color to the rock castings. Dip the foam pad applicator in the
Black wash and dab on the rock castings. Let it run into all the cracks and crevices. If you
want darker highlights, dip the foam pad applicator in water then in the undiluted Black
Pigment and dab on the rock castings. Allow to dry completely.
G. Set the color with a final spraying of Scenic Cement. Dry Completely.
H. The dirt and soil which
collect on rocks is modeled with a
technique called “flyspecking” (Fig.
21). Spray the rock castings with
water. Blend a sheet of paper into
an “L” shape. Place a small amount
of Soil Fine Turf on the horizontal
section of the paper. Hold the paper
near the rock castings and gently
puff air on the vertical section of the
paper. This will blow flyspecks of
Soil onto the rock castings. If you
have too much Soil, brush it off with
a dry paintbrush. Spray with Scenic
Cement to attach permanently.
I. Color all Plaster Cloth and Lightweight Hydrocal areas of the diorama with Earth
Undercoat Pigment in undiluted form. Do not color the Culvert or rock outcroppings. Use
a paintbrush to paint on the Earth Undercoat. A totally opaque layer of pigment is not
needed, just enough to cover the white plaster. Dip a brush in water to dilute the Earth
Undercoat a little. Use a damp sponge or paper towels to clean any Undercoat pigment off
the outside of the hardboard base. Dry completely.
LANDSCAPE
After the contours on the diorama are completed, the next step is to add landscaping. This
process will add color, texture and realism to the diorama as you model various types of
vegetation.
There is no specific order in which many of the landscape materials must be added to a
model or layout. In this diorama we will present one method of working, but feel free
to alter it a little if you wish, or return to an earlier section to add more of a particular
product. The best use of enclosed materials can be obtained by following the diagrams
closely.
1. TRACK AND BALLAST
Note: If you are making this diorama to display something other than model railroad
items, do not add the Track and Ballast. Instead you can make the sub-roadbed area into
a road, or cover it with Turf material. Proceed to Step 2-Low Ground Cover.
A. Install the Track-Bed on the sub-roadbed using Hob-e-Tac. Dry thoroughly.
B. Trial fit the strip of the track on the Track-Bed. It should fit exactly.
C. Pour Hob-e-Tac on the Track-Bed and spread with the brush applicator in the
10
Fig. 21

bottle. Save some Hob-e-Tac for
later use with trees and Field Grass.
Lay the track in place. Place some
weights on the track until the Hob-e-
Tac dries.
D. Open the bag of Ballast and
pour an even amount over the track
(Fig. 22).
E. Spread the Ballast evenly
with a dry paintbrush until it is even
with the ties (Fig. 23a).
F. Soak the Ballast
with “wet water” (a
mixture of two drops
of liquid detergent in
one cup of water). This
keeps the Ballast from
clumping.
G. Apply Scenic
Cement onto the Ballast
with an eyedropper, or
Scenic Sprayer (Fig. 23b), carefully avoiding contact with the track. Allow Scenic Cement
to dry.
2. LOW GROUND COVER
A. Cut off one corner of the bag of Green Blend Blended Turf. Working in one small
area at a time, generously spray the terrain base with Scenic Cement and sprinkle on a
fairly thick coating of Blended Turf (Fig. 24). Apply to all areas of diorama except for
the Culvert, track and rock outcroppings. Mask these areas with a sheet of paper when
spraying Scenic Cement. Allow to dry completely.
B. Blow off any excess Blended Turf which is not attached to the diorama.
C. Cut off one corner from each bag of the Fine Turf colors-Burnt Grass, Yellow
Grass, Earth and Soil. Overspray the Blended Turf with Scenic Cement and lightly
sprinkle on the Fine Turf colors in a salt and pepper fashion as accent colors. Burnt Grass
provides a variation in the basic
green coloring. Yellow areas can
indicate areas which might not
get as much water, such as the
sides of slopes. Earth and Soil
can be used to make a path, or
indicate bare spots of ground.
Use these accent colors more
sparingly than the basic Green
Blend Blended Turf and blend
them into each other so you do
not have splotches of color. If
you feel you have added too
much of one color, just sprinkle
another color in a salt and pepper
11
Fig. 22
Fig. 23a Fig. 23b
Fig. 24

style. When you like the coloring, lightly overspray with Scenic Cement to help secure
permanently.
D. If you are using the diorama for something other than a model railroad display, you
may wish to use the Earth or Soil Fine Turf to create a dirt road on the sub-roadbed area.
Spray the area with Scenic Cement and shake on the Turf in a fairly heavy layer. Blow off
any that is not attached after it dries.
E. Use a damp sponge or paper towels to clean off any Scenic Cement on the
hardboard sides.
3. ASSEMBLE TREES
Build the trees now and set them aside for placement on the diorama later.
A. Remove the temporary bases from the Tree Armatures. Twist and blend the
Armatures (Fig. 25a) to a shape you like. Using the brush applicator in the Hob-e-
Tac bottle, brush the Hob-e-Tac onto the branches of the Tree Armatures and wait
approximately 15 minutes until Hob-e-Tac is clear and tacky (Fig. 25b).
B. Attach Clump-Foliage to the Armatures. Or dip the Armatures into the bag of
Clump-Foliage for a quick application (Fig. 25c). Use both colors of Clump-Foliage.
Spray completed trees with Scenic Cement to secure foliage. Sprinkle on Yellow Grass
Fine Turf for highlights. Set the trees aside for planting later.
4. MEDIUM GROUND COVER
A The Medium Green Coarse Turf provides texture variation and can model weeds,
coarse grass and small plants. Spray the Turf areas with Scenic Cement and sprinkle on
the Coarse Turf. These types of plants would not have an even coverage over all areas.
Overspray with Scenic Cement to secure permanently.
B. Create bushes and shrubs with the remaining Clump-Foliage. Place dots of Hob-e-
Tac or Scenic Glue on the diorama where you want bushes, and press the Clump-Foliage
pieces into them (Fig. 26a). Mix the two colors of Clump-Foliage. Bushes would generally
grow in groups rather than in individual plants. Bunch the Clump-Foliage pieces together
to indicate groups of bushes (Fig. 26b).
12
Fig. 25a Fig. 25b Fig. 25c
Fig. 26a Fig. 26b Fig. 26c

C. Lightly overspray the Clump-Foliage
bushes with Scenic Cement. Use very light
sprinklings of Burnt Grass and Yellow Grass
Turf on top of the bushes for color highlights.
Dry completely (Fig. 26c).
D. Talus is the rock debris which collects
beneath cliffs, around the base of mountains,
and in and near water areas. Shake the bag
of Talus to mix. Cut one corner of the bag
and sprinkle on the Talus (Fig. 27a). Be sure
to add Talus below the rock outcroppings.
Consider placing it along the top of the rock
outcroppings. on the rock ledges, along the
back of the track area, and around and in
front of the Culvert. Refer to the box label
for suggestions on placement of Talus. If your
Talus does not closely resemble the color you
have painted you rocks, you can achieve a
more realistic look by painting the Talus. Dip
the foam pad applicator in water, then in the
Burnt Umber Pigment. Dab carefully on the
Talus. Use the Yellow Ocher and Black in the same manner if needed to produce a color
similar to the color of the rock castings. Allow to dry completely. To attach Talus, mix
equal parts of Scenic Glue and water.
Generously apply the mixture to Talus
with a straw or eyedropper (Fig. 27b).
When the glue is dry, apply another
coat in the same manner and dry
completely.
E. Pull off a small amount of Poly
Fiber. Stretch and pull this material
to a thin lacy sheet. Attach it to the
diorama with small dots of Scenic
Glue to model vines and low ground
cover plants (Fig. 28a and 28b).
F. . Lightly overspray the Poly
Fiber with Scenic Cement. Carefully
add a few small pinches of Burnt Grass
or Yellow Grass Fine Turf to add leaf
structure and color variations.
5. HIGH GROUND COVER
A. Remove the Field Grass from
the package. On a scrap piece of
paper, place a small amount of Hob-
e-Tac. Separate a small clump from
the whole amount. Roll it between
your thumb and forefinger to produce
an uneven end. With scissors, cut off
13
Fig. 27b
Fig. 28a
Fig. 28b
Fig. 27a
Fig. 29a Fig. 29b

the other end evenly in an appropriate
length (Fig. 29a). Dip the even end of
the Field Grass in the Hob-e-Tac (Fig.
29b) and install where desired on the
diorama (Fig. 29c). Continue adding
random clumps of Field Grass.
B. With the point of the hobby knife, make a small hole in the terrain shell where you
want to place a tree. Apply Hob-e-Tac or Scenic Glue in the hole. Set tree in hole (Fig.
30). Repeat with the other trees. Place the trees together in a clump rather than spread out.
See the box label for ideas on placement of trees.
FINISHING
1. DRY BRUSHING TURF
A. There may be several areas of your diorama where you want additional Turf to
create more color variation, add more color, cover up splotches of glue or plaster, or
disguise some other undesirable feature. Dry brushing with Turf is an easy technique
which allows you to see the results before attaching the Turf.
B. Dip a dry paintbrush into any of the colors of Turf and brush it onto the diorama
where you want it. Add some Soil or Earth Fine Turf on the top of the Talus, or along the
edges of the Ballast to model the weeds and grasses which might grow there. Use some
Burnt Grass Fine Turf around the base of the Field Grass to cover Hob-e-Tac Adhesive. If
you get too much, or do not like the look you have created, blow off the excess.
C. When you like the look you have created, mist lightly with Scenic Cement to hold
the Turf in place.
2. ADDING ADDITIONAL LANDSCAPE MATERIALS
A. You may wish to add some additional landscape materials to the diorama for more
variety in texture or color, to add more realism, or to create more interest in the scenery.
B. More Coarse Turf, Clump-Foliage bushes, Poly Fiber ground cover and Field Grass
clumps can be easily added at this time. Refer back to the original directions for adding
these items and add them in the same way now.
C. Lightly overspray the bushes, Poly Fiber ground cover and trees with Scenic
Cement and very lightly sprinkle on Burnt Grass or Yellow Grass Fine Turf to provide
color variations.
3. FLYSPECKING TURF
A. Dirt and soil collects in many areas including rock faces, on top of Ballast and
Talus and on Turf areas.
B. Use the flyspecking technique described in section 5H (pg. 13) to add Soil Turf to
these areas.
14
Fig. 30
Fig. 29c

4. TOUCHING UP BLACK PAINT
A. You may be able to see some of the newspaper contour building material through
the opening in the Culvert. If so, use a small paintbrush and carefully apply undiluted
Black Pigment to any material which is visible.
B. The hardboard frame of your diorama may need a touch-up coat of paint. This
can be done buy either spraying or rolling on paint. To spray paint, tilt the diorama as
you spray each side to keep the paint off the top surface of the diorama (Fig. 31). If you
rolled on the latex paint, apply a second coat carefully so the paint does not get on the top
surface. The slightly “orange peel texture” which is achieved by rolling on paint may be
desirable, even if you originally sprayed on the paint.
C. After the diorama has completely dried, place your engine, piece of rolling stock,
or other model on it, and it is ready for display.
The enclosed Woodland Scenics Buyer’s Guide includes all the Terrain and Landscaping
products which are available for use on your module or layout. Look for them at your local
hobby shop or visit our Web site at www.woodlandscenics.com.
15
Fig. 31
For more complete information on using the Woodland Scenics Terrain and Landscape
products included in this kit, refer to the Woodland Scenics Scenery Manual (C1207).
This informative guide also includes information on other Woodland Scenics products
not included in this kit. “Model Scenery Made Easy” (R993) is a comprehensive, detailed
account of scenery modeling. It was skillfully produced for every level of modeler. It will
show you how to create scenery the easy way. The Woodland Scenics video “The Clinic”
(R990) is a live demonstration on using the various Terrain and Landscaping products in
this kit.

16
We hope you have enjoyed using the Woodland Scenics materials included in this kit.
The following list gives you the Woodland Scenics product number for the terrain and
landscape products in the kit.
B94
C1201
C1203
C1220
C1222
C1223
C1229
C1234
C1262
C1274
C1275
FC183
FC184
FP178
FG173
S191
S192
S195
T41
T42
T43
T44
T49
T64
TR1101
ST1471
GRAY BLEND BALLAST
LIGHTWEIGHT HYDROCAL
PLASTER CLOTH
BLACK LIQUID PIGMENT
BURNT UMBER LIQUID PIGMENT
YELLOW OCHER LIQUID PIGMENT
EARTH UNDERCOAT PIGMENT
RANDOM ROCK ROCK MOLD
CONCRETE CULVERT
FINE BROWN TALUS
MEDIUM BROWN TALUS
MEDIUM GREEN CLUMP-FOLIAGE
DARK GREEN CLUMP-FOLIAGE
GREEN POLY FIBER
LIGHT GREEN FIELD GRASS
SCENIC CEMENT
SCENIC SPRAYER
HOB-E-TAC ADHESIVE
SOIL FINE TURF
EARTH FINE TURF
YELLOW GRASS FINE TURF
BURNT GRASS FINE TURF
GREEN BLEND BLENDED TURF
MEDIUM GREEN COARSE TURF
REALISTIC TREE KIT
TRACK-BED
DESCRIPTION PRODUCT NUMBER
WOODLAND SCENICS®
P.O. Box 98, Linn Creek, MO 65052
www.woodlandscenics.com
V6
Table of contents
Other WOODLAND SCENICS Toy manuals

WOODLAND SCENICS
WOODLAND SCENICS Rail Tracker Tidy Track User manual

WOODLAND SCENICS
WOODLAND SCENICS DPM FIRE STATION 3 User manual

WOODLAND SCENICS
WOODLAND SCENICS DPM LANDMARK STRUCTURES REED BOOKS User manual

WOODLAND SCENICS
WOODLAND SCENICS ROTO WHEEL CLEANER TT4561 User manual

WOODLAND SCENICS
WOODLAND SCENICS PINECAR P4036 Instruction manual

WOODLAND SCENICS
WOODLAND SCENICS SCENIC RIDGE ST1482 User manual

WOODLAND SCENICS
WOODLAND SCENICS LANDMARK STRUCTURES FIRE STATION N 3 User manual

WOODLAND SCENICS
WOODLAND SCENICS MILLIE'S HOUSE COMBO User manual

WOODLAND SCENICS
WOODLAND SCENICS ROOMETTES User manual

WOODLAND SCENICS
WOODLAND SCENICS Possum Hollow TS151 User manual