manuals.online logo
Brands
  1. Home
  2. •
  3. Brands
  4. •
  5. WOODLAND SCENICS
  6. •
  7. Toy
  8. •
  9. WOODLAND SCENICS LANDMARK STRUCTURES FIRE STATION N 3 User manual

WOODLAND SCENICS LANDMARK STRUCTURES FIRE STATION N 3 User manual

®
®
®
WOODLAND SCENICS®
MODELING AND CARE
INFORMATION
This kit suggests the use of materials
that may stain or cause damage. Take
care to cover project area and clothing
appropriately. Follow recommendations
for use and cleanup.
CAUTION: Cutting tools
recommended. Use with care.
We make every effort to ensure our kits are
manufactured complete. However, if this kit
is missing a part, please make note of the kit
name, number and missing part and contact the
Woodland Scenics Sales and Customer Service
Department at PO Box 98, Linn Creek, MO 65052,
573-346-5555 or [email protected].
XPF5212INST G4 ©2014 O CO
1:160
BUILDING KIT
FIRE STATION Nº 3
PF5212
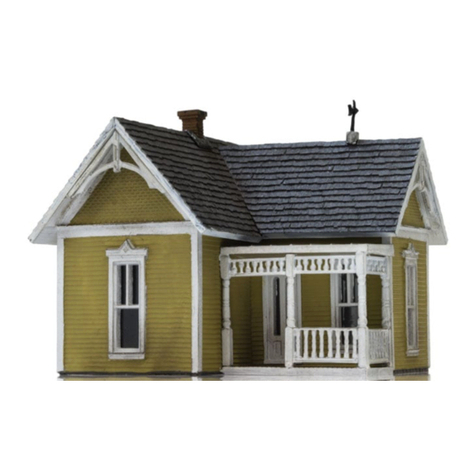
Fire Station Nº 3 represtents the elegantly styled
firehouses that communities built as a ‘point of
pride,’ across America. The exquisite architectural
details include a wide cornice, curved window
caps and an ornate cupola to house the tall tower
where fire hoses drainded following a fire. The
Fire Station Nº3 design includes hinged bay doors
and molding that allows easy installation of wiring
for interior lighting.
®
®
®
FIRE STATION Nº 3
1
❑Wall and Roof Sections
❑Sprues with Details
❑Printed Window Material
❑Clear Window Material
❑Dry Transfer Decals
❑Flag
❑Blackout Paper
Building Kit Contents
Building Footprint: 3-19/32 in W x 3-7/32 in D x 4-13/16 in H (9.11 cm x 8.17 cm x 12.2 cm)
Four void pieces,
please disregard!
Four void pieces,
please disregard!
Four void pieces,
please disregard!
Four void pieces,
please disregard!
Four void pieces,
please disregard!
2
4
3
1
25
27
29
22
23
28
23
26
30 8
9
24
24
20
18
19
21
9
8
2
Additional Needed Supplies
❑Solvent-based Plastic Cement or CA Glue*
❑Paints (acrylic and/or enamel)*
❑Primer*
❑Painting Tools
❑Hobby Knife / Flush Cutting Shears
❑White Glue
TIP! To assist in assembly, refer to exploded-view illustration on back of box.
❑Burnisher
❑Fine-grade Sandpaper
❑Tweezers
❑Ruler
❑Scissors
❑Newspaper
• Read through instructions booklet.
• Collect additional supplies.
• Check kit contents and verify Details.
• Cover project area with newspaper.
Before You Begin
NOTE: Allow glue to set before moving to the next step. Plastic cement works by dissolving
the surface of plastic and welding parts together. Avoid contact with detail on parts.
*Contact your local hobby shop for recommendations.
Four void pieces,
please disregard!
Four void pieces,
please disregard!
Four void pieces,
please disregard!
Four void pieces,
please disregard!
5
6 7
17
14
15
76
10
13
11
12
16
3
1. Prepare Building Parts and Details
• Remove mold flash from Wall and Roof Sections and Details
using a hobby knife and sandpaper (Fig. 1a). Do not remove
Details from sprues at this time.
• Wash Wall Sections, Roof and Details in warm, soapy water
using a mild detergent. Rinse and let dry.
• Details can be left on sprues (recommended) or
removed for priming and painting. Remove using
a hobby knife (or flush cutting shears) and sand
off parting lines (Fig. 1b). Details may be easier to
paint on sprue. It also makes identifying them easier
during assembly.
• Be careful to not remove placement posts or
installation tabs (Fig. 1c).
2. Prime and Paint
Do not prime or paint placement posts.
• Apply a thin coat of primer and let dry.
• Paint as desired and let dry. See Tips & Techniques
on pg. 6 for painting tips and weathering
techniques.
TIP! To make priming and painting loose
Details easier, secure them to strips of
masking tape attached (sticky side up) to
a piece of cardboard (Fig. 2a and 2b).
3. Install Window Material
Position Printed Window Material on
backside of Walls. Remove protective film
before installation. If clear windows are
preferred, use Clear Window Material.
• Align Window Material over
corresponding windows on inside of
Building. Verify placement, then glue
in place. Dab a small amount of glue
carefully around edges (Fig. 3a).
• Repeat for each set of window openings.
4. Apply Dry Transfer Decals
• Cut out desired Decal. Avoid handling the back and position in desired location. Rub over
entire Decal with a burnisher or dull pencil.
• Lift away carrier sheet carefully. If Decal did not transfer completely, let carrier sheet fall
back in place and burnish again.
• Place backing paper over Decal and burnish again for maximum adhesion.
• When applying onto textured surface, press Decal into texture with a pencil eraser.
Fig. 1a
Fig. 3a
Four void pieces,
please disregard!
Fig. 1b Fig. 1c
Placement Post
Fig. 2b
Fig. 2a
5. Install Hinged Doors
Fire Station Doors are hinged to swing
inward. Glue in place carefully.
• Position Front Wall 1facedown.
• Set Door 8onto backside of Front
Wall. Make sure the hinge pins are in
the grooved openings (Fig. 5a).
• Position Door Support
6
in groove and
on top of hinge pins to hold Door
8
in
place (Fig. 5b). Glue Door Support in
place, being careful to not get glue on
hinged area or door will not swing.
• Set Door 9hinge pins into grooved
openings on backside of Front Wall.
Position Door Support 7into groove
and on top of hinge pins, then glue in
place.
• Install second set Doors in the same
manner (Fig. 5c).
7. Attach Tower Assembly
• Insert Tower Assembly into
cutout in Front Wall at a slight
angle (Fig. 7a).
• Push Tower Assembly down,
inserting locking tabs into
notches on Front Wall. Snap
firmly into place (Fig. 7b). Apply
glue on inside tabs.
4
Fig. 5bFig. 5a
Fig. 5c
6
8
6
8
6
8
Fig. 7a
6. Assemble Tower
• Insert three locking tabs on Tower Wall
11
into notches on Front
Tower Wall
10
(Fig. 6a).
• Snap Back Wall 12 onto Tower Wall 11 (Fig. 6b).
• Align locking tabs on Tower Wall
13
with Front Tower Wall and Back
Wall and snap into place.
• Apply glue on tabs and
inside seams.
6
Fig. 6b
Fig. 7b
Fig. 6a
11
10
12
11
1
8 89 9
7 76 6
8
6
8
8. Assemble Walls and Roof
• Snap Wall 2and Wall 4into place on Front Wall 1(Fig. 8a).
• With cutout in Roof 5facing forward, slide it into place following the grooves on Walls
2and 4and securing in groove on Front Wall 1(Fig. 8b).
• Apply glue along seams from underneath building.
• Snap Back Wall 3into place. Secure with glue along inside seams.
9. Install Chimney Backs
Chimneys have specific placement.
Arrange as illustrated.
• Insert pegs on Chimney Back
14
into
posts on left front molded-in chimney
Apply a tiny amount of glue onto pegs
before installing.
• Continue by installing Chimney Back
15
onto left rear chimney, Chimney Back
16
onto right front chimney and Chimney
Back
17
onto right rear chimney (Fig. 9a).
10. Complete Tower Assembly
• Glue Upper Tower parts
18
and
19
together (Fig. 10a).
• Glue Assembly to Base
20
(Fig. 10a).
• Glue Cap
21
and Finial
22
in place
(Fig. 10b).
• Glue Assembly to Tower.
11. Install Details
Test fit Details before gluing. When possible, insert
placement post into hole and apply adhesive on
interior of building or use a toothpick to apply a tiny
amount of glue onto post and then insert into hole.
Fig. 8b
Fig. 8a
Fig. 9a
Fig. 10a Fig. 10b
Fig. 8a
5
Back (Fig. 11a)
Downspouts x2
24
, Light
23
, Ladder
25
, Trashcan
26
,
Electric Meter and Junction Box
27
24
18
16
17
15
14
5
4
1
2
19
20
21
22
24
27
26
25
23
12. Assemble Flag
• Cut out Paper Flag with scissors.
• Apply white glue onto backside of
Flag, fold in half and form around
Flagpole 30 and smooth surface
(Fig. 12a).
• Hold each end of Flag and push toward center creating a wavy-look and let dry (Fig. 12b).
• Install Flag Assembly on front of Building (Fig. 12c).
Tips and Techniques
Second Floor (OPTION)
Molded-in ledges on interior of Front and Back Walls are designed to add a second floor.
Cut a piece of styrene approx. 2-28/32" x 3-13/16". Test fit and cut out a notch to clear the
lighting raceway. Paint interior and styrene a flat earth-tone shade.
Painting Tips
Colors are your choice, but we recommend natural brick colors such as rust, tan or other
earth tones.
Airbrush or Hand-brush Use enamel (solvent-based) or acrylic (water-soluble) flat finish paint.
Aerosol Use flat finish spray paint.
Weathering Techniques
Mortar Wash Create the look of brick mortar or add a weathered look (formula follows).
Lay building flat so wash spreads evenly. Using a paintbrush, dab on small amounts
of Mortar Wash until desired look is achieved. Sponge off excess. Formula: Mix 1-part
acrylic paint (color suggestion: concrete or aged concrete), 12-parts rubbing alcohol,
8-parts water and 1 drop liquid dish soap.
11. Install Details cont.
6
Fig. 8a Fig. 8a
13. Blackout Paper
Cut two strips of Blackout Paper, each
measuring 4-11/16" L x 1-3/4" W.
• Cut another two strips, each
measuring 1" L x 5/8" W.
• Place the two strips on top of each
other and cut a notch halfway up.
Position large strips horizontally
(Fig. 13a) and the small strips
vertically (Fig. 13a).
• Assemble as shown (Fig. 13a).
• Insert small assembly into the
Tower and then large into building
(Fig. 13b and Fig. 13c).
• Hold in place with a drop of glue, if
necessary.
5
1
2
Fig. 13b
Fig. 13c
Fig. 13a
Left Side (Fig. 11b)
Bench
28
, Boots
29
Front (Fig. 11c)
Front Door Light
23
23
Fig. 12a Fig. 12b
2
5
6
8
Fig. 12c
30
29
28
Look for These Other N Scale
Landmark Structures Building Kits
at Your Local Hobby Shop
Fresh Market PF5200
Main Street
Mercantile PF5202
Planters Feed and
Seed Supply PF5201
Sicken Tire Company
PF5204
County Courthouse
PF5209
Rustic Barn
PF5211
Country Cottage
PF5206
O'Leary Dairy
Distribution PF5205
Sonny’s Super Service
PF5203
Woodland Station
PF5207
D’s Diner
PF5208
J.W. Cobbler
PF5210

This manual suits for next models

1

Other WOODLAND SCENICS Toy manuals

WOODLAND SCENICS SCENIC RIDGE ST1482 User manual

WOODLAND SCENICS

WOODLAND SCENICS SCENIC RIDGE ST1482 User manual

WOODLAND SCENICS ROOMETTES User manual

WOODLAND SCENICS

WOODLAND SCENICS ROOMETTES User manual

WOODLAND SCENICS DPM FIRE STATION 3 User manual

WOODLAND SCENICS

WOODLAND SCENICS DPM FIRE STATION 3 User manual

WOODLAND SCENICS Grand valley ST1483 User manual

WOODLAND SCENICS

WOODLAND SCENICS Grand valley ST1483 User manual

WOODLAND SCENICS DPM LANDMARK STRUCTURES REED BOOKS User manual

WOODLAND SCENICS

WOODLAND SCENICS DPM LANDMARK STRUCTURES REED BOOKS User manual

WOODLAND SCENICS JUST PLUG User manual

WOODLAND SCENICS

WOODLAND SCENICS JUST PLUG User manual

WOODLAND SCENICS S927 User manual

WOODLAND SCENICS

WOODLAND SCENICS S927 User manual

WOODLAND SCENICS MILLIE'S HOUSE COMBO User manual

WOODLAND SCENICS

WOODLAND SCENICS MILLIE'S HOUSE COMBO User manual

WOODLAND SCENICS RIVER PASS S1487 Instruction manual

WOODLAND SCENICS

WOODLAND SCENICS RIVER PASS S1487 Instruction manual

WOODLAND SCENICS Rail Tracker Tidy Track User manual

WOODLAND SCENICS

WOODLAND SCENICS Rail Tracker Tidy Track User manual

WOODLAND SCENICS Possum Hollow  TS151 User manual

WOODLAND SCENICS

WOODLAND SCENICS Possum Hollow TS151 User manual

WOODLAND SCENICS PINECAR P4036 Instruction manual

WOODLAND SCENICS

WOODLAND SCENICS PINECAR P4036 Instruction manual

WOODLAND SCENICS ROTO WHEEL CLEANER TT4561 User manual

WOODLAND SCENICS

WOODLAND SCENICS ROTO WHEEL CLEANER TT4561 User manual

Popular Toy manuals by other brands

Mattel Polly Pocket L9107 Assembly

Mattel

Mattel Polly Pocket L9107 Assembly

Wizarding World TIME-TURNER Building instructions

Wizarding World

Wizarding World TIME-TURNER Building instructions

Fisher-Price T3257 Assembly instructions

Fisher-Price

Fisher-Price T3257 Assembly instructions

John Adams Silly Sausage instructions

John Adams

John Adams Silly Sausage instructions

Bachmann Williams NW-2 instructions

Bachmann

Bachmann Williams NW-2 instructions

Little Tikes 637735M Assembly guide

Little Tikes

Little Tikes 637735M Assembly guide

Hangar 9 RV-8 Assembly manual

Hangar 9

Hangar 9 RV-8 Assembly manual

POLA G 331780 manual

POLA G

POLA G 331780 manual

Hasbro Jedi Dex instructions

Hasbro

Hasbro Jedi Dex instructions

Inspired Flight IF1200 user manual

Inspired Flight

Inspired Flight IF1200 user manual

Art-Tech ASK-21 user manual

Art-Tech

Art-Tech ASK-21 user manual

Fisher-Price GEO TRAX J9520 user manual

Fisher-Price

Fisher-Price GEO TRAX J9520 user manual

GREAT PLANES RV-4 instruction manual

GREAT PLANES

GREAT PLANES RV-4 instruction manual

MinimumRC A6M5-D Assembly instructions

MinimumRC

MinimumRC A6M5-D Assembly instructions

Fisher-Price GeoTrax T7158 instruction sheet

Fisher-Price

Fisher-Price GeoTrax T7158 instruction sheet

Trix 22658 instructions

Trix

Trix 22658 instructions

PLAYMOBIL 3269 manual

PLAYMOBIL

PLAYMOBIL 3269 manual

Fisher-Price CDK39 quick start guide

Fisher-Price

Fisher-Price CDK39 quick start guide

manuals.online logo
manuals.online logoBrands
  • About & Mission
  • Contact us
  • Privacy Policy
  • Terms and Conditions

Copyright 2025 Manuals.Online. All Rights Reserved.