woodmizer D10 Guide

D10 Engine
Safety, Operation, Maintenance
& Parts Manual
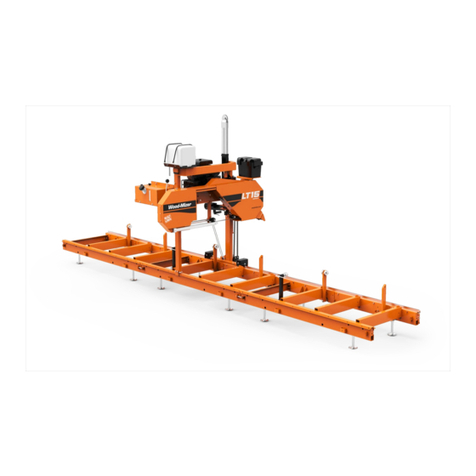
LT15 rev. D1.01
Safety is our #1 concern! Read and understand
all safety information and instructions before oper-
ating, setting up or maintaining this machine.
February 1998 Form #1098
!
This is the original language
for the manual.

ii D10doc060710 Table of Contents
Table of Contents Section-Page
ABOUT THIS MANUAL III
SECTION 1 OPERATION 1-1
1.1 Preparation For Starting .........................................................................1-2
1.2 Starting The Engine................................................................................1-5
1.3 Stopping The Engine............................................................................1-12
SECTION 2 MAINTENANCE 2-1
2.1 Air Cooling System................................................................................2-1
2.2 Air Filter & Pre-Cleaner.........................................................................2-2
2.3 Oil & Oil Filter.......................................................................................2-3
2.4 Fuel Filter ...............................................................................................2-4
2.5 Drive Belt Adjustment............................................................................2-5
2.6 Alternator Belt........................................................................................2-7
2.7 RPM Adjustments ..................................................................................2-9
SECTION 3 REPLACEMENT PARTS 3-1
3.1 How To Use The Parts List....................................................................3-1
3.2 Sample Assembly...................................................................................3-1
3.3 Engine Assembly....................................................................................3-2
3.4 Brake/Belt Tensioner Assembly.............................................................3-4
3.5 Key Switch Mount Bracket....................................................................3-7
SECTION 4 ELECTRICAL INFORMATION 4-1
4.1 Electrical Wiring Diagram, LT15D10-P + SW10..................................4-1
4.2 Electrical Components, LT15D10..........................................................4-2
About This Manual D1001doc060710 iii
ABOUT THIS MANUAL
This manual is provided as a supplement to the equipment manufacturer’s manuals. This
manual provides information specific to the use of this equipment on the Wood-Mizer®
sawmill. Refer to the sawmill operator’s manual and manufacturer's manual before
attempting to operate this equipment.
IMPORTANT! Read the sawmill operator’s manual and
engine manufacturer’s manual for instructions and safety
precautions before operating this equipment.
The information and instructions given in this manual do not amend or extend the limited
warranties for the equipment given at the time of purchase.
!

OPERATION
1
1-1 D10doc060710 OPERATION
SECTION 1 OPERATION
While your engine is still new, applying heavy loads may reduce its life. Follow the
breaking-in procedure below during the first 20 hours of operation.
1. Avoid overloading
Never apply heavy loads during the breaking-in period.
2. Change engine oil regularly
Change the engine oil after the first 50 hours of operation or after the first month
(whichever comes first) and every 3 months or 200 hours thereafter.
DANGER! Always drain the oil while the engine is still
warm. It may be difficult to drain the oil completely when the
engine is cold.
3. Check the fuel level in the fuel indicator pipe. Do not allow the fuel tank to become
empty. If this should happen, perform the following steps:
a) Fill the tank with diesel fuel,
b) Unbolt the fuel tank mounting bolts,
c) Raise the fuel tank so that fuel flows into the solenoid valve and air bleeds from the
system,
d) Tighten the tank mounting bolts and attempt to start the engine,
e) If the starting attempts are not successful, repeat steps b-d.

OPERATION
Preparation For Starting
OPERATION D10doc060710 1-2
1
1.1 Preparation For Starting
1. Fuel Selection And Handling
Use only diesel fuel recommended by the manufacturer. Before filling the fuel tank, make
sure the fuel does not contain water and/or dust. Failure to do so may result in damage to
the fuel injection pump and nozzles.
CAUTION! Use only recommended diesel fuel. Failure to
do so may result in serious engine damage.
CAUTION! The cetane value of the diesel fuel should be
above 45. This will ensure easy engine start and will
prevent misfiring and white exhaust gases.
CAUTION! Diesel fuel substitutes are not recommended;
they may cause damage to the fuel system.
CAUTION! The fuel should be free of water and dust.
Damage to the fuel injection pump and nozzles may result.
Change engine oil
Start up
1st time Approx.
one month
or 50 hours
Thereafter
every 3 months
or 200 hours

OPERATION
Preparation For Starting
1
1-3 D10doc060710 OPERATION
Overfilling is very dangerous. Do not fill the tank beyond the top of the red plug inside the
fuel tank filter.
Fuel tank capacity: 4,7 l.
2. Engine Oil
WARNING! Always check the engine oil level before starting the engine. Add oil if
necessary. If the lubricating oil level is too low, it may result in engine damage. If it is too
high, a sudden increase of RPM can occur as a result of the lube oil combustion.
Use 5W/40 engine oil.
Pour the oil up to the mouth of the filler port. Make sure the engine is level when pouring
the oil.
Lube oil capacity: 1.65 l.
Red Plug
C
ap
Upper level
Lower leve
l

OPERATION
Preparation For Starting
OPERATION D10doc060710 1-4
1
3. Servicing The Air Cleaner
1 - Air cleaner, 2 - Wing nut
1 - Element
CAUTION! Do not clean the air cleaner element with
detergents as it is of an oil-soaked type.
CAUTION! Replace the element when the power output
decreases or a bad color of the exhaust gases is noticed.
CAUTION! Never run the engine without the air cleaner
element. Doing so may result in quick engine wear.

OPERATION
Starting The Engine
1
1-5 D10doc060710 OPERATION
1.2 Starting The Engine
Recoil Starting
1 - Fuel cock
Perform the following steps to start the engine:
1. Set the fuel cock in the open (“O”) position.
2. Put the engine speed lever in the “START” position.
Grip

OPERATION
Starting The Engine
OPERATION D10doc060710 1-6
1
3. Pull out the start rope.
a) Holding the rope handle, pull the rope until you feel strong resistance and then allow
the handle to return to its initial position.
b) Push the decompression lever down. It will return automatically to its original
positionwhen the start rope is pulled again.
c) Pull out the start rope briskly holding the handle with both hands.
CAUTION! Do not allow the start rope handle to rapidly
return to its original position. Release it gently to avoid
damage to the starter.
CAUTION! Always pull the start rope firmly to start the
engine.
WARNING! Never use any cold-starting aids such as ether,
gasoline, paint thinner or other volatile liquid or gas.

OPERATION
Starting The Engine
1
1-7 D10doc060710 OPERATION

OPERATION
Starting The Engine
OPERATION D10doc060710 1-8
1
Electric starting
Engine Start
WARNING! Do not start the engine when the tensioner
lever is in the ENGAGED (up) position. Always be sure the
blade is disengaged and all persons are away from the
sawmill before starting the engine.
1. Set and lock with the pin the tensioner lever in the ENGINE START (middle) position.
See Figure 1-1.
FIG. 1-1
150215

OPERATION
Starting The Engine
1
1-9 D10doc060710 OPERATION
2. Turn the key to the START position.
See Figure 1-2.
3. When the engine is started, release the tensioner lever to the IDLING (down) position.
See Figure 1-3.
FIG. 1-2
FIG. 1-3
150216

OPERATION
Starting The Engine
OPERATION D10doc060710 1-10
1
4. To engage the blade, press and hold the green button on the control box and push the
tensioner lever to the ENGAGED (up) position.
CAUTION! If the starter is on for too long time, the battery
may go flat. Always keep the key in the “ON” position while
the engine is running.
IMPORTANT! The control light should be on when the key
is in the ON position.
Warm up the engine without load for about 3 minutes.
CAUTION! Do not loosen or readjust the throttle shut-off
weldment bolt (idling adjustment lever). Damage to the
engine may result.
WARNING! The exhaust silencer is very hot during
engine operation. Be careful not to touch the silencer.
WARNING! Never perform refueling while the engine is
running.
FIG. 1-3
150217
!

OPERATION
Starting The Engine
1
1-11 D10doc060710 OPERATION
Battery
Check the level of the fluid in the battery once a month. When the level has dropped to
the lower mark, replenish with distilled water up to the upper mark.
CAUTION! If the battery fluid is short, the engine may not
start because too little electricity is reaching the starter
motor. Always keep the fluid level within the upper and
lower limits.
CAUTION! If too much battery fluid is supplied, the fluid
may spill and corrode the surrounding parts.
CAUTION! The light located on the key switch mount
bracket is lit always when the key is turned to the “ON”
position.

OPERATION
Stopping The Engine
OPERATION D10doc060710 1-12
1
1.3 Stopping The Engine
1 - Nut of high-pressure fuel pipe
1. Before stopping the engine, push the engine speed lever to the low-speed position and let
the engine run for about 3 minutes with no load.
2. Return the engine speed lever to the “STOP” position.
3. In electric-start models, return the starter key to the “OFF” position.
4. Move the fuel cock lever to the “S” (closed) position.
5. Pull the start rope slowly until you feel resistance, i.e. until the engine is in the
compression position (where the intake and exhaust valves are closed) and leave the
engine in this position. This prevents rusting while the engine is not in use.
WARNING! If the engine keeps on running even after the
speed lever is placed in the “STOP” position, stop the
engine either by closing the fuel cock (“S” position) or by
loosening the nut of the high-pressure fuel pipe on the
pump side.
CAUTION! When stopping the engine, reduce the load
slowly. Do not stop the engine suddenly as it may cause the
temperature to raise abnormally.
CAUTION! Do not stop the engine using the
decompression lever.

Maintenance
Air Cooling System
2
2-1 doc060710 Maintenance
SECTION 2 MAINTENANCE
IMPORTANT! This manual only provides information about
additional procedures or procedures to be performed at
different time intervals than found in the engine
manufacturer's manuals. Refer to the manufacturer's
manual for complete maintenance instructions.
WARNING! Remove the blade before performing any
engine service. Failure to do so may result in serious injury.
This symbol identifies the interval (hours of operation) which each maintenance
procedure should be performed. "AR" signifies maintenance procedures which should be
performed as required.
2.1 Air Cooling System
Wash the engine or brush off sawdust and debris every 50 hours of operation. Clean the
grass screen, cooling fins, and external surfaces. Remove any dust, dirt or oil. See
engine manual for further instructions.
!
0
50

Maintenance
Air Filter & Pre-Cleaner
Maintenance doc060710 2-2
2
2.2 Air Filter & Pre-Cleaner
WARNING! Always wear proper and necessary safety
equipment when performing service functions. Proper
safety equipment includes eye protection, breathing
protection, hand protection and foot protection.
Service the pre-cleaner every four hours of operation. Service by gently shaking excess
sawdust and debris from the foam piece.
Clean the air filter (air cleaner element) and pre-cleaner (element wrapper) every eight
hours of operation. See the engine manual for further instructions.
Change the air cleaner element every 6 months or 400 hours (or earlier if dirty).
CAUTION! Never run the engine without the element or
with a defective element.
CAUTION! A clogged element hinders the flow of air to the
combusion chamber. This reduces engine output,
increases lube oil and fuel consumption and makes starting
difficult.
CAUTION! Make sure you clean the element regularly.
4
8
200

Maintenance
Oil & Oil Filter
2
2-3 doc060710 Maintenance
2.3 Oil & Oil Filter
Change the oil after the first 50 hours of operation or after the first month (whichever
comes first), and every 3 months or 200 hours thereafter.
CAUTION! Always drain the oil while the engine is still
warm. It may be difficult to drain the oil completely when the
engine is cold.
Change the oil filter every 6 months or 400 hours of operation.
Lube oil capacity: 1.65 l.
CAUTION! Before adding oil make sure the engine is not
tilted.

Maintenance
Fuel Filter
Maintenance doc060710 2-4
2
2.4 Fuel Filter
1 - Nuts, 2 - Drain plug
Clean: Every 3 months or 200 Hrs.Every 6 months or 400 Hrs.
The fuel filter has to be cleaned regularly to insure maximum engine output.
1. Drain fuel from the fuel tank.
2. Loosen the fuel cock nuts and remove the filter from the F.O. tank filler port. Wash the
filter thoroughly with diesel oil.

Maintenance
Drive Belt Adjustment
2
2-5 doc060710 Maintenance
2.5 Drive Belt Adjustment
WARNING! Do not for any reason adjust the engine drive
belts or belt support bracket with the engine running. Doing
so may result in serious injury.
Check the drive belt tension after the first 20 hours, and every 50 hours thereafter.
The drive belt tension should be adjusted with the tensioner handle engaged (in the up
position), by moving the engine assembly on the engine mount plate. To make the
adjustment, perform the following steps:
1. Loosen the engine mounting bolts and the jam nuts.
2. Using the adjustment bolts, shown in the figure below, adjust the belt tension to
approximately 11 mm deflection with 7.2 kG of deflection force.
3. Tighten the jam nuts and the engine mounting bolts.
50
Table of contents
Other woodmizer Engine manuals

woodmizer
woodmizer G18 LT20 Series Guide

woodmizer
woodmizer G15 Guide

woodmizer
woodmizer G13 Guide

woodmizer
woodmizer LT70 Series Guide

woodmizer
woodmizer D42 Guide

woodmizer
woodmizer D42 Guide

woodmizer
woodmizer LT30 Super Guide

woodmizer
woodmizer D42 Guide

woodmizer
woodmizer LT28 D17 Guide

woodmizer
woodmizer LT28 G25 Guide
Popular Engine manuals by other brands

Central Machinery
Central Machinery 96500 Assembly and operation instructions

Kohler
Kohler 7000 Series user manual

Briggs & Stratton
Briggs & Stratton 190000 Series Operator's manual

Clarke
Clarke C18 Operation and maintenance instruction manual

Jacobsen
Jacobsen J-501 Operator's manual

Zenoah
Zenoah G4K-D Operation and maintenance guide