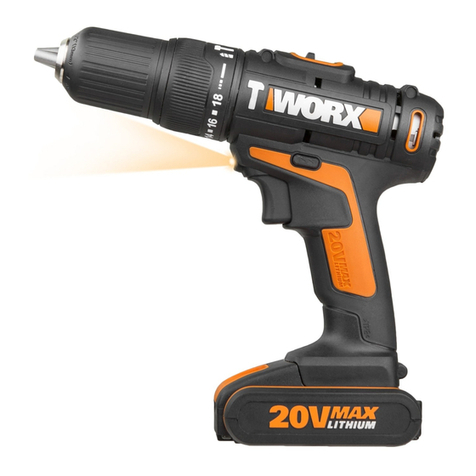
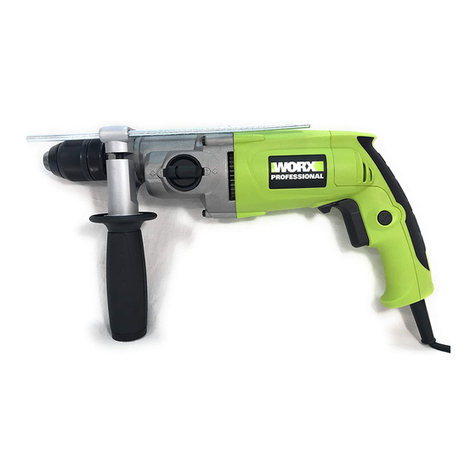
Worx WX160 User manual

P06
P15
P24
P33
P42
P51
P60
P69
P78
P87
P95
P105
P114
P123
EN
D
F
I
ES
PT
NL
DK
FIN
NOR
SV
TR
GR
RU
Lithium-Ion cordless drill/driver
Schnurloser Lithium-Ionen-Bohrer/Schraubendreher
Perceuse/Visseuse sans fil Lithium-Ion
Trapano/avvitatore con btteria agli ioni di litio
Atornilladora taladradora con batería de iones de litio
Berbequim/aparafusador sem fios com bateria de iões de lítio
Snoerloze boor/schroevendraaier op lithiumionbatterij
Trådløs bore og skruemaskine med Lithium-Ion batteri
Langaton Lithium-Ioni pora/ruuvauslaite
Litium-Ion trådløs bore-/skruemaskin
Sladdlös borrmaskin/skruvdragare med litiumjonbatteri
Lityum iyon kablosuz matkap
WX160 WX160.1 WX160.2 WX160.3 WX160.4
WX163 WX163.1 WX163.2 WX163.3

Original instructions EN
Originalbetriebsanleitung D
Notice originale F
Istruzioni originali I
Manual original ES
Manual original PT
Oorspronkelijke gebruiksaanwijzing NL
Original brugsanvisning DK
Alkuperäiset ohjeet FIN
Original driftsinstruks NOR
Bruksanvisning i original SV


1 2 3
4
5
7
8
9
10
11
6

C1BA
C2 D E
G HF

Lithium-Ion cordless drill/driver EN
6
1. KEYLESS CHUCK
2. TORQUE ADJUSTMENT RING
3. TWO-SPEED GEAR CONTROL
4. BUBBLE LEVEL
5. FORWARD/REVERSE ROTATION CONTROL
6. SOFT GRIP HANDLE
7. BATTERY PACK RELEASE BUTTON
8. BATTERY PACK *
9. DOUBLE ENDED BIT
10. ON/OFF SWITCH
11. SIGHT LIGHT
*Not all the accessories illustrated or described are included in standard delivery.

Lithium-Ion cordless drill/driver EN
7
TECHNICAL DATA
Type
WX160 WX160.1 WX160.2 WX160.3 WX160.4 WX163 WX163.1 WX163.2 WX163.3
(1-designation of machinery, representative of cordless drill)
Model No. WX160 WX160.1 WX160.2
WX160.3 WX160.4 WX163 WX163.1
WX163.2 WX163.3
Voltage 14.4V 18V
No load speed 0-350/0-1200/min
Number of clutch position 23+1
Max torque 30N.m 35N.m
Chuck capacity 10mm
Max. Drilling capacity Steel 10mm
Wood 28mm 30mm
Machine weight 1.6kg 1.7kg
NOISE INFORMATION
A weighted sound pressure LpA: 77dB(A)
A weighted sound power LwA: 88dB(A)
KPA & KWA 3.0dB(A)
Wear ear protection when sound pressure is over 80dB(A)
VIBRATION INFORMATION
Vibration total values (triax vector sum) determined according to EN 60745:
Drilling into metal Vibration emission value ah= 1.91m/s²
Uncertainty K = 1.5m/s²
Screwdriving without impact Vibration emission value ah= 1.16m /s²
Uncertainty K = 1.5m/s²
WARNING: The vibration emission value during actual use of the power tool can differ
from the declared value depending on the ways in which the tool is used dependant on
the following examples and other variations on how the tool is used:
How the tool is used and the materials being cut or drilled.
The tool being in good condition and well maintained.
The use the correct accessory for the tool and ensuring it is sharp and in good condition.
The tightness of the grip on the handles and if any anti vibration accessories are used.

Lithium-Ion cordless drill/driver EN
8
ACCESSORIES
We recommend that you purchase your accessories from the same store that sold you the
tool. Use good quality accessories marked with a well-known brand name. Choose the type
according to the work you intend to undertake. Refer to the accessory packaging for further
details. Store personnel can assist you and offer advice.
And the tool is being used as intended by its design and these instructions.
This tool may cause hand-arm vibration syndrome if its use is not adequately
managed.
WARNING: To be accurate, an estimation of exposure level in the actual conditions of
use should also take account of all parts of the operating cycle such as the times when
the tool is switched off and when it is running idle but not actually doing the job. This may
significantly reduce the exposure level over the total working period.
Helping to minimise your vibration exposure risk.
ALWAYS use sharp chisels, drills and blades.
Maintain this tool in accordance with these instructions and keep well lubricated (where
appropriate)
If the tool is to be used regularly then invest in anti vibration accessories.
Avoid using tools in temperatures of 100C or less.
Plan your work schedule to spread any high vibration tool use across a number of days.
Model No. WX160 WX160.1 WX160.2 WX160.3 WX160.4
1.3Ah Li-Ion battery pack 1 (WA3515) 2 (WA3515) 1 (WA3515) 2 (WA3515) 2 (WA3515)
Charger 1 (WA3730) 1 (WA3730) 1 (WA3839) 1 (WA3839) 1 (WA3730)
Double ended bits 1 1 1 1 1
158pc Accessories / / / / 1
Model No. WX163 WX163.1 WX163.2 WX163.3
1.3Ah Li-Ion battery pack 1 (WA3512) 2 (WA3512) 1 (WA3512) 2 (WA3512)
Charger 1 (WA3731) 1 (WA3731) 1 (WA3839) 1 (WA3839)
Double ended bits 1 1 1 1
158pc Accessories / / / /

Lithium-Ion cordless drill/driver EN
9
ADDITIONAL SAFETY
RULES FOR YOUR
CORDLESS DRILL
1. Remove the battery pack from the drill
before carrying out adjustments.
2. Do not expose to rain or water.
3. Do not store the battery pack in
temperatures over 40oC.
4. Always charge the battery pack between
temperatures 0oC to 30oC. Ideal charging
temperature is 18oC to 24oC.
5. Only use the charger and the battery pack
provided no others.
6. Avoid short circuit of the battery pack
connections (screws & nails).
7. Do not incinerate or burn the battery pack,
it may explode.
8. Do not charge a damaged battery pack.
9. Replace any damaged supply cords on
your charger.
10.Always disconnect the charger power
supply before making or breaking the
connections to the battery pack.
11. Battery pack and charger will be warm
during charging this is normal.
12.When not in use, remove a charged
battery pack from the charger.
13.Always remove the battery pack from the
charger immediately after re-charging is
completed.
14.Your drill and battery pack will be warm
when working, this is normal.
15.Do not dispose of batteries in fire, or
with household waste. Return exhausted
batteries to your local collection or
recycling point.
16.Always check walls, floors and ceilings for
hidden power cables and pipes.
17. Use auxiliary handle(s), if supplied
with the tool. Loss of control can cause
personal injury.
18.Accessories and metal parts can become
very hot.
19.Hold power tool by insulated gripping
surfaces, when performing an operation
where the cutting accessory may
contact hidden wiring. Cutting accessory
contacting a “live” wire may make
exposed metal parts of the power tool
“live” and could give the operator an
electric shock.
WARNING: If a small amount
of electrolyte should leak from
the battery pack under extremes of
temperature or after heavy use, then
wash off immediately from your skin
and hands using clean water. For eye
contact, rinse thoroughly with clean water
and seek medical treatment immediately.
SAFETY INSTRUCTIONS
FOR BATTERY PACK
1. Do not dismantle, open or shred
secondary cells or battery pack.
2. Do not expose cells or battery pack to heat
or fire. Avoid storage in direct sunlight.
3. Do not short-circuit a cell or a battery
pack. Do not store cells or battery pack
haphazardly in a box or drawer where
they may short-circuit each other or be
short-circuited by other metal objects.
4. Do not remove a cell or battery from its
original battery pack enclosure required
for use.
5. Do not subject cells or battery pack to
mechanical shock.
6. In the event of a cell leaking, do not allow
the liquid to come in contact with the skin
or eyes. If contact has been made, wash
the affected area with copious amounts of
water and seek medical advice.
7. Do not use any charger other than that
specifically provided for use with the
equipment.
8. Observe the plus (+) and minus (–) marks
on the cell, battery and equipment and
ensure correct use.
9. Do not use any cell or battery pack
which is not designed for use with the
equipment.
10.Do not mix cells of different manufacture,
capacity, size or type within a device.
11. Keep cells and battery pack out of the
reach of children.
12.Seek medical advice immediately if a cell
or a battery pack has been swallowed.
13.Always purchase the correct cell or battery
for the equipment.
Lithium-Ion cordless drill/driver EN
10
To reduce the risk of injury, user
must read instruction manual
Warning
Wear ear protection
Wear eye protection
Wear dust mask
Indoor use only
Do not expose to rain or water
Do not burn
Do not dispose of batteries, Return
exhausted batteries to your local
collection or recycling point
14.Keep cells and battery pack clean and dry.
15.Wipe the cell or battery pack terminals
with a clean dry cloth if they become dirty.
16.Secondary cells and battery pack need
to be charged before use. Always use
the correct charger and refer to the
manufacturer’s instructions or equipment
manual for proper charging instructions.
17. Do not leave a battery pack on prolonged
charge when not in use.
18.After extended periods of storage, it may
be necessary to charge and discharge
the cells or battery pack several times to
obtain maximum performance.
19.Secondary cells and battery pack give their
best performance when they are operated
at normal room temperature (20°C ± 5°C).
20.Retain the original product literature for
future reference.
21.Use only the cell or battery pack in the
application for which it was intended.
22.When possible, remove the battery pack
from the equipment when not in use.
23.Dispose of properly.
SYMBOLS

Lithium-Ion cordless drill/driver EN
11
OPERATING INSTRUCTIONS
NOTE: Before using the tool, read the
instruction book carefully.
INTENDED USE
The machine is intended for driving in and
loosening screws as well as for drilling in
wood, metal and plastic.
BEFORE PUTTING INTO OPERATION
A) CHARGING THE BATTERY
The battery charger supplied is matched to
the Li-Ion battery installed in the machine.
Do not use another battery charger.
The Li-Ion battery is protected against deep
discharging. When the battery is empty,
the machine is switched off by means of a
protective circuit: The tool holder no longer
rotates.
In a warm environment or after heavy use,
the battery pack may become too hot to
permit charging. Allow time for the battery to
cool down before recharging.
When the battery pack is charged for the first
time and after prolonged storage, the battery
pack will accept a 100% charge after several
charge and discharge cycles.
B) TO REMOVE OR INSTALL BATTERY
PACK (See Fig. A)
Depress the battery pack release button to
release and slide the battery pack out from
your tool. After recharge, slide it back into
your tool. A simple push and slight pressure
will be sufficient.
OPERATION
1. ON / OFF SWITCH (See Fig. B)
Depress the On/Off switch to start and
release it to stop your drill. The on/off switch
is fitted with a brake function which stops
your chuck immediately when you quickly
release the switch.
It is also a variable speed switch that delivers
higher speed and torque with increased
trigger pressure. Speed is controlled by the
amount of switch trigger depression.
WARNING: Do not operate for
long periods at low speed because
excess heat will be produced internally.
2. SWITCH LOCK
The switch trigger can be locked in the OFF
position. This helps to reduce the possibility
of accidental starting when not in use. To
lock the switch trigger, place the rotation
control in the center position.
3. REVERSIBLE (See Fig. C1, C2)
For drilling and screw driving use forward
rotation marked “ ” (lever is moved to the
left). Only use reverse rotation marked
“ ” (lever is moved to the right) to remove
screws or release a jammed drill bit.
WARNING: Never change the
direction of rotation when the
chuck is rotating, wait until it has
stopped!
4. TWO-SPEED GEAR CONTROL
(See Fig. D)
The drill has a two-speed gear control
designed for drilling or driving at LO (mark
is 1) or HI (mark is 2) speeds. A slide switch
is located on top of the drill to select either
LO or HI speed. When using the drill in the
LO speed range, the speed will decrease and
the drill will have greater power and torque.
When using the drill in the HI speed range,
the speed will increase and the drill will have
less power and torque.
Gear I
Low speed range: for screwdriving or
working with large drilling diameter
Gear II
High speed range: for working with small
drilling diameter
WARNING: To prevent gear
damage, always allow the chuck
to come to a complete stop before
changing the direction of rotation or
the two-speed gear control.
5. CHUCK ADJUSTMENT (See Fig. E)
To open the chuck jaws rotate the front
section of the chuck. Insert the drill bit
between the chuck jaws and rotate the front
section in the opposite direction. Ensure the
drill bit is in the center of the chuck jaws.
Finally, firmly rotate the front chuck section
in the opposite directions. Your drill bit is

Lithium-Ion cordless drill/driver EN
12
now clamped in the chuck.
6. TORQUE ADJUSTMENT (See Fig. F)
(Screw driving force of your drill driver)
The torque is adjusted by rotating the torque
adjustment ring. The torque is greater when
the torque adjustment ring is set on a higher
setting. The torque is less when the torque
adjustment ring is set on a lower setting.
Make the setting as follows:
1 - 4 for driving small screws
5 - 9 for driving screws into soft mate-
rial
10 - 14 for driving screws into soft and
hard material
15 - 19 for driving screws into hard wood
20 - 23 for driving larger screws
for heavy drilling
7. AUTOMATIC SPINDLE LOCK
(See Fig. G)
The automatic spindle lock allows you to use
it as a regular screwdriver. You can give an
extra twist to firmly tighten a screw, loosen
a very tight screw or continue working
when the battery energy has expired. For
manual screwdriver purposes, the chuck is
automatically locked when the tool is off.
8. USING THE SIGHT LIGHT
The sight light allows you to keep a clear
view under less illuminated circumstances.
To turn on the light simply press the on/off
switch. When you release the on/off switch,
the light will go out.
9. LEVEL DRILLING (See Fig. H)
The bubble level is recessed in the motor
housing on the top of the drill. It can be
used to keep the drill level during horizontal
drilling operation.
The bubble level is recessed in the motor
housing on the back of the drill. It can be
used to keep the drill level during vertical
drilling operation.
10. DRILLING
When drilling into a hard smooth surface,
use a center punch to mark the desired hole
location. This will prevent the drill bit from
slipping off center as the hole is started. Hold
the tool firmly and place the tip of the bit at
the point to be drilled. Depress the switch
trigger to start the tool. Move the drill bit
into the workpiece, applying only enough
pressure to keep the bit cutting. Do not force
or apply side pressure to elongate a hole.
Tungsten carbide drill bits should
always be used for concrete and
masonry. When drilling in metal, only
use HSS drill bits in good condition.
Always use a magnetic bit holder (not
included) when using short screwdriver
bits. When screw-driving, apply a small
quantity of liquid soap or similar to the
screw threads to ease insertion.
11. DISPOSAL OF AN EXHAUSTED
BATTERY PACK
To preserve natural resources, please
recycle or dispose of the battery
pack properly. This battery pack
contains Lithium batteries. Consult your local
waste authority for information regarding
available recycling and/or disposal options.
Discharge your battery pack by operating
your drill, then remove the battery pack
from the drill housing and cover the battery
pack connections with heavy-duty adhesive
tape to prevent short circuit and energy
discharge. Do not attempt to open or remove
any of the components.
12. OVERLOAD PROTECTION
When overloaded, the motor comes to
a stop. Relieve the load on the machine
immediately and allow cooling for approx. 30
seconds at the highest no-load speed.
13. TEMPERATURE DEPENDENT
OVERLOAD PROTECTION
When using as intended for the power tool
cannot be subject to overload. When the
load is too high or the allowable battery
temperature of 75°C is exceeded, the
electronic control switches off the power

Lithium-Ion cordless drill/driver EN
13
tool until the temperature is in the optimum
temperature range again.
14. PROTECTION AGAINST DEEP
DISCHARGING
The Li-Ion battery is protected against deep
discharging by the “Discharging Protection
System”. When the battery is empty, the
machine is switched off by means of a
protective circuit: The inserted tool no longer
rotates.
PROBLEM SOLUTION
1. WHY DOES THE DRILL NOT TURN ON
WHEN YOU PRESS THE SWITCH?
The forward/reverse rotation control, which
is on top of the trigger, is positioned in the
lock function. Unlock the forward/reverse
rotation control by putting it into the required
rotation position. Push the trigger and the
drill will start to rotate.
2. THE DRILL STOPS BEFORE THE
SCREW IS COMPLETELY TIGHTENED.
WHY?
Verify the torque position of the torque
adjusting ring, you can find the torque-
adjusting ring between the chuck and the
drill body. Position 1 is the lowest torque
(screw driving force) and position 23 is the
highest torque (screw driving force). Position
24 is for drill operation. Regulate the torque
adjusting ring to a higher position to reach
the best result.
3. REASONS FOR DIFFERENT BATTERY
PACK WORKING TIMES
Charging time problems, as above, and
having not used a battery pack for a
prolonged time will reduce the battery pack
working time. This can be corrected after
several charge and discharge operations by
charging & working with your drill. Heavy
working conditions such as large screws
into hard wood will use up the battery
pack energy faster than lighter working
conditions. Do not re-charge your battery
pack below 0oC and above 45oC as this will
affect performance.
MAINTENANCE
Your tool requires no additional lubrication
or maintenance.
There are no user serviceable parts in your
power tool. Never use water or chemical
cleaners to clean your power tool. Wipe
clean with a dry cloth. Always store your
power tool in a dry place. Keep the motor
ventilation slots clean. Keep all working
controls free of dust. Occasionally you may
see sparks through the ventilation slots. This
is normal and will not damage your power
tool.
ENVIRONMENTAL
PROTECTION
Waste electrical products must not
be disposed of with household waste.
Please recycle where facilities exist.
Check with your local authorities or retailer
for recycling advice.

Lithium-Ion cordless drill/driver EN
14
DECLARATION OF
CONFORMITY
We,
POSITEC Germany GmbH
Konrad-Adenauer-Ufer 37
50668 Köln
Declare that the product,
Description WORX Lithium-Ion cordless
drill/driver
Type WX160 WX160.1 WX160.2
WX160.3 WX160.4 WX163 WX163.1
WX163.2 WX163.3
(1-designation of machinery,
representative of cordless drill)
Function Drilling
Complies with the following directives:
Machinery directive 2006/42/EC
Electromagnetic compatibility directive
2004/108/EC
RoHS directive 2011/65/EU
Standards conform to:
EN 55014-1
EN 55014-2
EN 60745-1
EN 60745-2-1
EN 60745-2-2
The person authorized to compile the technical
file,
Name Russell Nicholson
Address Positec Power Tools (Europe)
Ltd, PO Box 152, Leeds, LS10 9DS, UK
2012/12/11
LeoYue
POSITEC Quality Manager

Schnurloser Lithium-Ionen-Bohrer/Schraubendreher
D
15
1. SCHNELLSPANNBOHRFUTTER
2. EINSTELLRING FÜR RUTSCHKUPPLUNG
3. GETRIEBESTEUERUNG
4. WASSERWAAGE
5. RECHTS-/LINKSLAUF
6. SOFTHANDGRIFF
7. AKKUVERRIEGELUNG
8. AKKU *
9. DOPPELSEITIGE KLINGEN
10. EIN/AUS-SCHALTER
11. ARBEITSLICHT
*Abgebildetes oder beschriebenes Zubehör gehört teilweise nicht zum Lieferumfang.

Schnurloser Lithium-Ionen-Bohrer/Schraubendreher
D
16
TECHNISCHE DATEN
Type
WX160 WX160.1 WX160.2 WX160.3 WX160.4 WX163 WX163.1 WX163.2 WX163.3
(1-Bezeichnung der Maschine, Repräsentant des Akku-Bohrmaschine)
MODELLNR. WX160 WX160.1 WX160.2
WX160.3 WX160.4 WX163 WX163.1
WX163.2 WX163.3
Nennspannung 14.4V 18V
Nenndrehzahl 0-350/0-1200/min
Drehmomentstufen 23+1
Max. Drehmoment 30N.m 35N.m
Bohrfutter Spannweite 10mm
Maximaler
Bohrdurchmesser in
Stahl 10mm
Holz 28mm 30mm
Gewicht 1.6kg 1.7kg
INFORMATIONEN ÜBER LÄRM
Gewichteter Schalldruck LpA: 77dB(A)
Gewichtete Schallleistung LwA: 88dB(A)
KPA & KWA 3.0dB(A)
Tragen Sie bei einem Schalldruck über einen Gehörschutz 80dB(A)
INFORMATIONEN ÜBER VIBRATIONEN
Vibrationsgesamtmesswertermittlung gemäß EN 60745:
Bohren in Metall Vibrationsemissionswert ah= 1.91m/s²
Unsicherheit K = 1.5m/s²
Schrauben Vibrationsemissionswert ah= 1.16m /s²
Unsicherheit K = 1.5m/s²
WARNUNG: Der Vibrationsemissionswert während des tatsächlichen Gebrauchs
des Elektrowerkzeugs kann vom angegebenen Wert abweichen, je nachdem, wie
das Werkzeug gemäß folgender Beispiele und anderweitiger Verwendungsmöglichkeiten
eingesetzt wird:
Wie das Werkzeug verwendet wird und Materialen geschnitten oder angebohrt werden.
Das Werkzeug ist in gutem Zustand und gut gepflegt
Verwendung des richtigen Zubehörs für das Werkzeug und Gewährleistung seiner Schärfe

Schnurloser Lithium-Ionen-Bohrer/Schraubendreher
D
17
ZUBEHÖRTEILE
Wir empfehlen Ihnen, sämtliche Zubehörteile beim selben Fachhändler zu beziehen, bei dem
Sie auch Ihr Elektrowerkzeug gekauft haben. Verwenden Sie nur hochwertige Zubehörteile von
namhaften Herstellern. Weitere Informationen finden Sie auf der Verpackung der Zubehörteile.
Auch Ihr Fachhändler berät Sie gerne.
und seines guten Zustands.
Die Festigkeit der Handgriffe und ob Antivibrationszubehör verwendet wird.
Und ob das verwendete Werkzeug dem Design und diesen Anweisungen entsprechend
verwendet wird.
Wird dieses Werkzeug nicht anemessen gehandhabt, kann es ein Hand-Arm-
Vibrationssyndrom erzeugen.
WARNUNG: Um genau zu sein, sollte ein Abschätzung des Belastungsgrades aller
Arbeitsabschnitte während tatsächlicher Verwendung berücksichtigt werden, z.B. die
Zeiten, wenn das Werkzeug ausgeschaltet ist, und wenn es sich im Leerlauf befindet und
eigentlich nicht eingesetzt wird. Auf diese Weise kann der Belastungsgrad während der
gesamten Arbeitszeit wesentlich gemindert werden.
Minimieren Sie Ihr Risiko, dem Sie bei Vibrationen ausgesetzt sind.
Verwenden Sie IMMER scharfe Meissel, Bohrer und Sägeblätter.
Pflegen Sie dieses Werkzeug diesen Anweisungen entsprechend und achten Sie auf eine gute
Einfettung (wo erforderlich).
Bei regelmäßiger Verwendung dieses Werkzeugs sollten Sie in Antivibrationszubehör
investieren.
Vermeiden Sie den Einsatz von Werkzeugen bei Temperaturen von 10ºC oder darunter.
Machen Sie einen Arbeitsplan, um die Verwendung von hochvibrierenden Werkzeugen auf
mehrere Tage zu verteilen.
Modellnr. WX160 WX160.1 WX160.2 WX160.3 WX160.4
1.3Ah Li-Ion Batteriepack 1 (WA3515) 2 (WA3515) 1 (WA3515) 2 (WA3515) 2 (WA3515)
Lader 1 (WA3730) 1 (WA3730) 1 (WA3839) 1 (WA3839) 1 (WA3730)
Doppelseitige Klingen 1 1 1 1 1
158pc Zubehörteile / / / / 1
Modellnr. WX163 WX163.1 WX163.2 WX163.3
1.3Ah Li-Ion Batteriepack 1 (WA3512) 2 (WA3512) 1 (WA3512) 2 (WA3512)
Lader 1 (WA3731) 1 (WA3731) 1 (WA3839) 1 (WA3839)
Doppelseitige Klingen 1 1 1 1
158pc Zubehörteile / / / /

Schnurloser Lithium-Ionen-Bohrer/Schraubendreher
D
18
ZUSÄTZLICHE
SICHERHEITSHINWEISE FÜR
AKKU-BOHRMASCHINEN
1. Entfernen Sie den Akku aus der Maschine,
ehe Sie irgendwelche Einstell-, Reparatur-
oder Wartungsarbeiten vornehmen.
2. Setzen Sie das Werkzeug niemals Regen
oder Feuchtigkeit aus.
3. Lagern Sie den Akku nicht an Orten, wo
dieTemperatur 40°C übersteigen kann.
4. Laden Sie den Akku ausschließlich bei
Temperaturen zwischen 0°C und 30°C auf.
Die ideale Ladetemperatur liegt zwischen
18 und 24°C.
5. Verwenden Sie niemals andere Ladegeräte
oder Akkus als die im Lieferumfang
enthaltenen.
6. Vermeiden Sie es, die Anschlüsse des
Akkus mit Schrauben, Nägeln o. ä.
kurzzuschließen.
7. Verbrennen Sie den Akku nicht! Er kann
explodieren.
8. Versuchen Sie niemals, einen
beschädigten Akku aufzuladen.
9. Tauschen Sie beschädigte Netzkabel am
Ladegerät sofort aus.
10.Ziehen Sie grundsätzlich den Netzstecker
des Ladegerätes, bevor Sie Verbindungen
zum Akkupack herstellen oder trennen.
11. Akkupack und Ladegerät erwärmen sich
beim Laden; dies ist völlig normal.
12.Nehmen Sie ein geladenes Akkupack aus
dem Ladegerät, wenn es nicht gebraucht
wird.
13.Nehmen Sie das Akkupack grundsätzlich
gleich aus dem Ladegerät, sobald es voll
geladen wurde.
14.Bohrmaschine und Akkupack erwärmen
sich im Betrieb; dies ist völlig normal.
15.Entsorgen Sie Batterien und Akkus
nicht durch Verbrennen und nicht mit
dem Hausmüll. Bringen Sie erschöpfte
Batterien und defekte Akkus zu einer
geeigneten Sammelstelle.
16.Untersuchen Sie Wände, Böden und
Decken vor dem Bohren auf verborgene
Kabel und Rohre.
17. Benutzen Sie mit dem Gerät gelieferte
Zusatzhandgriffe. Der Verlust der Kontrolle
kann zu Verletzungen führen.
18.Zubehör- und Metallteile können sehr heiß
werden.
19.Halten Sie das Gerät an den isolierten
Griffflächen, wenn Sie Arbeiten ausführen,
bei denen das Einsatzwerkzeug
verborgene Stromleitungen oder das
eigene Netzkabel treffen kann. Der
Kontakt mit einer spannungsführenden
Leitung kann auch metallene Geräteteile
unter Spannung setzen und zu einem
elektrischen Schlag führen.
WARNUNG: Wenn unter extremen
Bedingungen oder nach intensivem
Gebrauch Akkuflüssigkeit aus dem Akku
austritt und an Ihre Haut gelangt: Spülen
Sie die Flüssigkeit sofort mit reichlich
Wasser ab. Falls die Flüssigkeit mit den
Augen in Berührung kommt, spülen Sie mit
reichlich Wasser und suchen Sie umgehend
einen Arzt auf.
SICHERHEITSHINWEISE FÜR
AKKUPACKS
1. Akkus bzw. Akkupacks nicht zerlegen,
öffnen oder zerdrücken.
2. Zellen bzw. Akkupacks nicht Hitze oder
Feuer aussetzen. Lagerung in direktem
Sonnenlicht vermeiden.
3. Zellenbzw. ein Akkupacks
nichtkurzschließen. Zellen bzw. Akkupacks
nicht wahllos in einer Schachtel oder
Schublade aufbewahren, wo sie einander
kurzschließen oder durch andere
Metallgegenstände kurzgeschlossen
werden könnten.
4. Eine Zelle bzw. eine Batterie nicht
aus der zum Einsatz notwendigen
Originalummantelung des
Akkupacksentfernen.
5. Zellen bzw. Akkupacks nicht mechanischen
Stößen aussetzen.
6. Im Fall, dass Flüssigkeit aus einer Zelle
austritt, darf diese nicht in Kontakt mit
der Haut oder den Augen kommen. Sollte
dies dennoch geschehen, den betroffenen
Bereich sofort mit viel Wasser spülen und
einen Arzt aufsuchen.

Schnurloser Lithium-Ionen-Bohrer/Schraubendreher
D
19
7. Nur das speziell für das Gerät konzipierte
Ladegerät verwenden.
8. Die Markierungen Plus (+) und Minus
(–) auf Zellen, Batterien und dem Gerät
beachten und für korrekten Einsatz sorgen.
9. Keine Zellen bzw. Akkupacks verwenden,
die nicht ausdrücklich für den Gebrauch
mit dem Gerät vorgesehen sind.
10.Zellen verschiedener Hersteller, Kapazität,
Größe oder Art nicht im selben Gerät
mischen.
11. Zellen und Akkupacks von Kindern
fernhalten.
12.Beim Verschlucken einer Zelle oder
eines Akkupacks muss sofort ein Arzt
herangezogen werden.
13.Immer die richtige Zelle bzw. Batterie für
das Gerät kaufen.
14.Zellen und Akkupacks sauber und trocken
halten.
15.Sollten die Klemmen der Zelle bzw. des
Akkupacks schmutzig werden, diese
mit einem sauberen, trockenenTuch
abwischen.
16.Akkus und Akkupacks müssen vor dem
Gebrauch aufgeladen werden.Immer
das richtige Ladegerät benutzen und vor
Gebrauch für die korrekten Instruktionen
zum Aufladen in den Anweisungen des
Herstellers bzw. im Benutzerhandbuch
nachschlagen.
17. Ein Akkupack bei Nichtverwendung nicht
längere Zeit aufladen lassen.
18.Nach längerer Lagerung des Gerätes ist es
eventuell notwendig, die Zellen oder das
Akkupackmehrere Male aufzuladen und
zu entladen, um eine optimale Leistung zu
erhalten.
19.Akkus und Akkupacks funktionieren bei
normaler Zimmertemperatur (20 °C ± 5 °C)
am besten.
20.Die originalen Produktunterlagen zum
späteren Nachschlagen aufbewahren.
21.Zellen bzw. Akkupack nur im dafür
vorgesehenen Gerät verwenden.
22.Das Akkupack bei Nichtverwendung
womöglich aus dem Gerät nehmen.
23.Ordnungsgemäß entsorgen.
SYMBOLE
Lesen Sie diese
Bedienungsanleitung gut durch,
bevor Sie die Elektrowerkzeug
benutzen
Achtung – Bedienungsanleitung
lesen!
Tragen Sie Gehörschutz, Wenn Sie
die Elektrowerkzeug benutzen
Beim Arbeiten mit der
Elektrowerkzeug, tragen Sie eine
Schutzbrille
Tragen Sie eine Elektrowerkzeug
Nicht im Freien verwenden
Vor Regen und Feuchtigkeit schützen
Nicht verbrennen
Akku nicht in den Haushaltsmüll
geben. Bringen Sie den leeren
Akku zu Ihrer lokalen Sammel-
oder Recyclingstelle

Schnurloser Lithium-Ionen-Bohrer/Schraubendreher
D
20
HINWEISE ZUM BETRIEB
HINWEIS: Lesen Sie das Handbuch
vor Inbetriebnahme des Werkzeuges
sorgfältig durch.
BESTIMMUNGSGEMÄSSER GEBRAUCH
Das Elektrowerkzeug ist bestimmt zum
Eindrehen und Lösen von Schrauben sowie
zum Bohren in Holz, Metall, und Kunststoff.
VOR DEM EINSATZ
A) LADEN DES AKKUS
Das mitgelieferte Akku-Ladegerät ist dem in
der Maschine eingebauten Lithium-Ionen-
Akku angepasst. Verwenden Sie kein anderes
Akku-Ladegerät.
Der Lithium-Ionen-Akku ist gegen
übermäßiges Entladen geschützt. Wenn
der Akku leer ist, wird die Maschine von
einem Schutzkreis ausgeschaltet: Der
Werkzeughalter dreht sich nicht mehr.
In einer warmen Umgebung oder nach
extremem Gebrauch könnte der Akku zu
heiss geworden sein, um einen Ladevorgang
einzuleiten. Lassen Sie den Akku sich erst gut
abkühlen, bevor Sie ihn aufladen.
Wird der Akku erstmalig oder nach längerer
Zeit aufgeladen, nach mehrmaligen Lade-
und Entladezyklen akzeptiert der Akku jedoch
ein Aufladen von 100%.
B) ANBRINGEN UND ENTFERNEN DES
AKKUS (Siehe A)
Drücken Sie die Akkuverriegelung hinein,
um den Akku zu entriegeln, und ziehen Sie
ihn aus dem Bohrer heraus. Schieben Sie
ihn nach dem Aufladen wieder in den Bohrer
hinein. Schieben Sie ihn mit leichtem Druck
ganz in die Aufnahme hinein.
HINWEISE ZUM BETRIEB
1. EIN / AUS-SCHALTER (Siehe B)
Zum Einschalten des Werkzeugs drücken
Sie auf den Schalter. Zum Stoppen lassen
Sie den Schalter wieder los. Der Ein/Aus-
Schalter bietet zugleich eine Bremsfunktion,
die das Bohrfutter augenblicklich stoppt,
wenn Sie den Schalter loslassen.
Je nach Betätigungsdruck können Sie mit
dem Ein-/Ausschalter auch die Drehzahl
steuern: Je stärker der Druck, desto größer
Drehzahl und Drehmoment. Die Drehzahl
wird durch den Druck auf den Schalter
reguliert.
WARNUNG: Nicht über längere
Zeiträume bei niedriger
Geschwindigkeit betreiben, dabei kann
es zu großer Hitzeentwicklung im
Geräteinneren kommen.
2. SCHALTERVERRIEGELUNG
Der Schalter kann in der OFF (AUS)-
Position verriegelt werden. Dies vermindert
die Gefahr des unbeabsichtigten
Anlaufens des Bohrers. Stellen Sie
den Laufrichtungswahlschalter in die
Mittelposition, um die Schalterverriegelung
zu aktivieren.
3. EINSTELLUNG DER DREHRICHTUNG
(Siehe C1, C2)
Zum Bohren und Schrauben nutzen Sie den
Vorwärtslauf, dieser ist markiert als “ ”
(Hebel ist zur linken Seite umgelegt). Nutzen
Sie die Rücklauffunktion, markiert als
“ ” (Hebel ist zur rechten Seite umgelegt)
nur, um Schrauben herauszudrehen oder um
eingeklemmte Bohrer herauszuholen.
WARNUNG: Ändern Sie die
Arbeitsrichtung niemals bei
laufendem Bohrer. Warten Sie, bis der
Bohrer steht!
4. ZWEISTUFIGE GANGSCHALTUNG
(Siehe D)
Die Bohrmaschine hat eine 2-Gangschaltung
für Bohren und Schrauben mit niedriger
LO (1) oder hoher HI (2) Drehzahl.
Ein Schieber an der Oberseite dient
der Einstellung der Drehzahl auf LO
oder HI. In der Geschwindigkeitsstufe
LO arbeitet die Bohrmaschine mit
niedriger Geschwindigkeit; Leistung
und Drehmoment sind jedoch höher. In
der Geschwindigkeitsstufe HI arbeitet
die Bohrmaschine dagegen mit höherer
Geschwindigkeit; Leistung und Drehmoment
sind jedoch geringer.
This manual suits for next models
8
Table of contents
Languages:
Other Worx Drill manuals
Popular Drill manuals by other brands

Stanley
Stanley FATMAX SFMCD710D2K Original instructions

Gude
Gude SBM 710 E Translation of the original instructions

Haussmann Xpert
Haussmann Xpert PT100122 Operator's manual

Clarke
Clarke CHD850B Operation & maintenance instructions

Makita
Makita DDF343 instruction manual

Black & Decker
Black & Decker 9089KB instruction manual