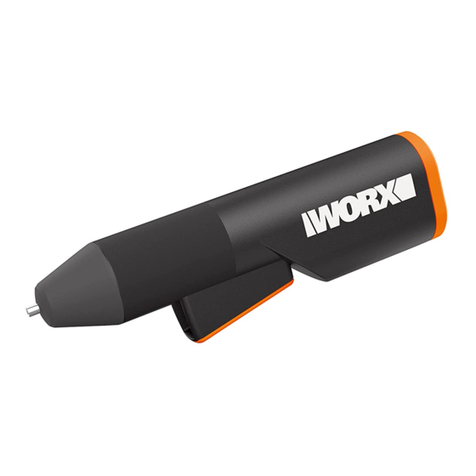
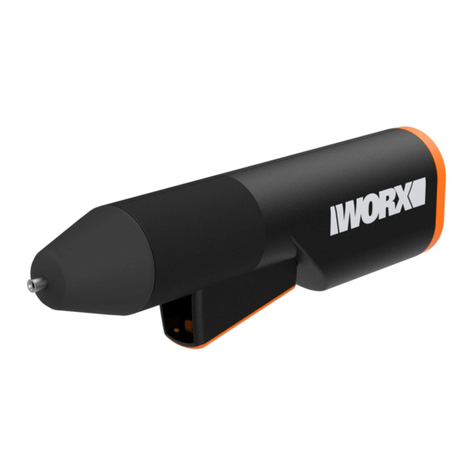
Worx MakerX WX746 User manual

WX746
WX746.X
20V Cordless Glue Gun


1
2
3
4
5
6

A B
C
E
D
F
Red on
Green on

EN
PRODUCT SAFETY
WARNING: Read all safety warnings and instructions.
Failure to follow
all instructions listed below may result in electric shock, fire and/or serious
injury.
Save all warnings and instructions for future reference.
This appliance is not intended for use by persons (including children) with
reduced physical, sensory or mental capabilities, or lack of experience and
knowledge, unless they have been given supervision or instruction concerning
use of the appliance by a person responsible for their safety.
-Children should be supervised to ensure that they do not play with the appliance.
WARNING: For the purposes of recharging the battery, only use the detachable
supply unit provided with this appliance.
ADDITIONAL SAFETY INSTRUCTIONS FOR GLUE GUNS
A fire may result if the appliance is not used with care, therefore
– be careful when using the appliance in places where there are combustible
materials;
– do not apply to the same place for a long time;
– do not use in presence of an explosive atmosphere;
– be aware that heat may be conducted to combustible materials that are out of
sight;
– place the appliance on its stand after use and allow it to cool down before
storage;
– do not leave the appliance unattended when it is switched on.
SAFETY WARNINGS FOR BATTERY PACK
a) Do not dismantle, open or shred cells or battery pack.
b) Do not short-circuit a battery pack. Do not store battery packs
haphazardly in a box or drawer where they may short-circuit each other or
be short-circuited by conductive materials. When battery pack is not in use,
keep it away from other metal objects, like paper clips, coins, keys, nails, screws
or other small metal objects, that can make a connection from one terminal to
another. Shorting the battery terminals together may cause burns or a fire.
c) Do not expose battery pack to heat or fire. Avoid storage in direct sunlight.
d) Do not subject battery pack to mechanical shock.
e) In the event of battery leaking, do not allow the liquid to come into contact
with the skin or eyes. If contact has been made, wash the affected area
with copious amounts of water and seek medical advice.
f) Keep battery pack clean and dry.
g) Wipe the battery pack terminals with a clean dry cloth if they become
dirty.
EN
h) Battery pack needs to be charged before use. Always refer to this
instruction and use the correct charging procedure.
i) Do not maintain battery pack on charge when not in use.
j) After extended periods of storage, it may be necessary to charge
and discharge the battery pack several times to obtain maximum
performance.
k) Recharge only with the charger specified by Worx. Do not use any charger
other than that specifically provided for use with the equipment.
l) Do not use any battery pack which is not designed for use with the
equipment.
m) Keep battery pack out of the reach of children.
n) Retain the original product literature for future reference.
o) Remove the battery from the equipment when not in use.
p) Dispose of properly.
q) Do not mix cells of different manufacture, capacity, size or type within a
device.
r) Keep the battery away from microwaves and high pressure.
SYMBOLS
Read operator’s manual
Warning
Wear eye protection
Wear protective gloves
Do not burn
Batteries may enter water cycle if disposed improperly, which
can be hazardous for ecosystem. Do not dispose of waste
batteries as unsorted municipal waste.

EN
Li-Ion battery. This product has been marked with a symbol
relating to ‘separate collection’ for all battery packs and
battery pack. It will then be recycled or dismantled in order to
reduce the impact on the environment. Battery packs can be
hazardous for the environment and for human health since
they contain hazardous substances.
COMPONENT LIST
1. NOZZLE
2. CAP
3. TRIGGER
4. GLUE STICK HOLE
5. POWER BUTTON
6. GLUE STICK*
* Not all the accessories illustrated or described are included in stan-
dard delivery.
TECHNICAL DATA
WX746 WX746.X **
Rated voltage 20 V Max. ***
Glue Stick Diameter 7.2mm
Nozzle Caliber 1.2 mm
Preheating Time 25 s
Temperature when heated 200° C
Runtime(2.0Ah) more than 120 mins
Machine weight (bare tool) 0.12Kg
* * X=1-999, A-Z, M1-M9 there are only used for different customers, there are no safe
relevant changes between these models.
** * Voltage measured without workload. Initial battery voltage reaches maximum of 20
volts. Nominal voltage is 18 volts.

EN
Category Model Capacity
20V Hub/HubX
WA7160 Input: 20 V 10 A Max.
Output: 20 V 10 A Max.
WA7161 Input: 20 V 10 A Max.
Output 1: 20 V 10 A Max.
Output 2: 5 V 2 A (USB port)
We recommend that you purchase your accessories from the same store that sold you
the tool. Refer to the accessory packaging for further details. Store personnel can assist
you and offer advice.
MakerX series tools and 20V Hub/HubX are specially designed to work together, so do
not attempt to use any other devices.
OPERATING INSTRUCTIONS
NOTE: Before using the tool, read the instruction book carefully.
INTENDED USE
The tool can be used for bonding wood, leather, plastics ,papers and other mate-
rials.
ASSEMBLY
1. Insert the appropriate glue stick for the material being glued via the hole at
the rear of the glue gun.Use 7.2mm mini glue sticks (See Fig. A)
2. Connect the gun and the hub. (See Fig. B)
WARNING: Before operation, make sure the speed control button on
the hub is at the “Min” position. (See Fig. C) and the surfaces to be
glued must be clean, dry and free of grease.
NOTE The speed control does not work with the glue gun. The speed
control is for other tools, such as the MakerX Rotary Tool or Angle
Grinder.
OPERATION
1. Confirm the speed control button is set to “Min”. Grasp the tool by the grip.
Press the on/off switch on the hub. Then press button on the tool for 3s until
the it turns red ,which means the glue gun is heating. When the light turns
green, the gun is ready for operation. Press the trigger for gluing. (See Fig.
D,E,F) After applying the glue, immediately press the surfaces to be glued
together.
NOTEIt is recommended to apply the glue on large surfaces or long work
pieces in the form of points. On flexible materials, apply in lines.

EN
WARNING: Do not allow the hot glue or the nozzle tip to come into
contact with persons or animals.If hot glue contacts with the skin,
do not try to remove the glue from the skin,but put the affected area
immediately under a stream of cold water for several minutes.
2. Press the power button until the light goes out. Then press the on/off switch
on the hub to turn off after use.
NOTE In order to save energy, the glue gun switches off automatically after 10
minutes.
NOTE Put down the glue gun in a safe way and allow it to cool down completely
before packing it away after each use.
MAINTENANCE
Remove the battery before carrying out any adjustment, servicing or
maintenance.
There are no user serviceable parts in your power tool. Never use water or
chemical cleaners to clean your power tool. Wipe clean with a dry cloth. Always
store your power tool in a dry place. Keep the motor ventilation slots clean. Keep
all working controls free of dust. Occasionally you may see sparks through the
ventilation slots. This is normal and will not damage your power tool.
Store the accessories in a dry place.
WARNING Do not use inflammable solvents for cleaning the surfaces
to be glued. For excess hardened glue, it can be removed with a blunt
object. Do not use solvent for cleaning.
TROUBLESHOOTING
Problems Possible Causes Possible Solution
No glue comes out Glue stick is used up.
Glue stick diameter is too
large or small.
Glue stick is not pushed to
the end.
Insert a new glue stick.
Use recommended glue
sticks.
Push the glue stick to the
end when loading.
Glue stick falls out
from the tool. Glue stick diameter is too
small. Use recommended glue
sticks.
There is glue leaking
out without trigger
pressed after use.
The temperature is still
high in short time after use
and will cause glue melted.
It is normal and will stop
leaking out when the
glue gun cools down.

EN
Trigger is blocked for
glue escaping toward
the rear.
Glue stick diameter too
small.
Glue stick’s melting
temperature is too low.
Use recommended glue
sticks.
Glue does not flow
evenly. Glue stick’s melting
temperature is too low.
Glue is not heated long
enough.
Trigger is not pressed
uniformly.
Wait for heating.
Allow the glue gun time
to heat up.
Press trigger slowly and
uniformly.
Adhesive surface only
bonds on one side. Adhesive already partially
has cooled off before
work-pieces have been
bonded.
Bond work-pieces in a
quicker way.
Set gluing points instead
of applying glue over
surface.
Adhesive bond doesn’t
work after cooling. Surface is greasy or too
smooth.
Surface is dusty.
Unsuitable material or
work-piece.
Roughen adhesive
surface slightly.
Clean the surface.
Use specialized
adhesive.
Glued tiles in moist
locations are not
adhesive.
Moisture spreads under
bonding parts. Suggest to use
specialized adhensive
suitable for moist
locations
Glued shoe soles are
not adhesive. Moisture causes leather to
puff up and creeps under
bonding location.
Use specialized
adhesive.
Strands are pulled
out when removing
the glue gun from the
work-piece.
Trigger is still pressed after
operation.
Nozzle has not been wiped
off.
Discontinue pressing
trigger before
completing the
operation.
Wipe off nozzle.
Work-piece melts. Work-piece contains
material that melts at a low
temperature.
Use specialized
adhesive.

EN
Burns on fingers when
applying adhesive. Adhesive penetrates
through paper/ fabric/
tissue
Do not hold work-piece in
hand.
Apply adhesive with
work-piece placed on
heat-resistant silicone
pad or base.
Metal work-piece has
heated up. Do not hold work-piece in
hand.
Apply adhesive with
work-piece placed on
heat-resistant silicone
pad or base.
Clamp work-piece.
ENVIRONMENTAL PROTECTION
Waste electrical products must not be disposed of with household
waste. Please recycle where facilities exist. Check with your local
authorities or retailer for recycling advice.

CN
产品安全
通用安全警告
警告!阅读随电动工具提供的所有安全警告、说明、图示和规定。
不遵照以下所列说明会导致电击、着火和/或严重伤害。
保存所有警告和说明书以备查阅。
本机器不应被具有限制身体、知觉或精神能力的人以及缺少经验和知识
的人或儿童使用,除非他们被负责他们安全的人提供监护或有关器具使
用的指导。儿童应被监护确保他们不玩弄本机器。清洁和维护不应让没
有监护的儿童来实施。
热胶枪安全警告
如果使用本器具时不小心可能引起着火,所以:
—在有易燃材料的地方使用本器具时要小心;
—不要长时间在同一地方使用本器具;
—不要在易爆炸性环境中使用本器具;
—要意识到热可能传递到远处的易燃材料;
—使用后把本器具放在支架上使之冷却,然后在保存;
—器具接通时需有人照看。
安全警告
电池包安全警告
a) 禁止拆卸、打开或切碎蓄电池组。
b) 禁止将电池组暴露在热源或火焰下。避免在阳光直射下储存。
c) 禁止将电池组短路。不要将电池组随意搁置在盒子或抽屉中以避免
它们间相互短路或被其他金属物体短路。
d) 禁止使电池组经受机械冲击。
e) 一旦电池泄漏,勿将泄漏出的液体直接接触皮肤或眼睛。如果发生
接触,应用大量水冲洗接触部位并及时就医。
f) 不要使用非设备专用的充电器。
g) 不要使用非设备专用电池组。
h) 将电池组远离儿童。
i) 为设备购买合适的电池组。
j) 保持电池组清洁和干燥。
k) 如果电池组的极端变脏应使用清洁干燥的布擦拭。

CN
l) 蓄电池组在使用前应进行充电。充电时应使用正确的充电器并参照
制造商的说明或设备使用手册中正确的说明充电。
m) 不使用时不要将电池组长期充电。
n) 经长期储存后,需将电池组进行数次充放电循环以获得最佳的性
能。
o) 在常温(20℃±5℃)下使用蓄电池组的性能最佳。
p) 保存好产品的原始说明书以备日后参考。
q) 电池组仅用于预期的用途。
r) 不使用时尽可能将蓄电池组取出。
s) 正确地处理电池组。
标记
阅读说明书
警告
请佩戴防护眼镜
请佩戴防护手套
不要投入水中
不要投入火中
电池含有锂,为保护环境,废弃电池应分类回收,不要丢入
垃圾桶

CN
机件
1. 喷嘴
2. 帽
3. 扳机
4. 胶棒孔
5. 电源开关
6. 胶棒*
* 插图或文字中所提及的配件,有些并不包括在供货范围内。
机器规格
WX746 WX746.X **
额定电压 20 V 最大***
胶棒直径 7.2mm
喷嘴口径 1.2 mm
预热时间 25 s
加热时的温度 200° C
运行时间(2.0Ah) 大于 120 分钟
机器重量 ( 裸机 ) 0.12Kg
**X=1-99,A-Z,M1-M9仅用于不同的客户,这些型号之间没有安规
相关的更改。
***初始电池容量最大可达20V,正常使用是18V。
类别 型号 电量
20VHub/HubX
WA7160 输入: 20伏 10安最大
输出: 20伏 10安最大
WA7161
输入: 20伏 10安最大
输出: 20伏 10安最大
或输出: 5伏 2安
(USB接口)

CN
我们建议您从所购买电动工具的商店选配您的附件。请选择适合您工作
所需的正确附件。并参考附件包装,以获得进一步了解,店内工作人员
可以给您提供更多意见。
MakerX系列工具需与20VHub/HubX配套使用,请勿使用其他转换器
操作指南
注意:使用机器前,请仔细阅读说明书。
预期用途
本工具可以用于木料、皮革、塑料、纸张和其它材料的粘结。
安装
1.从胶枪后部的孔中将适宜于待粘结材料的胶棒插入胶枪。使用最小直
径7.2mm的胶棒。(见图A)
2.连接胶枪和转换器。(见图B)
警告:开始操作之前,确保转换器上的速度控制按钮处于“Min”
位置。(见图C)且需粘结的表面必须干净、干燥、无油脂。
注:胶枪没有速度控制功能。速度控制功能用于其它工具,如MakerX
旋转工具或角磨机。
操作
1. 检查确保转换器上的调速钮在“Min”(最低)位置。用手握住热胶
枪,按压转换器上的开/关键。然后,长按胶枪上的开关3秒,直到红
灯亮,此时,胶枪加热。绿灯亮时,胶枪已经就绪可以操作。按下打
胶扳机。(见图D、E和F)打胶后,立即将需粘结的表面压在一起。
注:建议以点状在大表面或长工件上涂胶。如果是柔性材料,以线状涂
胶。
警告:禁止高温胶或喷嘴头触及任何人或动物。如果高温胶与皮肤接
触,不得试图将胶从皮肤上取下,立即用冷水冲洗粘有胶的皮肤位置
数分钟。
2 . 使 用 完 后 ,按 下 电 源 开 关 直 至 灯 熄 灭 。然 后 ,按 下 转换器上的on/off开
关关机。
注:为节约能源,胶枪会在10分钟后自动断电。

CN
注:每次使用完后,在放回包装盒之前,安全摆放好胶枪,让其完全冷却
下来。
保养与维护
对机器作任何换修工作之前,请务必先取下电池包,避免意外启动。
该机器没有供用户更换的零件。不要用水或化学清洗剂来清洗你的电动
工具,用干布擦拭干净就可以了。工具需储藏在干燥的环境中,并保持
马达通风口处的清洁。尽量在无尘环境中使用。
出风口处偶尔会有火星出现,这属于正常现象,不会对机器造成损害。
警告:禁止使用易燃溶剂清洁需粘结的表面。可以用钝的器件清除多
余的硬化胶。禁止用溶剂进行清洁。
故障处理
故障 可能原因 可能解决方法
没有胶排出。 胶棒用完。
胶棒直径过大或过小。
胶棒没有推到底。
插入新胶棒。
使用建议的胶棒。
装胶棒时将胶棒推到底。
胶棒从胶枪上脱落。 胶棒直径过小 . 使用建议的胶棒。
使用后,扳机未按下时,
有胶漏出。
使用后的一小段时间内温
度仍然很高,使胶熔化。
胶枪冷却后胶就不会漏
出来。
有胶从后部漏出,导致
扳机被卡住。
胶棒直径过小。
胶棒的熔化温度太低。
使用建议的胶棒。
胶不能均匀流动。 胶棒的熔化温度太低。
没有将胶加热足够长的时
间。
扳机没有均匀按下。
等待加热。
让胶枪有一定时间预热。
缓慢均匀按下扳机。
粘结表面只在一面粘
结。
在工件粘结好之前。粘结
部分冷却。
工件粘结的速度过快。
确定打胶点,而不是在表
面上抹胶。
冷却后粘结不能粘结。 表面上的油脂过多或过于
光滑。
表面上灰尘多。
材料或工件不适宜。
将粘胶表面轻轻打毛。
将表面清理干净。
使用专用粘胶。
潮湿位置的粘胶瓷砖不
能粘结。
湿气在粘结部件下扩散。 建议使用适于潮湿位置
的专用粘结。

CN
粘胶的鞋底不能粘结。 潮气会引起皮革在粘结位
置膨胀和收缩。
使用专用粘胶。
从工件上退出胶枪时形
成胶丝。
操作完成后仍按下扳机。
喷嘴没有擦拭干净。
完成操作之前,断断续续
按下扳机。
将喷嘴擦拭干净。
工件熔化。 工件含有在低温下熔化的
材料。
使用专用粘胶。
涂胶时烧到手指。 粘胶穿透纸张 / 织物 / 织体 禁止手持工件。
将工作摆放在耐热硅胶
板或底板上后涂胶。
金属工作已被加热。 禁止手持工件。
将工作摆放在耐热硅胶
板或底板上后涂胶。
夹紧工件。
环境保护
处理废弃物
为了响应环保,对于坏损的机器、配件及包装材料必须详细加以分
类处理,以便利于回收。为方便分类回收,各塑胶部位都做有材料标
识。

CN
产品中有害物质声明
部件名称
有害物质
铅(Pb) 汞(Hg) 镉(Cd)
六价铬
(Cr(VI))
多溴联苯
(PBB)
多溴二苯醚
(PBDE)
外壳 ○ ○ ○ ○ ○ ○
开关 ○ ○ × ○ ○ ○
充电器 × ○ ○ ○ ○ ○
电池 × ○ ○ ○ ○ ○
电加热丝 ×○ ○ ○ ○ ○
电路板 × ○ ○ ○ ○ ○
○ ○ ○ ○ ○ ○
○:表示该有害物质在该部件所有均质材料中的含量均在GB/T26572规定的限
量要求以下。
×:表示该有害物质至少在该部件的某一均质材料中的含量超出GB/T26572规
定的限量要求。
因生产工艺和技术等原因产品中以上列举的部件某些有害物质超限值要求,但都
在欧盟有害物质管控豁免之列,在环保使用期限内请放心使用。
该产品含有某些有害物质,其环保使用期限为25年,在从生产日开始的
环保使用期限内产品中的有毒、有害物质或元素不会发生外泄或突变,
使用该产品不会对环境造成严重污染或对使用者人身、财产造成不良损
害,可以放心使用,超过环保使用期限之后则应该进入回收循环系统。
“环保使用期限”不是安全使用期限,尤其不同于基于电气性能安全、电磁安全等
因素而被限定的使用期限。“环保使用期限”也不是产品的质量保证期限。
说明:
1.开关:触点含镉;
2.充电器:插头电源线插脚的铜合金中含铅;
3.电池:电池中电路板焊锡含铅;
4.电路板:焊锡中含铅;

宝时得科技(中国)有限公司
江苏省苏州工业园区东旺路18号,邮编:215123
www.worx.com
宝时得科技(中国)有限公司
江苏省苏州工业园区东旺路18号,邮编:215123
www.worx.com
全国统一服务电话
400 887 9955
全国统一服务电话
400 887 9955
保修卡
保修条款
公司仅对存在质量缺陷的产品给予免费修理,产品保修期为12个月。
用户要求保修时必须出示购买票据和保修卡,并经授权维修中心核实,否则不具备保修权利。
下列情况不予免费保修:
• 任何自然磨损,超负荷工作
• 使用不当等人为损坏
• 售出后因运输不当造成损坏
• 未按规定使用威克士原装零配件及附件而引起的损坏
• 任何自行改装、拆修的产品
• 打草线、碳刷及易耗附件等易磨损件的更换
查询产品爆炸图和零部件清单,请访问网站:www.worx.com。

保修卡
保修卡
重要事项:为确保您的威克士电动工具能享有免费保修服务,请即填妥以下表格并在一月内寄回。
用户姓名:_______________女士/先生 单位名称:_______________________________________________
年龄段: □ 20岁以下 □ 20-29岁 □ 30-39岁 □ 40-49岁 □ 50岁以上
用户性质: □ 单位用户 □ 个人用户
地址:_____________省______________市________________区/县_________________街道_____________号
邮编:________________________________ 电子邮件:_____________________________________________
固定电话:___________________________ 移动电话:_____________________________________________
型号:_____________________机身编号:_________________________________________________________
采购日期:__________年_____月_____日 发票号码:______________________________________________
经销商名称:___________________________________________________________________________________
经销商地址:___________________________________________________________________________________
经销商电话:___________________________ 经销商盖章:_________________________________________
保修时用户必须出示此卡及购买票据,以便进行保修服务。
用户姓名:_______________女士/先生 单位名称:_______________________________________________
年龄段: □ 20岁以下 □ 20-29岁 □ 30-39岁 □ 40-49岁 □ 50岁以上
用户性质: □ 单位用户 □ 个人用户
地址:_____________省______________市________________区/县_________________街道_____________号
邮编:________________________________ 电子邮件:_____________________________________________
固定电话:___________________________ 移动电话:_____________________________________________
型号:_____________________机身编号:_________________________________________________________
采购日期:__________年_____月_____日 发票号码:______________________________________________
经销商名称:___________________________________________________________________________________
经销商地址:___________________________________________________________________________________
经销商电话:___________________________ 经销商盖章:_________________________________________
请填妥后寄回
请保存此卡
回执联
用户保存联
Other manuals for MakerX WX746
1
This manual suits for next models
1
Table of contents
Languages:
Other Worx Glue Gun manuals