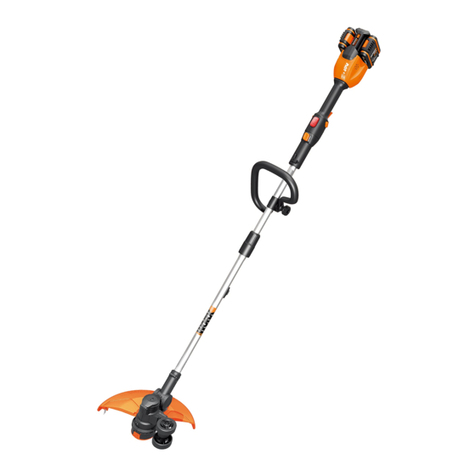
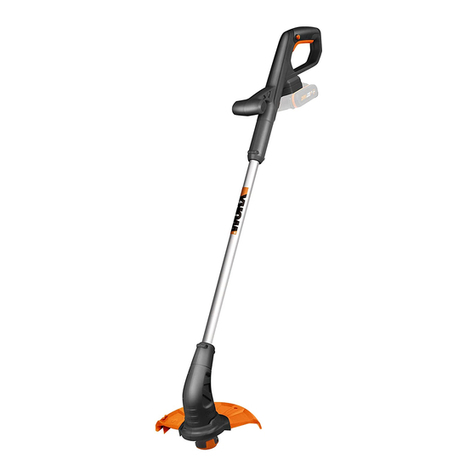
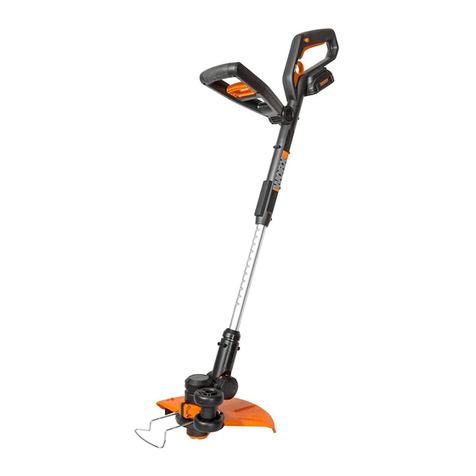
Worx WG184E User manual

WG184E WG184E.9
P09
P16
2*20V/33cm Li Grass Trimmer/Edger
Электрокосилка 2*20В/33см
EN
RU

Original instructions EN
Перевод оригинальных инструкций RU

6
7
8
9
10
11
12
2
1
3
4
5
14
13
15
16

2
1
2
1
0o
2
1
1
3
Click!
2
100%
0%
2
1
3
2
2
1
2
1
90
o
17
18
F1
F2 G
H1
H3 H4
C3 C4
D
E
C2
A B
C1
P
Q
IJ
KL
MN
O
C5
R
S
H2

2
1
2
1
0o
2
1
1
3
Click!
2
100%
0%
2
1
3
2
2
1
2
1
90o
17
18
F1
F2 G
H1
H3 H4
C3 C4
D
E
C2
A B
C1
P
Q
IJ
KL
MN
O
C5
R
S
H2

2
1
2
1
0o
2
1
1
3
Click!
2
100%
0%
2
1
3
2
2
1
2
1
90
o
17
18
F1
F2 G
H1
H3 H4
C3 C4
D
E
C2
A B
C1
P
Q
IJ
KL
MN
O
C5
R
S
H2

2
1
2
1
0o
2
1
1
3
Click!
2
100%
0%
2
1
3
2
2
1
2
1
90
o
17
18
F1
F2 G
H1
H3 H4
C3 C4
D
E
C2
A B
C1
P
Q
IJ
KL
MN
O
C5
R
S
H2

2
1
2
1
0o
2
1
1
3
Click!
2
100%
0%
2
1
3
2
2
1
2
1
90
o
17
18
F1
F2 G
H1
H3 H4
C3 C4
D
E
C2
A B
C1
P
Q
IJ
KL
MN
O
C5
R
S
H2

2*20V/33cm Li Grass Trimmer/Edger EN
9
PRODUCT SAFETY
GENERAL SAFETY WARNINGS
WARNING: Read all safety warnings
and all instructions. Failure to follow the
warnings and instructions may result in electric shock,
fire and/or serious injury.
Save all warnings and instructions for future
reference.
The appliance is only to be used with the power
supply unit provided with the appliance.
IMPORTANT
READ CAREFULLY BEFORE USE
KEEP FOR FUTURE REFERENCE
Safe operating practices
1. Training
a) Read the instructions carefully. Be familiar with
the controls and the correct use of the machine.
b) Never allow children, persons with reduced
physical, sensory or mental capabilities or lack of
experience and knowledge or people unfamiliar
with these instructions to use the machine, local
regulations may restrict the age of the operator.
c) Keep in mind that the operator or user is
responsible for accidents or hazards occurring to
other people or their property.
2. Preparation
a) Before use, always visually inspect the machine
for damaged, missing or misplaced guards or
shields.
b) Never operate the machine while people,
especially children, or pets are nearby.
3. Operation
a) Wear eye protection, long trousers and stout
shoes at all times while operating the machine.
b) Avoid using the machine in bad weather
conditions especially when there is a risk of
lightning.
c) Use the machine only in daylight or good
artificial light.
d) Never operate the machine with damaged guards
or shields or without guards or shields in place.
e) Switch on the motor only when the hands and
feet are away from the cutting means.
f) Always disconnect the machine from the power
supply (e.g. remove the battery pack from the
machine)
1) whenever the machine is left unattended;
2) before clearing a blockage;
3) before checking, cleaning or working on the
machine;
4) after striking a foreign object;
5) whenever the machine starts vibrating
abnormally.
g) Take care against injury to feet and hands from
the cutting means. h) Always ensure that the
ventilation openings are kept clear of debris.
i) Never fit metal cutting elements.
j) Always be sure of your footing on slopes.
k) Walk, never run.
l) Not overreach and keep the balance at all times.
m) Not to touch moving hazardous parts before
removing the battery pack from the machine
and the moving hazardous parts have come to a
complete stop.
4. Maintenance and storage
a) Disconnect the machine from the power supply
(e.g. remove the battery pack from the machine)
before carrying out maintenance or cleaning
work.
b) Use only the manufacturer’s recommended
replacement parts and accessories.
c) Inspect and maintain the machine regularly.
Have the machine repaired only by an authorized
repairer.
d) When not in use, store the machine out of the
reach of children.
SAFETY WARNINGS FOR
BATTERY PACK
a) Do not dismantle, open or shred cells or
battery pack.
b) Do not short-circuit a battery pack. Do not
store battery packs haphazardly in a box or
drawer where they may short-circuit each
other or be short-circuited by conductive
materials. When battery pack is not in use, keep
it away from other metal objects, like paper
clips, coins, keys, nails, screws or other small
metal objects, that can make a connection from
one terminal to another. Shorting the battery
terminals together may cause burns or a fire.
c) Do not expose battery pack to heat or fire.
Avoid storage in direct sunlight.
d) Do not subject battery pack to mechanical
shock.
e) In the event of battery leaking, do not
allow the liquid to come into contact
with the skin or eyes. If contact has been
made, wash the affected area with copious
amounts of water and seek medical advice.
f) Seek medical advice immediately if a cell
or battery pack has been swallowed.
g) Keep battery pack clean and dry.
h) Wipe the battery pack terminals with a
clean dry cloth if they become dirty.
i) Battery pack needs to be charged before
use. Always refer to this instruction and
use the correct charging procedure.
j)
Do not maintain battery pack on charge
when not in use.
k) After extended periods of storage, it may
be necessary to charge and discharge
the battery pack several times to obtain
maximum performance.
l) Battery pack gives its best performance
2*20V/33cm Li Grass Trimmer/Edger EN
10
when it is operated at normal room
temperature (20°C ± 5°C).
m) When disposing of battery packs, keep
battery packs of different electrochemical
systems separate from each other.
n) Recharge only with the charger specified
by WORX. Do not use any charger other
than that specifically provided for use with
the equipment. A charger that is suitable for
one type of battery pack may create a risk of fire
when used with another battery pack.
o) Do not use any battery pack which is not
designed for use with the equipment.
p) Keep battery pack out of the reach of
children.
q) Retain the original product literature for
future reference.
r) Remove the battery from the equipment
when not in use.
s) Dispose of properly.
SYMBOLS
Read operator’s manual
Keep bystanders away
Wear eye and ear protection
Do not expose to rain
Waste electrical products
must not be disposed of with
household waste. Please recycle
where facilities exist. Check with
your local authorities or retailer
for recycling advice.
Do not dispose of batteries.
Return exhausted batteries to
your local collection or recycling
point.
Do not expose to rain or water
Do not burn
Make sure the battery is removed
prior to changing accessories.
Trimming
Edging
Lock
Unlock
High speed
Low speed
Correct
Incorrect

2*20V/33cm Li Grass Trimmer/Edger EN
11
1. HANDLE ADJUSTMENT KNOB
2. AUXILIARY HANDLE
3. UPPER SHAFT ROTATION BUTTON
4. COMMAND FEED BUTTON
5. BATTERY INDICATOR LIGHT
6. BATTERY PACK *
7. ON/OFF SWITCH
8. LOCK OFF SWITCH
9. UPPER SHAFT
10. LOCKING COLLAR
11. LOWER SHAFT
12. WHEEL STORAGE POSITION
13. SAFETY GUARD
14. LINE CUTTER
15. EDGER WHEELS
16. LINE FEED BUTTON
17. SPOOL CAP (SEE FIG. N)
18. SPOOL (SEE FIG. N)
* Not all the accessories illustrated or de-
scribed are included in standard delivery.
TECHNICAL DATA
WG184E WG184E.9
Voltage 40V MAX (2x20V MAX) *
Cutting Diameter 33cm
Line Diameter 2mm
Battery type Lithium-ion /
Battery Model WA3551 (2.0Ah) /
Charger Model WA3876 /
Charger rating
Input:
100-240V~50/60Hz,
100W
Output: 20V , 4.0A
/
Charging time
(approx.)
Battery pack:
2.0Ah (1pc)
2.0Ah (2pcs)
60min.
60min.
/
Machine Weight 3.9kg 3.1kg
*Voltage measured without workload. Initial battery
voltage reaches maximum of 20 volts. Nominal
voltage is 18 volts.
ACCESSORIES
WG184E WG184E.9
Battery pack (WA3551) 2 /
Charger (WA3876) 1 /
Spool (WA0014) 1 1
Safety guard 1 1
Edger wheels 1 1
We recommend that you purchase your accessories
listed in the above list from the same store that
sold you the lawn trimmer. Refer to the accessory
packaging for further details. Store personnel can
assist you and offer advice.
NOISE DATA
A weighted sound pressure LpA = 78 dB(A)
KpA 3 dB(A)
A weighted sound power LwA = 95.4 dB(A)
KwA 3 dB(A)
Wear ear protection
VIBRATION INFORMATION
Typical weighted vibration ah < 4 m/s2
Uncertainty K = 1.5 m/s²
The declared vibration total value may be used for
comparing one tool with another, and may also be used in
a preliminary assessment of exposure.
WARNING! The vibration emission value
during actual use of the power tool can differ
from the declared value depending on the ways in
which the tool is used dependant on the following
examples and other variations on how the tool is used:
How the tool is used and the materials being cut or
drilled.
The tool being in good condition and well maintained.
The use the correct accessory for the tool and ensuring
it is sharp and in good condition.
The tightness of the grip on the handles and if any anti
vibration accessories are used.

2*20V/33cm Li Grass Trimmer/Edger EN
12
And the tool is being used as intended by its design
and these instructions.
This tool may cause hand-arm vibration syndrome if
its use is not adequately managed.
WARNING! To be accurate, an estimation of
exposure level in the actual conditions of use
should also take account of all parts of the operating
cycle such as the times when the tool is switched off
and when it is running idle but not actually doing the
job.This may significantly reduce the exposure level
over the total working period.
Helping to minimise your vibration exposure risk.
ALWAYS use sharp chisels, drills and blades
Maintain this tool in accordance with these instructions
and keep well lubricated (where appropriate)
If the tool is to be used regularly then invest in anti
vibration accessories.
Plan your work schedule to spread any high vibration
tool use across a number of days.
ASSEMBLY & OPERATION
Action Figure
Assembly
Assembling the Main Handle See Fig. A
Assembling the Safety Guard See Fig. B
Installing and Removing the Battery
Pack
NOTE:
•This machine will only run when
2 batteries are installed. It is
recommended to use the same two
batteries and charge the two batteries
at the same time.
• Using two different sized batteries
or if one battery isn’t fully charged
then the machine will only run to the
lowest common denominator.
See Fig. C1,
C2
Checking the battery charge
condition
NOTE: Fig. C3 only applies for the
battery pack with battery indicator
light.
See Fig. C3
Charging the battery pack
NOTE:
•The batteries are shipped
uncharged. Each battery must be
fully charged before the first use.
• Always fully charge the two
batteries at same time. More details
can be found in charger’s manual.
See Fig. C4
Battery power indicator on the
machine
See details in BATTERY STATUS
section
See Fig. C5
Operation
On/Off Switch
Warning! The cutting head
continues to rotate after the
trimmer has been switched off; wait
until it has completely stopped then
lay down the tool.
See Fig. D
Trimming See Fig. E
-Adjusting theTrimmer Head See Fig.
F1, F2
-Adjusting the Auxiliary handle See Fig. G
Edging See Fig.
H1-H4
-Edger wheel storage See Fig. I
Command feeding the line See Fig. J
Manually feeding the line See Fig. K
Replacing the trimmer line and spool See Fig. L,
M, N
Manually winding the line See Fig. O,
P, Q, R
BATTERY STATUS (See Fig. C5)
Before starting or after use, press the button beside the power
indicator light on the machine to check the battery capacity.
The indicator lights displays the battery condition as follows:
Battery power
indicator status
Battery condition
Five green lights
( ) are
illuminated.
The two batteries are in a
highly charged condition.
Two, three or four
green lights are
illuminated.
The two batteries have a
remaining charge.The more
lights are illuminated, the
more battery capacity.
Only one green light
( ) is
illuminated.
At least one battery is
depleted and needs to be
charged.
No light is
illuminated.
At least one battery is not
fully installed or battery may
be defective.
Only one light is
flashing twice per
cycle.
At least one battery is
over discharged (please
refer to the battery charge
condition), please recharge
the two batteries at once
before use again or storage.
Only one light is
flashing three times
per cycle.
At least one battery is hot,
wait for them cool down
before start again.
Only one light is
flashing four times
per cycle.
The machine is over load.
Raise the cutting height or
push slowly.

2*20V/33cm Li Grass Trimmer/Edger EN
13
OPERATION INSTRUCTIONS
WARNING! The charger and battery pack are
specially designed to work together so do not
attempt to use any other devices. Never insert or
allow metallic objects into your charger or battery
pack connections because of an electrical failure and
hazard will occur.
1. COMMAND FEEDING THE LINE
(See Fig. J)
Your grass trimmer is equipped with a Command
Feed System. Just press the button while the
machine is running, new line will feed out and then
stop when you hear the ‘clattering’ noise of the
new line being cut.The motor stops briefly when
the Command Feed button is pressed, and restarts
when released.This process enables the machine to
automatically feed out new line.
2. MANUALLY FEEDING THE LINE
(See Fig. K)
Turn off the trimmer and remove the battery. If
required, line can be fed out manually.To operate,
press and release manual Line Feed Button, while
gently pulling out the line until it is long enough to
reach the Line Cutter. If the line extends past the Line
Cutter, too much line has been fed out. If too much
line is fed out, remove the Spool Cap and turn Spool
counter-clockwise until the line is at the desired
length.
3. MANUALLY WINDING THE LINE
(See Fig. O, P, Q, R)
Take approximately 20ft (6m) of line. Insert 0.080 inches
(2mm )of line into the Spool holes and wind line in the
direction of the arrows on the top of the Spool. Leave
approximately 4 inches (100mm) of line unwound and
place into the cleat. Ensure that the line is neatly coiled on
the Spool. Failure to do so will impair the efficiency of the
automatic line feed.Then fit the Spool as described above
in “Replacing the trimmer line and Spool”
STORING YOUR GRASS
TRIMMER
Always remove the battery pack from
your trimmer after use.
TO STORE YOUR GRASS TRIMMER
The trimmer is provided with a hanging slot for
storing the trimmer on the wall. (See Fig. S)
Store in a dry place where the trimmer and battery
can be protected from damage.
MAINTENANCE
Always remove the battery pack from
your trimmer after use.
Always check the product prior to being used for
any damage.
After use, disconnect the battery from the tool and
check for damage.
Your power tool requires no additional lubrication
or maintenance.There are no user serviceable parts
in your power tool. Never use water or chemical
cleaners to clean your power tool. Wipe clean
with a dry cloth. Always store your power tool in
a dry room temperature location. Keep the motor
ventilation slots clean. Keep all working controls
free of dust.

2*20V/33cm Li Grass Trimmer/Edger EN
14
TROUBLESHOOTING
The following table gives problems and actions that you can perform if your machine does not operate
correctly.
WARNING: Switch the machine off and remove the battery prior to any troubleshooting.
Problems Possible Causes Corrective Action
Trimmer fails to
operate.
Battery discharged.
Battery too hot/cold.
Motor is broken.
Internal wiring of machine damaged.
Recharge battery; also see
the content in charger manual
Allow to cool/warm.
Contact Service Agent.
Trimmer runs
intermittently.
Motor is broken.
Battery not fully charged.
On/Off switch defective.
Contact Service Agent.
Recharge battery.
Contact Service Agent.
Excessive vibrations/
noise.
Machine defective.
Line spool is not wound well.
Contact Service Agent.
Rewind the line. See ’’To fit spool and
line assembly.’’
Cutting time per
battery charge
too short.
Battery has not been used for long period
or only charged for short term.
Grass too high.
Battery defective.
Fully charge battery; also see
the content in charger manual Cut in
stages.
Replace the battery.
Machine does not cut. Line broken.
Battery not fully charged.
Motor is broken (speed is too low).
Grass entangled around cutting head.
Replace the line
Recharge battery; also see
the content in charger manual
Contact Service Agent.
Remove grass.
Continuous lighting
of the battery charge
indicator.
No charging
procedure possible.
Battery not (properly) inserted.
Battery contacts contaminated.
Battery defective.
Properly insert battery into battery
charger.
Clean the battery contacts or replace
the battery.
Replace the battery.
Battery charge
indicator does not
light up.
Plug of battery charger not plugged in
(properly).
Socket outlet, mains cable or battery
charger defective.
Insert mains plug (fully) into the
socket outlet.
Check the mains voltage; have
the battery charger checked by an
authorized after-sales service agent.
Command feed does
not work
Cutting line is not wound well.
The line is tangled.
Line is used up.
Manually feed the line, if still can not
feed out, remove the Spool out and
rewind the line.
Replace with a new spool of line.

2*20V/33cm Li Grass Trimmer/Edger EN
15
ENVIRONMENTAL
PROTECTION
Waste electrical products must not be disposed
of with household waste. Please recycle where
facilities exist. Check with your local authorities
or retailer for recycling advice.
DECLARATION OF
CONFORMITY
We,
POSITEC Germany GmbH
Grüner Weg 10, 50825 Cologne, Germany
Declare that the product
Description Cordless Grass Trimmer
Type WG184E WG184E.9 (1-designation of
machinery, representative of Cordless Grass
Trimmer)
Function Cutting grass and similar soft
vegetation and for trimming grass edges
Complies with the following Directives:
2006/42/EC, 2014/30/EU, 2011/65/EU,
2000/14/EC amended by 2005/88/EC
2000/14/EC amended by 2005/88/EC:
- Conformity Assessment Procedure as per Annex V
- Measured Sound Power Level 95.4 dB (A)
- Declared Guaranteed Sound Power Level 96 dB(A)
The notified body involved
Name: Intertek Testing & Certification Ltd
(notified body 0359)
Address: Davy Avenue, Knowlhill, Milton
Keynes, MK5 8NL
Standards conform to
EN 60335-1, EN 50636-2-91, EN 62233,
EN ISO 3744, EN 55014-1, EN 55014-2
The person authorized to compile the technical file,
Name Marcel Filz
Address Positec Germany GmbH
Grüner Weg 10, 50825 Cologne, Germany
2018/01/10
Allen Ding
Deputy Chief Engineer,Testing & Certification
PositecTechnology (China) Co., Ltd
18, Dongwang Road, Suzhou Industrial
Park, Jiangsu 215123, P. R. China

Электрокосилка 2*20В/33см RU
БЕЗОПАСНОСТЬ
ПРОДУКТА
ОБЩИЕ
ПРЕДУПРЕЖДЕНИЯ О
БЕЗОПАСНОСТИ
ПРЕДУПРЕЖДЕНИЕ Прочтите все
предупреждения о безопасности и все
инструкции. Несоблюдение предупреждений
и инструкций может привести к поражению
электрическим током, пожару и / или серьезной
травме.
Сохраните все предупреждения
и инструкции для дальнейшего
использования.
Прибор должен использоваться только с блоком
питания, поставляемым с прибором.
ВАЖНО
ПРОЧТИТЕ ВНИМАТЕЛЬНО ПЕРЕД
ИСПОЛЬЗОВАНИЕМ
Сохраните для будущей справки
Безопасная эксплуатация
1. Обучение
a) Внимательно прочитайте инструкции.
Ознакомьтесь с элементами управления и
правильным использованием машины.
b) Никогда не позволяйте детям, лицам с
ограниченными физическими и умственными
способностями или отсутствию опыта и знаний
или незнакомым с этими инструкциями людям
использовать машину, местные правила могут
ограничивать возраст оператора.
c) Имейте в виду, что оператор или пользователь
несет ответственность за несчастные случаи в
отношении людей и имущества.
2. Подготовка
a) Перед использованием всегда визуально
проверяйте машину на наличие поврежденных,
отсутствующих или неправильно установленных
защитных ограждений или экранов.
б) Никогда не работайте с машиной, пока
поблизости находятся люди, особенно дети или
домашние животные.
3. Эксплуатация
a) Во время работы машины всегда надевайте
защитные очки, длинные брюки и крепкую обувь.
b) Избегайте использования машины в плохих
погодных условиях, особенно когда существует
опасность молнии.
c) Используйте машину только при дневном свете
или в хорошем искусственном освещении.
d) Никогда не эксплуатируйте машину с
поврежденными ограждениями или без защитных
ограждений или экранов.
e) Включайте двигатель только тогда, когда руки и
ноги находятся вдали от режущего средства.
f) Всегда отсоединяйте устройство от источника
питания (например, извлеките аккумулятор из
устройства) :
1) всякий раз, когда машина остается без
присмотра;
2) перед очисткой засоров;
3) перед проверкой, очисткой или работой на
машине;
4) после удара о посторонний предмет;
5) всякий раз, когда машина начинает странно
вибрировать.
g) Следите за тем, чтобы ноги и руки были на
безопасном расстоянии от режущих ножей.
h) Всегда следите за тем, чтобы вентиляционные
отверстия были очищены от мусора.
i) Никогда не устанавливайте металлические
лезвия.
j) Всегда будьте уверены в своей устойчивости на
склонах.
k) При работе ходите, не бегайте.
l) Держите равновесие все время.
m) Не прикасайтесь к движущимся и вращающимся
опасным частям до извлечения аккумуляторной
батареи из устройства, дождитесь полной
остановки подобных частей.
4. Техническое обслуживание и хранение
a) Перед выполнением работ по техническому
обслуживанию или очистке отключите устройство
от источника питания (например, извлеките
аккумуляторную батарею из аппарата).
b) Используйте только рекомендованные
производителем запасные части и
принадлежности.
c) Регулярно проверяйте и обслуживайте машину.
Ремонтировать машину должен только
квалифицированный персонал.
d) Когда устройство не используется, храните в
недоступном для детей месте.
ПРЕДУПРЕЖДЕНИЯ
БЕЗОПАСНОСТИ ДЛЯ
АККУМУЛЯТОРНОЙ
БАТАРЕИ
a) Не разбирайте, не открывайте ячейки
или батарейный блок.
b) Не замыкайте аккумуляторную
батарею. Не храните беспорядочно
аккумуляторы в коробке или ящике, где
они могут замыкаться друг с другом
или быть закорочены проводящими
материалами. Когда аккумулятор не
используется, держите его подальше от других
металлических предметов, таких как скрепки,
монеты, ключи, гвозди, винты или другие
мелкие металлические предметы, которые
могут замкнуть контакты. Замыкание контактов
аккумулятора может привести к ожогам или
пожару.

Электрокосилка 2*20В/33см RU
c) Не подвергайте аккумуляторную
батарею воздействию тепла или
огня. Избегайте попадания прямых
солнечных лучей.
d) Не подвергайте аккумуляторную
батарею механическим ударам.
e) В случае протекания батареи не
допускайте контакта жидкости с
кожей или глазами. Если жидкость
контактировала с телом, промойте
пораженный участок обильным
количеством воды и обратитесь за
медицинской помощью.
f) Немедленно обратитесь за
медицинской помощью, если часть
батареи была проглочена.
g) Держите аккумулятор в чистоте и сухом
состоянии.
h) Протрите клеммы аккумуляторной
батареи чистой сухой тканью, если они
загрязнились.
i) Перед использованием батареи
ее необходимо зарядить. Всегда
обращайтесь к этой инструкции и
используйте правильную процедуру
зарядки.
j) Не храните аккумулятор в зарядном
устройстве, когда он не используется.
k) После продолжительных периодов
хранения может потребоваться
несколько раз зарядить и разрядить
аккумуляторную батарею,
чтобы получить максимальную
производительность.
л) Аккумулятор обеспечивает
максимальную производительность
при работе при нормальной комнатной
температуре (20oC ± 5oC).
m) При утилизации аккумуляторных
батарей держите батарейки разных
электрохимических составляющих
отдельно друг от друга.
n) Перезаряжайте только зарядным
устройством, одобренным WORX. Не
используйте зарядное устройство,
отличное от того, которое специально
предназначено для использования
с оборудованием. Зарядное устройство,
подходящее для батарей одного типа, может
привести к пожару при использовании с другим
аккумулятором.
o) Не используйте батарейный блок,
который не предназначен для
использования с оборудованием.
p) Храните аккумулятор в недоступном для
детей месте.
q) Сохраните оригинальную литературу
по продуктам для дальнейшего
использования.
r) Извлеките аккумулятор из
оборудования, если он не используется.
s) Утилизируйте надлежащим образом.

Электрокосилка 2*20В/33см RU
ПРЕДУПРЕЖДАЮЩИЕ
ЗНАКИ
Прочтите руководство оператора
Держите посторонних лиц вдали
Носите защиту для глаз и ушей
Не подвергайте воздействию
дождя
Отходы электротехнических
изделий нельзя утилизировать
с бытовыми отходами.
Пожалуйста, утилизируйте
их в специализированных
местах. Проконсультируйтесь с
местными органами власти или
розничной торговли.
Не выбрасывайте батареи.
Возвратите израсходованные
батареи в местную коллекцию
или пункт утилизации.
Не сжигать
Не подвергать воздействию
дождя или воды
Перед заменой частей
убедитесь, что аккумулятор снят.
Кошение
Подравнивание
Заблокировано
Разблокировано
Верно
Неверно
Высокая скорость
Низкая скорость

Электрокосилка 2*20В/33см RU
1. РЕГУЛИРОВКА РУЧКИ
2. ВСПОМОГАТЕЛЬНАЯ РУКОЯТКА
3. КНОПКА ВРАЩЕНИЯ ВЕРХНЕГО ВАЛА
4.
КНОПКА ДИСТАНЦИОННОЙ ПОДАЧИ ЛЕСКИ
5. ИНДИКАТОР БАТАРЕИ
6. АККУМУЛЯТОР *
7. ВКЛЮЧЕНИЕ / ВЫКЛЮЧЕНИЕ
8. ЗАБЛОКИРОВАТЬ ВЫКЛЮЧАТЕЛЬ
9. ВЕРХНИЙ ВАЛ
10. ФИКСИРУЮЩИЙ СОЕДИНИТЕЛЬ
11. НИЖНИЙ ВАЛ
12. ПОЛОЖЕНИЕ ДЛЯ ХРАНЕНИЯ КОЛЕС
13. ЗАЩИТНЫЙ КОЖУХ
14. РЕЖУЩАЯ ЛЕСКА
15. КОЛЕСА ПОДРАВНИВАТЕЛЯ
16. КНОПКА ПОДАЧИ НИТИ
17. КРЫШКА КАТУШКИ (СМ. РИСУНОК N)
18. КАТУШКА (СМ. РИСУНОК N)
* Не все аксессуары, показанные или описанные,
включены в стандартный комплект.
ТЕХНИЧЕСКИЕ
ДАННЫЕ
WG184E WG184E.9
Напряжение 40V MAX (2x20V MAX) *
Режущий диаметр
33cm
Диаметр нити 2mm
Тип
аккумулятора Литий-ионный /
Модель
аккумулятора WA3551 (2.0А*Ч) /
Модель
зарядного
устройства
WA3876 /
Рейтинг
зарядного
устройства
Вход:
100-240В ~50/60Hz,
100вт
Выход:
20В , 4,0А*Ч
/
Время зарядки
Батарея:
2.0Ah (1pc)
2.0Ah (2pcs)
60min.
60min.
/
Вес 3.9kg 3.1kg
*Напряжение измеряется без нагрузки.
Начальное напряжение батареи достигает
максимума 40 вольт. Номинальное
напряжение составляет 36 вольт.
АКСЕССУАРЫ
WG184E WG184E.9
Батарея (WA3551) 2/
Зарядное ус-во
(WA3876)
1/
Катушка(WA0014) 1 1
Защита 1 1
Колеса подравнивателя 1 1
Мы рекомендуем вам приобрести аксессуары,
перечисленные в приведенном выше списке, в том
же магазине, где вам продали электрокосилку. Для
получения дополнительной информации см. на
упаковку. Сотрудники магазина могут помочь вам и
дать совет.
ДАННЫЕ О ШУМЕ
Условное звуковое давление LpA = 78 dB(A)
KpA 3 dB(A)
Удельная мощность звука LwA = 95.4 dB(A)
KwA 3 dB(A)
Носите защиту для ушей
ИНФОРМАЦИЯ О
ВИБРАЦИИ
Типичная вибрация ah < 4 m/s²
Погрешность K = 1.5 m/s²
Заявленное значение вибрации может использоваться для
сравнения одного инструмента с другим

Электрокосилка 2*20В/33см RU
ПРЕДУПРЕЖДЕНИЕ. Значение вибрации при
фактическом использовании электроинструмента
может отличаться от заявленного значения в
зависимости от того, как инструмент используется:
Как используется инструмент
Инструмент находится в хорошем состоянии и ухожен
Используйте правильный аксессуар для инструмента и
убедитесь, что он острый и в хорошем состоянии.
Плотность захвата на ручках при использовании любых
антивибрационных аксессуаров.
Инструмент используется в соответствии с его конструкцией
и этими инструкциями.
Этот инструмент может вызвать синдром
вибрации руки, если его использование
недостаточно эффективно.
ПРЕДУПРЕЖДЕНИЕ. Чтобы быть точным,
оценка уровня воздействия в реальных условиях
использования должна также учитывать все части
рабочего цикла, такие как время, когда инструмент
выключен и когда он работает на холостом ходу, но не
выполняет работу , Это может значительно снизить
уровень воздействия за весь рабочий период и
помогает минимизировать риск вибрации.
Обслуживайте этот инструмент в соответствии с
этими инструкциями и хорошо смазывайте (при
необходимости)
Если инструмент следует использовать регулярно, то
приобретите антивибрационные аксессуары.
СБОРКА И
ЭКСПЛУАТАЦИЯ
Действие Рисунок
Сборка
Сборка главной рукоятки A
Сборка защиты B
Установка и снятие батареи
Примечание:
• Эта машина будет работать
только при установке 2
батарей. Рекомендуется
использовать две одинаковые
батареи, также одновременно
их заряжать.
• Используя две батареи
с разным зарядом,
может привести к плохой
производительности машины
C1, C2
Проверка состояния заряда
аккумулятора
ПРИМЕЧАНИЕ. Рисунок
3 применим только к
аккумуляторным батареям
с индикаторной лампой
аккумулятора.
C3
Зарядка аккумулятора
Более подробную информацию
можно найти в руководстве WA3876
Примечание:
• Батареи поставляются без зарядки.
Перед первым использованием
каждая батарея должна быть
полностью заряжена.
• Всегда заряжайте две батареи
одновременно и полностью. Более
подробную информацию можно
найти в руководстве зарядного
устройства.
C4
Индикатор питания аккумулятора на
машине
См. Подробности в разделе
«Состояние батареи»
C5
ЭКСПЛУАТАЦИЯ
ВКЛ/ВЫКЛ выключатель
Предупреждение! Режущая
головка продолжает вращаться
после отключения электрокосилки;
подождите, пока она полностью
не остановится, а затем положите
инструмент.
D
Кошение E
-Регулировка головки резака F1, F2
-Регулировка вспомогательной ручки G
Подравнивание H1-H4
-Место хранения колес для
подравнивания I
Пульт управления подачи лески J
Ручная подача лески K
Замена режущей лески и катушки L, M, N
Ручное наматывание лески O, P, Q, R
СТАТУС БАТАРЕИ (см. Рис. C5)
Перед запуском или после использования
нажмите кнопку рядом с индикатором питания на
аппарате, чтобы проверить емкость аккумулятора.
Светодиодные индикаторы отображают состояние
батареи следующим образом:
Статус
индикатора
Состояние батареи
Пять зеленых ламп
( ) горят.
Две батареи находятся в
заряженном состоянии.
2, 3,или 4 лампы
горят.
Чем больше горит ламп,
тем больше емкость
аккумулятора.
1 лампа
( ) горит.
По меньшей мере одна
батарея разряжена и должна
быть заряжена.
Other manuals for WG184E
2
This manual suits for next models
1
Table of contents
Languages:
Other Worx Trimmer manuals

Worx
Worx WG209E User manual

Worx
Worx WG255.1 User manual

Worx
Worx WG209E Installation manual

Worx
Worx WG263E.X User manual

Worx
Worx Nitro WG186E.1 Operation instructions

Worx
Worx WG163E User manual

Worx
Worx WG155 User manual

Worx
Worx WG261E User manual

Worx
Worx WG284E Installation manual

Worx
Worx WG168E User manual