X-ARMOUR XR-9500
10
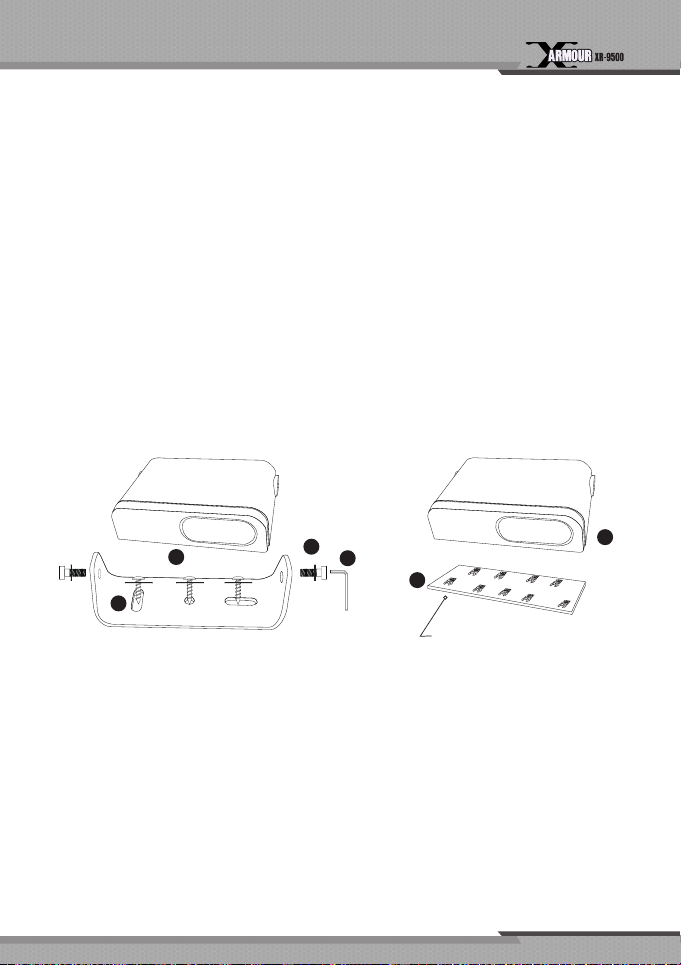
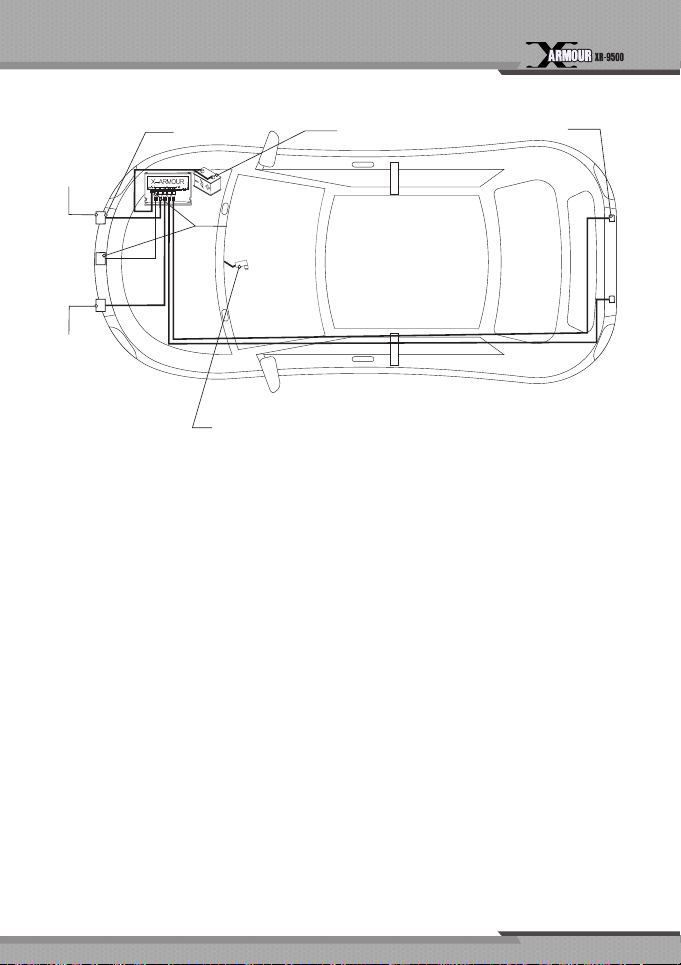
Receiver Installation
• Locateanappropriateplaceforinstallnottointerruptdriving.Usingthe3M
fastenertapesatthebottomtox.
• ConnecttheDC12Vpowerwithcigarcablesupplied.
Operation
Power-On/Off for control unit
Thecontrolunitrecognizesthecarbatterynoisewhenengineison.Whenever
starting an engine, the control unit automatically turns on and checking the battery
noise and Receiver’s wireless link signal. If there is no electronic noise or no link
signal from Receiver whenever checking, the control unit automatically turns off. If
thereisnoiseandlinksignal,itisoperatingmore2hourscontinued.Whenyounish
theinstall,pleasecheckifthe‘PWR’atthecontrolboardturnsonwhenengineison.
Whenitisin‘Laserdiffuser’mode,the‘PWR’showsredcolor.Whenitisin‘Parking
assistantmode’the‘PWR’showsbluecolor.
Power On for receiver unit
WheneverconnectingwithDC12Vpower,thereceiverunitturnson.Whenitis
connected with control unit wireless, it goes to laser diffuser mode with red light on.
If it is not connected with control unit wireless, it blinks red light slowly like one time
per second. If the wireless connection is not good condition, please put the control’s
antenna unrolled.
Receiver unit brightness control (Dim mode)
Pressing the ☼(BRIGHT/MODE)buttontotogglefourlevelsofbrightnessmode:
bright,dim,dimmeranddark.Whenitchangesthebrightness,itmakesbeepsound
onetime(dark),twotimes(dimmer),threetimes(dim),fourtimes(bright).Theselected
brightness mode is saved after power off.
Receiver unit mode change (Laser diffuser and Parking assistant modes)
There are laser diffuser mode and parking assistant mode. Pressing the ☼(BRIGHT/