X-Rite i1Display User manual

Quick Start Guide
Kurzanleitung
Manuel de démarrage
Guida introduttiva
Guía de inicio rápido
クィックスタートガイド
快速入门指南

Important Notices
CE Declaration
Manufacturer’s Name: X-Rite, Incorporated
Authorized Representative: X-Rite, Incorporated
Siemensstraße 12b • 63263 Neu-Isenburg • Germany
Phone:+49 (0) 61 02-79 57-0 • Fax: +49 (0) 61 02 -79 57-57
Model Name: i1Display
Directive(s) Conformance: EMC 2004/108/EC and LV 2006/95/EC
FEDERAL COMMUNICATIONS COMMISSION NOTICE
NOTE: This equipment has been tested and found to comply with the limits for a Class B digital device, pursuant to
Part 15 of the FCC Rules. These limits are designed to provide reasonable protection against harmful interference in a
residential installation. This equipment generates, uses and can radiate radio frequency energy and, if not installed and
used in accordance with the instructions, may cause harmful interference to radio communications. However, there is no
guarantee that interference will not occur in a particular installation. If this equipment does cause harmful interference to
radio or television reception, which can be determined by turning the equipment off and on, the user is encouraged to try
to correct the interference by one or more of the following measures:
• Reorient or relocate the receiving antenna.
• Increase the separation between the equipment and receiver.
• Connect the equipment into an outlet on a circuit different from that to which the receiver is connected.
• Consult the dealer or an experienced radio/TV technician for help.
INDUSTRY CANADA COMPLIANCE STATEMENT
This Class B digital apparatus complies with Canadian ICES-003.
Cet appareil numérique de la classe B est conforme à la norme NMB-003 du Canada.

EQUIPMENT INFORMATION
Use of this equipment in a manner other than that specified by X-Rite, Incorporated may compromise
design integrity and become unsafe.
WARNING: This instrument is not for use in explosive environments.
ADVERTENCIA – NO use este aparato en los ambientes explosivos.
AVVERTIMENTO – NON usare questo apparecchio in ambienti esplosivi.
WARNUNG: Das Gerät darf in einer explosiven Umgebung NICHT verwendet werden.
AVERTISSEMENT: Cet instrument ne doit pas être utilisé dans un environnement explosif.
RoHS/WEEE
X-Rite products meet the Restriction of Hazardous Substances (RoHS) Directive 2002/95/EC and
European Union – Waste Electrical and Electronic Equipment (WEEE) Directive 2002/96/EC. Please refer
to www.xrite.com for more information on X-Rite’s compliance with the RoHS/WEEE directives.
If this product is used in a manner not specified by the instruction, the safety protection provided by the device
may be impaired or become inoperable.
Unauthorized dismantling of the i1Display will void all warranty claims.
EN
!
Safety Information

3
2
1
Package Contents Lieferumfang Contenu du coffret Contenuto della confezione

Contenido del paquete パッケージ内容 包装内容
ES
JP
CN
1. i1Display 2. Quick Start Guide. 3. Software CD.
1. i1Display 2. Kurzanleitung 3. Software-CD
1. Instrument i1Display 2. Guide de démarrage 3. CD du logiciel
1. i1Display 2. Guida introduttiva 3. CD contenente il software
1. i1Display 2. Guía de inicio rápido 3. CD del software
1. i1Display ディスプレイ 2. 基本操作の手引き 3. ソフトウェアCD
1. i1Display 显示器 2. 快速入门指南 3. 软件光盘
EN
DE
FR
IT

Installation 1 Installation 1 Installation 1 Installazione 1 Instalación 1 インストール 1 安装 1

ES
JP
CN
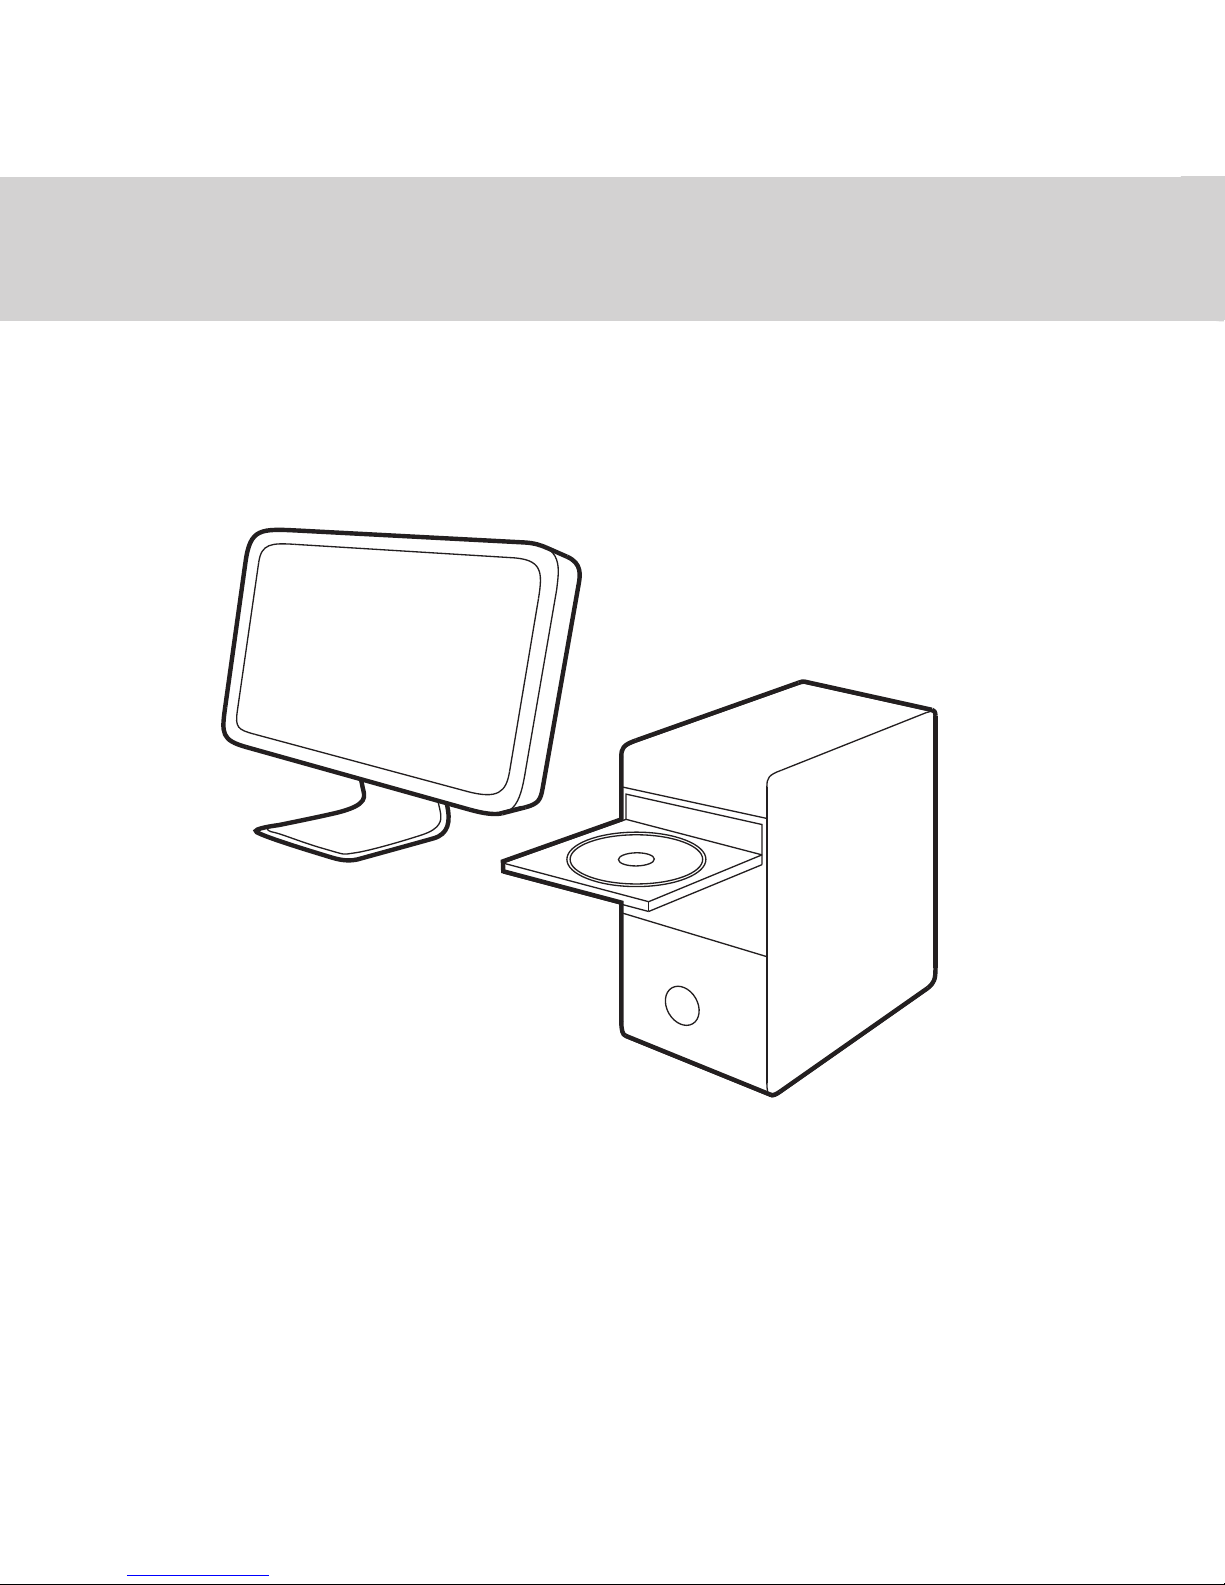
Install the software application from the CD onto your PC or Macintosh®
Please do not plug in the instrument USB cable to your computer until after you have installed the
software from the CD. Review all of the instructions in this Quick Start Guide before you start using your
new device. For more detailed information, please refer to contents on software CD.
Installieren Sie das Programm von der CD auf Ihren PC oder Macintosh®.
Bitte schließen Sie das Gerät erst an den Computer an, nachdem Sie das Programm von der CD installiert
haben. Lesen Sie diese Kurzanleitung sorgfältig, ehe Sie Ihr neues Gerät erstmalig verwenden. Weitere
Informationen finden Sie in der Dokumentation auf der Software-CD.
Installez l‘application sur votre ordinateur PC ou Macintosh® à l‘aide du CD fourni.
Reliez le câble USB de l‘instrument à votre ordinateur uniquement APRÈS avoir installé le logiciel figurant sur
le CD. Passez en revue toutes les instructions de ce guide avant d‘utiliser votre nouveau périphérique. Pour
de plus amples informations, reportez-vous aux informations contenues sur le CD du logiciel.
Inserire il CD e installare l‘applicazione software sul PC o sul Macintosh®.
Non collegare il cavo USB dello strumento al computer finché non è stato installato il software dal CD.
Leggere tutte le istruzioni di questa Guida introduttiva prima di iniziare a utilizzare il dispositivo. Per infor-
mazioni più dettagliate vedere il contenuto del CD del software.
Instale la aplicación del software a partir del CD en su PC o Macintosh®.
No conecte el cable USB del instrumento a la computadora antes de instalar el software a partir del CD.
Revise todas las instrucciones de esta guía de inicio rápido antes de empezar a usar su nuevo dispositivo.
Para obtener información más detallada, consulte el contenido del CD del software.
CDからソフトウェアのアプリケーションをPCまたはMacintosh® にインストールします。
CDからソフトウェアをインストールするまで、装置のUSBケーブルをコンピュータに接続しないでくだ
さい。新しい装置を使用する前に、この基本操作の手引きにある手順をお読みください。 詳細は同梱ソ
フトウェアCDをご参照ください。
通过光盘将该软件应用程序安装于 PC 或 Macintosh®。
安装光盘中的软件之前,切勿将仪器的 USB 电缆连接至计算机。开始使用新设备前,请先阅读本《快速入
门指南》中的所有说明。 若需更多详细信息,请参阅软件光盘内容。
EN
DE
FR
IT
Installation 1 Installation 1 Installation 1 Installazione 1 Instalación 1 インストール 1 安装 1

Installation 2 Installation 2 Installation 2 Installazione 2 Instalación 2 インストール 2 安装 2

ES
JP
CN
After you have completed the software installation process, attach the i1Display into your
computer’s USB port.
Bitte schließen Sie nach Abschluss der Installation das i1Display an Ihren Computer an.
Une fois le processus d‘installation du logiciel terminé, connectez l‘instrument i1Display au port USB de
votre ordinateur.
Dopo aver completato il processo d‘installazione del software, collegare il i1Display alla porta USB
del computer.
Luego de completar el proceso de instalación del software, conecte el instrumento i1Display al puerto USB
de su computadora.
ソフトウェアのインストールが終了後、i1DisplayをコンピュータのUSBポートに接続してください。
完成软件安装程序后,将 i1Display 接入到计算机的 USB 接口。
EN
DE
FR
IT
Installation 2 Installation 2 Installation 2 Installazione 2 Instalación 2 インストール 2 安装 2

Overview 1 Übersicht 1 Présentation 1 Cenni generali 1 Visión general 1 概要 1 概览 1
12

ES
JP
CN
1. Ambient Diffuser Arm. 2. Ambient Diffuser
1. Lichtdiffuserhalter 2. Lichtdiffuser
1. Bras du diffuseur ambiant 2. Diffuseur ambiant
1. Braccio del diffusore della luce ambientale 2. Diffusore della luce ambientale
1. Brazo del difusor de la luz ambiente 2. Difusor de la luz ambiente
1. 環境光拡散アーム 2. 環境光拡散
1. 周围光源扩散器机臂 2. 周围光源扩散器
EN
DE
FR
IT
Overview 1 Übersicht 1 Présentation 1 Cenni generali 1 Visión general 1 概要 1 概览 1

Overview 2 Übersicht 2 Présentation 2 Cenni generali 2 Visión general 2 概要 2 概览 2

ES
JP
CN
Ambient diffuser arm snaps into place over measurement optics. Be sure to lift up on ambient diffuser
arm before attempting to rotate into different measurement positions.
Lichtdiffuserhalter rastet über der Messoptik ein. Lichtdiffuserhalter muss angehoben werden, ehe er in die
verschiedenen Messpositionen gebracht werden kann.
Le bras du diffuseur ambiant s‘enclenche sur l‘optique de mesure. Veillez à soulever le bras du diffuseur
ambiant avant de tenter de le faire pivoter dans d‘autres positions de mesure.
Il braccio del diffusore della luce ambientale si aggancia in posizione sopra le ottiche di misurazione. Prima
di ruotare lo strumento in posizioni di misurazione differenti assicurarsi di aver sollevato il braccio del diffu-
sore della luce ambientale.
El brazo del difusor de la luz ambiente se encaja en su lugar sobre la óptica de medición. Asegúrese de levan-
tar el brazo difusor de la luz ambiente antes de intentar girarlo en sus posiciones de medición distintas.
環境光拡散アームは、測定オプチクス上にカチッとはまるように取り付けます。環境光拡散アームを他
の測定位置に回転する際は、必ず上に持ち上げてから回転してください。
周围光源扩散器机臂扣在测量镜头之上。尝试旋转周围光源扩散器的位置前,请确保向上提起周围光源扩
散器机臂。
EN
DE
FR
IT
Overview 2 Übersicht 2 Présentation 2 Cenni generali 2 Visión general 2 概要 2 概览 2

Overview 3 Übersicht 3 Présentation 3 Cenni generali 3 Visión general 3 概要 3 概览 3
1 2
3

ES
JP
CN
Measuring Modes
1. Ambient Light Measurement 2. Emissive Light Measurement 3. Projector Measurement
Messmodi
1. Umgebungslichtmessung 2. Emissionslichtmessung 3. Projektormessung
Modes de mesure
1. Mesure de la lumière ambiante 2. Mesure de la lumière émissive 3. Mesure du projecteur
Modalità di misurazione
1. Misurazione Luce ambientale 2. Misurazione Luce d‘emissione 3. Misurazione Proiettore
Modos de medición
1. Medición de la luz ambiente 2. Medición de la luz emisiva 3. Medición del proyector
測定モード
1. 環境光の測定 2. モニタ放射光の測定 3. プロジェクタの測定
测量模式
1. 周围光源测量 2. 放射光测量 3. 放映机测量
EN
DE
FR
IT
Overview 3 Übersicht 3 Présentation 3 Cenni generali 3 Visión general 3 概要 3 概览 3

Monitor measurement 1 Monitormessung 1 Mesure de moniteur 1 Misurazione del monitor 1 Medición del monitor 1 モニタ測定 1 显示器测量 1
1
2
3

ES
JP
CN
For display measurements: 1. Lift up on ambient diffuser arm. 2. Rotate ambient diffuser arm to rear
position. 3. Ambient diffuser arm will snap into place when located in rear position.
Monitormessung: 1. Lichtdiffuserhalter anheben. 2. Lichtdiffuserhalter nach hinten drehen.
3. Lichtdiffuserhalter rastet ein, wenn er richtig positioniert ist.
Pour les mesures d‘écran : 1. Soulevez le bras du diffuseur ambiant. 2. Faites pivoter le bras du diffuseur
ambiant en position arrière. 3. Le bras du diffuseur ambiant s‘enclenche lorsqu‘il se trouve en position
arrière.
Per misurazioni di uno schermo: 1. Sollevare il braccio del diffusore della luce ambientale. 2. Ruotare il
braccio del diffusore della luce ambientale in posizione posteriore. 3. Il braccio del diffusore della luce
ambientale si aggancia quando collocato in posizione posteriore.
En el caso de las mediciones de pantallas: 1. Levante el brazo del difusor de la luz ambiente. 2. Gire el
brazo del difusor de la luz ambiente a su posición trasera. 3. El brazo del difusor de la luz ambiente se enca-
ja en su lugar cuando se encuentra en su posición trasera.
ディスプレイ測定: 1. 環境光拡散アームを持ち上げます。 2. 環境光拡散アームを後方位置に回転させ
ます。 3. 環境光拡散アームは、後方位置にカチッとはまるように取り付けます。
对于显示器测量: 1. 提起周围光源扩散器机臂。 2. 旋转周围光源扩散器机臂至后端位置。
3. 周围光源扩散器机臂将卡入后端位置。
EN
DE
FR
IT
Monitor measurement 1 Monitormessung 1 Mesure de moniteur 1 Misurazione del monitor 1 Medición del monitor 1 モニタ測定 1 显示器测量 1

Monitor measurement 2 Monitormessung 2 Mesure de moniteur 2 Misurazione del monitor 2 Medición del monitor 2 モニタ測定 2 显示器测量 2
1
2

ES
JP
CN
To adjust the position of the counter weight, depress the button on the counter weight and slide counter
weight simultaneously to desired location.
Position kann mit Taste auf dem Gegengewicht angepasst werden. Taste drücken und halten, und
Gegengewicht in gewünschte Position schieben.
Pour régler la position du contrepoids, appuyez sur le bouton situé sur le contrepoids tout en faisant cou-
lisser le contrepoids à l‘emplacement désiré.
Per regolare la posizione del contrappeso, premere il pulsante sul contrappeso e contemporaneamente farlo
scorrere nella posizione desiderata.
Para ajustar la posición del contrapeso, oprima el botón en el contrapeso y deslícelo al mismo tiempo a la
ubicación deseada.
バランスウェイト(錘)の位置を調整するには、バランスウェイトのボタンを押しながら同時にバラン
スウェイトを動かします。
要调整平衡锤的位置,请下压平衡锤上的按钮并同时将平衡锤滑动至所需位置。
EN
DE
FR
IT
Monitor measurement 2 Monitormessung 2 Mesure de moniteur 2 Misurazione del monitor 2 Medición del monitor 2 モニタ測定 2 显示器测量 2

Monitor measurement 3 Monitormessung 3 Mesure de moniteur 3 Misurazione del monitor 3 Medición del monitor 3 モニタ測定 3 显示器测量 3
Other manuals for i1Display
1
This manual suits for next models
1
Table of contents
Other X-Rite Test Equipment manuals