ENGLISH
3
1. Getting started
Copyright / Trademark
Thanks for your purchasing XCube X-405.
We’re very sure that X-405 would sufficiently
satisfy you and make your life more exciting.
This manual will help you safely to use the
product.
Please be sure to check this manual carefully
before the usage.
1. Copyright
XCube is the registered trademark of New Media
Entertainment (NME),Inc in USA.
This is for home use only and cannot be used
for business purpose.
New Media Entertainment(NME),Inc. has
all the rights of trademarks and intellectual
property of this manual.
It is prohibited to distribute this manual in part
or whole parts illegally.
All software, audio, video and game which
have an intellectual property is protected by
the copyright.
We recommend Users to register our
homepage, www.xcubedigital.com, which
provides all information of company, products
and other related technical information.
All contents included in this User Manual are
subject to change without any prior notice for
improving features or according to changing
specification.
Precaution
Be fully aware of this manual for your safety.
Do not use this player for other purpose.
Do not attempt to disassemble or modify the
player by yourself.
If happens, we don’t have any responsibility
for the warranty.
Pay attention to USB cable direction for con-
necting to PC.
The PC or the player would be damaged
if you connect the USB cable with wrong
direction. Never use damaged USB cable.
Do not place any heavy device on the player.
Do not drop the player in the water.
It can be classified as flooded and the war-
ranty will be unacceptable.
Do not leave the player in hot or humid
area and do not touch the player with wet
hands. Do not use water and the chemical to
clean the player but just clean up the player
with soft clean clothes.
Keep out of sunlight directly and extreme
heat and cold, because it may occur player 's
malfunctions.
Do not be exposed in high volume(over 25
level) continuously, it may injure your hearing.
Be careful of backing up your data.
The data in the player may be deleted during
usage.
We are not responsible of any damage or the
lost which you didn’t back up on your PC.
Make sure Service Center doesn't have any
responsibility of backing data up while servic-
ing.
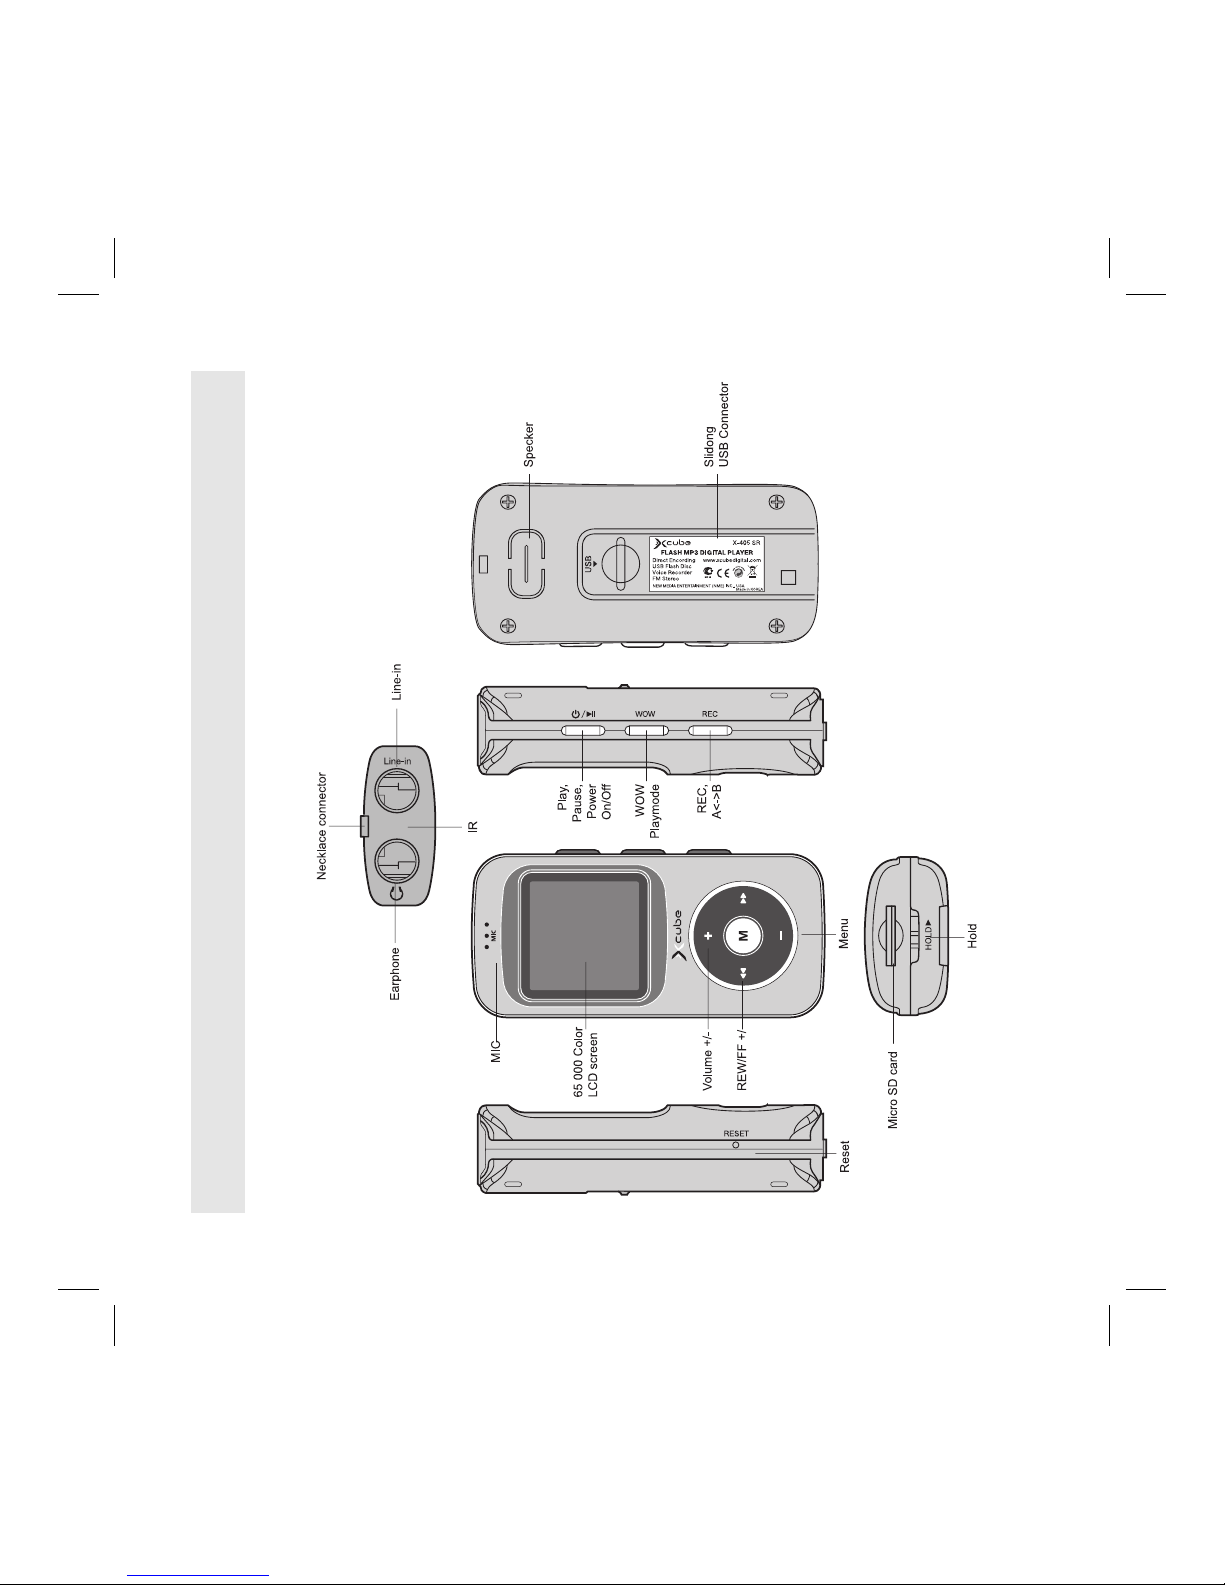
Features
1.1' 65,000 Color full Graphic LCD
1.1’ of 65,000 Color full graphic LCD(8 lines)
Built-in rechargeable Li-Polymer battery
Quick charge to 2~3hrs and playback approx.
26hrs
405IM.indd 3405IM.indd 3 23.10.2006 12:30:3923.10.2006 12:30:39