manuals.online logo
Brands
  1. Home
  2. •
  3. Brands
  4. •
  5. Xerox
  6. •
  7. All In One Printer
  8. •
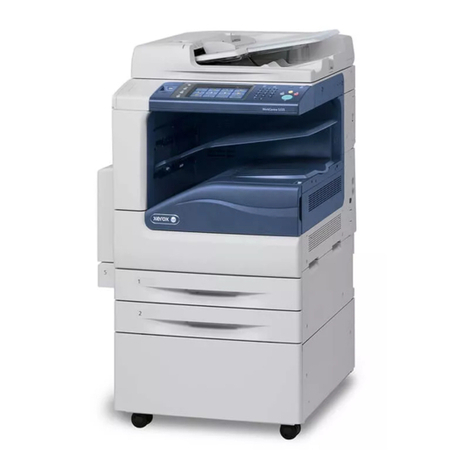
  9. Xerox WorkCentre Pro 255 User manual

Xerox WorkCentre Pro 255 User manual

This manual suits for next models

6

Other Xerox All In One Printer manuals

Xerox WorkCentre 6655 Service manual

Xerox

Xerox WorkCentre 6655 Service manual

Xerox B205 Operating manual

Xerox

Xerox B205 Operating manual

Xerox WorkCentre 5019 User manual

Xerox

Xerox WorkCentre 5019 User manual

Xerox B205 Operating manual

Xerox

Xerox B205 Operating manual

Xerox 3210 - workcentre b/w laser User manual

Xerox

Xerox 3210 - workcentre b/w laser User manual

Xerox FaxCentre F110 User manual

Xerox

Xerox FaxCentre F110 User manual

Xerox WorkCentre M24 Color User manual

Xerox

Xerox WorkCentre M24 Color User manual

Xerox Phaser 6115 MFP User manual

Xerox

Xerox Phaser 6115 MFP User manual

Xerox 220 User manual

Xerox

Xerox 220 User manual

Xerox WORKCENTRE PE 220 User manual

Xerox

Xerox WORKCENTRE PE 220 User manual

Xerox Phaser 6115 MFP User manual

Xerox

Xerox Phaser 6115 MFP User manual

Xerox WORKCENTRE 7755 Operating manual

Xerox

Xerox WORKCENTRE 7755 Operating manual

Xerox WORKCENTRE 7755 Operating manual

Xerox

Xerox WORKCENTRE 7755 Operating manual

Xerox D95 User manual

Xerox

Xerox D95 User manual

Xerox WORKCENTRE 7120 User manual

Xerox

Xerox WORKCENTRE 7120 User manual

Xerox Phaser 6115 MFP User manual

Xerox

Xerox Phaser 6115 MFP User manual

Xerox VersaLink C505 User manual

Xerox

Xerox VersaLink C505 User manual

Xerox B225 User manual

Xerox

Xerox B225 User manual

Xerox WORKCENTRE C2424 Operating instructions

Xerox

Xerox WORKCENTRE C2424 Operating instructions

Xerox WorkCentre 6015NI User manual

Xerox

Xerox WorkCentre 6015NI User manual

Xerox PHASER 6121MFP User manual

Xerox

Xerox PHASER 6121MFP User manual

Xerox WorkCentre M24 Color User manual

Xerox

Xerox WorkCentre M24 Color User manual

Xerox DocuMate 700 User manual

Xerox

Xerox DocuMate 700 User manual

Xerox 3635MFP - Phaser B/W Laser User manual

Xerox

Xerox 3635MFP - Phaser B/W Laser User manual

Popular All In One Printer manuals by other brands

Brother MFC-J220 Basic user's guide

Brother

Brother MFC-J220 Basic user's guide

Brother MFC-8510DN Basic user's guide

Brother

Brother MFC-8510DN Basic user's guide

Ricoh Aficio FX200 Service training

Ricoh

Ricoh Aficio FX200 Service training

Olivetti d-Copia 16W Operation manual

Olivetti

Olivetti d-Copia 16W Operation manual

Konica Minolta bizhub C3850FS user guide

Konica Minolta

Konica Minolta bizhub C3850FS user guide

Konica Minolta bizhub 758 manual

Konica Minolta

Konica Minolta bizhub 758 manual

Lexmark MX310 Series Service manual

Lexmark

Lexmark MX310 Series Service manual

Ricoh Aficio 3224C operating instructions

Ricoh

Ricoh Aficio 3224C operating instructions

Sagem MF 3625 user manual

Sagem

Sagem MF 3625 user manual

Epson Epson Stylus NX530 quick guide

Epson

Epson Epson Stylus NX530 quick guide

Brother MFC9800 - MFC 9800 B/W Laser owner's manual

Brother

Brother MFC9800 - MFC 9800 B/W Laser owner's manual

Konica Minolta 7033 instruction manual

Konica Minolta

Konica Minolta 7033 instruction manual

Ricoh Aficio MP 161F operating instructions

Ricoh

Ricoh Aficio MP 161F operating instructions

Epson WorkForce WF-2510 Basic guide

Epson

Epson WorkForce WF-2510 Basic guide

Epson Stylus Scan 2000 Product information guide

Epson

Epson Stylus Scan 2000 Product information guide

Epson PictureMate Snap PM 240 Start here

Epson

Epson PictureMate Snap PM 240 Start here

Brother MFC-J430w user guide

Brother

Brother MFC-J430w user guide

Konica Minolta BIZHUB 558 Quick reference guide

Konica Minolta

Konica Minolta BIZHUB 558 Quick reference guide

manuals.online logo
manuals.online logoBrands
  • About & Mission
  • Contact us
  • Privacy Policy
  • Terms and Conditions

Copyright 2025 Manuals.Online. All Rights Reserved.

Page 1
Microsoft Windows (NetBEUI) Peer-to-Peer Networks Quick Install Card
Xerox Document Centre 240/255/265 LP/ST
b) On the keypad enter 1111 or the
current password. Press the Enter
button when finished. If your printer is
an ST model press the Go to Tools
button, otherwise skip to the next step.
c) The Touch Screen will be used for the
remainder of the data entry.
3. Enable Microsoft Network printing.
a) Press the Connectivity and Network
Setup button.
b) At the next screen, press the Network
Setup button.
4. Enable the Protocol and Media.
a) At the next screen, press the
Microsoft Networking button.
b) At the next screen, press the
Transport and Media button.
c) At the next screen, press the Enable
button to enable the Microsoft Network
protocols.
d) Once enabled the Physical Media
portion of the screen will appear. Press
the corresponding button to select one
of the following NetBEUI or Ethernet,
NetBEUI/Token Ring. After making
your selection press Save.
5. Assign the Workgroup and Host Names
a) You will be returned to the previous
screen, press the Workgroup and
Host button.
b) At the next screen, press the
Workgroup Name button. Using the
Touch Screen keys, enter the name of
the workgroup in which you want the
printer to appear then press Save.
c) You will be returned to the previous
screen. Press the SMB Host Name
button. Using the touch panel keys,
enter the desired text for this item then
press Save.
d) OPTIONAL STEP: Press the SMB
Host Description button, enter the
desired text then press Save. You will
be returned to the previous screen.
e) Press Save again to return to the
previous screen.
6. Assign a Printer Name and Description
a) Press the Printer Description button.
b) Press the Printer Name button, using
the touch panel keys, enter the
desired text for this item then press
Save. Press Save again to return to
the previous screen.
Before You Start
If your printer is equipped with a Token Ring
interface, use the Token Ring Quick Install
Card supplied in this Quick Install Card set to
set the Ring Speed and Source Routing settings
for your environment.
.
Record the following information:
Network Interface Type ___________________
Workgroup Name _______________________
SMB Host Name ________________________
Printer Name ___________________________
OPTIONAL INFORMATION:
SMB Host Description ____________________
Printer Description _______________________
Go to the printer and...
1. Connect your Document Centre to the net-
work with the appropriate cabling.
2. Enter the Tools pathway
a) Press the Access () button.
For assistance, contact your local Xerox Customer Support Center:
USA: 1-800-821-2797 Canada: 1-800-939-3769
Page 2
Microsoft Windows (NetBEUI) Peer-to-Peer Networks Quick Install Card
Xerox Document Centre 240/255/265 LP/ST
next section of this procedure called Go to
the workstations and.
Go to the workstations and...
11. Verify that the NetBEUI protocol is loaded
(ALL Windows 3.11 or greater versions).
12. Use the CentreWare Network Services
CD-ROM (CD-ROM 2) to install print
drivers on a Windows-based workstation.
Details for this are found in the document
supplied with your printer entitled Getting
Started with Print and Fax Services.
13. On the Configuration Report review the
NetBIOS: area and note the Workgroup,
Host Name, and Printer Name.
Windows for Workgroups Users
•Open the Control Panel and double-click
the Printers icon.
•Select the printer driver you just installed
and click Connect.
•Select an available port and click Network.
•Double-click the name of the WorkGroup for
the printer.
•Double-click the Host Name of the printer.
•Click once on the Printer Name then click
OK.
Windows 95, Windows 98 and Windows
NT 4.X Workstation Users
•Click the Start button and select Settings.
•From the cascade menu select Printers.
•Select a printer with the right mouse button.
•Select the Properties entry in the cascade
menu.
•Select the Details tab on the Properties
dialog.
•Click the Add Port button and browse to the
Workgroup.
•Double-click the name of the WorkGroup for
the printer as shown on the Configuration
Report.
•Double-click the Host Name of the printer as
shown on the Configuration Report.
•Click once on the Printer Name then click
OK.
14. Open an application and print a test page
to verify operation.
15. If your print job does not print, refer to the
Troubleshooting section of the Network
Installation and Troubleshooting Guide
to solve the problem.
c) OPTIONAL STEP: Press the Printer
Description button, using the Touch
Screen keys, enter the desired text for
this item then press Save.
d) Press the Connections button.
7. Set Maximum Connections and Timeout
a) Touch the Maximum Connections
soft button on the touch screen and on
the keypad enter the desired
maximum connection number
between 1 and 30. It is recommended
that this value should be set at the
default.
b) Touch the Connection Timeout soft
button on the Touch Screen. On the
keypad enter the desired number of
second between 0 and 9999. Press
Save to exit the Connections Screen.
c) Press the Exit Tools button.
8. Wait a MINIMUM of 7 minutes for the
printer to reset.
9. Obtain a Configuration Report from the
printer to use in the remainder of the
installation.
10. Fromthedocumentationpackagesupplied
with your printer, retrieve the CentreWare
Network Services CD-ROM and the
document entitled Getting Started with
Print and Fax Services. Proceed to the