XM XMP3 User manual

Car Kit Installation Guide
TM

2 3
Welcome to XM
Thank you for purchasing the XMp3™ Radio Car Kit. This guide walks you through the
installation of your new car kit and helps get you set up and listening fast.
What’s in the box?
car cradle
power adapter swivel mountvent mount swivel mount
preparation kit
remote control
audio cable car antenna
IntroductionTable of Contents
Introduction . . . . . . . . . . . . . . . . . .3
Welcome to XM . . . . . . . . . . . . . . . . . . . . . . . . . 3
What’s in the box?. . . . . . . . . . . . . . . . . . . . . . . 3
Remote control functions . . . . . . . . . . . . . . . 4
Vehicle Installation . . . . . . . . . . . 5
Step 1: Plan the installation. . . . . . . . . . . . . 6
Step 2: Mount the XM car antenna . . . . . . 7
Step 3: Install the swivel or vent mount . 10
Step 4: Connect your XMp3 radio. . . . . . . 12
Step 5: Turning on your XMp3 radio. . . . . 14
Find an FM frequency.. . . . . . . . . . . . . . . . . . 15
Set the line out level. . . . . . . . . . . . . . . . . . . . 17
Aim antenna for best reception. . . . . . . . . 18
Automatic power. . . . . . . . . . . . . . . . . . . . . . . 19
Power o.. . . . . . . . . . . . . . . . . . . . . . . . . . . . . . 20
Troubleshooting. . . . . . . . . . . . . .21
Product Specs, FCC and IC info,
Warranty . . . . . . . . . . . . . . . . . . . .25
Product Specications. . . . . . . . . . . . . . . . . . 26
FCC and IC Statement . . . . . . . . . . . . . . . . . . 27
Warranty. . . . . . . . . . . . . . . . . . . . . . . . . . . . . . . 28
Owner’s record. . . . . . . . . . . . . . . . . . . . . . . . . 30
Patent information . . . . . . . . . . . . . . . . . . . . . 31
Environmental information. . . . . . . . . . . . . 31

4 5
Introduction
Vehicle Installation
Remote Control functions
30-Minute Replay Buttons
Pause and replay up to 30
minutes of live XM broadcast.
Power Button
Record
Record a song or channel.
Arrow Buttons
Select menu entries,
change channels.
Options
TuneSelect, bookmarks,
favourites, auto recording,
and view programs for
channel.
Select/XM Button
Press to confirm selections.
Back
Return to previous screen.
Press and hold to return
to the previous channel.
Jump
Switches between current
channel and previous channel.
Menu
Go to My Music Library,
access advanced features
and configuration options
or info extras information.
Number Keys
Enter a channel directly
or select your favourite
channels.
+ and -
Change channels or control
volume for audio system
(sold separately).
Mute
Silences live, saved songs,
and replayed XM content.

6 7
Step 2: Mount the XM Car Antenna
1. Place the car cradle on the dashboard. You will connect it to the swivel or vent
mount later on.
2. Select a suitable location on the outside of your car for the XM car antenna.
For example, on the roof near the windshield or rear window.
TIP! When selecting a location, consider any accessories that your car has, such as a
luggage rack, and how often you use the accessories. Select a location where the XM car
antenna won’t be covered or blocked as this could interfere with signal reception.
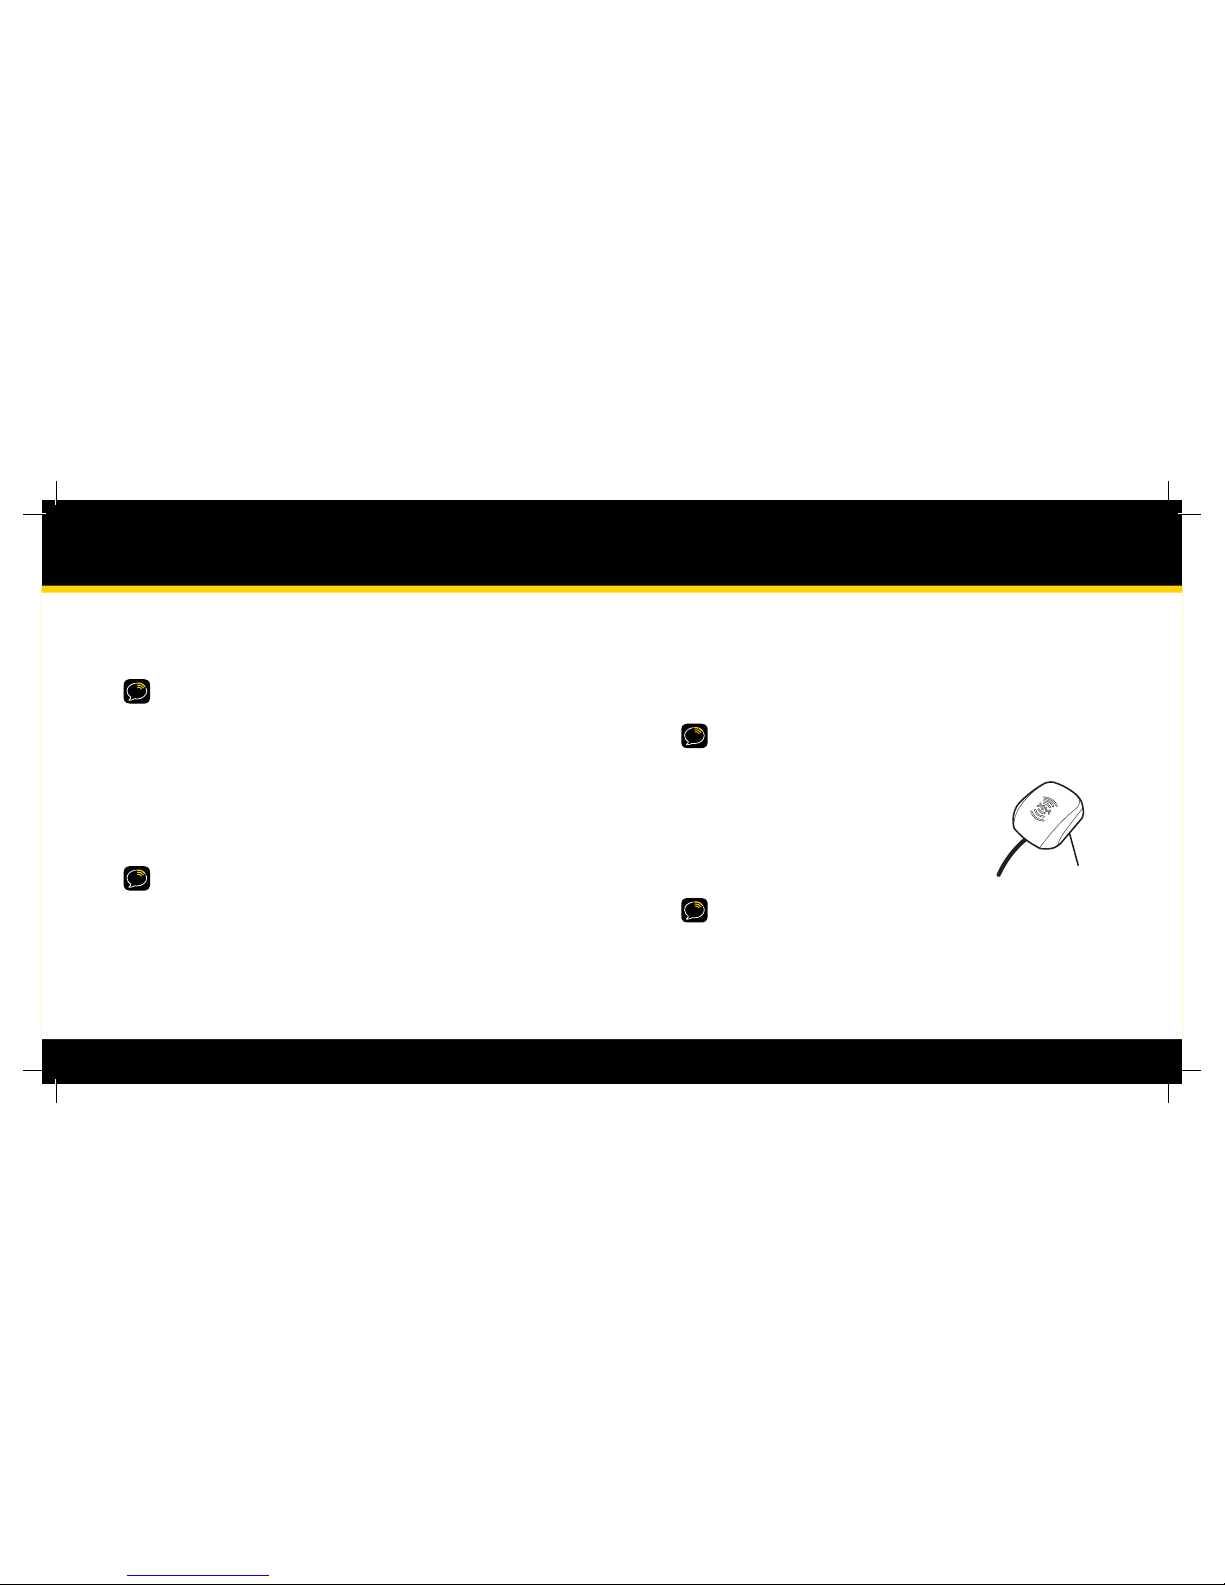
3. Gently place the XM car antenna in the location
you selected. The antenna has a strong magnet
that sticks to any metallic surface.
TIP! Make sure the door does not pinch the cable when closed.
TIP! Always cross the weather seals at the lowest point possible to reduce water leaks.
TIP! Always hand wash or use brushless or touch-free car washes.
6
Vehicle Installation
Step 1: Plan the Installation
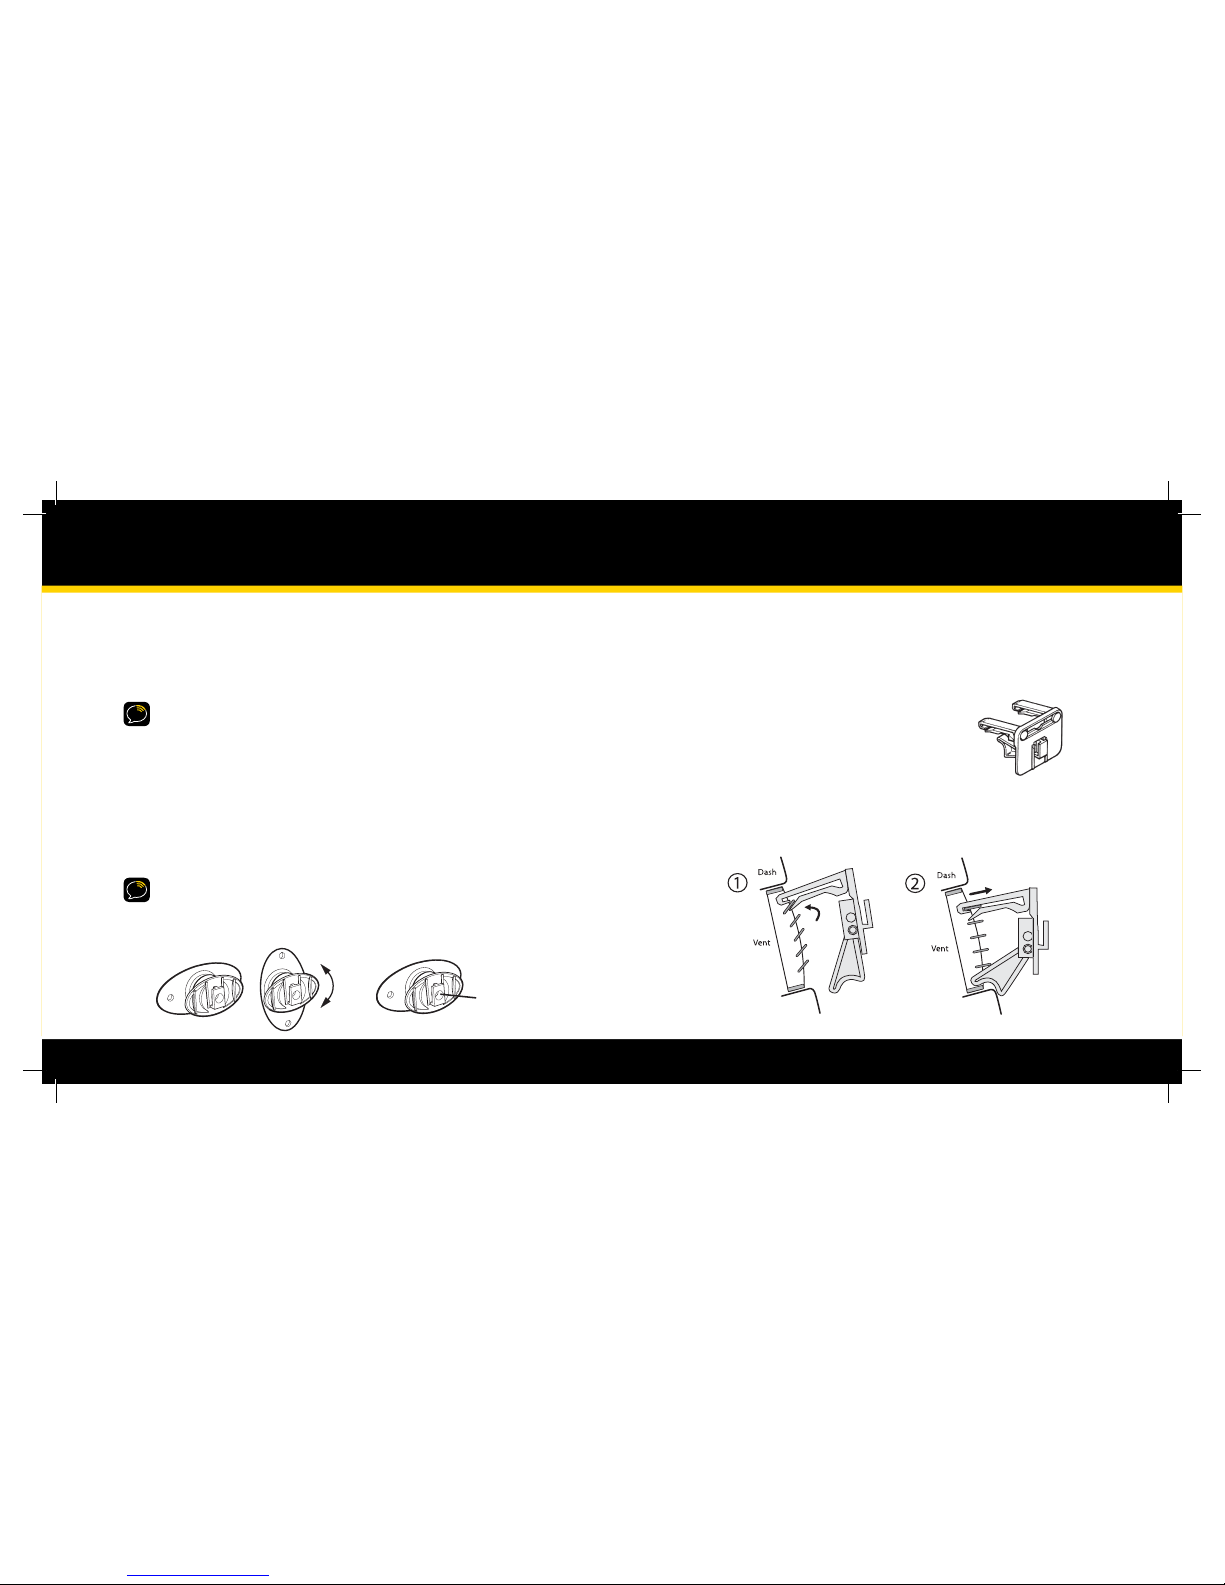
Select an area on the dashboard you want to place the car cradle. This is where
you will install the swivel or vent mount.
TIP! An adhesive pad is used to mount the swivel mount to the dashboard. The adhesive
requires 24 hours to cure. Make sure you provide yourself the proper amount of time to
install your car kit. See Step 3: Install the Swivel or Vent Mount for more information.
Determine which connection method you plan to use in order to receive the
XM signal:
Audio Cable (Included)
XM SureConnect (sold separately)
Cassette Adapter (sold separately)
FM Direct Adapter (sold separately)
WARNINGS:
When using this product, it is always important to keep your eyes on the road and hands
on the wheel. Not doing so could result in personal injury, death, and/or damage to your
XMp3 radio, accessories, and/or to your vehicle or other property.
Your XMp3 radio should be placed in your vehicle where it will not interfere with
the function of safety features, e.g., deployment of airbags. Failure to correctly place
your XMp3 radio may result in injury to you or others, if the unit becomes detached
during an accident and/or obstructs the deployment of an airbag.
1.
2.
•
•
•
•
•
•
Magnet

8 9
Next, route the cable from the rear window molding into the weather stripping
around the trunk opening. Run the cable into the trunk and then into the rear
passenger compartment. Route the cable through the main compartment by tucking
it under the door jam trim or under the carpet and up to the radio.
5
5 Make sure any excess cable does not interfere with vehicle operations.
TIP! Always be careful to include enough slack in your cable to accommodate open doors
or trunk lids. Use things typically found around the home, like electrical tape, to secure
cables in areas so that hinges do not pinch the cable with the door. Hide any excess cable in
the trim.
•
4.
4. Route the cable:
• If you placed the XM car antenna on the front of the vehicle, route the cable
across the top of the windshield. Gently pry up the rubber weather seal
and tuck the cable underneath. Follow the weather seal down the side
of the windshield to the door jam. Tuck the cable into the door jam and
then under the oormat to the car cradle.
• If you placed the XM car antenna on the rear of the vehicle, route the cable
under the weather seal of the rear window. Tuck the antenna cable around
and down the window to the lowest point, just above the trunk.
Vehicle Installation

10 11
Step 3: Install the swivel or vent mount
You can use either the included swivel mount or vent mount for your XMp3 radio depending
on your vehicle interior.
Installing the swivel mount
CAUTION! The adhesive used with the swivel mount may make it dicult to remove. Do not
install this mount on leather surfaces and make sure the air temperature is at least 60°F (15°C)
during installation.
1
1 Locate a at surface for the mount. Make sure there is ample room for the XM
cradle and radio when installed.
2
2 Clean the surface with the preparation kit and let it dry thoroughly.
3
Peel o the adhesive liner. Position, press, and hold the swivel mount in place
for 30 seconds.
IMPORTANT! Let the adhesive cure for 24 hours before attaching the XM cradle and
radio to the mount.
4
Turn the swivel to accommodate the XM cradle and radio. Adjust the tension
via the center screw.
Vehicle Installation
You can adjust this screw
to adjust the tension of the
mount with a screwdriver.
To remove, carefully lift the adhesive pad with your ngers or a spoon. Warming the pad with a
hair dryer for several minutes will help soften the adhesive.
You can reinstall the swivel mount using the extra adhesive pad.
Installing the vent mount
1
1 Locate a vent with horizontal slats
sturdy enough to hold your XM cradle and radio.
2
2 Adjust the clamps to t your vent.
3
3Snap the mount onto the vent.
To remove, push the mount into the vent, then lift up.

12 13
lineout 5VDC
antenna
lineout 5VDC
antenna
Step 4: Connect your XMp3 radio.
1
1 Plug the antenna jack into antenna on the cradle.
2
2 Plug the power adapter jack into 5V DC on the cradle.
3
3Plug the audio adapter jack into line out on the cradle.
• Use the audio cable (included) if your vehicle has an audio input jack.
• Use the cassette adapter (sold separately) if your vehicle has a built in
cassette player
4
4Insert mount into the cradle then slide it up until
it feels tightly in place.
5
5Insert your XMp3 radio into the cradle.
NOTE! If your car does not contain a cassette player or an audio input, you will need to
use either the XM SureConnect (sold separately) or the FM Direct (sold separately).
Vehicle Installation
XM Car Antenna
Audio Cable or
Cassette Adapter
Configuration
SureConnect Configuration
XM Car Antenna
Power Adapter
Power Adapter
XMp3 Car Cradle
XMp3 Car Cradle
Audio Cable
(included)
Cassette Adapter
(sold separately)
XM SureConnect
(sold separately)
lineout 5VDC
antenna

14 15
• XM SureConnect (sold separately): You can listen to your XMp3 radio through your
car stereo by using the XMp3 car cradle’s built-in FM modulator and the XM
SureConnect. Simply nd an unused FM frequency on the stereo and set your XMp3
radio to transmit on that same frequency. Refer to Find an FM frequency in your user
guide for more information.
• FM Direct (sold separately): This option directly connects the XMp3 car
cradle to your car’s audio system and antenna. A professional installation is
recommended if you choose to use this method. Professional installation can help
improve your XMp3 radio’s reception and signicantly reduce the visibility of wires.
To learn more, check with the retailer where you bought your radio or go to
xmradio.ca/accessories
Step 5: Turning on your XMp3 radio.
1
1 Turn on your car radio.
2
2 Plug in the audio cable or insert the cassette adapter into your car stereo if
applicable.
3
3Turn on your XMp3 radio.
NOTE: You may experience a brief delay while your XMp3 radio powers up. If you press
the power button during this time, you will see a“Please Wait”message.
Vehicle Installation
Find an FM frequency
(When using the XM SureConnect or FM Direct.)
If you are using the SureConnect or FM Direct to transmit audio, you must set the
FM frequency on both your XMp3 radio and your car radio.
1
1 Select menu →Settings → Vehicle Settings → Frequency Finder.
2
2 Your XMp3 radio automatically scans for all available FM frequencies.

16 17
3
3 You’ll see a list of all the frequencies. Turn the control wheel to highlight a
frequency, then press the XM button to select it.
4
4 Set your car radio to the frequency selected.
TIP! The best FM frequency to use is displayed at the top of the list. It is recommended
to choose that frequency. However, if you are not satised with the sound quality,
select a dierent FM frequency within the list (or select View All Frequencies to see 100
frequencies), press the XM button on your XMp3 radio, and tune your car stereo to that
frequency.
Set the line out level
To connect the line out on the XMp3 car cradle directly to your car’s stereo to transmit
audio, you can:
• Use your car stereo’s audio input called“Aux In”(cable included).
• Use a cassette adapter (sold separately).
Either of these methods will give you the best audio quality. When using either of these
methods to transmit audio through your car’s stereo, you can adjust the XMp3 radio’s
audio level to match other audio sources.
1
1 Press menu → Settings → Line Out level
2
2 Spin the wheel to increase or decrease the level.
3
3 Press the XM button.
Do not use the Line Out Level menu item as a volume control; use the volume control on
your car stereo instead. Line Out Level is used to adjust the volume level to match other
audio sources (your CD player, other FM stations, or MP3 player).
Vehicle Installation

18 19
Aim XM car antenna for best reception
For best reception, your XM car antenna should have an unobstructed view of the XM
satellites in the southern sky. In large cities, XM has a network of ground repeaters to
help increase the signal coverage.
Your XMp3 radio can help you aim the XM car antenna for
best reception.
1
1 Select menu →Settings →Antenna Aiming.
2
2 The Satellite and Terrestrial bars show the
level of your current signal.
3
3 Move around your antenna if you are having
trouble getting a signal.
Automatic power
Usually, your XMp3 radio turns on automatically when it is plugged in and receiving
power. You can change this so you must manually turn the radio on/o each time.
1
1 Press menu →Settings →Vehicle Settings →Automatic Power.
2
2 Press the XM button to toggle On or O.
TIP! With your XMp3 radio in the car cradle, the remote will not be able to
turn it on.
Vehicle Installation

20 21
Power Off
This option is available if you are using the car cradle and the cigarette lighter is always
powered.
1
1 Press menu →Settings → Vehicle Settings → Power O.
2
2 Press the XM button to adjust the setting.
• Choose the amount of time (60, 90, 120, or 180 minutes or O ) that
should pass before the radio turns o automatically.
3
3 Press the XM button.
Troubleshooting
Vehicle Installation

22 23
The XMp3 radio has been designed and built to be trouble-free but if you experience a
problem, try this:
• Check that all connections are rm and secure.
• Make sure the cigarette lighter/auxiliary power socket is clean and free
of corrosion.
• If you are using your XMp3 radio in your vehicle, check the 12V adapter fuse by
unscrewing the ribbed end of the 12V adapter. If required, replace with a 1-amp
fuse only. If the 12V adapter does not have a removable end-cap, it has an internal
fuse that resets itself after it is left unplugged for a period of time.
If you see this on the screen: Try this
No signal Make sure the XM car antenna is mounted outside of
the vehicle.
Move your XM car antenna or your vehicle away from
the obstructed area. For example, if you are parked in
an underground garage, you should receive a signal
after leaving the garage.
Check Antenna Make sure that the XM car antenna cable is rmly and
securely plugged into the cradle. Make sure the cable is
not bent or broken.
Turn the XMp3 radio o, then on, to reset this message.
Troubleshooting
If you see this on the screen: Try this
O Air The channel you’ve selected is not currently
broadcasting. Tune to another XM channel.
Loading Your XMp3 radio is acquiring audio or program
information from the XM signal. This message
usually goes away in a few seconds.
Updating XM is updating your XMp3 radio with the latest
encryption code. Wait until the update is done.
OR
You may be trying to tune to a channel that is blocked
or unavailable. Tune to another channel.
- - - No program information, such as artist name, song title,
or channel exists.
If this happens: Try this
XMp3 radio shuts o unexpectedly One or both of the”Sleep Timer” or “Delayed Power”
features might be enabled. At the“Settings” menu,
make sure both features are turned“O”
You do not receive all the XM
channels you subscribed to
If you have not yet activated your XM Satellite Radio
service, refer to Activation in your XMp3 radio user
guide.
No audio Check all cables between your XMp3 radio and your
stereo system for a rm and secure connection.
No song title or artist name is
displayed
The information may not be available or updates may
be in progress.

24 25
Troubleshooting
Product Specs, FCC and IC Info & Warranty
If this happens: Try this
No audio when listening to XM
through an FM radio
Check that your XMp3 radio and your car radio are
tuned to the same FM frequency.
Audio fades or has static when
listening
Check all cables for a rm and secure connection.
If the problem persists, it might be interference from
another FM channel. Refer to Find an FM Frequency
on page 15 when using the XM SureConnect (sold
separately) or the FM Direct (sold separately).
Audio sounds too soft Raise or lower the audio level until the sound quality
improves. Refer to Setting the Line Out Level on page
17.
XM Instant Trac and Weather
channels sound dierent from other
channels
These channels use a dierent audio technology than
the other XM channels so they often sound dierent
from other channels.
ON

26 27
Dimensions
Car Cradle 53 mm (W) X 70 mm (H) X 35 mm (D)
2 in (W) X 2.75 in (H) X 1.37 in(D)
XM Car Antenna Cable Length: 23 feet (7 m)
Audio Cable Cable Length: 1 meter with standard 3.5mm
stereo plug on each end
Remote Control 40 mm (W) X 119 mm (H) X 14 mm (D)
1.5 in (W) X 4.7 in (H) X 0.55 in(D)
Weight
Car Cradle 48 g 1.7 oz
Antenna 85 g 3 oz
Remote 60 g 2 oz
Audio Outputs 3.5 mm diameter mini stereo jack
External Power
Voltage 5V DC
Current 2000 mA
Polarity
Remote Battery
Type CR2032
Voltage 3 V
Model Numbers
XMp3 Radio GEX-XMP3-C
XMp3 Home Kit CD-XMHOME1-C
XMp3 Car Kit CD-XMPCAR1-C
Product Specifications
The user is cautioned that changes or modications not expressly approved by XM Satellite Radio Inc. can void
the user’s authority to operate this device.
This device has been designed to operate with the antenna provided in the original packaging. Use of antenna
other than the antenna provided will result in improper operation, and is strictly prohibited per regulations of
Industry Canada.
This device complies with Part 15 of the FCC Rules and is certied to Industry Canada’s RSS-210 specication:
1. This device may not cause harmful interference.
2. This device must accept any interference received, including
interference that may cause undesired operation.
This equipment has been tested and found to comply with the limits for a Class B digital device, pursuant to Part
15 of the FCC Rules and Industry Canada RSS-210. These limits are designed to provide reasonable protection
against harmful interference in a residential installation.
This equipment generates, uses, and can radiate radio frequency energy and, if not installed and used in
accordance with the installation instructions, may cause harmful interference to radio communications. However,
there is no guarantee that interference will not occur in a particular installation. If this equipment does cause
harmful interference to radio or television reception, which can be determined by turning the equipment o and
on, the user is encouraged to try to correct the interference by one or more of the following measures:
• Reorient or relocate the receiving antenna of the aected receiver.
• Increase the separation between the XM equipment and the aected receiver.
• Connect the XM equipment into an outlet on a circuit dierent from that to which
the aected receiver is connected.
• Consult the dealer or an experienced radio/TV technician for help.
WARNING! The FCC and FAA have not certied this Satellite Radio Receiver for use in any aircraft (neither portable
nor permanent installation). Therefore, XM Satellite Radio cannot support this type of application or installation
FCC and IC Statement

28 29
WARRANTY
Pioneer Electronics of Canada, Inc. (POC) warrants that XMP3 products distributed by POC in
Canada that fail to function properly within the specied warranty period, under normal use
due to a manufacturing defect when installed and operated according to the owner’s manual
enclosed with the unit will be exchanged with a unit of comparable value, at the option of
POC, free of charge (excluding any activation or deactivation charges incurred by user).
This limited warranty applies to the original owner of this Pioneer product during the
warranty period, provided the product was purchased from an authorized XM Canada’s
distributor or retailer in Canada. You will be required to provide a sales receipt or other valid
proof of purchase showing the date of original purchase. In the event of product failure, to
avail yourself of this warranty, the product must be delivered within the warranty period
to the retailer where it was purchased. You will be responsible for the removal and re-
installation of the product and for any applicable activation/deactivation charges.
PRODUCT WARRANTY PERIOD
Portable Satellite Radio……………1 Year (Exchange only at place of purchase)
Portable Satellite Radio Battery………………...………………………… 90 Days
(warranty continues next page)
Warranty
WHAT IS NOT COVERED
If this product was purchased from an unauthorized dealer, there are no warranties,
express or implied, including the implied warranty of merchantability and the implied
warranty of tness for a particular purpose and this product is sold strictly “as is” and
“with all faults”.
Pioneer shall not be liable for any consequential and/or Incidental damages. Pioneer
does not warrant any product listed above when it is used in a trade or business or in
any industrial or commercial application.
This warranty does not apply if the product has been subjected to power in excess
of its published power rating. This warranty does not cover the cabinet or any other
appearance item, user attached antenna, any damage to the product resulting from
alterations, modications not authorized in writing by Pioneer, accident, misuse or
abuse, damage due to lightning or to power surges, subsequent damage from leaking,
damage from inoperative batteries, or the use of batteries not conforming to those
specied in the owner’s manual. This warranty does not cover defects or damage
caused by tampering, or from improper maintenance.
ALTERED, DEFACED, OR REMOVED SERIAL NUMBERS VOID THIS ENTIRE WARRANTY.
NO OTHER WARRANTIES, EXCEPT AS EXPRESSLY PROVIDED HEREIN, THERE ARE NO
REPRESENTATIONS, WARRANTIES, OBLIGATIONS, OR CONDITIONS, IMPLIED, STATUTORY
OR OTHERWISE, APPLICABLE TO THIS PRODUCT.
(warranty continues next page)

30 31
TO OBTAIN WARRANTY SERVICE
To receive warranty service, you need to present your sales receipt showing place and date of
original owner’s transaction and deliver the product within the warranty period to the retailer
where it was purchased. Your defective product will be exchanged by the retailer once it is
conrmed to be defective.
Removal and re-installation of the product and any applicable activation/deactivation fees
are not covered by this warranty.
ADDITIONAL INFORMATION
For additional information on this product and its warranty, please contact:
Customer Service Department
Pioneer Electronics of Canada, Inc.
300 Allstate Parkway
Markham, Ontario, L3R 0P2
(905) 479-4411 1-877-283-5901
http://www.pioneerelectronics.ca
DO NOT RETURN ANY PRODUCT TO THE ABOVE ADDRESS. IT IS NOT A SERVICE LOCATION.
RECORD THE PLACE AND DATE OF PURCHASE FOR FUTURE REFERENCE
Model No. __________________________________
Serial No. ___________________________________
Purchase Date _______________________________
Purchased From _____________________________________________________________
KEEP THIS INFORMATION AND YOUR SALES RECEIPT IN A SAFE PLACE
Warranty Patent and Environmental Info
Patent Information
It is prohibited to, and you agree that you will not, copy, decompile, disassemble, reverse
engineer, hack, manipulate, or otherwise access and/or make available any technology
incorporated in receivers compatible with the XM Satellite Radio system. Furthermore, the
AMBE® voice compression software included in this product is protected by intellectual
property rights including patent rights, copyrights, and trade secrets of Digital Voice
Systems, Inc. The software is licensed solely for use within this product. The music, talk,
news, entertainment, data, and other content on the Services are protected by copyright
and other intellectual property laws and all ownership rights remain with the respective
content and data service providers. You are prohibited from any export of the content
and/or data (or derivative thereof ) except in compliance with applicable export laws, rules
and regulations. The user of this or any other software contained in an XM Radio is explicitly
prohibited from attempting to copy, decompile, reverse engineer, hack, manipulate or
disassemble the object code, or in any other way convert the object code into
human-readable form.
Environmental Information
Follow local guidelines for waste disposal when discarding packaging and electronic
appliances.
Your Satellite Radio receiver is packaged with cardboard, polyethylene, etc., and does not
contain any unnecessary materials.

CD-XMPCAR1-C
Pioneer Electronics of Canada, Inc
300 Allstate Parkway
Markham, ON
L3R 0P2
1-877-283-5901
http://www.pioneerelectronics.ca
XM, XMp3, XM2go, and related logos are trademarks of XM Satellite Radio Inc.
Other trademarks are the property of their respective owners.
©2008 Pioneer Electronics Of Canada, Inc. All rights reserved.
Other manuals for XMP3
5
Table of contents
Other XM Radio manuals
Popular Radio manuals by other brands

Makita
Makita XRM06 instruction manual

Milwaukee
Milwaukee 2790-20 Operator's manual

Albrecht
Albrecht CB Radio AE 6490 user guide

Vertex Standard
Vertex Standard VX-230 Series operating manual

PCS Electronics
PCS Electronics CyberMaxFM+ DSP/RDS manual

Psion Teklogix
Psion Teklogix WORKABOUT PRO installation guide