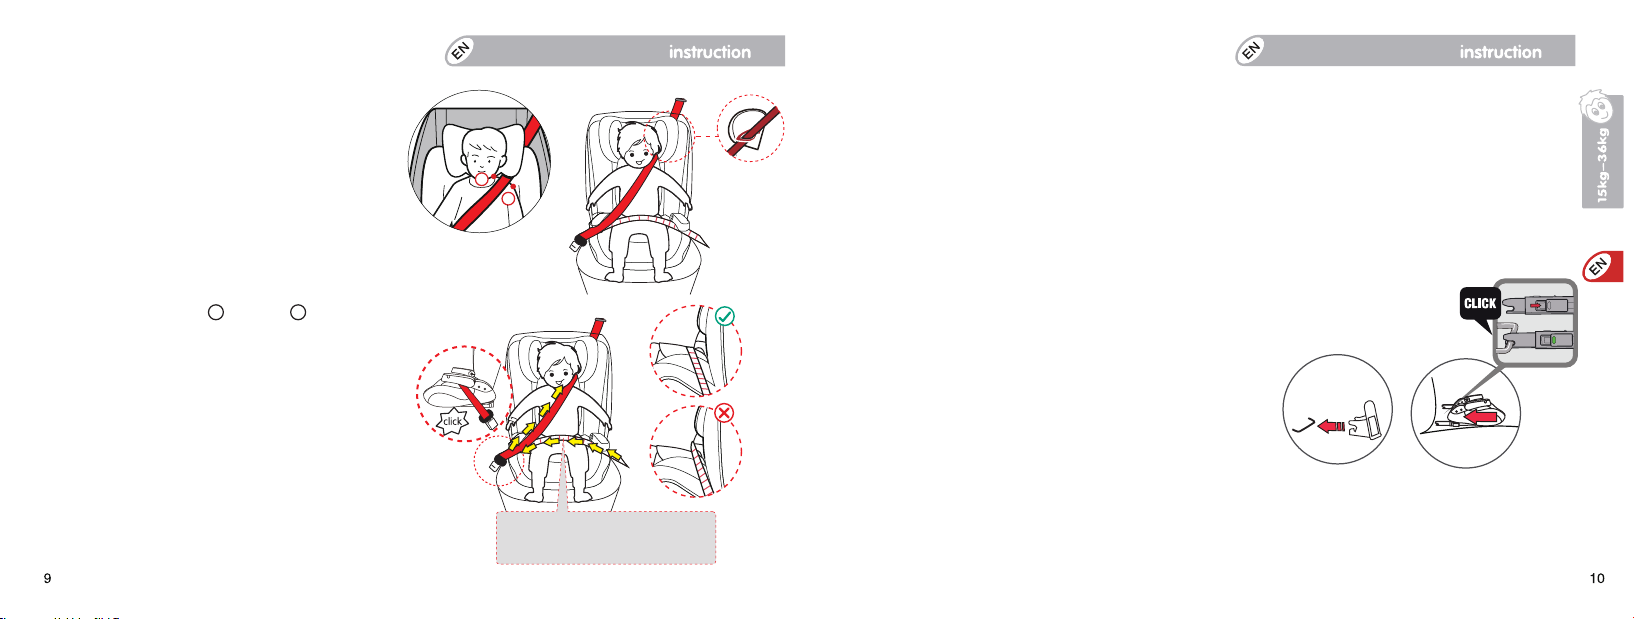
Lock the tip of the buckle into the veicle
seat buckle with a CLICK noise.
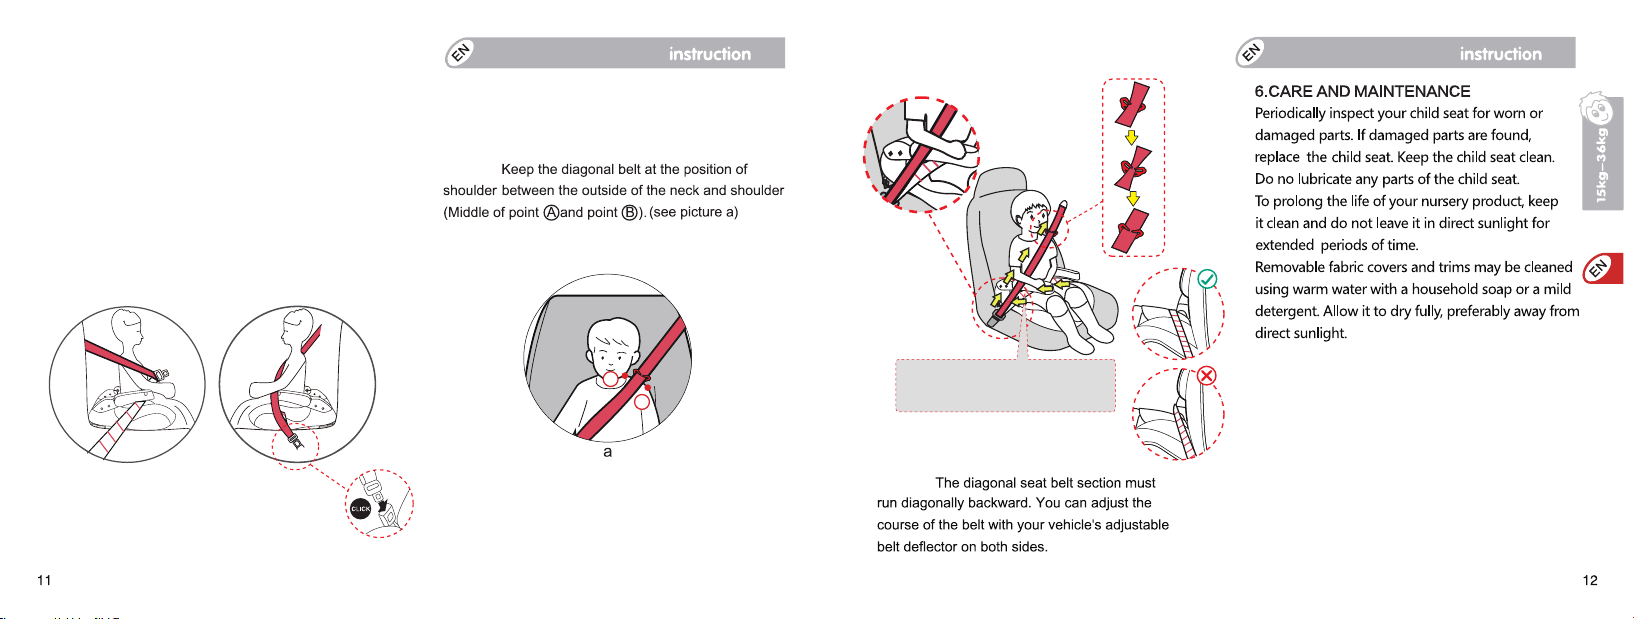
NOTE 1: Keep the diagonal belt at the position of
shoulder between the outside of the neck and
shoulder (Middle of point A and point B ).
(see page 11 picture a)
run diagonally backward. You can adjust the
course of the belt with your vehicle's adjustable
belt deflector on both sides.
NOTE 2: The diagonal seat belt section must
belt through the same side of Belt guidance ②, then
pull the diagonal belt and lap belt together through
another side of Belt guidance .②
Step 3: Pull out the belt from the belt ALR. Diagonal
belt through the same side of Belt guidance ①. Lap
5.2 A23 Mandy Group Ⅲ(22-36kg)
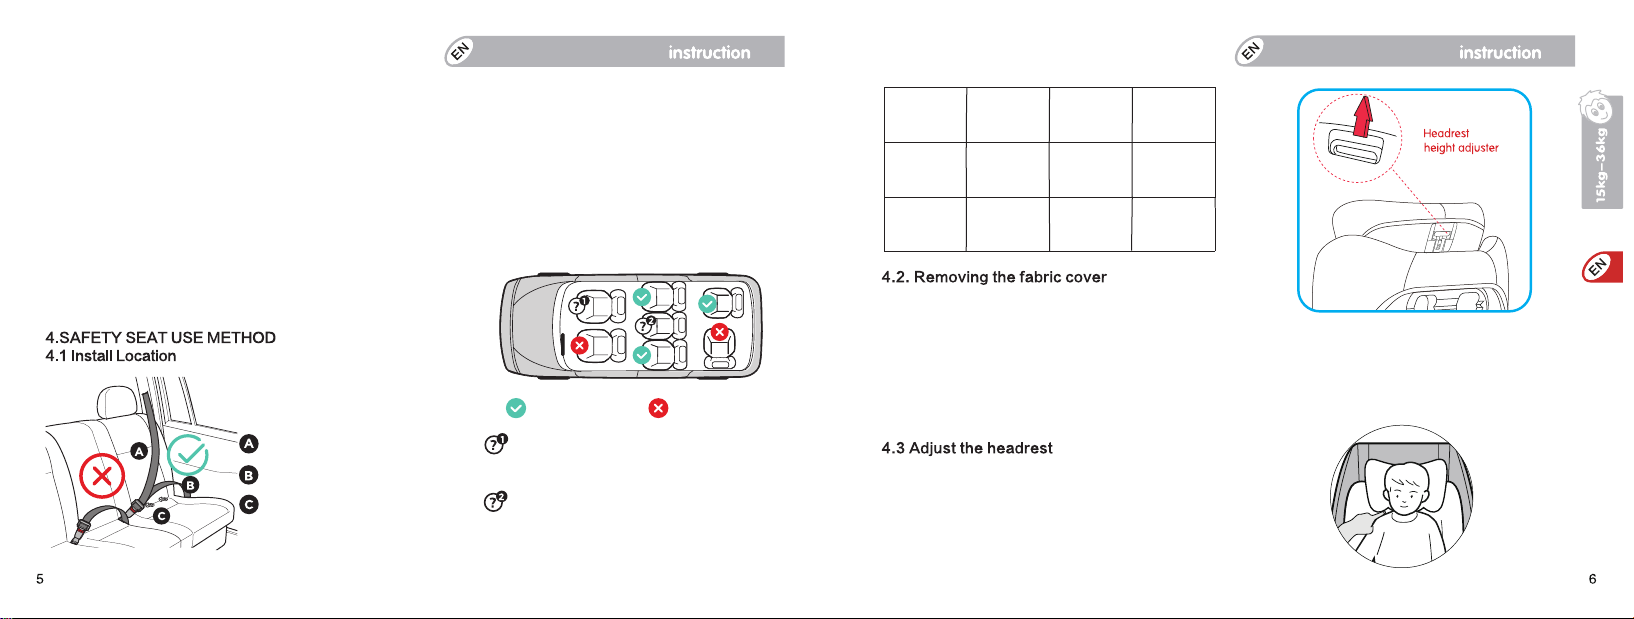
Installed in the forward facing position with
ISOFIX CONNECTOR and vehicle seat belt
Use the child safety seat only on forward facing
If you don't want to use the backrest, it can be
separated (See 4.4 and 4.5) to only use the base
booster.
vehicle seats. According to accident statistics,
children are safer when properly restrained in
rear seats than in front seats.
If you do not have ISOFIX Insert guide, please
ignore this step.
Step1: Put the ISOFIX insert guide into the two
ISOFIX attachments of your vehicle. ISOFIX
Insert guide
seat with both hands and slide the two
locking arms firmly into the insert guides
until the locking arms engage with a clicking
noise on both sides. The green safety button
must now be visible on both sides.
Try your best to push the booster, and it will
be tighter.
Step2: Press the ISOFIX button to pull out
both ISOFIX locking arms. Grasp the child
A
B
picture a
Ensure the lap belt is as close as
possible to lower. Ensure the lap belt
is on the pelvis, not on the abdomen.